Home |
Home |

Mappa sito |
Mappa sito |
Tutorial |
Tutorial |
Tut tecnici |
Tut tecnici |
Links-Banner |
Links-Banner |
Regali-Award |
Regali-Award |
Informatica |
Informatica |
Archivio |
Archivio |
Mail |
Mail |
Privacy policy |
Privacy policy |
Novità |
Novità |
Home |
Home |
Mappa sito |
Mappa sito |
Tutorial |
Tutorial |
Tut tecnici |
Tut tecnici |
Links-Banner |
Links-Banner |
Regali-Award |
Regali-Award |
Informatica |
Informatica |
Archivio |
Archivio |
Mail |
Mail |
Privacy policy |
Privacy policy |
Novità |
Novità |
|
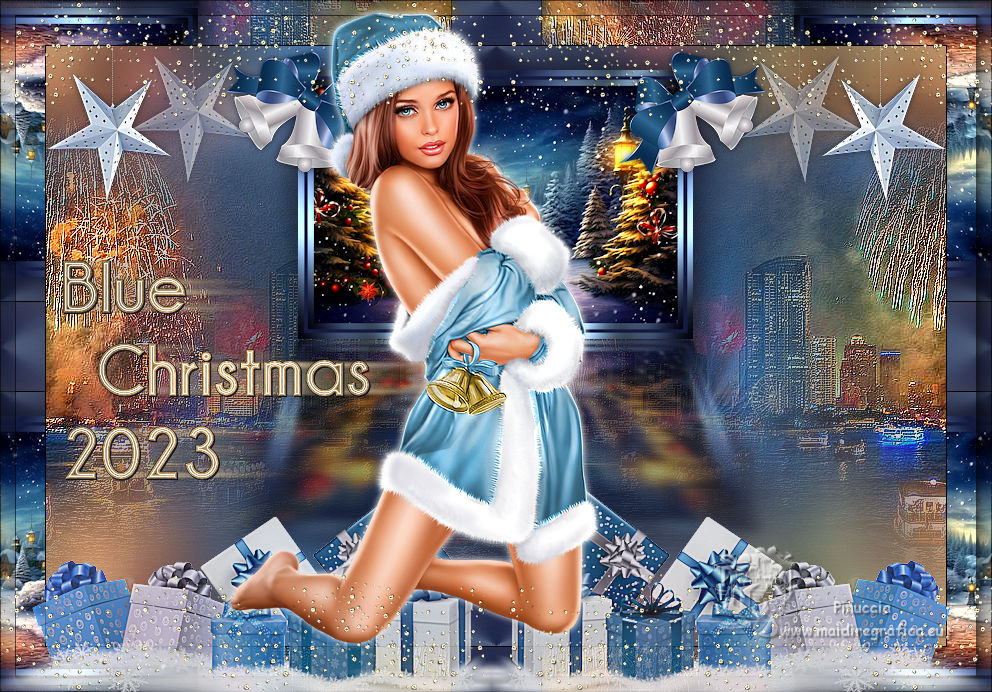
BLUE CHRISTMAS 2023 

This tutorial, created with PSPX9 has been translated with PSPX2, but it can also be made using other versions of PSP. For this tutorial, you will need:  Thanks for the tubes Clo. The rest of the material is by Lady Tess. (you find here the links to the material authors' sites)  consult, if necessary, my filter section here Filters Unlimited 2.0 here FM Tile Tools - Saturation Emboss here Graphics Plus - Cross Shadow here Mehdi - Wavy Lab 1.1 here Alien Skin Eye Candy 5 Impact - Perspective Shadow here Mura's Meister - Copies here AAA Frames - Foto Frame here Filters Graphics Plus can be used alone or imported into Filters Unlimited. (How do, you see here) If a plugin supplied appears with this icon  it must necessarily be imported into Unlimited it must necessarily be imported into Unlimited You can change Blend Modes according to your colors.  Copy the Selections in the Selections Folder. 1. Set your foreground color to #161c3e and your background color to #7d9db7. 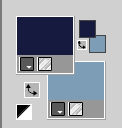 Set your foreground color to a Foreground/Background Gradient, style Linear. 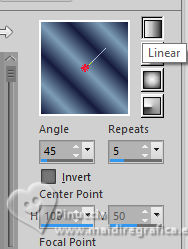 Open Christmas_image 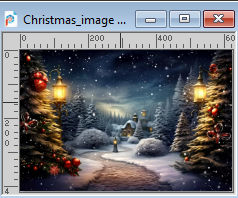 Work on this image. Layers>Promote Background Layer, Raster 1. Effects>Plugins>FM Tile Tools - Saturation Emboss, default settings.  2. Selections>Select All. Layers>New Raster Layer. Selections>Modify>Contract - 10 pixels. Selections>Invert. Flood Fill  the selection with your Gradient. the selection with your Gradient.3. Effects>Plugins>Graphics Plus - Cross Shadow. 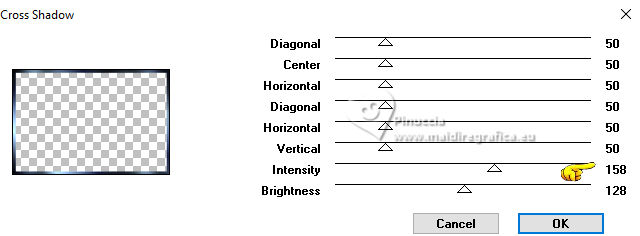 Effects>Reflection Effects>Rotating Mirror. 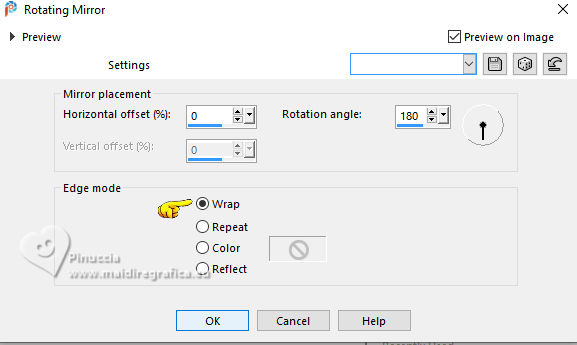 Image>Add borders, 6 pixels, symmetric, foreground color #161c3e. 4. Selections>Select All. Image>Add borders, 10 pixels, symmetric, background color #7d9db7. Selections>Invert. Flood Fill the selection with your Gradient.Effects>Plugins>Graphics Plus - Cross Shadow, same settings. 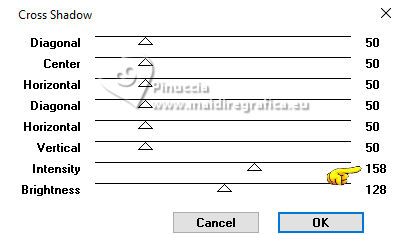 Effects>Reflection Effects>Rotating Mirror, same settings. Selections>Select None. 5. Result 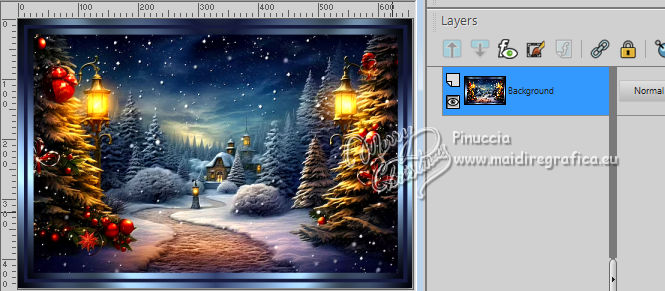 6. Minimize this image for the moment. Open a new transparent image 900 x 600 pixels. Invert your colors  Effects>Plugins>Mehdi - Wavy Lab 1.1. This filter creates gradients with the colors of your Materials palette. The first is your background color #161c3e, the second is your foreground color #7d9db7. Change the last two colors created by the filtre both with color #a1b9cb 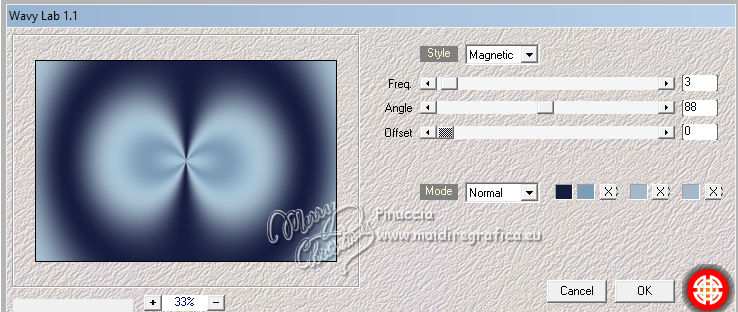 Layers>Duplicate. Adjust>Blur>Gaussian Blur - radius 65. 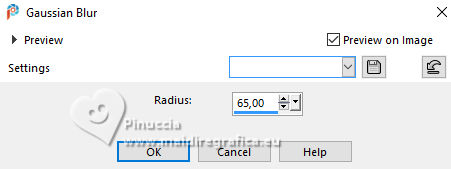 7. Layers>New Raster Layer. Selections>Select All. Open MistedCapodannoBankok_byClo  Edit>Copy. Go back to your work and go to Edit>Paste into Selection. Selections>Select None. 8. Layers>Merge>Merge Down. Adjust>Blur>Gaussian Blur - radius 20.  Effects>Image Effects>Seamless Tiling, default settings.  Adjust>Brightness and Contrast>Brightness and Contrast. 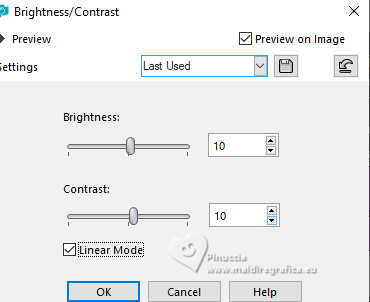 Effects>Edge Effects>Enhance. 9. Result: 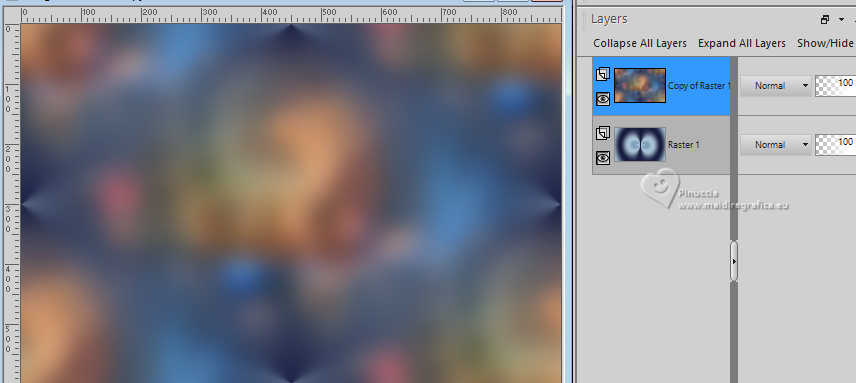 10. Activate your minimized image of step 6. Edit>Copy. Go back to your new image and go to Edit>Paste as new layer. Image>Resize, to 60%, resize all layers not checked. K key to activate your Pick Tool  and set Position X: 252,00 and Position Y: 24,00. 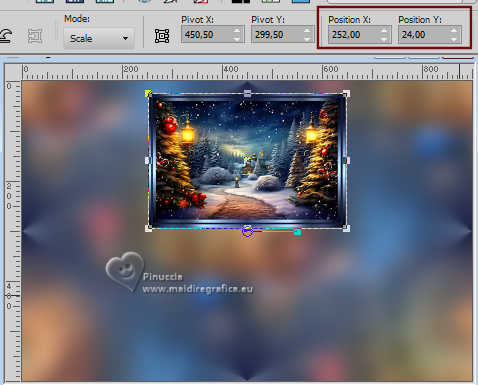 Layers>Duplicate. 11. Activate the layer below, Raster 2. Effects>Plugins>Alien Skin Eye Candy 5 Impact - Perspective Shadow. Select the preset Reflect in Front with these settings 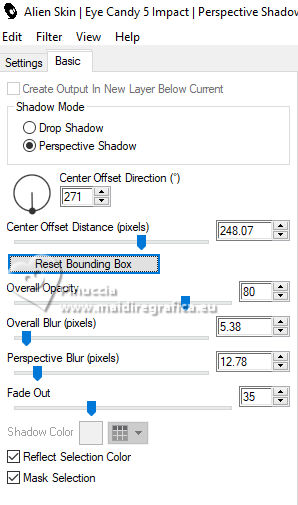 if necessary, use the filter's tool to adapt the shadow to your image Consequently the setting of Center Offset Distance will change 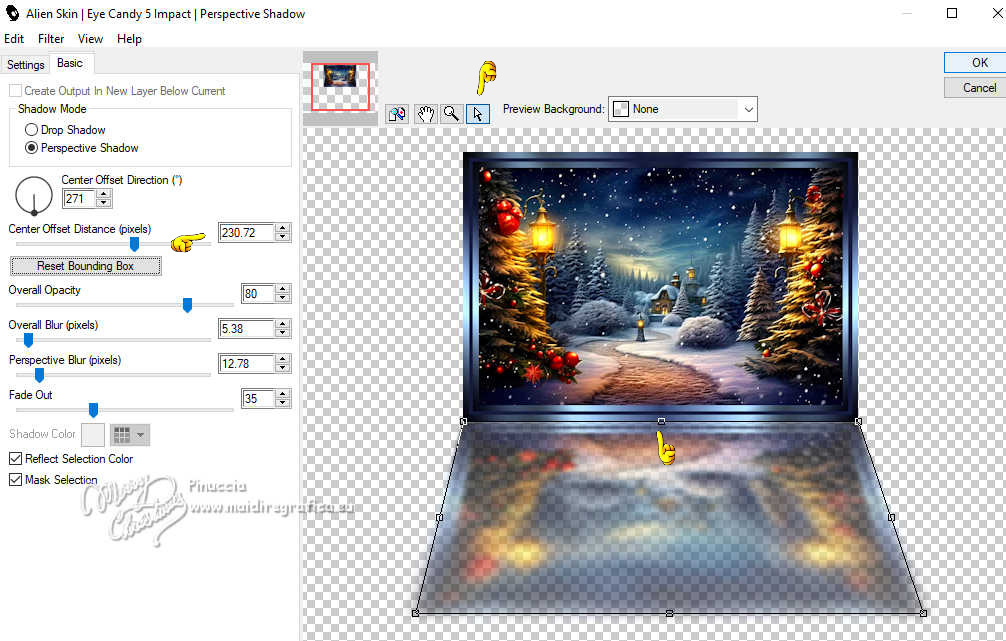 Activate the layer above of the copy. Layers>Delete. 11. We have this. 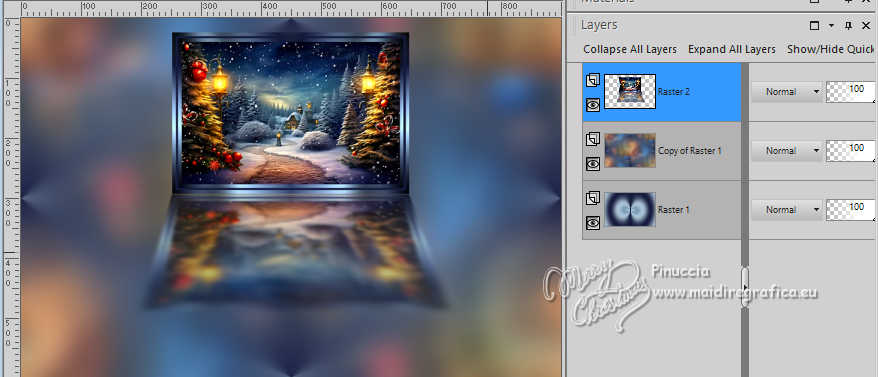 12. Effects>3D Effects>Drop Shadow, color #0b0e1f.  Repeat Drop Shadow negative 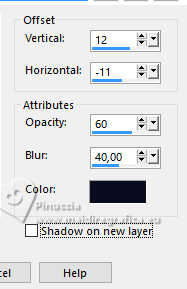 Adjust>Brightness and Contrast>Brightness and Contrast, same settings. 13. Activate the central layer, Copy of Raster 1. Activate again the misted MistedCapodannoBankok_byClo and go to Edit>Copy. Go back to your work and go to Edit>Paste as new layer. Effects>Image Effects>Seamless Tiling, Side by Side.  Effects>Plugins>FM Tile Tools - Saturation Emboss - default settings. 14. Activate your top layer, Raster 2. Open Capmpana_image 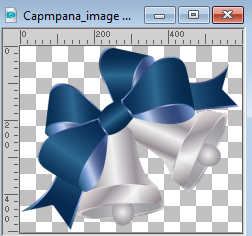 Edit>Copy. Go back to your work and go to Edit>Paste as new layer. Image>Resize, 2 times to 50%, resize all layers not checked. K key to activate your Pick Tool and set Position Y: 572,00 and Position Y: 6,00. 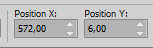 15. Effects>3D Effects>Drop Shadowm color #0b0e1f. 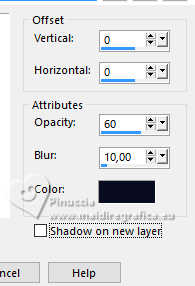 Adjust>Sharpness>Sharpen. Layers>Duplicate. Image>Mirror. Layers>Merge>Merge Down. Result:  16. Open Decoro14_byClo 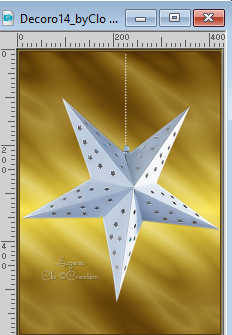 Edit>Copy. Go back to your work and go to Edit>Paste as new layer. Image>Resize, to 30%, resize all layers not checked. Objects>Align>Top. Adjust>Sharpness>Sharpen More. Effects>3D Effects>Drop Shadow, same settings. 17. We have this 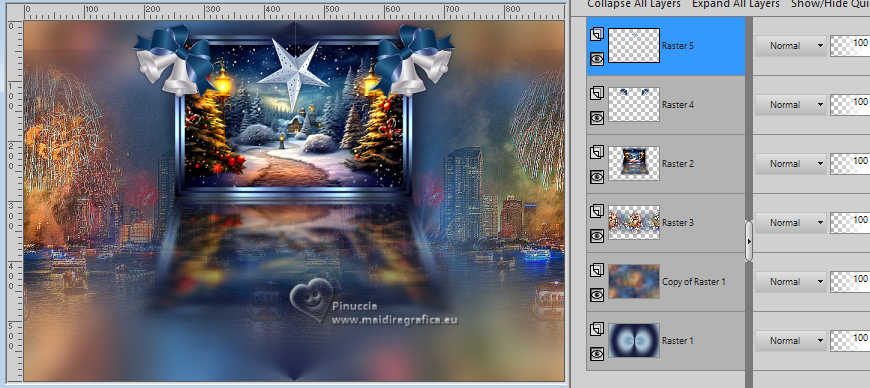 18. Stay on the star's layer, Raster 5, and set Position X and Y to 0,00.  M key to deselect the Tool. Effects>Plugins>Mura's Meister - Copies. 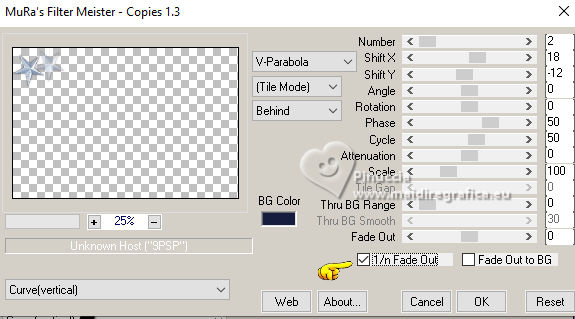 Effects>Reflection Effects>Rotating Mirror.  Layers>Arrange>Move Down. 19. We have this  20. Activate the layer Copy of Raster 1. Edit>Copy Edit>Paste as new image and minimize this image. Image>Add borders, 1 pixel, symmetric, color #000000. Selections>Select All. Image>Add borders, 45 pixels, symmetric, color #ffffff. Selections>Invert. 21. Edit>Paste into Selection (the minimized image of the step 20 is still in memory). Selections>Invert. Effects>Image Effects>Seamless Tiling, default settings.  Again Selections>Invert. 22. Image>Rotate Left. Effects>Reflection Effects>Rotating Mirror, default settings.  Image>Rotate Right. 23. Effects>Plugins>AAA Frames - Foto Frame. 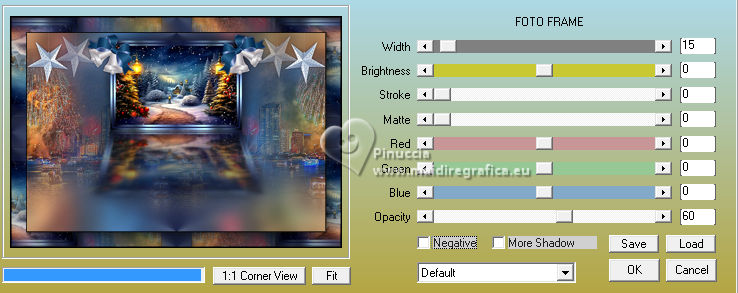 Selections>Select None. Open borde_image 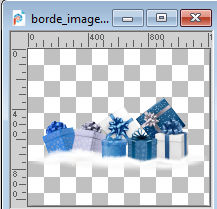 Edit>Copy. Go back to your work and go to Edit>Paste as new layer. Image>Resize, to 45%, resize all layers not checked. 24. K key to activate your Pick Tool and set Position X: -10,00 and Position Y: 490,00. 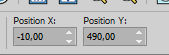 M key to deselect. Effects>Reflection Effects>Rotating Mirror. Reduce the opacity of this layer to 81%. Adjust>Sharpness>Sharpen More. 25. Open the tube Woman1437_byClo 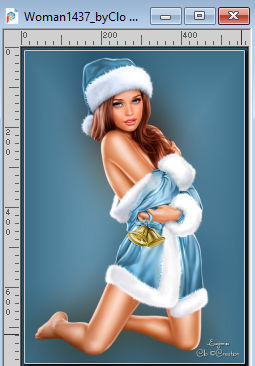 Edit>Copy. Go back to your work and go to Edit>Paste as new layer. Image>Resize, to 85%, resize all layers not checked. K key to activate your Pick Tool and set Position X: 229,00 and Position Y: 11,00. 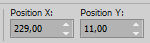 M key to deselect the Tool. Effects>3D Effects>Drop Shadow, color #ffffff. 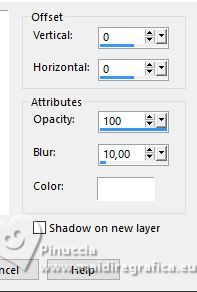 Adjust>Sharpness>Sharpen. 26. Open LTDStudio_BlueChristmas2023_Texto 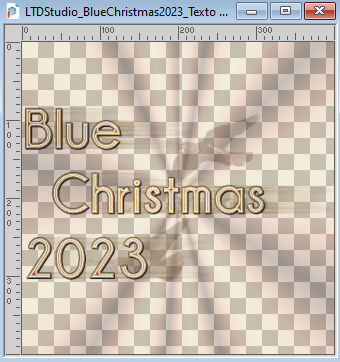 Edit>Copy. Go back to your work and go to Edit>Paste as new layer. Place  the text to your liking. the text to your liking.Open LTDStudio_BlueChristmas2023_Deco 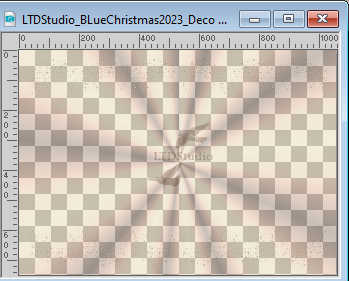 Edit>Copy. Go back to your work and go to Edit>Paste as new layer. 27. Sign your work on a new layer. Add the author and translator watermarks. Layers>Merge>Merge All and save as jpg. For the tube of this version thanks Wieskes 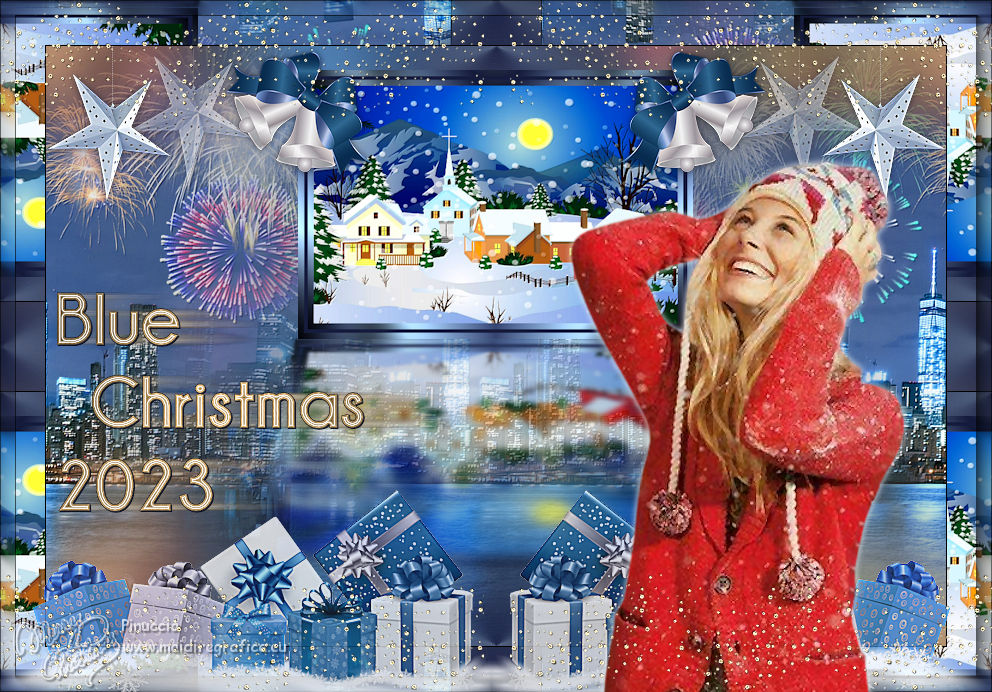   Your versions. Thanks Your versions. ThanksIf you have problems or doubts, or you find a not worked link, or only for tell me that you enjoyed this tutorial, write to me. 1 December 2023 |