|
NUIT D'ORAGE
 ENGLISH VERSION ENGLISH VERSION
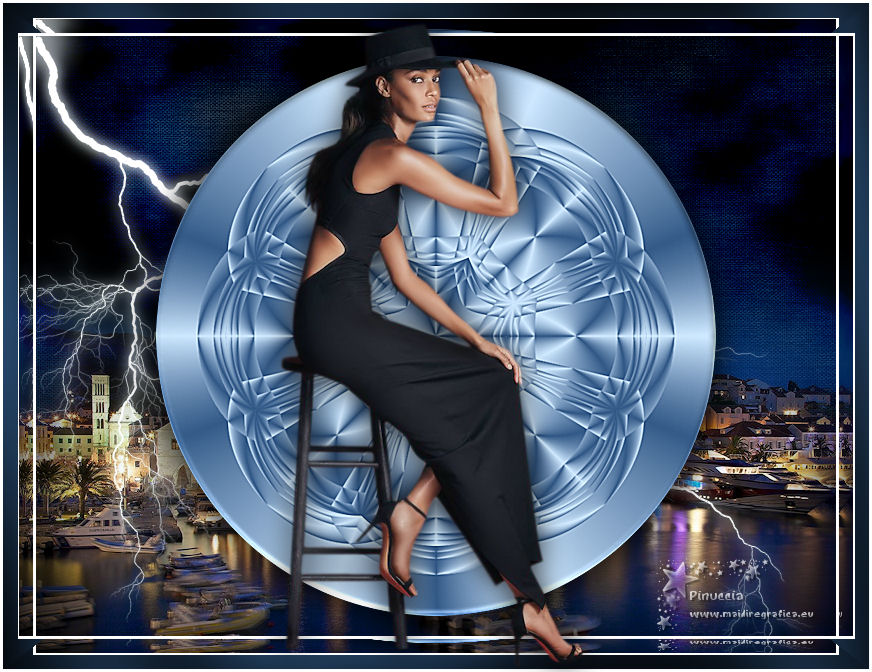
Thanks Joanne for the invitation to translate your tutorials:

This tutorial was translated with PSPX3 but it can also be made using other versions of PSP.
Since version PSP X4, Image>Mirror was replaced with Image>Flip Horizontal,
and Image>Flip with Image>Flip Vertical, there are some variables.
In versions X5 and X6, the functions have been improved by making available the Objects menu.
In the latest version X7 command Image>Mirror and Image>Flip returned, but with new differences.
See my schedule here
Italian translation here
your versions here
For this tutorial, you will need:
Material here
Thanks Mina for the landscape tube and Beatriz for the woman tube.
Plugins
Filters Unlimited 2.0 here
Graphics Plus - Cross Shadow here
Mura's Meister - Cloud here
Alien Skin Xenofex 2 - Lightning here
Flaming Pear - Flexify 2 here
&<Bkg Designer sf10I> (da importare in Unlimited) here
Filters Graphics Plus can be used alone or imported into Filters Unlimited.
(How do, you see here)
If a plugin supplied appears with this icon  it must necessarily be imported into Unlimited it must necessarily be imported into Unlimited

Copy the Gradient in the Gradients Folder.
1. Set your foreground color to Gradient and select the gradient dbaw_bluesgrad, style Radial.
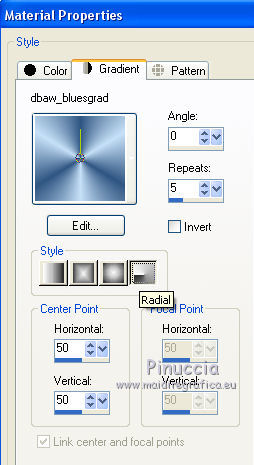
Set your background color to blue #182c42.
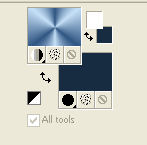
2. Open a new transparent image 800 x 600 pixels.
Flood Fill  the transparent image with your blue background color. the transparent image with your blue background color.
3. Effects>Plugins>Graphics Plus - Cross Shadow, default settings.

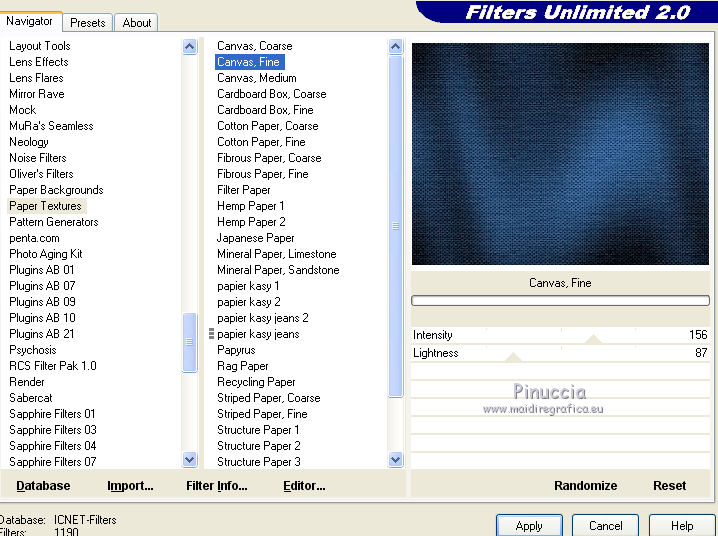
4. Effects>Plugins>Filters Unlimited 2.0 - Paper Textures - Canvas Fine, default settings.
5. Layers>New Raster Layer.
Effects>Plugins>Mura's Meister - Cloud.
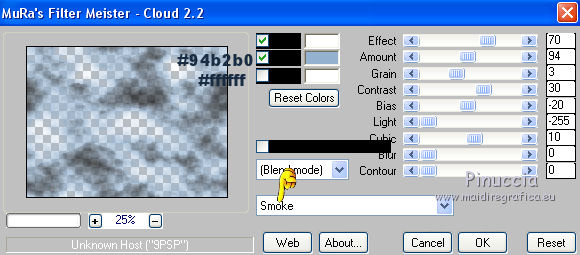
6. Image>Mirror.
Change the Blend Mode of this layer to Burn.
7. Open the landscape tube and go to Edit>Copy.
Go back to your work and go to Edit>Paste as new layer.
8. Effects>Image Effects>Offset.
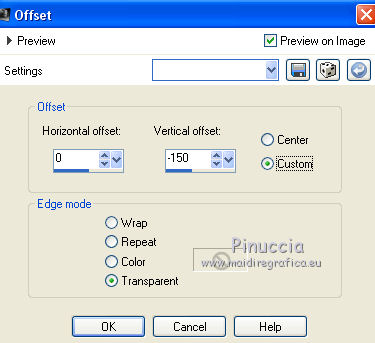
9. Layers>New Raster Layer.
Effects>Plugins>Alien Skin Xenofex 2 - Lightning.
settings: Lighting Example
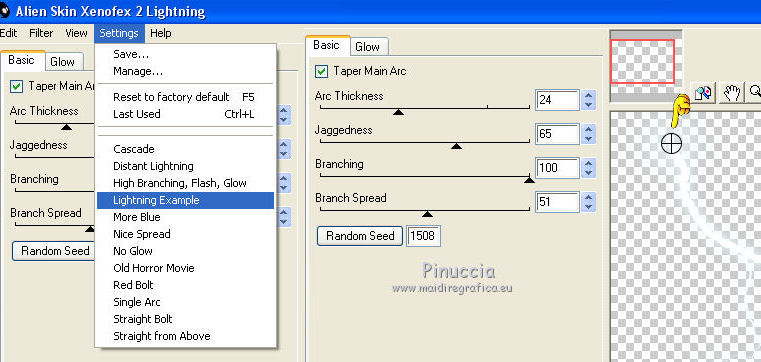
press your left bottom of the mouse sur le circle and push it at the upper left, as below.
 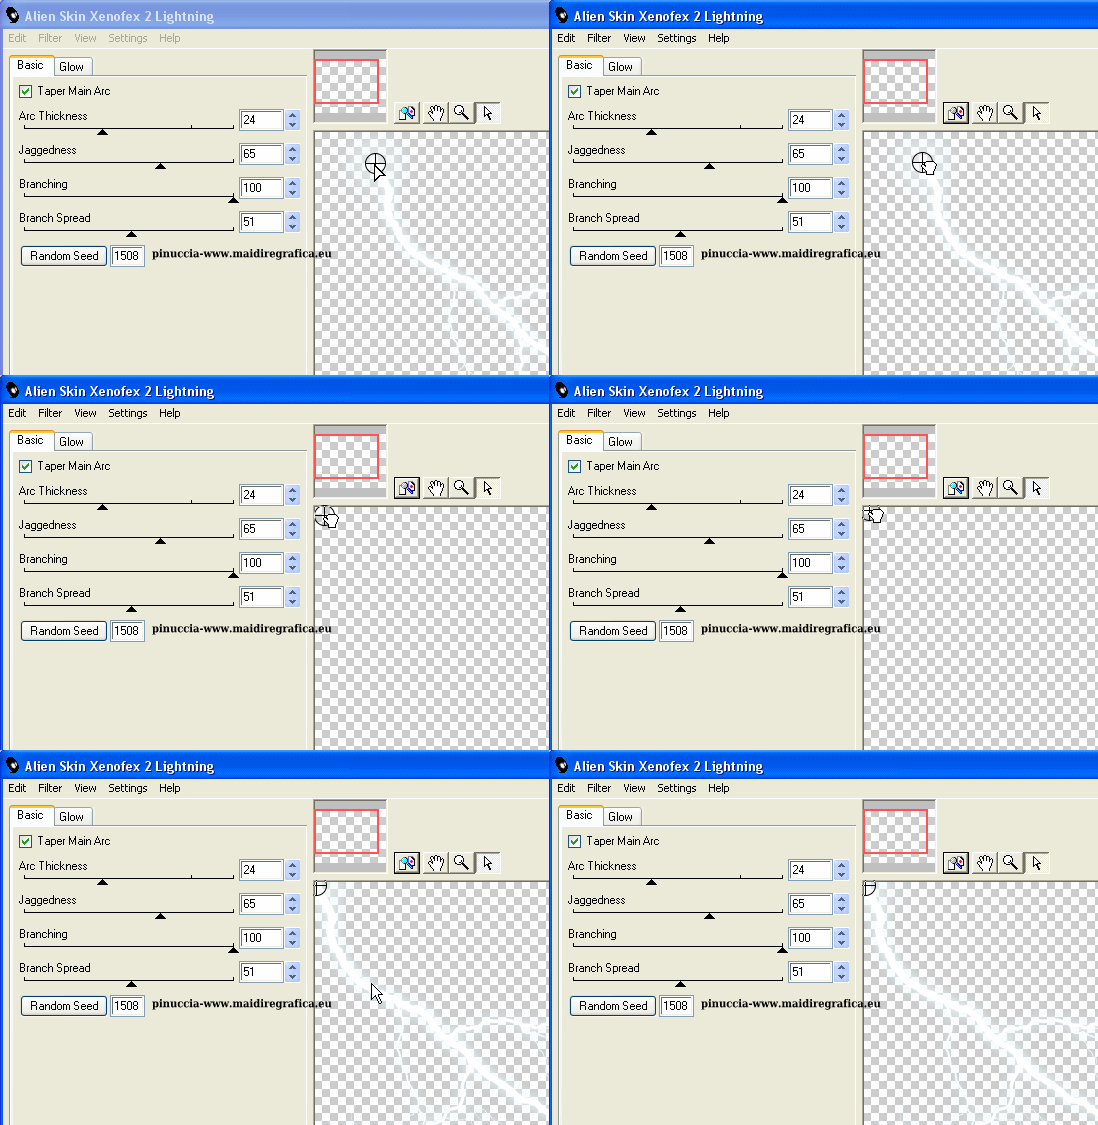
10. Layers>New Raster Layer.
Flood Fill  width the Gradient. width the Gradient.
11. Effects>Plugins>Filters Unlimited 2.0 - &<Bkg Designer sf10I> - ALF's Border Mirror Bevel, default settings.
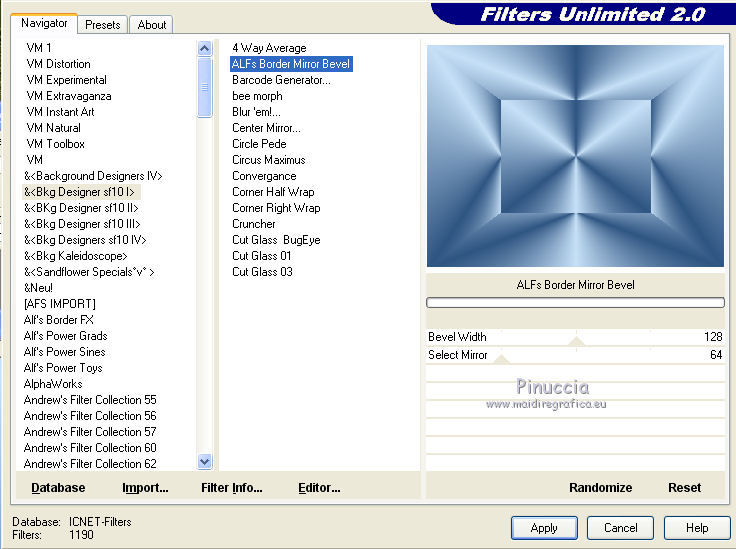
Repeat this Effect 2 times (total 3 times).
12. Effects>Plugins>Flaming Pear - Flexify 2.
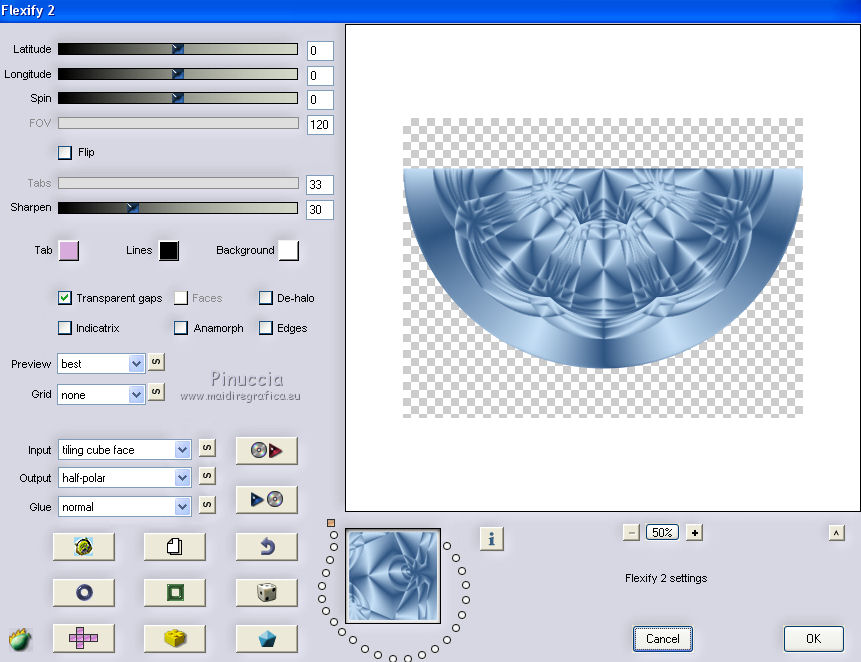
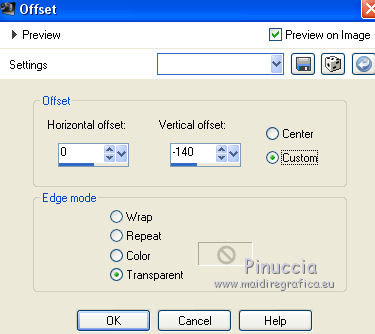
13. Image>Resize, to 70%, resize all layers not checked.
Effects>Image Effects>Offset.
14. Layers>Duplicate.
Image>Mirror.
Layers>Merge>Merge Down.
Adjust>Sharpness>Sharpen More.
15. Effects>3D Effects>Inner Bevel.

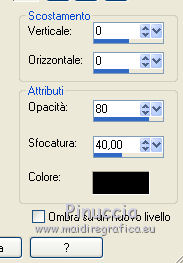
16. Effects>3D Effects>Drop Shadow.

Edit>Repeat Drop Shadow.
17. Sign your work on a new layer.
little note about the watermark:
I never ask to put watermark on the versions made by my translations.
But if you decide to use the watermark supplied by the author (to change in Soft Light),
I would appreciate that my work as translator was respected too.
For that, I added my watermark to the material (a layer for every language that I translate).
Layers>Merge>Merge All.
18. Image>Add borders, 3 pixels, symmetric, color white.
Image>Add borders, 30 pixels, symmetric, background color.
Image>Add borders, 3 pixels, symmetric, color white.
19. Activate your Magic Wand Tool 
and click on the 30 pixels border to select them.
20. Effects>Plugins>Graphics Plus - Cross Shadow, default settings.

21. Effects>Plugins>Filters Unlimited 2.0 - &<Bkg Designer sf10I> - ALF's Border Mirror Bevel,
same settings.
Selections>Select None.
22. Open the woman tube and go to Edit>Copy.
Go back to yur work and go to Edit>Paste as new layer.
Place  rightly the tube. rightly the tube.
23. Effects>3D Effects>Drop Shadow, same settings.
24. Save as jpg.

If you have problems or doubts, or you find a not worked link, or only for tell me that you enjoyed this tutorial, write to me.
9 Mai 2019
|
 ENGLISH VERSION
