|
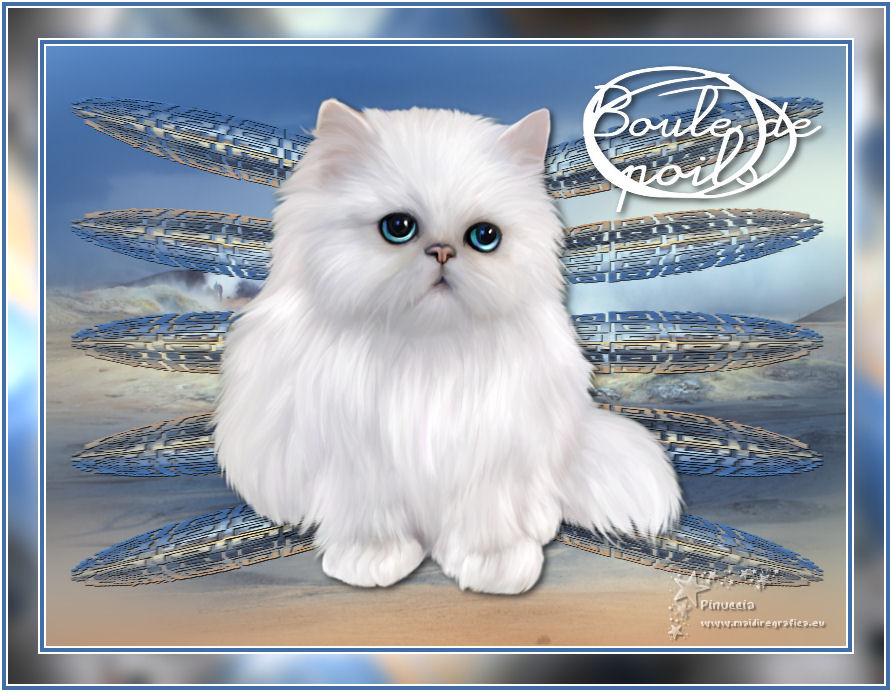
BOULE DE POILS
 ENGLISH VERSION ENGLISH VERSION
Thanks Joanne for the invitation to translate your tutorials:

This tutorial was translated with PSPX3 but it can also be made using other versions of PSP.
Since version PSP X4, Image>Mirror was replaced with Image>Flip Horizontal,
and Image>Flip with Image>Flip Vertical, there are some variables.
In versions X5 and X6, the functions have been improved by making available the Objects menu.
In the latest version X7 command Image>Mirror and Image>Flip returned, but with new differences.
See my schedule here
Italian translation here
your versions here
For this tutorial, you will need:
Material here
For the landscape thanks Thafs.
(The links of the tubemakers sites here).
Plugins
Filters Unlimited 2.0 here
Graphics Plus - Cross Shadow here
Frischluft - Amiga Rulez here
Simple - Diamonds here
Flaming Pear - Flexify 2 here
Filters Graphics Plus and Simple can be used alone or imported into Filters Unlimited.
(How do, you see here)
If a plugin supplied appears with this icon  it must necessarily be imported into Unlimited it must necessarily be imported into Unlimited

You can change Blend Modes according to your colors.
Open the masks in PSP and minimize them with the rest of the material.
1. Open a new transparent image 800 x 600 pixels.
2. Selections>Select All.
Open the landscape and go to Edit>Copy.
Go back to your work and go to Edit>Paste into Selection.
Selections>Select None.
3. Layers>Duplicate.
Close the bottom layer and stay on the copy's layer.
4. Layers>New Mask layer>From image
Open the menu under the source window and you'll see all the files open.
Select the mask 70828....
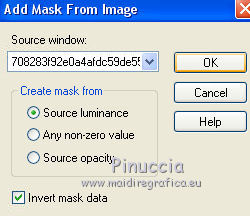
Layers>Merge>Merge Group.
5. Effects>Plugins>Flaming Pear - Flexify 2
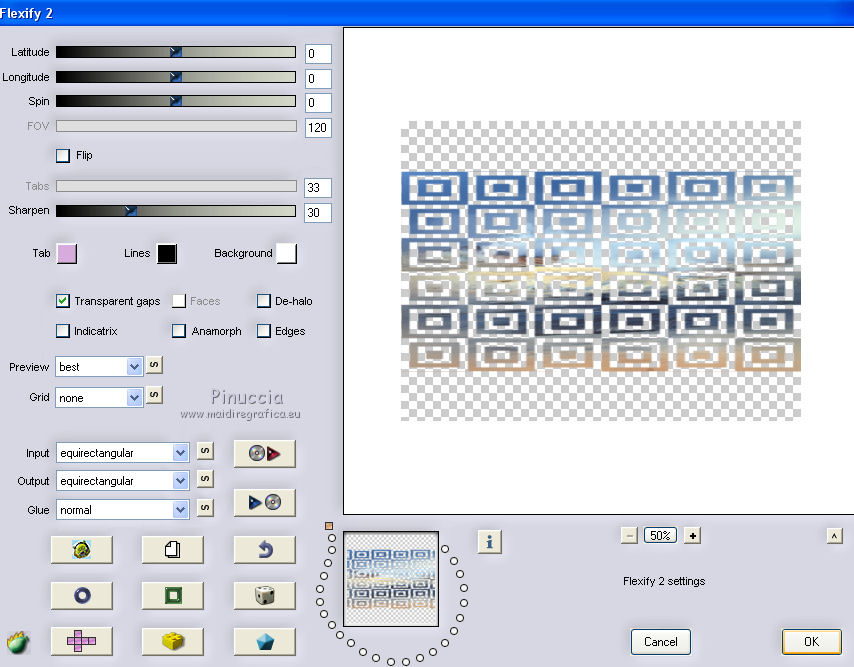
6. Effects>Geometric Effects>Circle.

7. Effects>Plugins>Frischluft - Amiga Rulez
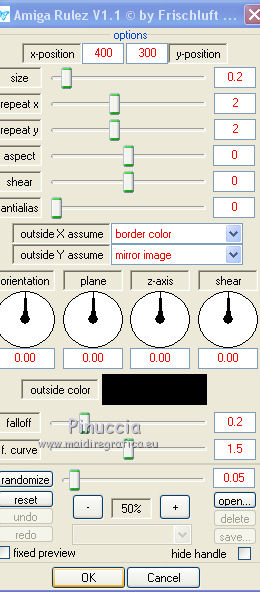
8. Layers>Duplicate.
Layers>Merge>Merge Down.
9. Effects>Image Effects>Offset.
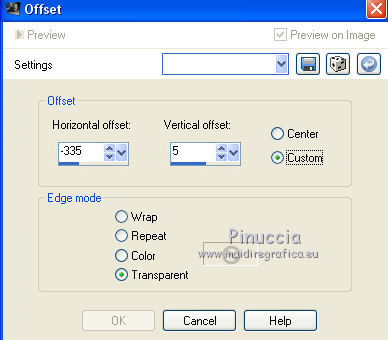
10. Layers>Duplicate.
Image>Mirror.
Layers>Merge>Merge Down.
11. Effects>Geometric Effects>Perspective Vertical.
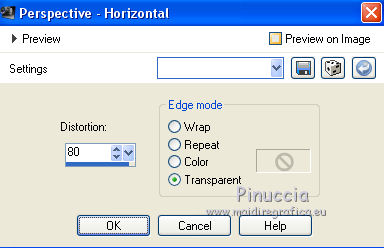
12. Effects>Reflection Effects>Rotating Mirror.

13. Layers>Duplicate.
Layers>Merge>Merge Down.
14. Effects>3D Effects>Drop Shadow.
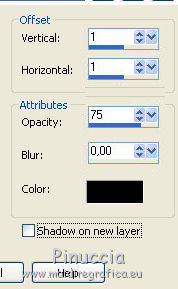
15. Set your foreground color to white #ffffff.
Layers>New Raster Layer.
Flood Fill  the layer with color white. the layer with color white.
16. Layers>New Mask layer>From image
Open the menu under the source window
and select the mask 63814....
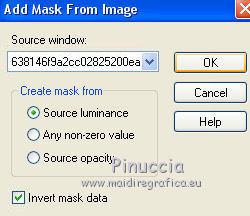
Layers>Merge>Merge Group.
Image>Resize, to 35%, resize all layers not checked.
16. Effects>3D Effects>Drop Shadow.
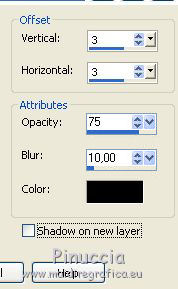
Move  the image at the upper right. the image at the upper right.
17. Open the tube of the cat and go to Edit>Copy.
Go back to your work and go to Edit>Paste as new layer.
Place  the tube as in my example. the tube as in my example.
Effects>3D Effects>Drop Shadow, same settings.
18. Sign your work on a new layer.
little note about the watermark:
I never ask to put watermark on the versions made by my translations.
But if you decide to use the watermark supplied by the author (to change in Soft Light),
I would appreciate that my work as translator was respected too.
For that, I added my watermark to the material (a layer for every language that I translate).
19. Open again the bottom layer.
Layers>Merge>Merge All.
20. Image>Add borders, 2 pixels, symmetric, color white.
Image>Add borders, 4 pixels, symmetric, color #426ea8.
Image>Add borders, 2 pixels, symmetric, color white.
Image>Add borders, 30 pixels, symmetric, color black.
Image>Add borders, 2 pixels, symmetric, color white.
Image>Add borders, 4 pixels, symmetric, color #426ea8.
Image>Add borders, 2 pixels, symmetric, color white.
21. Activate your Magic Wand Tool 
and click on the 30 pixels border to select it.
22. Activate again the landscape and go to Edit>Copy.
Go back to your work and go to Edit>Paste into Selection.
23. Effects>Plugins>Simple - Diamonds.
24. Adjust>Blur>Gaussian Blur - radius 10.

25. Effects>Plugins>Graphics Plus - Cross Shadow, default settings.

Selections>Select None.
26. Save as jpg.
Version with tubes by Cal


If you have problems or doubts, or you find a not worked link, or only for tell me that you enjoyed this tutorial, write to me.
4 November 2019
|
 ENGLISH VERSION

 ENGLISH VERSION
