|
AMÉLIA
 ENGLISH VERSION ENGLISH VERSION
Thanks Joanne for the invitation to translate your tutorials:

This tutorial was translated with PSPX3 but it can also be made using other versions of PSP.
Since version PSP X4, Image>Mirror was replaced with Image>Flip Horizontal,
and Image>Flip with Image>Flip Vertical, there are some variables.
In versions X5 and X6, the functions have been improved by making available the Objects menu.
In the latest version X7 command Image>Mirror and Image>Flip returned, but with new differences.
See my schedule here
Italian translation here
your versions here
For this tutorial, you will need:
Material here
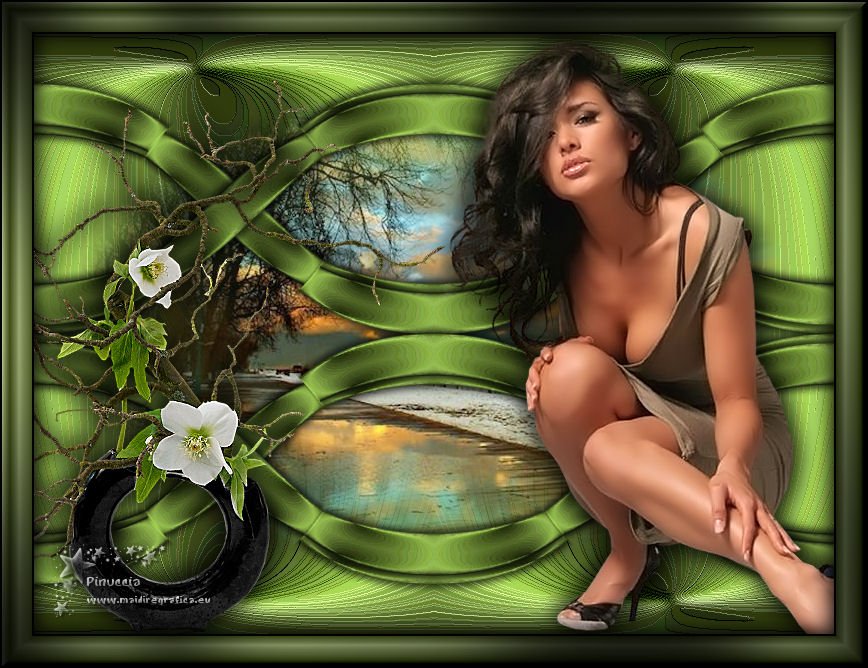
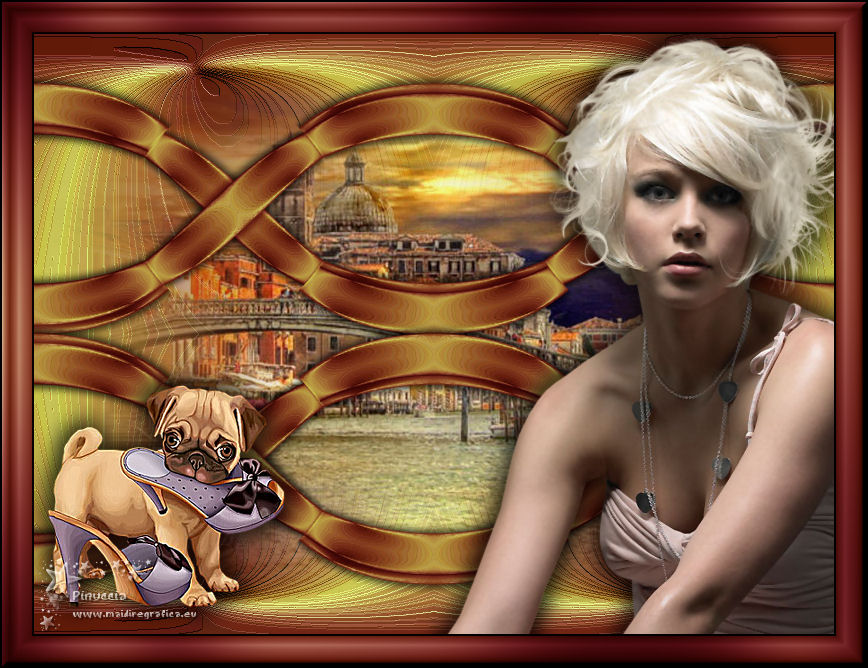
For the tubes thanks Nikita (woman), DBK-Katrina (vase) and Claudia Viza (landscape).
(The links of the tubemakers sites here).
Plugins
Filters Unlimited 2.0 here
Graphics Plus - Cross Shadow here
Simple - Top Left Mirror here
Flaming Pear - Flexify (it is also in the material) here
Flaming Pear - Flexify 2 here
Filters Graphics Plus and Simple can be used alone or imported into Filters Unlimited.
(How do, you see here)
If a plugin supplied appears with this icon  it must necessarily be imported into Unlimited it must necessarily be imported into Unlimited

You can change Blend Modes according to your colors.
In the newest versions of PSP, you don't find the foreground/background gradient (Corel_06_029).
You can use the gradients of the older versions.
The Gradient of CorelX here
1. Set your foreground color to #2a3411,
and your background color to #b7e664.
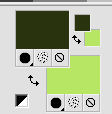
2. Set your foreground color to a Foreground/Background Gradient, style Linear.
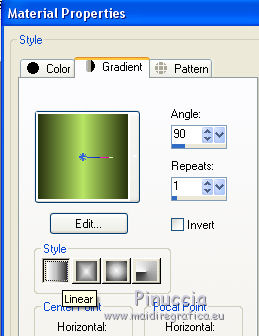
3. Open a new transparent image 800 x 600 pixels,
Flood Fill  with your Gradient. with your Gradient.
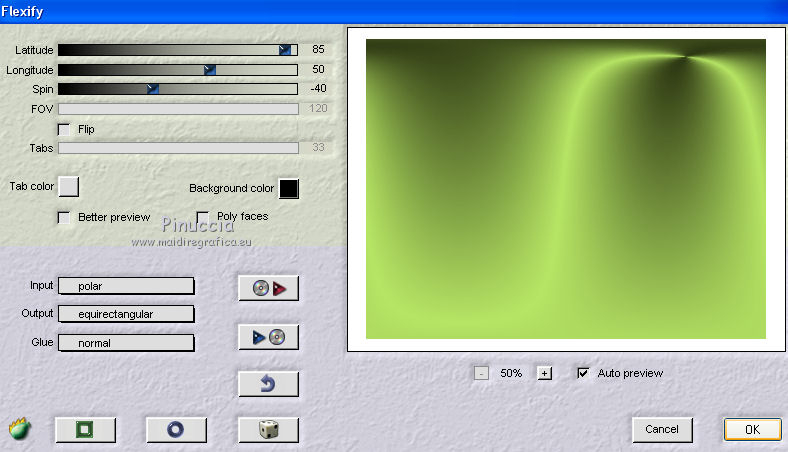
4. Effects>Plugins>Flaming Pear - Flexify .
5. Effects>Artistic Effects>Topography.
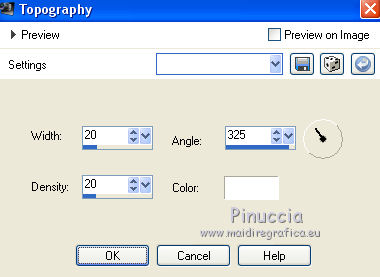
6. Image>Mirror.
7. Effects>Plugins>Simple - Top Left Mirror.
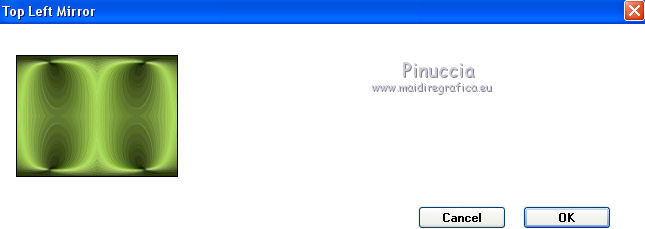
8. Layers>Duplicate and stay on this layer.
9. Activate your Pick Tool  , ,
mode Scale 
push the top central node down until 200 pixels
and the bottom central node up until 350 pixels.
(if you don't see the rules go to View>Rules)
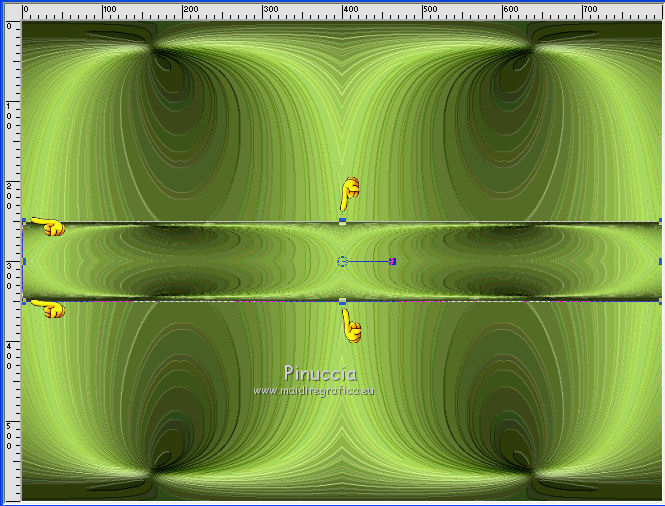
10. Effects>3D Effects>Inner Bevel.
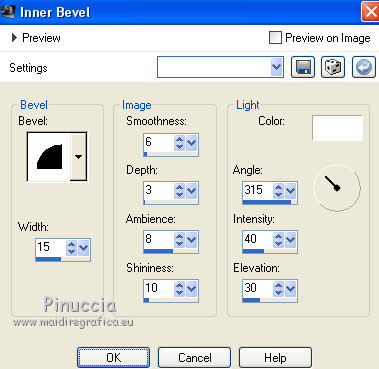
11. Effects>3D Effects>Drop Shadow.

Repeat Drop Shadow, vertical and horizontal -5.
12. Effects>Plugins>Flaming Pear - Flexify 2.
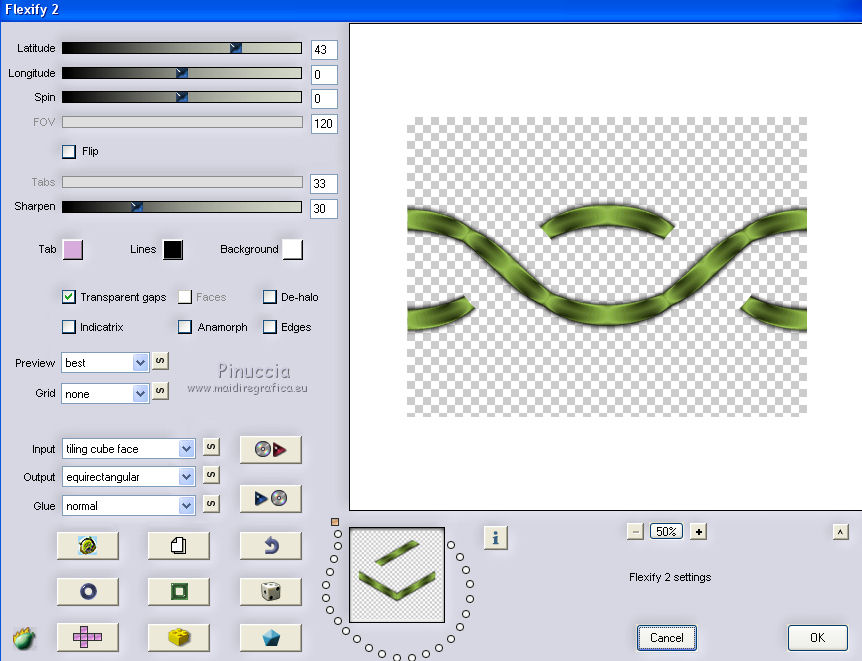
13. Layers>Duplicate.
Image>Flip.
Layers>Merge>Merge Down.
14. Effects>Image Effects>Offset.
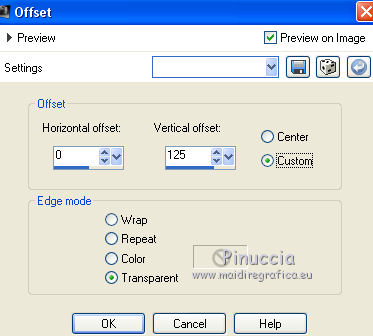
15. Layers>Duplicate.
Image>Flip.
16. Activate the bottom layer.
Open the landscape tube and go to Edit>Copy.
Go back to your work and go to Edit>Paste as new layer.
Layers>Duplicate.
17. Activate the top layer.
Open the tube of the vase and go to Edit>Copy.
Go back to your work and go to Edit>Paste as new layer.
Image>Resize, to 60%, resize all layers not checked.
Adjust>Sharpness>Sharpen More.
Move  the tube at the bottom left. the tube at the bottom left.
18. Effects>3D Effects>Drop Shadow, as step 11.
19. Open the woman tube, erase the watermark, and go to Edit>Copy.
Go back to your work and go to Edit>Paste as new layer.
Image>Mirror.
Image>Resize, to 90%, resize all layers not checked.
Adjust>Sharpness>Sharpen More.
Move  the tube to the right side. the tube to the right side.
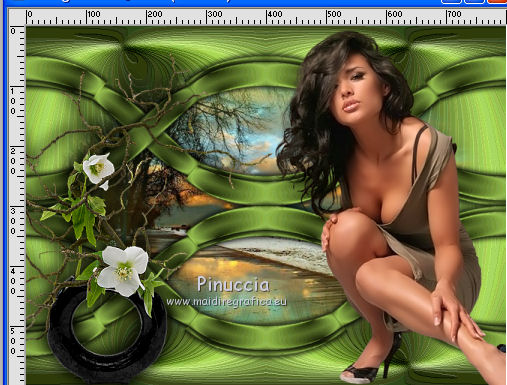
20. Sign your work on a new layer.
little note about the watermark:
I never ask to put watermark on the versions made by my translations.
But if you decide to use the watermark supplied by the author (to change in Soft Light),
I would appreciate that my work as translator was respected too.
For that, I added my watermark to the material (a layer for every language that I translate).
Layers>Merge>Merge All.
21. Image>Add borders, 2 pixels, symmetric, color black.
Image>Add borders, 30 pixels, symmetric, foreground color.
Image>Add borders, 2 pixels, symmetric, color black.
22. Activate your Magic Wand Tool 
and click on the 30 pixels border to select them.
23. Effects>Plugins>Filters Unlimited 2.0 - Button &Frames - 3D Glass Frame 1.
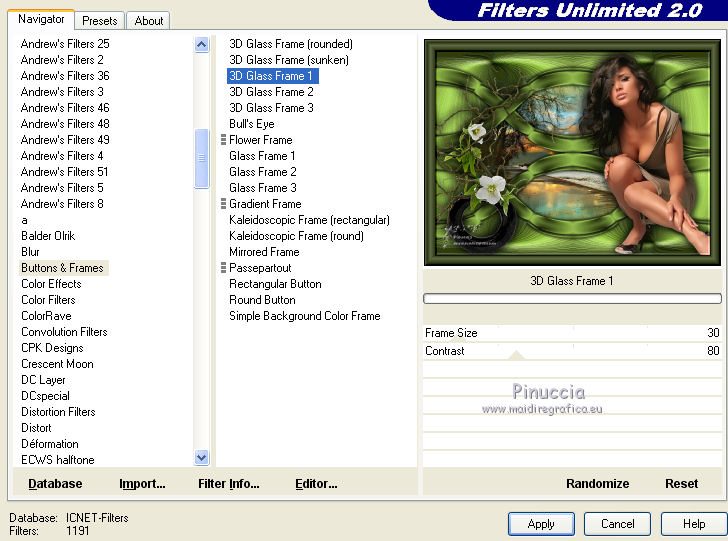
24. Effects>Plugins>Graphics Plus - Cross Shadow, default settings.

25. Effects>3D Effects>Drop Shadow, as step 11.
Selections>Select None.
26. Save as jpg.
Version with tubes by Rooske and Thafs

If you have problems or doubts, or you find a not worked link, or only for tell me that you enjoyed this tutorial, write to me.
16 Mai 2019
|
 ENGLISH VERSION
