|
ELFE DE NOËL
 ENGLISH VERSION ENGLISH VERSION


This tutorial was translated with PSPX3 but it can also be made using other versions of PSP.
Since version PSP X4, Image>Mirror was replaced with Image>Flip Horizontal,
and Image>Flip with Image>Flip Vertical, there are some variables.
In versions X5 and X6, the functions have been improved by making available the Objects menu.
In the latest version X7 command Image>Mirror and Image>Flip returned, but with new differences.
See my schedule here
Italian translation here
le vostre versioni/your versions qui
For this tutorial, you will need:
Material here
For the tube thanks Feeline and for the animations Simone.
Le tube sol-enneigé est by Joanne.
Thanks also to the authors, that I don't know, of the rest of the material.
(The links of the tubemakers here).
Plugins
Filters Unlimited 2.0 here
Graphics Plus - Cross Shadow, Emboss here
Eye Candy 4000 - Corona here
Filters Graphics Plus can be used alone or imported into Filters Unlimited.
(How do, you see here)
If a plugin supplied appears with this icon  it must necessarily be imported into Unlimited it must necessarily be imported into Unlimited
Animation Shop here

You can change Blend Modes according to your colors.
In the newest versions of PSP, you don't find the foreground/background gradient (Corel_06_029).
You can use the gradients of the older versions.
The Gradient of CorelX here
Open the mask in PSP and minimize it with the rest of the material, except the animations that you'll use in Animation Shop.
1. Set your Foreground color to #9fb8e0
and your background color to #193452.
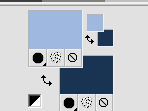
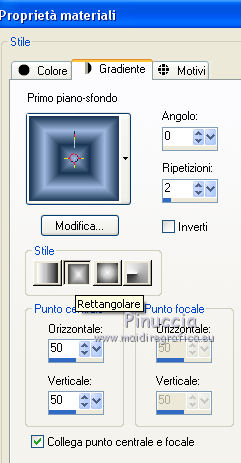
2. Set your foreground color to a Foreground/Background Gradient, style Rectangular.
3. Open a new transparent image 800 x 600 pixels.
Selections>Select All.
4. Open the landscape and go to Edit>Copy.
Go back to your work and go to Edit>Paste into Selection.
Selections>Select None.
5. Open the tube sol-enneigé-by-Joanne and go to Edit>Copy.
Go back to your work and go to Edit>Paste as new layer.
Image>Mirror.
6. Image>Resize, to 120%, resize all layers not checked.
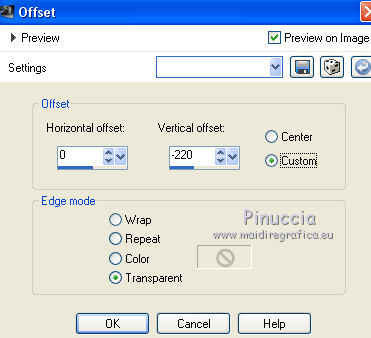
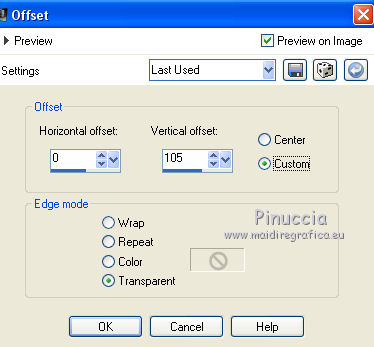
7. Effects>Image Effects>Offset.
8. Change the Blend Mode of this layer to Dissolve.
9. Layers>Merge>Merge visible.
Close this layer.
10. Open a new transparent image 500 x 500 pixels.
Flood Fill  the transparent image with your Gradient. the transparent image with your Gradient.
11. Layers>New Mask layer>From image
Open the menu under the source window and you'll see all the files open.
Select the mask d24e8ca6ffc...
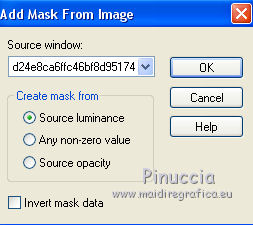
Layers>Merge>Merge Group.
12. Effects>Distortion Effects>Pinch.

13. Effects>Distortion Effects>Twirl.
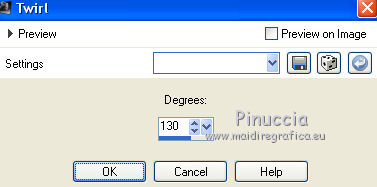
14. Edit>Copy.
Go back to your first work (800 x 600 pixels) and go to Edit>Paste as new layer.
Image>Resize, to 80%, resize all layers not checked.
15. Layers>Duplicate.
Layers>Merge>Merge Down.
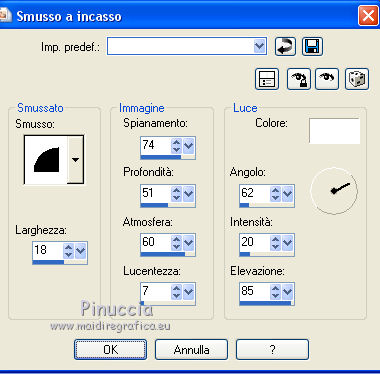
16. Effects>3D Effects>Inner Bevel.
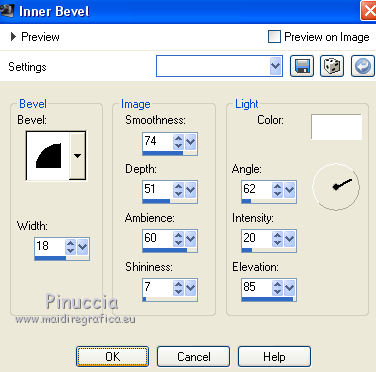
17. Effects>Plugins>Eye Candy 4000 - Corona
Settings: Magnetic Flux
Color: click on the little palette of blu background color to set the Color.
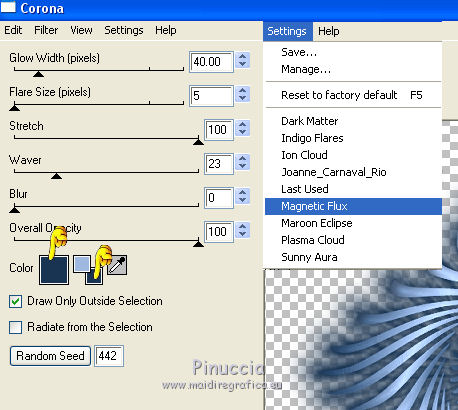
18. Layers>Duplicate.
Close this layer and activate the layer below.
19. Effects>Image Effects>Offset.
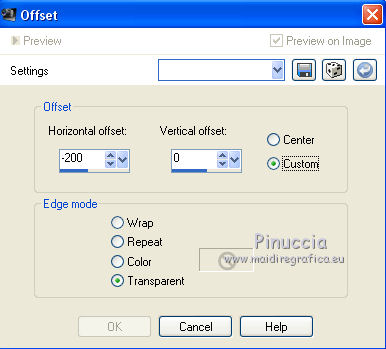
20. Layers>Duplicate.
Image>Mirror.
21. Re-open and activate the layer of the copy.
Effects>Image Effects>Offset.
22. Keep the bottom layer closed.
Layers>Merge>Merge visible.
Adjust>Sharpness>Sharpen More.
23. Open the bottom layer and keep the layer Merged selected.
24. Open the tube of the woman and go to Edit>Copy.
Go back to your work and go to Edit>Paste as new layer.
Image>Resize, to 60%, resize all layers not checked.
Adjust>Sharpness>Sharpen - 2 times.
Place  the tube as in my example. the tube as in my example.
25. Effects>3D Effects>Drop Shadow.
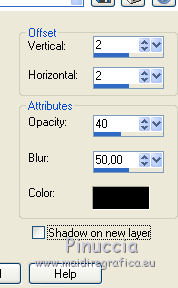
Repeat Drop Shadow, but vertical and horizontal -2.
26. Open the tube of the balls and go to Edit>Copy.
Go back to your work and go to Edit>Paste as new layer.
Image>Resize, to 60%, resize all layers not checked.
Move  the tube at the bottom left. the tube at the bottom left.
27. Effects>3D Effects>Drop Shadow.

28. Open the tube of th candy and go to Edit>Copy.
Go back to your work and go to Edit>Paste as new layer.
Image>Resize, to 80%, resize all layers not checked.
Image>Mirror.
Adjust>Sharpness>Sharpen.
Move  the tube at the bottom left. the tube at the bottom left.
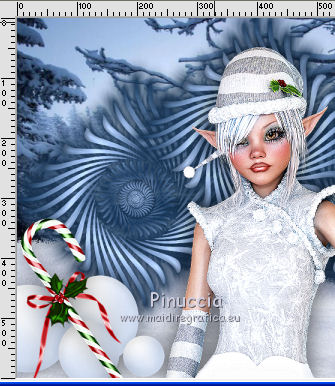
29. Effects>3D Effects>Drop Shadow, same settings.

30. Open the tube holly and go to Edit>Copy.
Go back to your work and go to Edit>Paste as new layer.
Image>Resize, to 80%, resize all layers not checked.
Image>Mirror.
Adjust>Sharpness>Sharpen More - 2 times.
Move  the tube at the bottom right. the tube at the bottom right.
31. Effects>3D Effects>Drop Shadow, same settings.

32. Sign your work on a new layer.
little note about the watermark:
I never ask to put watermark on the versions made by my translations.
But if you decide to use the watermark supplied by the author (to put in mode Soft Light),
I would appreciate that my work as translator was respected too.
For that, I added my watermark to the material (in italian and in english).
33. Layers>Merge>Merge All.
34. Image>Add border, 1 pixel, symmetric, color black.
Image>Add border, 2 pixels, symmetric, color whie.
Image>Add border, 30 pixels, symmetric, blue background color.
Image>Add border, 4 pixels, symmetric, colore white.
35. Activate your Magic Wand Tool 
and click on the 30 pixels border to select it.
36. Effects>Plugins>Graphics Plus - Cross Shadow, default settings.

37. Effects>3D Effects>Inner Bevel, same settings.
Selections>Select None.
38. Edit>Copy.
Open Animation Shop and go to Edit>Paste>Paste as new animation.
Edit>Duplicate and repeat until you get an animation composed by 18 frames.
Click on the first frame to select it and go to Edit>Selection All.
39. Open the animation SimoneAni514-MNG, also composed by 18 frames.
Edit>Select All.
Edit>Copy.
40. Activate your work and go to Edit>Paste>Paste in the selected frame.
Place the animation to the left side.
41. Open the animation SimoneAni515-MNG also composted by 18 frames.
Edit>Select All.
Edit>Copy.
Activate your work and go to Edit>Paste>Paste in the selected frame.
Place the animation to the right side.
43. Check the result clicking on View Animation 
and save as gif.
The tube of this version is by Krys


If you have problems or doubts, or you find a not worked link, or only for tell me that you enjoyed this tutorial, write to me.
10 December 2018
|
 ENGLISH VERSION
