|
ARLENE
 ENGLISH VERSION ENGLISH VERSION
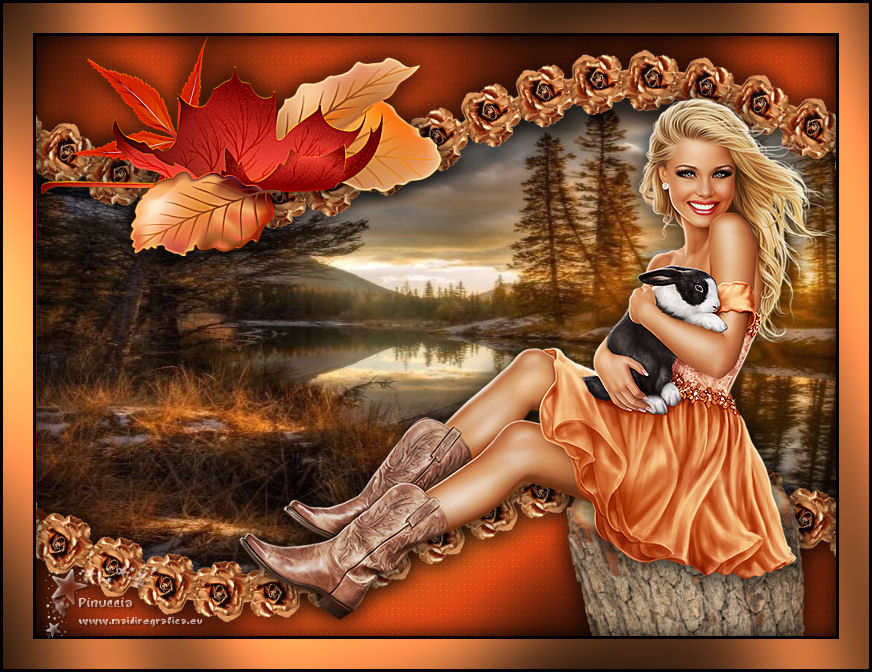
Here you find the original of this tutorial:

This tutorial was translated with PSPX3 but it can also be made using other versions of PSP.
Since version PSP X4, Image>Mirror was replaced with Image>Flip Horizontal,
and Image>Flip with Image>Flip Vertical, there are some variables.
In versions X5 and X6, the functions have been improved by making available the Objects menu.
In the latest version X7 command Image>Mirror and Image>Flip returned, but with new differences.
See my schedule here
Italian translation here
le vostre versioni/your versions qui
For this tutorial, you will need:
Material here
Thanks to the authors of the material used (some of the elements are not signed)
(The links of the tubemakers here).
Plugins
Filters Unlimited 2.0 here
Graphics Plus - Cross Shadow, Emboss here
Carolaine and Sensibility - CS-LDots here
Mura's Meister - Copies here
Filters Graphics Plus can be used alone or imported into Filters Unlimited.
(How do, you see here)
If a plugin supplied appears with this icon  it must necessarily be imported into Unlimited it must necessarily be imported into Unlimited

Copy the Selection in the Selections Folder.
1. Set your Foreground color to #db7c43.
2. Open a new transparent image 800 x 600 pixels.
Flood Fill  with your foreground color. with your foreground color.
3. Effects>Plugins>Graphics Plus - Cross Shadow, default settings.

4. Layers>New Raster Layer.
Flood Fill  with your foreground color. with your foreground color.
5. Effects>Texture Effects>Blinds, foreground color #db7c43
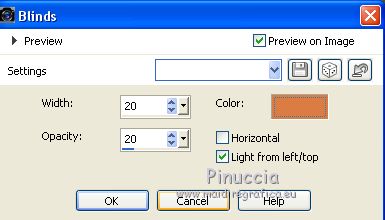
6. Effects>Plugins>Carolaine and Sensibility - CS-LDots, default settings.
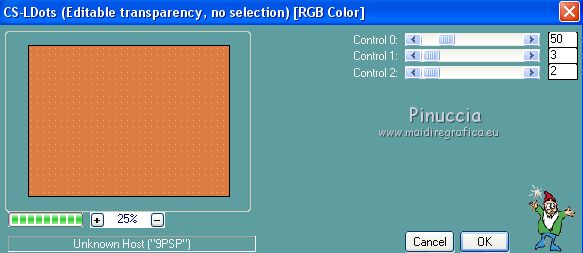
7. Change the Blend Mode of this layer to Multiply
8. Layers>New Raster Layer.
Selections>Select All.
9. Open the landscape tube and go to Edit>Copy.
Go back to your work and go to Edit>Paste into Selection.
Selections>Select None.
10. Selections>Load/Save Selection>Load Selection from Disk.
Look for and load the selection Selection-Joanne_Arlène
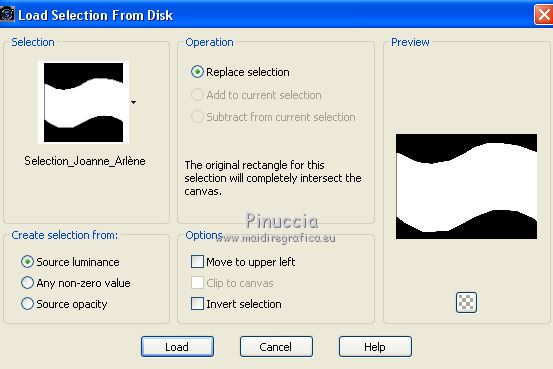
11. Selections>Invert.
Press CANC on the keyboard 
Selections>Select None.
12. Open the flower tube and go to Edit>Copy.
Go back to your work and go to Edit>Paste as new layer.
Image>Resize, to 30%, resize all layers not checked.
13. Effects>Plugins>Mura's Meister - Copies.
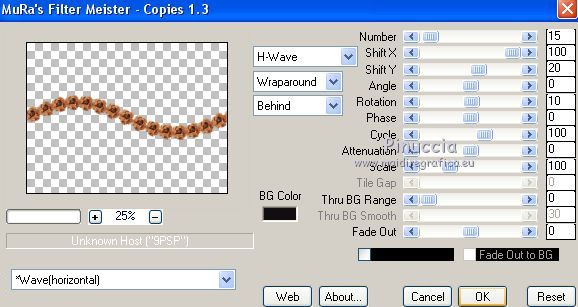
14. Image>Mirror.
15. Effects>Image Effects>Offset.
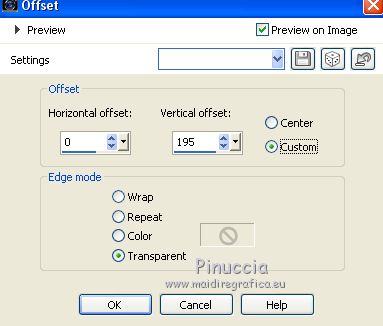
16. Layers>Duplicate.
Image>Flip.
Image>Mirror.
Layers>Merge>Merge Down.
17. Adjust>Sharpness>Sharpen More.
18. Effects>3D Effects>Drop Shadow.

Repeat Drop Shadow, but vertical and horizontal -3.
19. Open the trunk tube and go to Edit>Copy.
Go back to your work and go to Edit>Paste as new layer.
Image>Resize, to 80%, resize all layers not checked.
Image>Mirror.
20. Effects>Image Effects>Offset.
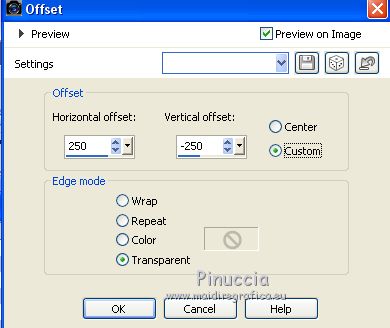
21. Effects>3D Effects>Drop Shadow, as step 18.
22. Open the woman tube and go to Edit>Copy.
Go back to your work and go to Edit>Paste as new layer.
Move  the tube to the right side, see my example. the tube to the right side, see my example.
23. Effects>3D Effects>Drop Shadow, as step 18.
24. Open the leaves tube and go to Edit>Copy.
Go back to your work and go to Edit>Paste as new layer.
Image>Resize, to 80%, resize all layers not checked.
Image>Mirror.
Adjust>Sharpness>Sharpen More.
Move  the tube at the upper left. the tube at the upper left.
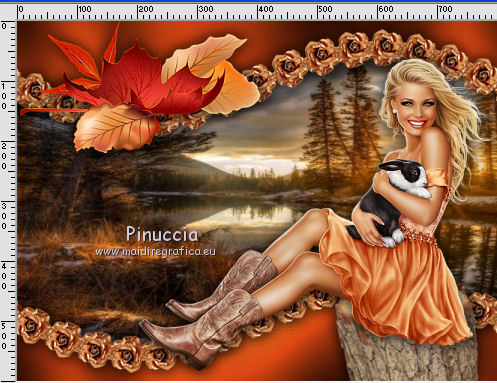
25. Effects>3D Effects>Drop Shadow, as step 18.
26. Sign your work on a new layer.
little note about the watermark:
I never ask to put watermark on the versions made by my translations.
But if you decide to use the watermark supplied by the author (to put in mode Soft Light),
I would appreciate that my work as translator was respected too.
For that, I added my watermark to the material (in italian and in english).
Layers>Merge>Merge All.
27. Image>Add borders, 3 pixels, symmetric, color black.
Image>Add borders, 30 pixels, symmetric, foreground color.
Image>Add borders, 3 pixels, symmetric, color black.
28. Activate the Magic Wand Tool 
and click on the 30 pixels border to select it.
29. Effects>Plugins>Graphics Plus - Cross Shadow, default settings.

30. Effects>3D Effects>Drop Shadow.
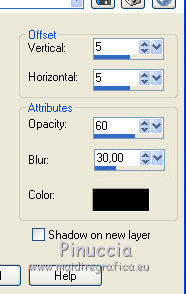
Repeat Drop Shadow, but vertical and horizontal -5.
Selections>Select None.
Save as jpg.
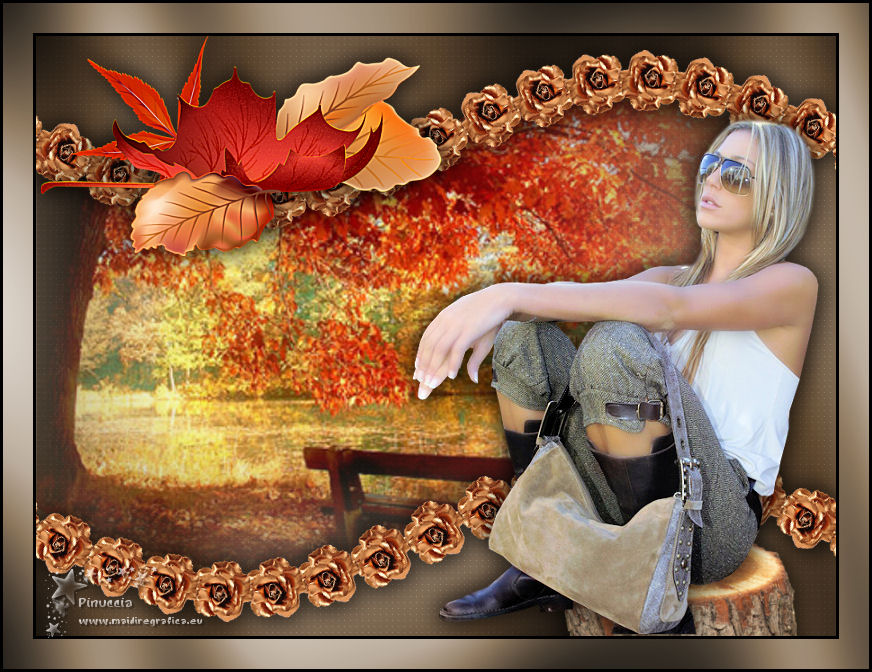
The tubes of this version are by Mone and Luz Cristina

If you have problems or doubts, or you find a not worked link, or only for tell me that you enjoyed this tutorial, write to me.
24 October 2018
|
 ENGLISH VERSION
