|
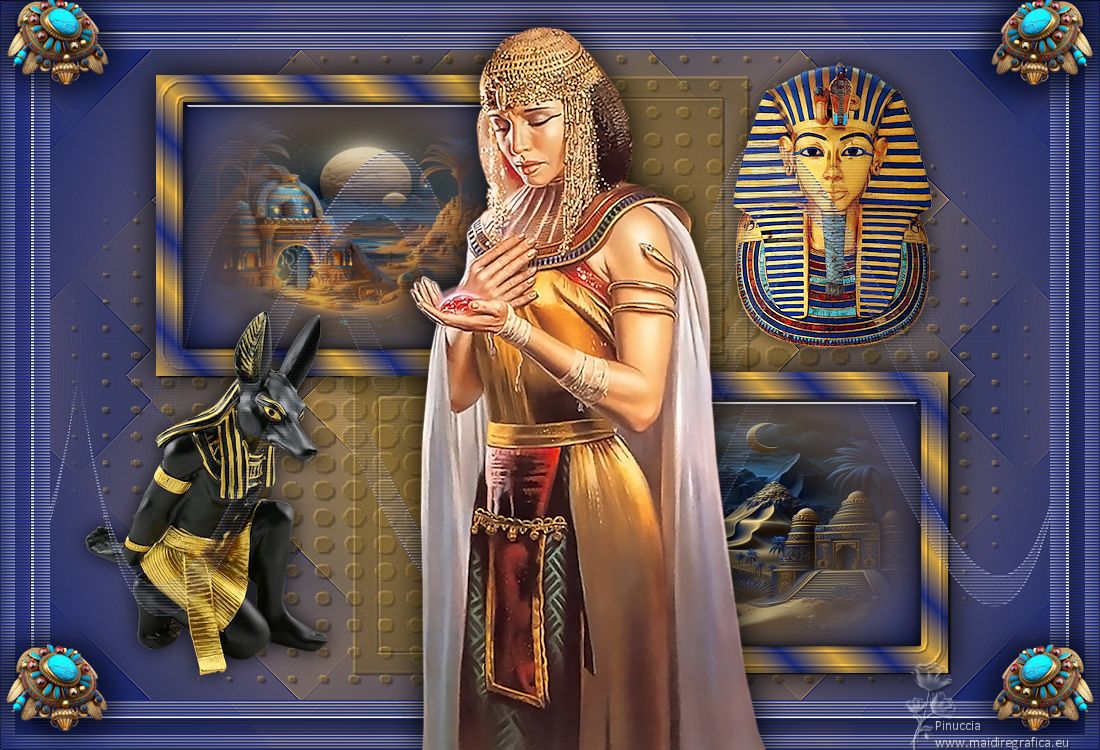
TUTANCHAMUN

Thanks Inge-lore for your invitation to translate your tutorials.

This tutorial was translated with PSPX, PSPX2, PSPX3, but it can also be made using other versions of PSP.
Since version PSP X4, Image>Mirror was replaced with Image>Flip Horizontal,
and Image>Flip with Image>Flip Vertical, there are some variables.
In versions X5 and X6, the functions have been improved by making available the Objects menu.
In the latest version X7 command Image>Mirror and Image>Flip returned, but with new differences.
See my schedule here
 Italian translation qui Italian translation qui
 French translation here French translation here
 Your versions ici Your versions ici
Material:
Tube of yours (the tube used by Inge-Lore is under licence).
The rest of the material here
For the deco tubes thanks Louise Pause and for the masks thanks Narah.
For the tube of my version thanks Colybrix.
(you find here the links to the material authors' sites)

consult, if necessary, my filter section here
Filters Unlimited 2.0 here
Mehdi - Sorting Tiles here
Mura's Seamless - Emboss at Alpha here
AAA Frames - Foto Frame here
Alien Skin Eye Candy 5 Impact - Glass here
Filters Mura's Seamless can be used alone or imported into Filters Unlimited.
(How do, you see here)
If a plugin supplied appears with this icon  it must necessarily be imported into Unlimited it must necessarily be imported into Unlimited

You can change Blend Modes according to your colors.
In the newest versions of PSP, you don't find the foreground/background gradient (Corel_06_029).
You can use the gradients of the older versions.
The Gradient of CorelX here

Open the masks in PSP and minimize them with the rest of the material.
Choose two colors from your tubes.
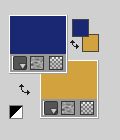
Set your foreground color to the dark color, for me#1c2870,
and your background color to the light color, for me #d2a23e
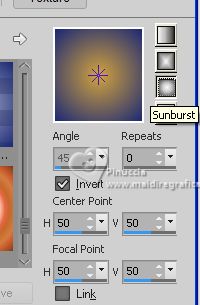
Set your foreground color to a Foreground/Background Gradient, style Sunburst.
Open a new transparent image 1000 x 650 pixels,
Flood Fill  the transparent image with your Gradient. the transparent image with your Gradient.
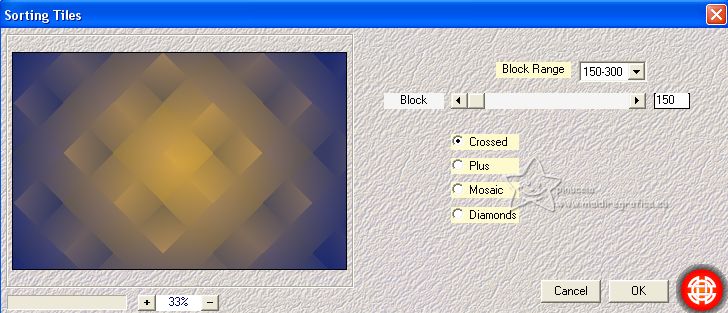
Effects>Plugins>Mehdi - Sorting Tiles.
Effects>Reflection Effects>Rotating Mirror, default settings.

Effects>Reflection Effects>Rotating Mirror.

Effects>Edge Effects>Enhance More.
2. Layers>New Raster Layer.
Flood Fill  the layer with your light background color. the layer with your light background color.
Layers>New Mask layer>From image
Open the menu under the source window and you'll see all the files open.
Select the mask Narah_Mask_1136
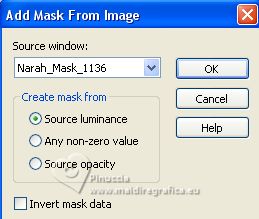
Effects>Edge Effects>Enhance.
Layers>Merge>Merge Group.
Selection Tool 
(no matter the type of selection, because with the custom selection your always get a rectangle)
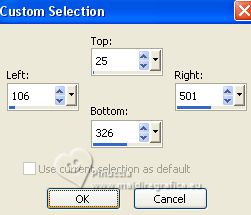
clic on the Custom Selection 
and set the following settings.
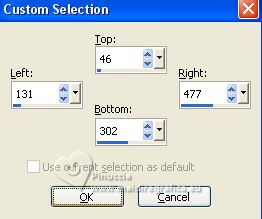
Press CANC on the keyboard 
Layers>New Raster Layer.
Flood fill  the layer with your Gradient. the layer with your Gradient.
Layers>New Raster Layer.
Open the first background tube paper(7) 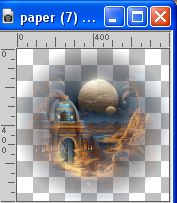
Edit>Copy.
Go back to your work and go to Edit>Paste into Selection.
3. Layers>New Raster Layer.
Effects>3D Effects>Cutout.
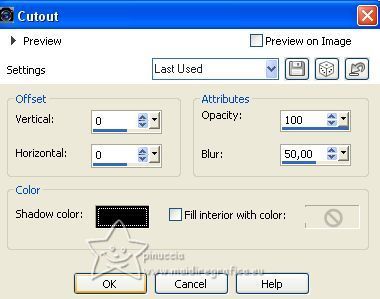
Selections>Select None.
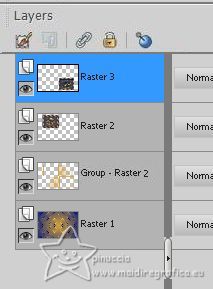
Layers>Merge>Merge Down - 2 times.
Custom Selection 
Change the settings of your Gradient, style Linear.
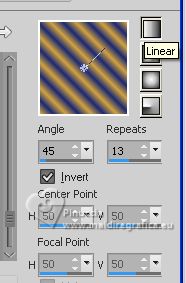
Layers>New Raster Layer.
Flood fill  the selection with your Gradient. the selection with your Gradient.
Selections>Modify>Contract - 27 pixels.
Press CANC on the keyboard 
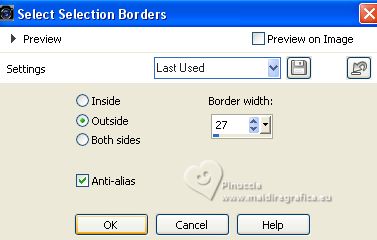
4. Selections>Modify>Select Selection Border.
Effects>3D Effects>Inner Bevel.
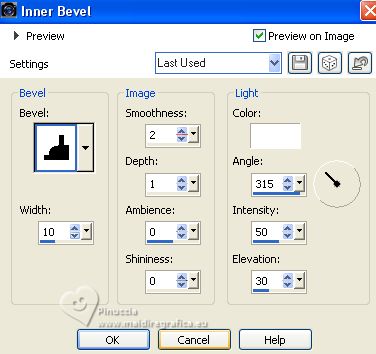
Selections>Select None.
Activate your Magic Wand Tool 
and click in the frame to select it.
Effects>Plugins>Alien Skin Eye Candy 5 Impact – Glass
select the preset Clear and ok.

Selections>Select None.
Layers>Duplicate.
K key to activate your Pick Tool 
and set Position X: 503,00 and Position Y: 322,00.

Activate the layer Raster 3.
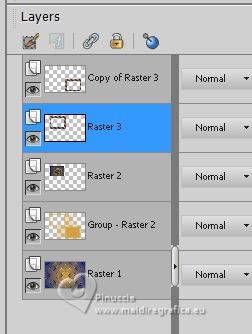
Layers>Merge>Merge Down.
Effects>3D Effects>Drop Shadow.
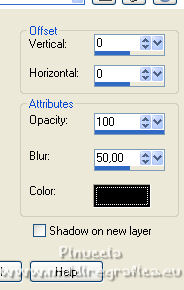
5. Activate the layer below of the mask.
Custom Selection 
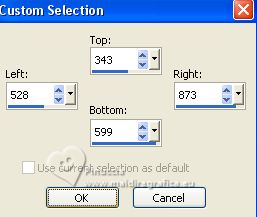
Press CANC on the keyboard.
Layers>New Raster Layer.
Layers>Arrange>Move Up.
Set again your Sunburst Gradient.

Flood Fill  the selection with your Gradient. the selection with your Gradient.
Layers>New Raster Layer.
Open your second background tube paper (4) 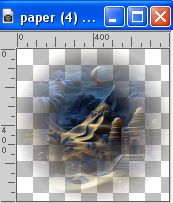
Edit>Copy.
Go back to your work and go to Edit>Paste into Selection.
Adjust>Sharpness>Sharpen.
6. Layers>New Raster Layer.
Effects>3D Effects>Cutout, same settings.

Selections>Select None.
Activate your top layer.
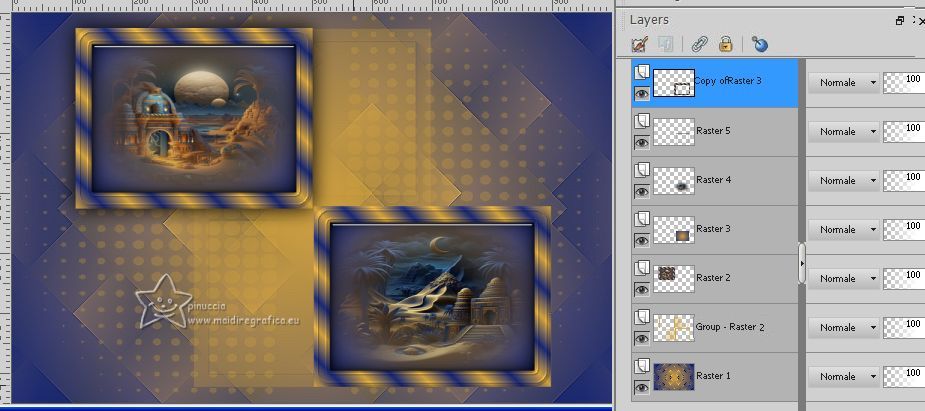
Layers>Merge>Merge Down - 3 times.
Effects>3D Effects>Drop Shadow.

7. Activate the mask's layer.
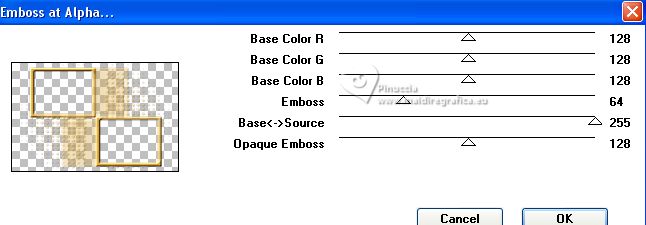
Effects>Plugins>Mura's Seamless - Emboss at Alpha, default settings.
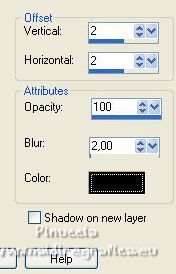
Effects>3D Effects>Drop Shadow.
Activate your top layer.
Open the tube #365- Tube Egypt-Muse–louisepausepsp20207 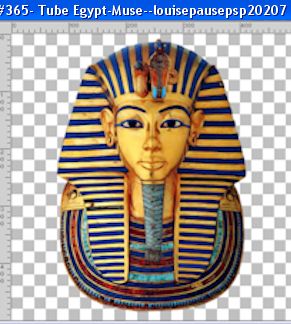
Edit>Copy.
Go back to your work and go to Edit>Paste as new layer.
Image>Resize, to 60%, resize all layers not checked.
Adjust>Sharpness>Sharpen.
Move  the tube at the upper right. the tube at the upper right.
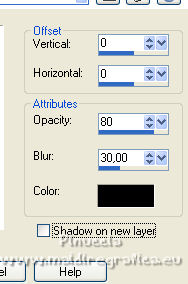
Effects>3D Effects>Drop Shadow.
8. Open the tube #363- Tube Egypt- statue–louisepausepsp20207 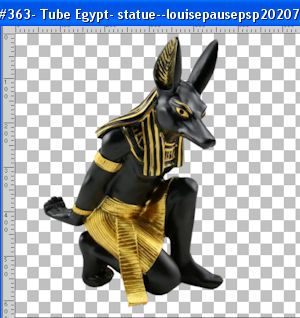
Edit>Copy.
Go back to your work and go to Edit>Paste as new layer.
Image>Resize, to 60%, resize all layers not checked.
Adjust>Sharpness>Sharpen.
Effects>3D Effects>Drop Shadow, same settings.
Move  the tube at the bottom left. the tube at the bottom left.
Set your foreground color to color white.
Layers>New Raster Layer.
Flood Fill  with color white #ffffff. with color white #ffffff.
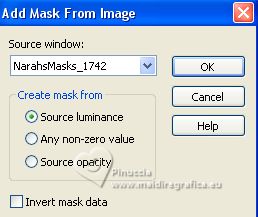
Layers>New Mask layer>From image
Open the menu under the source window
and select the mask NarahsMasks_1742
Effects>Edge Effects>Enhance More.
Layers>Merge>Merge Group.
9. Effects>Image Effects>Seamless Tiling - side by side.

Activate the layer Raster 1.
Selections>Select All.
Edit>Copy.
Activate your top layer.
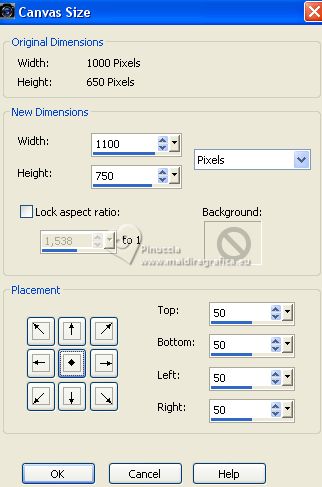
Image>Canvas Size - 1100 x 750 pixels.
10. Selections>Invert.
Edit>Paste into selection.
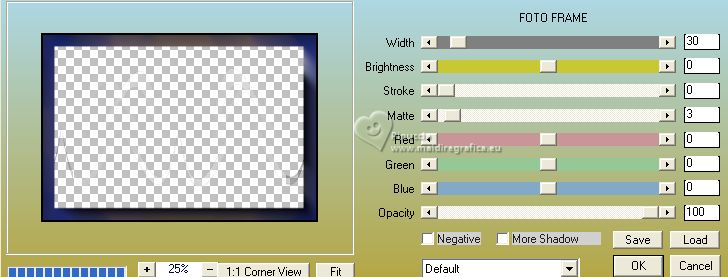
Effects>Plugins>AAA Frames - Foto Frame.
Selections>Invert.
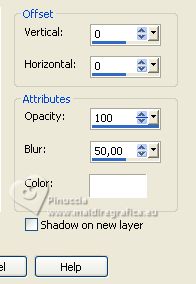
Effects>3D Effects>Drop Shadow, color white.
Selections>Select All.
Selections>Modify>Contract - 15 pixels.
Effects>3D Effects>Drop Shadow, same settings.
Selections>Select None.
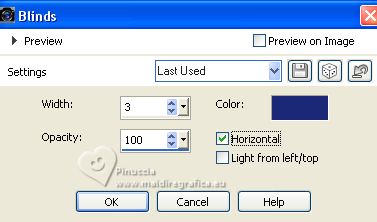
11. Effects>Texture Effects>Blinds, dark color.
Stay on the top layer.
Open your main tube and go to Edit>Copy.
Go back to your work and go to Edit>Paste as new layer.
Image>Resize, if necessary, resize all layers not checked.
Adjust>Sharpness>Sharpen.
Effects>3D Effects>Drop Shadow, same settings, but color black.

Open adventures_of_egypt_cc(48) 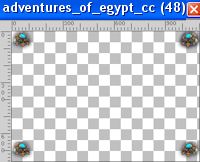
Edit>Copy.
Go back to your work and go to Edit>Paste as new layer.
Effects>3D Effects>Drop Shadow, same settings.
Sign your work on a new layer.
Layers>Merge>Merge All and save as jpg.
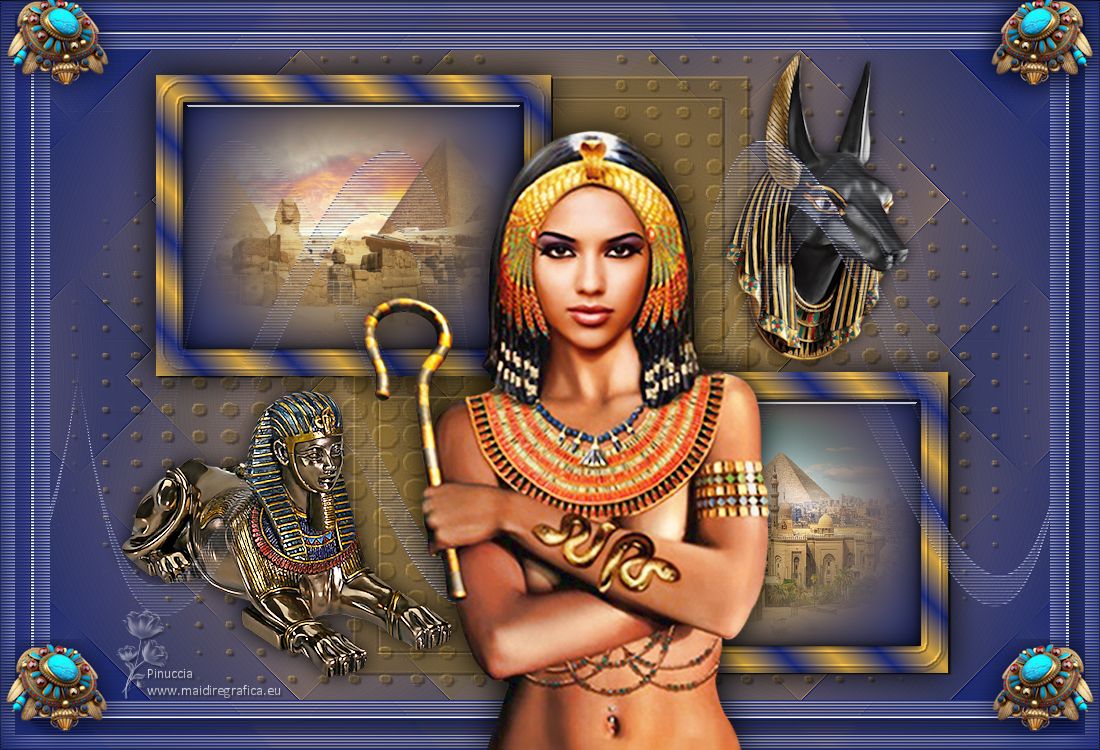
For the tubes of this version thanks Colybrix and DBK Katrina; the misted are mine.

If you have problems or doubts, or you find a not worked link, or only for tell me that you enjoyed this tutorial, write to me.
9 August 2023

|

