|
DRAGONLADY

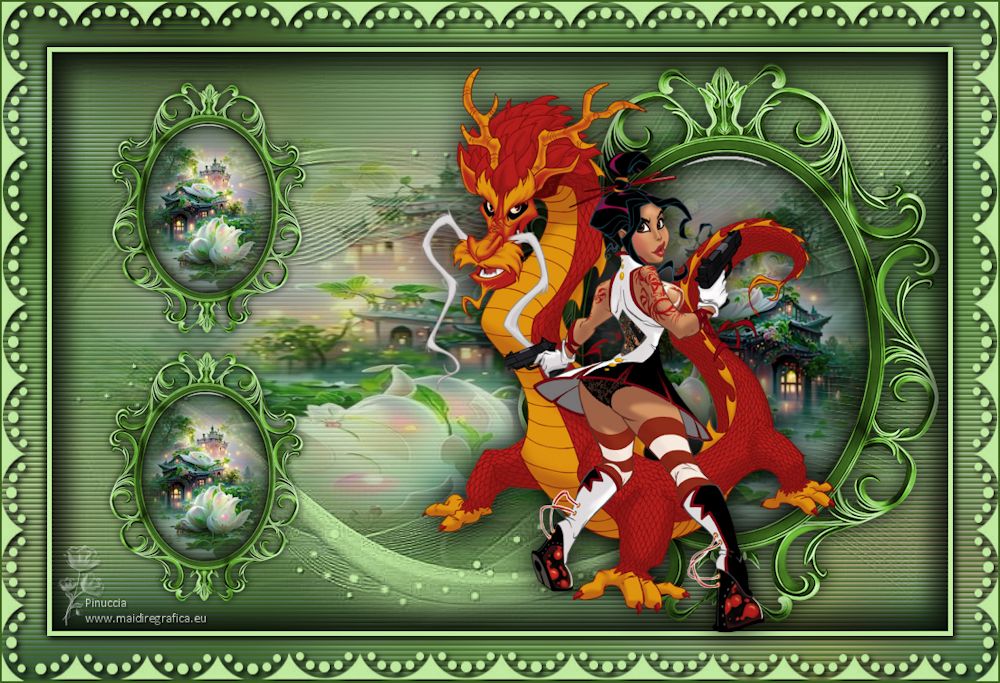
Thanks Inge-lore for your invitation to translate your tutorials.

This tutorial was translated with PSPX, PSPX2, PSPX3, but it can also be made using other versions of PSP.
Since version PSP X4, Image>Mirror was replaced with Image>Flip Horizontal,
and Image>Flip with Image>Flip Vertical, there are some variables.
In versions X5 and X6, the functions have been improved by making available the Objects menu.
In the latest version X7 command Image>Mirror and Image>Flip returned, but with new differences.
See my schedule here
 Italian translation qui Italian translation qui
 French translation here French translation here
 Your versions ici Your versions ici
For this tutorial, you will need:
Tube at your choice (the tube used by Inge-Lore is under licence)
The rest of the material 
For a mask thanks Narah.
For the tubes used for my translation thanks Mull.
(you find here the links to the material authors' sites)

consult, if necessary, my filter section here
Alien Skin Eye Candy 5 Impact - Glass here

You can change Blend Modes according to your colors.
In the newest versions of PSP, you don't find the foreground/background gradient (Corel_06_029).
You can use the gradients of the older versions.
The Gradient of CorelX here

Open the masks in PSP and minimize them with the rest of the material.
1. Choose 2 colors from your material;
set your foreground color to the light color; for me #c1eba1
and your background color to the dark color; for me #3c6320
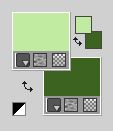
Set your foreground color to a Foreground/Background Gradient, style Linear.
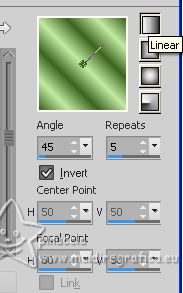
Open a new transparent image 1000 x 650 pixels.
Flood Fill  the transparent image with your Gradient. the transparent image with your Gradient.
Selections>Select All.
Open the misted 53125db61a05... 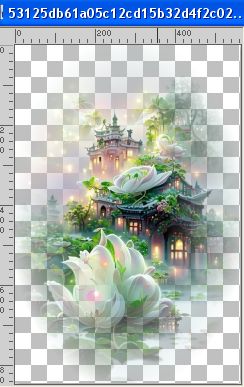
Edit>Copy.
Go back to your work and go to Edit>Paste into Selection.
Selections>Select None.
Effects>Image Effects>Seamless Tiling, default settings.

Adjust>Blur>Gaussian Blur - radius 30.

2. Open Frame 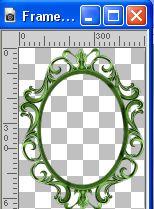
Edit>Copy.
Go back to your work and go to Edit>Paste as new layer.
Activate your Magic Wand Tool 
and click in the frame to select it.
Layers>New Raster Layer.
Layers>Arrange>Move Down.
Activate again the misted and go to Edit>Copy.
Go back to your work and go to Edit>Paste into Selection.
Layers>Duplicate.
Layers>Merge>Merge Down.
Activate the top layer of the frame.
3. Layers>New Raster Layer.
Effects>3D Effects>Cutout.
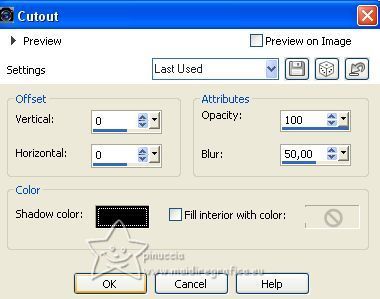
Effects>Plugins>Alien Skin Eye Candy 5 Impact – Glass
Select the preset Clear and ok.

Selections>Select None.
Layers>Merge>Merge Down - 2 times.
Image>Resize, to 95%, resize all layers not checked.
K key to activate your Pick Tool 
and set Position X: 509,00 and Position Y: 17,00.

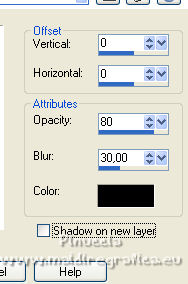
Effects>3D Effects>Drop Shadow.
4. Layers>Duplicate.
Image>Resize, to 45%, resize all layers not checked.
Image>Mirror.
K key to activate your Pick Tool 
and set Position X: 65,00 and Position Y: 31,00.

Layers>Duplicate.
Set Position X: 62,00 and Position Y: 327,00.

Layers>Merge>Merge Down - 2 times.
Activate the layer Raster 1.
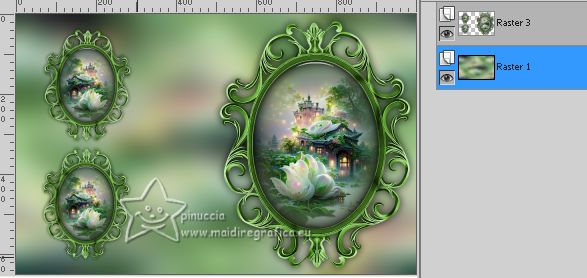
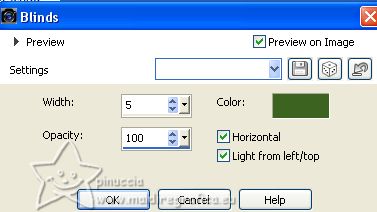
Effects>Texture Effects>Blinds, dark color.
5. Layers>New Raster Layer.
Selections>Select All.
Edit>Paste into Selection (your misted is still in memory).
Selections>Select None.
Reduce the opacity of this layer to 80%.
Layers>New Raster Layer.
Set your foreground color to Color.
Flood Fill  the layer with your light color (or white if you like better). the layer with your light color (or white if you like better).
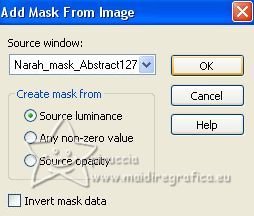
Layers>New Mask layer>From image
Open the menu under the source window and you'll see all the files open.
Select the mask Narah_mask_Abstract127
Effects>Edge Effects>Enhance more.
Layers>Merge>Merge group.
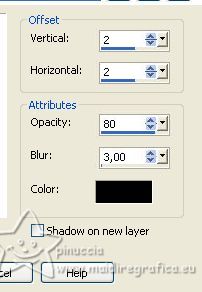
Effects>3D Effects>Drop shadow.
6. Activate the layer Raster 1.
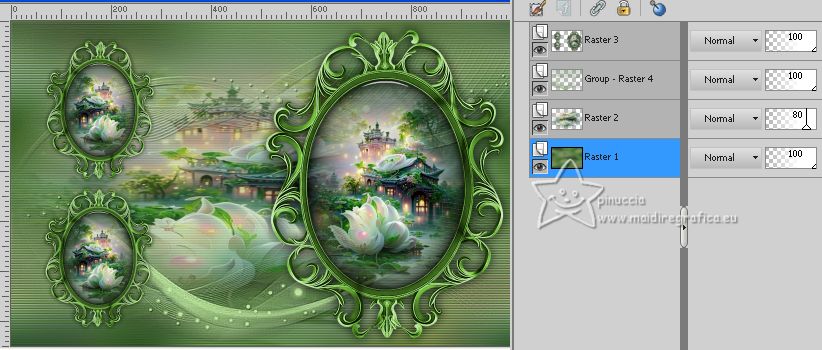
Edit>Copy
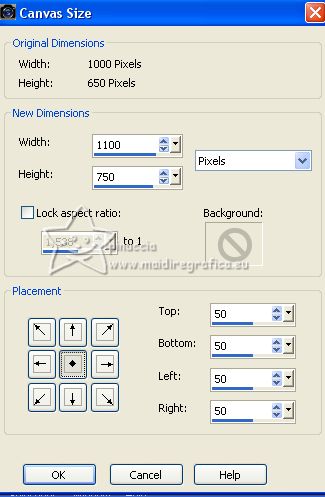
Image>Canvas Size - 1100 x 750 pixels
Layers>New Raster Layer.
Calques>Arrange>Move Down.
Selections>Select All.
Edit>Paste into Selection.
Selections>Select None.
Layers>New Raster Layer.
Flood Fill  the layer with your light color. the layer with your light color.
Layers>New Mask layer>From image
Open the menu under the source window
and select the mask 17.
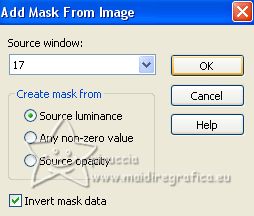
Layers>Merge>Merge Group.
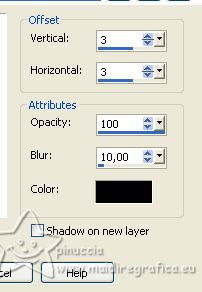
Effects>3D Effects>Drop Shadow.
7. Activate the layer Raster 1.
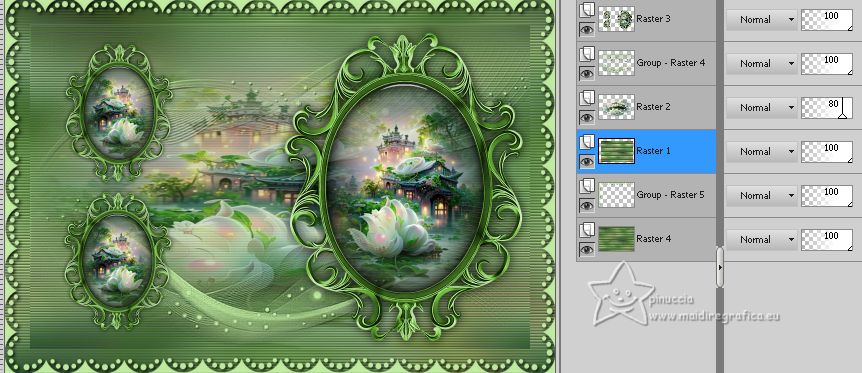
Activate your Magic Wand Tool 
and click in the transparent bord to select it.
Selections>Invert.
Selections>Modify>Select Selection Borders.
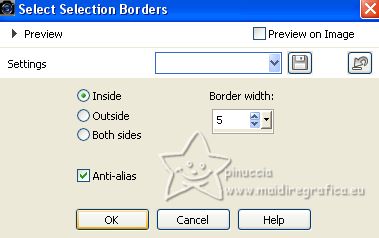
Layers>New Raster Layer.
Flood Fill  with your light color. with your light color.
Selections>Select None.
Activate your Magic Wand Tool 
and click inside the frame to select it.
Effects>3D Effects>Cutout, same settings.

Selections>Select None.
Layers>Arrange>Bring to Top.
Effects>3D Effects>Drop Shadow, same settings.

Repeat Drop Shadow, vertical and horizontal -3.
8. Stay on the top layer.
Open your tube, for me un tube de Mull masuimiTracyMarcklee-mull-sm 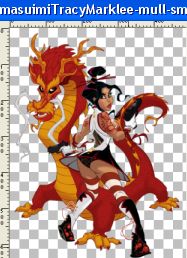
Edit>Copy.
Go back to your work and go to Edit>Paste as new layer.
Image>Resize, if necessary.
Adjust>Sharpness>Sharpen.
Effects>3D Effects>Drop Shadow.
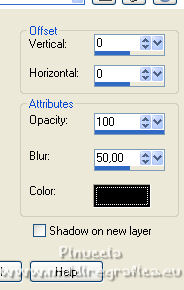
Image>Add borders, 2 pixels, symmetric, dark color.
Image>Resize, 1030 pixels width, resize all layers checked.
If necessary, Adjust>Sharpness>Sharpen.
Sign your work on a new layer.
Layers>Merge>Merge All and save as jpg.
The tube of this version is not signed
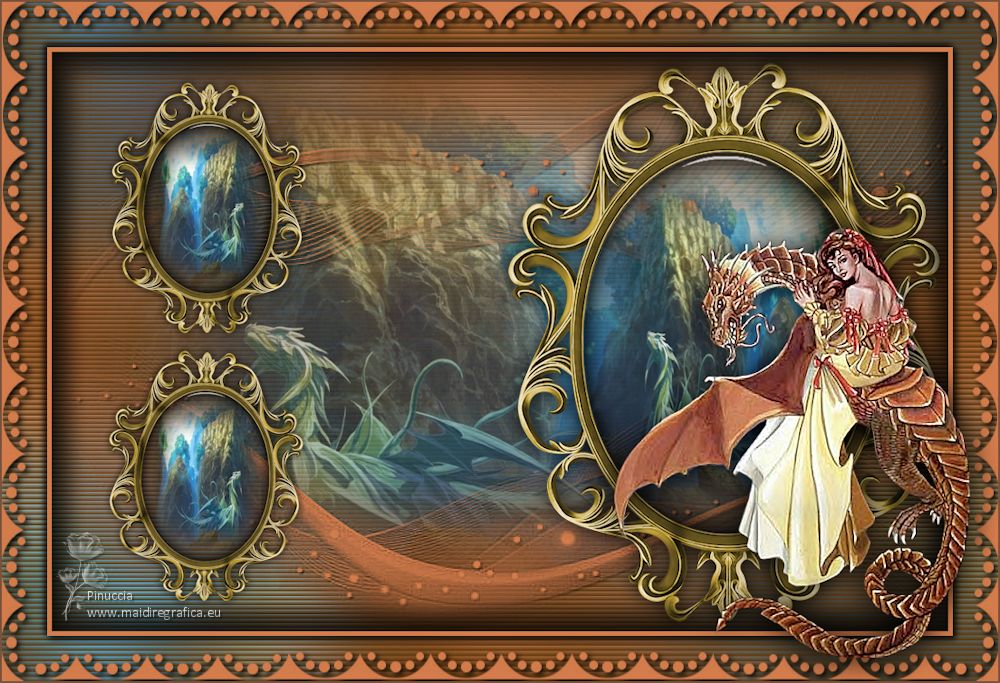

If you have problems or doubts, or you find a not worked link, or only for tell me that you enjoyed this tutorial, write to me.
16 June 2023

|

