|
NUIT ÉTOILÉE
 ENGLISH VERSION ENGLISH VERSION
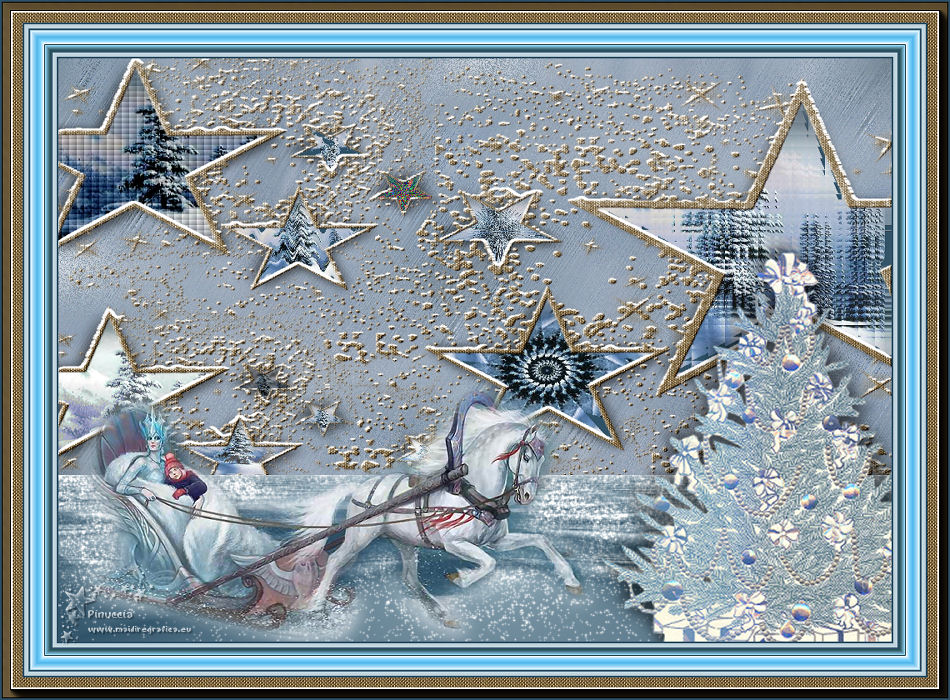
Here you find the original of this tutorial:

This tutorial was created with PSP2019 and translated with PSPX3 but it can also be made using other versions of PSP.
Since version PSP X4, Image>Mirror was replaced with Image>Flip Horizontal,
and Image>Flip with Image>Flip Vertical, there are some variables.
In versions X5 and X6, the functions have been improved by making available the Objects menu.
In the latest version X7 command Image>Mirror and Image>Flip returned, but with new differences.
See my schedule here
Italian translation here
Vos versions here
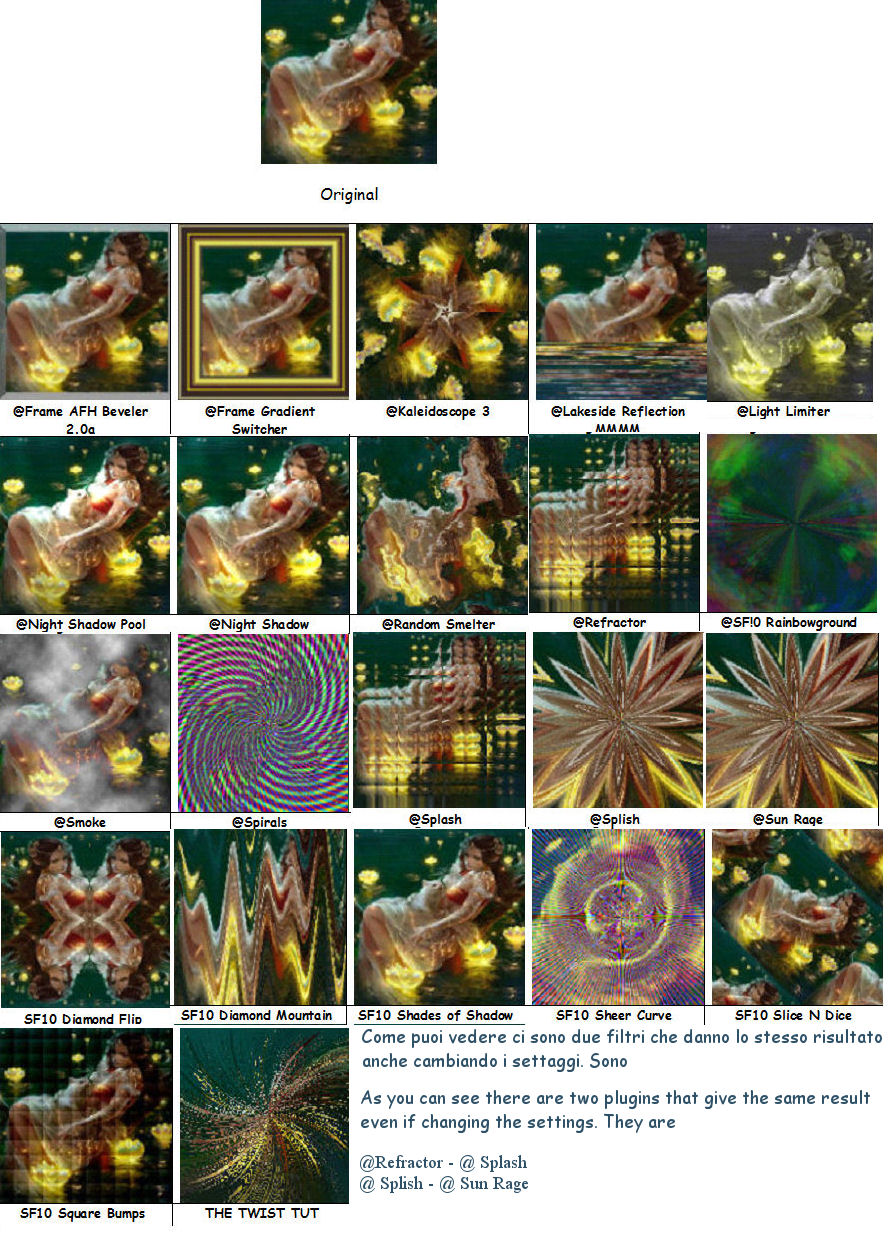
With this tutorial we'll study the Plugin &<Background Designer IV>
Material here
Plugins
Filters Unlimited 2.0 here
AAA Frames - Foto Frame here
Filters Unlimited 2.0 qui
&<Background Designer IV> (da importare in Unlimited) here
Mura's Seamless - Emboss at Alpha here
Mura's Meister - Perspective Tiling here
Alien Skin Eye Candy 5 Nature - Snow Drift here
Filters Mura's Seamless can be used alone or imported into Filters Unlimited.
(How do, you see here)
If a plugin supplied appears with this icon  it must necessarily be imported into Unlimited it must necessarily be imported into Unlimited

You can change Blend Modes according to your colors.
In the newest versions of PSP, you don't find the foreground/background gradient (Corel_06_029).
You can use the gradients of the older versions.
The Gradient of CorelX here
Copy the preset  in the folder of the plugins Alien Skin Eye Candy 5 Nature>Settings>Snow Drift in the folder of the plugins Alien Skin Eye Candy 5 Nature>Settings>Snow Drift
One or two clic on the file (it depends by your settings), automatically the preset will be copied in the right folder.
why one or two clic see here
Open the mask and the golden pattern in PSP and minimize them with the rest of the material.
1. Choose two colors from your background image, or your main tube.
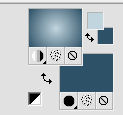
Set your foreground color to a light color; for me #c1d5de,
and your background color to a dark color; for me #2e5167.
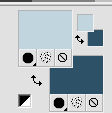
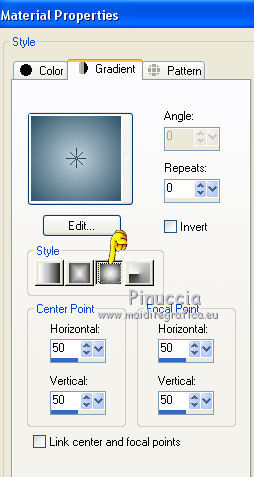
Set your foreground color to a Foreground/Background Gradient, style Sunburst.
2. Open nuit_étoilée_Alpha.
Window>Duplicate, or on the keyboard shift+D, to make a copy.
Close the original.
The copy, that will be the basis of your work, is not empty,
but contains the selections saved on the alpha channel.
Flood Fill  the transparent image with your Gradient. the transparent image with your Gradient.
3. Selections>Select All.
Layers>New Raster Layer.
Open your landscape and go to Edit>Copy.
Go back to your work and go to Edit>Paste into Selection.
Selections>Select None.
Effects>Image Effects>Seamless Tiling, default settings.

Adjust>Blur>Gaussian Blur - radius 25.

4. Effects>Plugins>Filters Unlimited 2.0 - &<Background Designer IV> - THE TWIST TUT
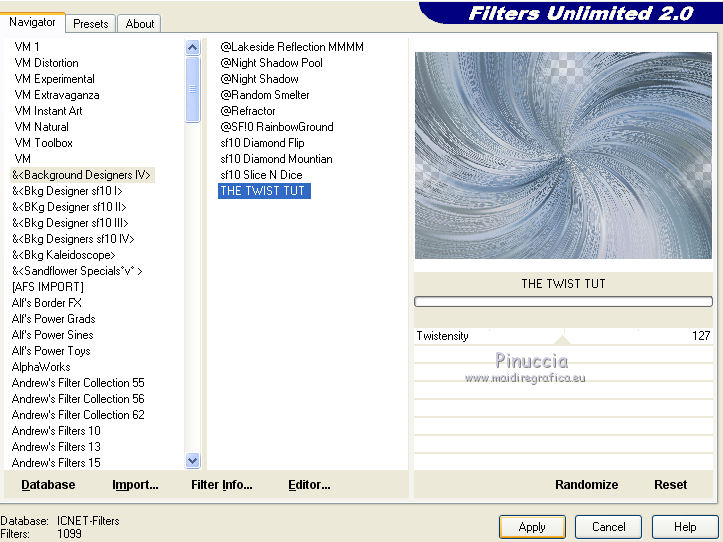
Effects>Image Effects>Seamless Tiling, same settings.

Adjust>Blur>Motion Blur.
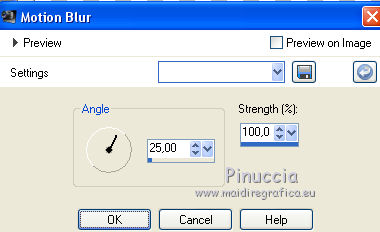
Effects>Edge Effects>Enhance More.
Layers>Duplicate.
Image>Mirror.
Image>Flip.
Change the Blend Mode of this layer to Dissolve (or other at your choice)
and reduce the oopacity to 60%, according to your colors.
Layers>Merge>Merge Down.
5. Set your foreground color to Pattern and, under the category Open images,
look for and select the pattern patron dorado with these settings
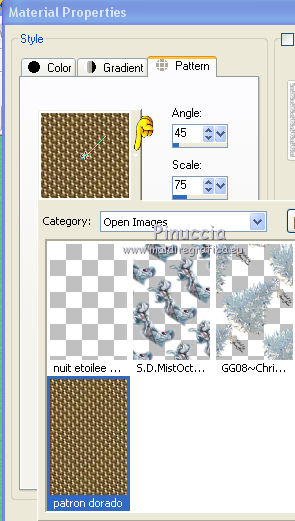
Layers>New Raster Layer.
Flood Fill  the layer with your golden pattern. the layer with your golden pattern.
6. Layers>New Mask layer>From image
Open the menu under the source window and you'll see all the files open.
Select the mask Garances 1
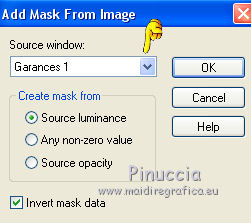
Layers>Merge>Merge group.
7. Effects>Plugins>Mura's Seamless - Emboss at Alpha, default settings.
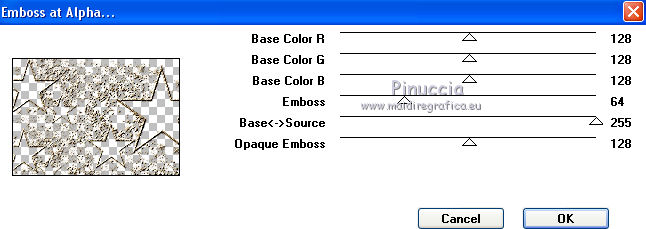
8. Layers>New Raster Layer.
Selections>Load/Save Selection >Load Selection from Alpha Channel.
The selection sélection#1 is immediately available. You just have to click Load.
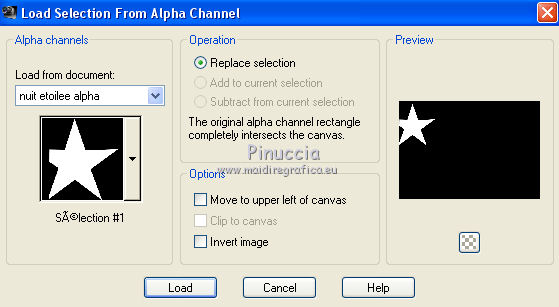
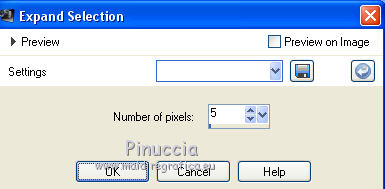
Selections>Modify>Expand - 5 pixels.
Set again your foreground color to Gradient.
Flood Fill  the selection with your gradient. the selection with your gradient.
Adjust>Blur>Gaussian Blur, radius 25.
Edit>Paste into Selection (your landscape is still in memory).
Effects>Plugins>Filters Unlimited 2.0 - &<Background Designer IV> - SF10 Square Bumps
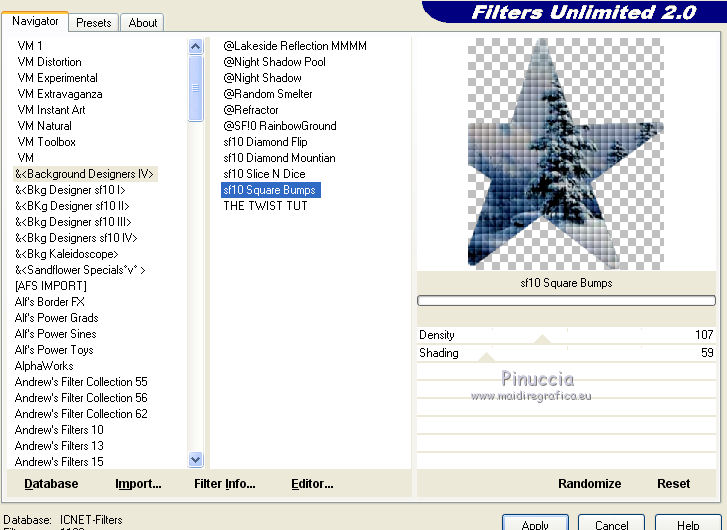
Selections>Select None.
Layers>Arrange>Move Down (under the layer of the mask).
Effects>3D Effects>Drop Shadow, color black or light (according to your colors).
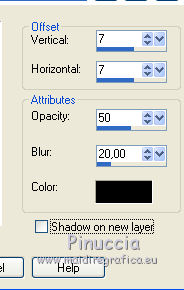
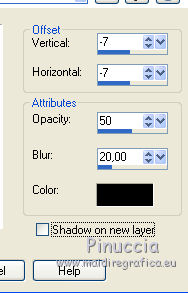
Repeat Drop Shadow, but vertical and horizontal -7.
9. Stay on the layer under the layer of the mask.
Layers>New Raster Layer.
Selections>Load/Save Selection >Load Selection from Alpha Channel.
Open the selections menu and load sélection#2.
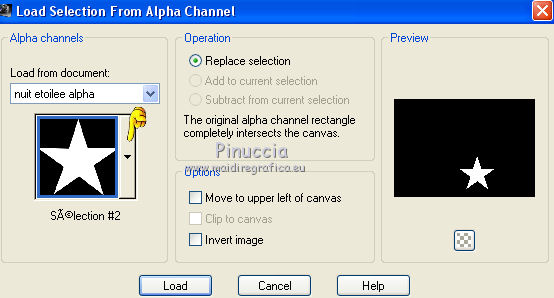
Selections>Modify>Expand - 5 pixels.

Flood Fill  the selection with your gradient. the selection with your gradient.
Adjust>Blur>Gaussian Blur, radius 25.
Edit>Paste into Selection (your landscape is still in memory).
Effects>Plugins>Filters Unlimited 2.0 - &<Background Designer IV> - @Kaleidoscope 3.
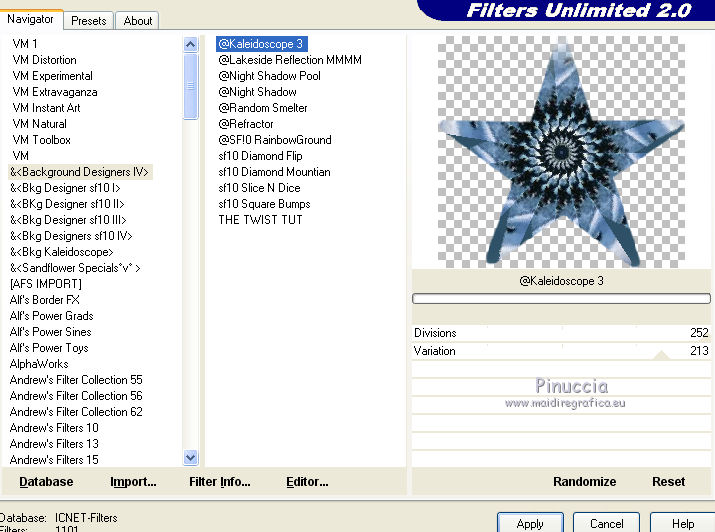
Selections>Select None.
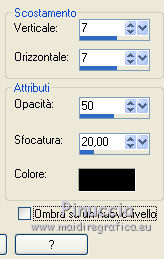
Effects>3D Effects>Drop Shadow, same settings.
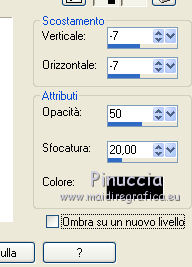
Repeat to 7
10. Stay always under the mask layer.
Layers>New Raster Layer.
Selections>Load/Save Selection >Load Selection from Alpha Channel.
Open the selections menu and load sélection#3.
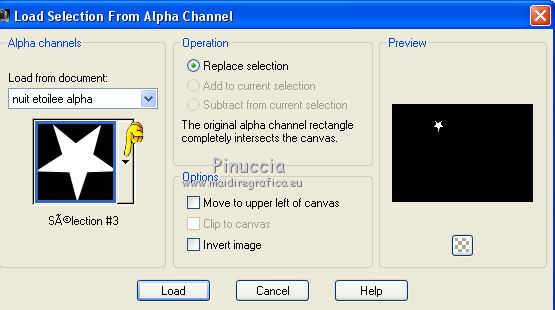
Selections>Modify>Expand - 2 pixels.
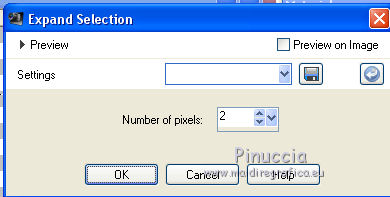
Flood Fill  the selection with your gradient. the selection with your gradient.
Adjust>Blur>Gaussian Blur, radius 25.
Edit>Paste into Selection (your landscape is still in memory).
Effects>Plugins>Filters Unlimited 2.0 - &<Background Designer IV> . @Random Smelter.
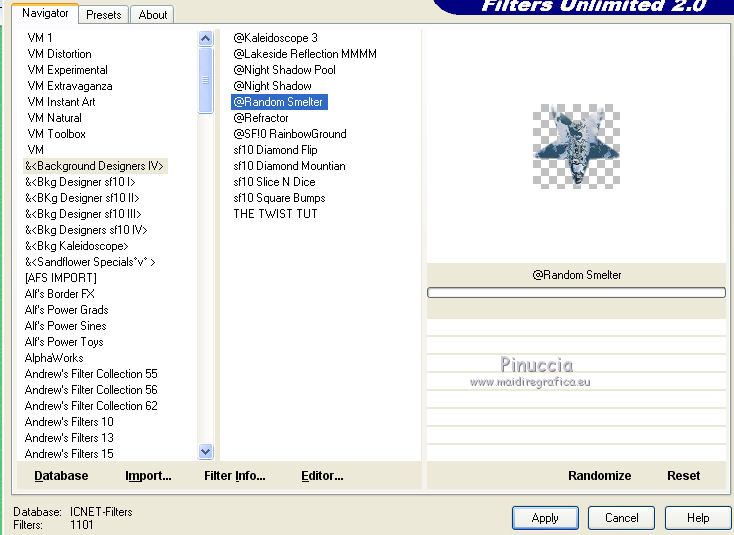
Selections>Select None.
Effects>3D Effects>Drop Shadow, same settings
 
11. Layers>New Raster Layer.
Selections>Load/Save Selection >Load Selection from Alpha Channel.
Open the selections menu and load sélection#4.
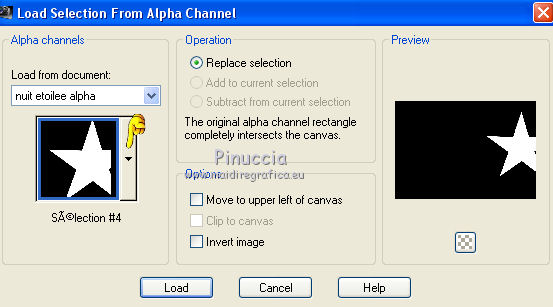
Selections>Modify>Expand - 5 pixels.

Flood Fill  the selection with your gradient. the selection with your gradient.
Adjust>Blur>Gaussian Blur, radius 25.
Edit>Paste into Selection (your landscape is still in memory).
Effects>Plugins>Filters Unlimited 2.0 - &<Background Designer IV> - @Refractor.
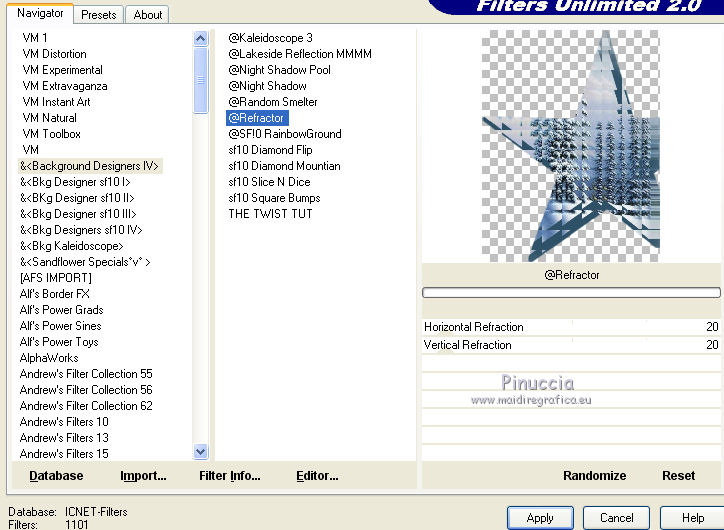
Selections>Select None.
Effects>3D Effects>Drop Shadow, same settings.
 
12. Layers>New Raster Layer.
Selections>Load/Save Selection >Load Selection from Alpha Channel.
Open the selections menu and load sélection#5.
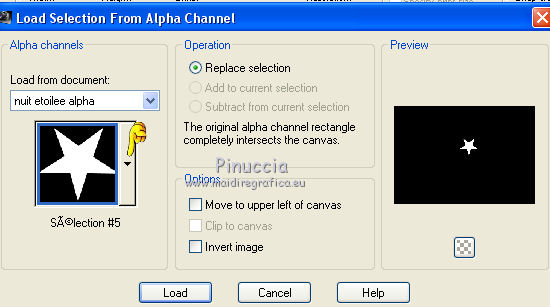
Selections>Modify>Expand - 2 pixels.

Flood Fill  the selection with your gradient. the selection with your gradient.
Adjust>Blur>Gaussian Blur, radius 25.
Edit>Paste into Selection (your landscape is still in memory).
Effects>Plugins>Filters Unlimited 2.0 - &<Background Designer IV> - @Splish.
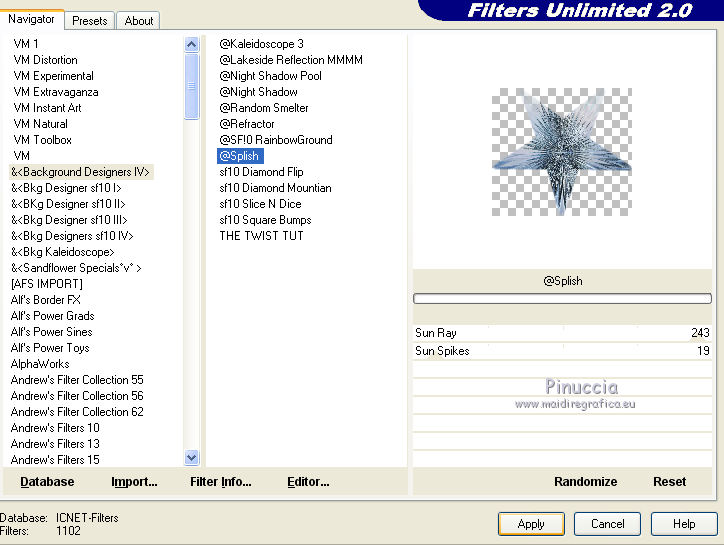
Selections>Select None.
Effects>3D Effects>Drop Shadow, same settings.
 
13. Layers>New Raster Layer.
Selections>Load/Save Selection >Load Selection from Alpha Channel.
Open the selections menu and load sélection#6.
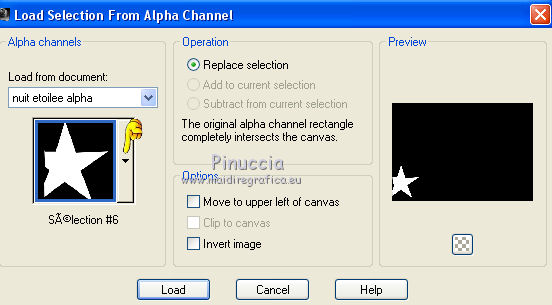
Selections>Modify>Expand - 5 pixels.

Flood Fill  the selection with your gradient. the selection with your gradient.
Adjust>Blur>Gaussian Blur, radius 25.
Edit>Paste into Selection (your landscape is still in memory).
Effects>Plugins>Filters Unlimited 2.0 - &<Background Designer IV> - @Light Limiter
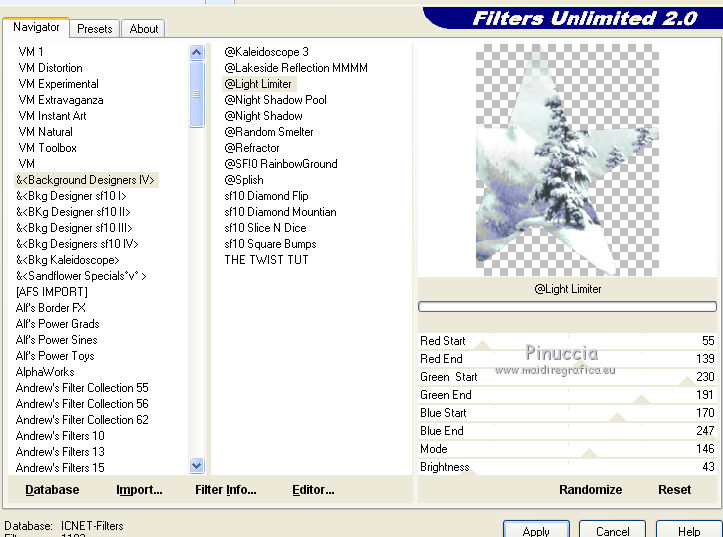
Selections>Select None.
The layer are always under the mask layer.
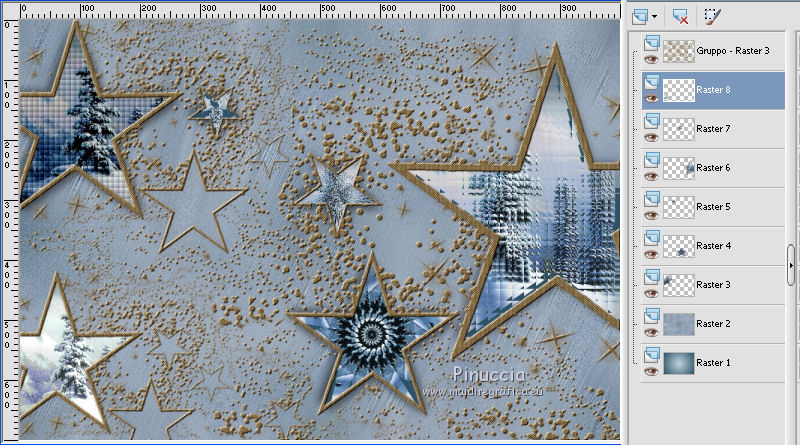
Effects>3D Effects>Drop Shadow, same settings.
 
14. Layers>New Raster Layer.
Selections>Load/Save Selection >Load Selection from Alpha Channel.
Open the selections menu and load sélection#7.
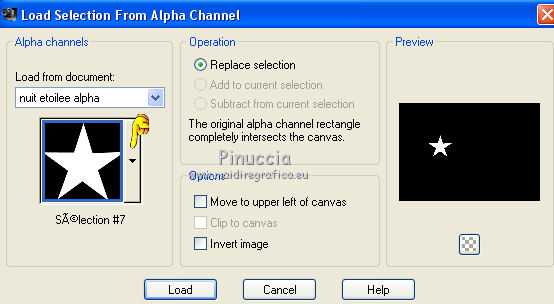
Selections>Modify>Expand - 2 pixels.

Flood Fill  the selection with your gradient. the selection with your gradient.
Adjust>Blur>Gaussian Blur, radius 25.
Edit>Paste into Selection (your landscape is still in memory).
Effects>Plugins>Filters Unlimited 2.0 - &<Background Designer IV> - SF10 Diamond Mountian.
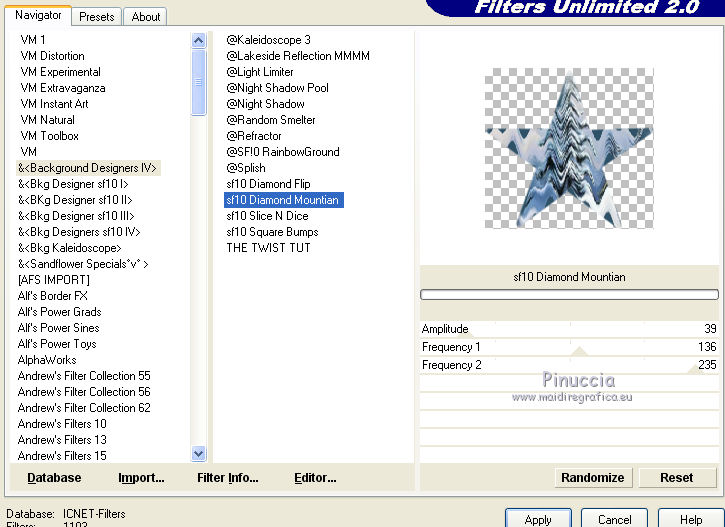
Selections>Select None.
Effects>3D Effects>Drop Shadow, same settings.
 
15. Layers>New Raster Layer.
Selections>Load/Save Selection >Load Selection from Alpha Channel.
Open the selections menu and load sélection#8.
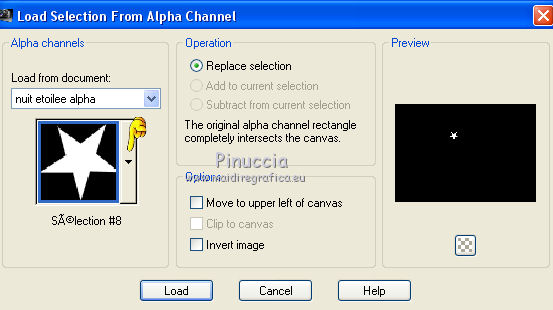
Selections>Modify>Expand - 2 pixels.

Flood Fill  the selection with your gradient. the selection with your gradient.
Adjust>Blur>Gaussian Blur, radius 25.
Edit>Paste into Selection (your landscape is still in memory).
Effects>Plugins>Filters Unlimited 2.0 - &<Background Designer IV> - @Spirals.
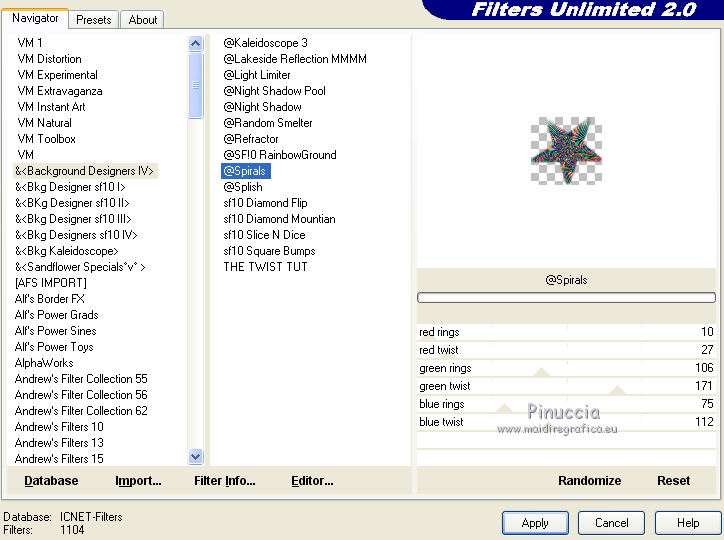
Selections>Select None.
Effects>3D Effects>Drop Shadow, same settings.
 
16. Layers>New Raster Layer.
Selections>Load/Save Selection >Load Selection from Alpha Channel.
Open the selections menu and load sélection#9.

Selections>Modify>Expand - 2 pixels.

Flood Fill  the selection with your gradient. the selection with your gradient.
Adjust>Blur>Gaussian Blur, radius 25.
Edit>Paste into Selection (your landscape is still in memory).
Effects>Plugins>Filters Unlimited 2.0 - &<Background Designer IV> - @Smoke
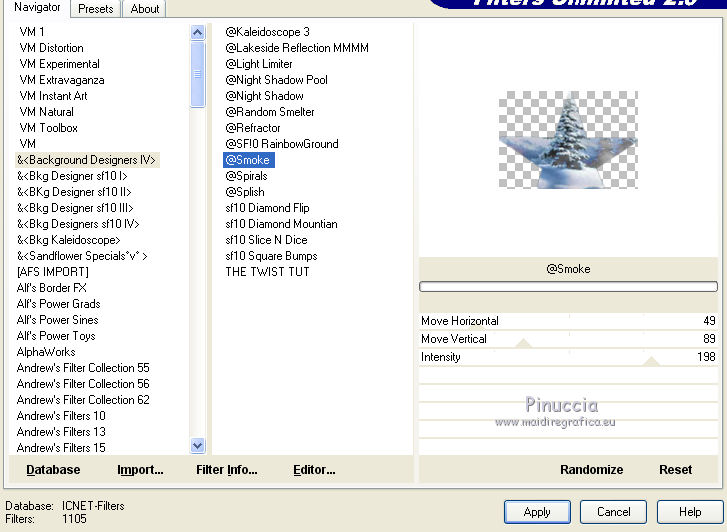
Selections>Select None.
Effects>3D Effects>Drop Shadow, same settings.
 
17. Layers>New Raster Layer.
Selections>Load/Save Selection >Load Selection from Alpha Channel.
Open the selections menu and load sélection#10.
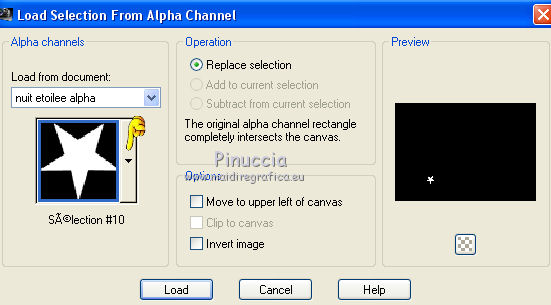
Selections>Modify>Expand - 2 pixels.

Flood Fill  the selection with your gradient. the selection with your gradient.
Adjust>Blur>Gaussian Blur, radius 25.
Edit>Paste into Selection (your landscape is still in memory).
Effects>Plugins>Filters Unlimited 2.0 - &<Background Designer IV> - @Night Shadow Pool.
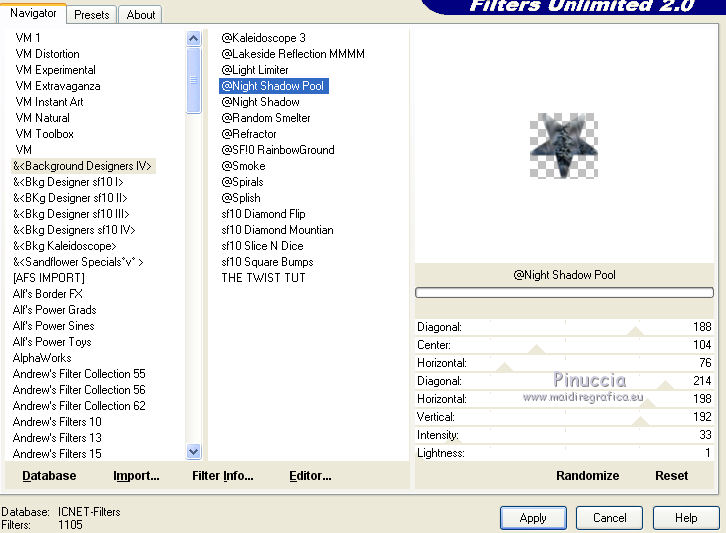
Selections>Select None.
Effects>3D Effects>Drop Shadow, same settings.
 
18. Layers>New Raster Layer.
Selections>Load/Save Selection >Load Selection from Alpha Channel.
Open the selections menu and load sélection#11.
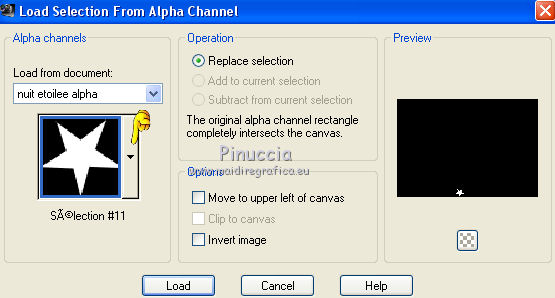
Selections>Modify>Expand - 2 pixels.

Flood Fill  the selection with your gradient. the selection with your gradient.
Adjust>Blur>Gaussian Blur, radius 25.
Edit>Paste into Selection (your landscape is still in memory).
Effects>Plugins>Filters Unlimited 2.0 - &<Background Designer IV> - sf10 Shades of Shadow.
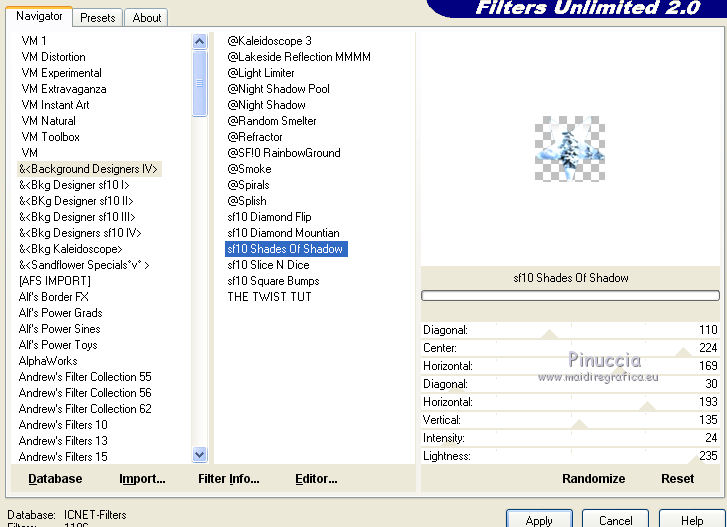
Selections>Select None.
Effects>3D Effects>Drop Shadow, same settings.
 
19. Layers>New Raster Layer.
Selections>Load/Save Selection >Load Selection from Alpha Channel.
Open the selections menu and load sélection#12.
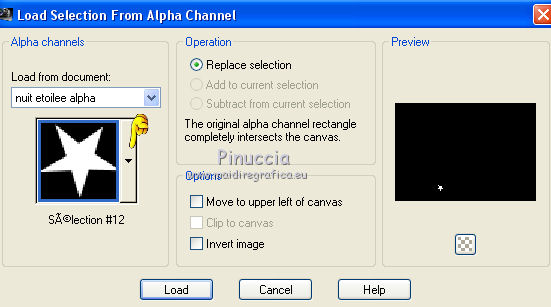
Selections>Modify>Expand - 2 pixels.

Flood Fill  the selection with your gradient. the selection with your gradient.
Adjust>Blur>Gaussian Blur, radius 25.
Edit>Paste into Selection (your landscape is still in memory).
Effects>Plugins>Filters Unlimited 2.0 - &<Background Designer IV> - @Lakeside Reflection
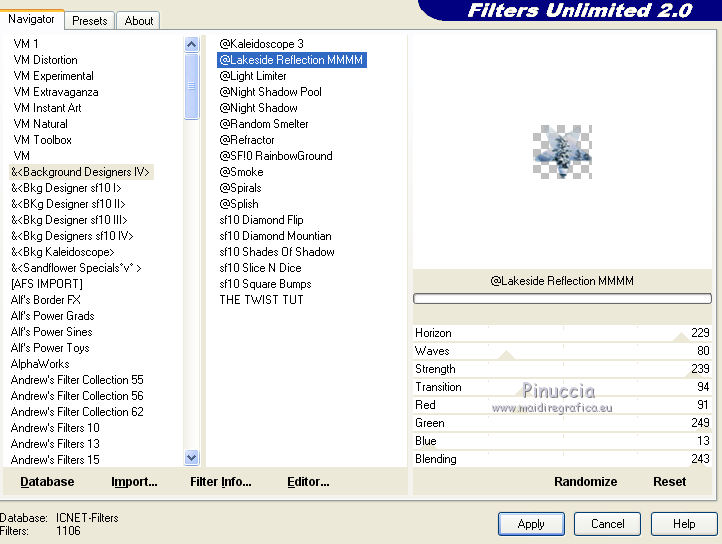
Selections>Select None.
Effects>3D Effects>Drop Shadow, same settings.
 
20. Activate the top layer of the mask
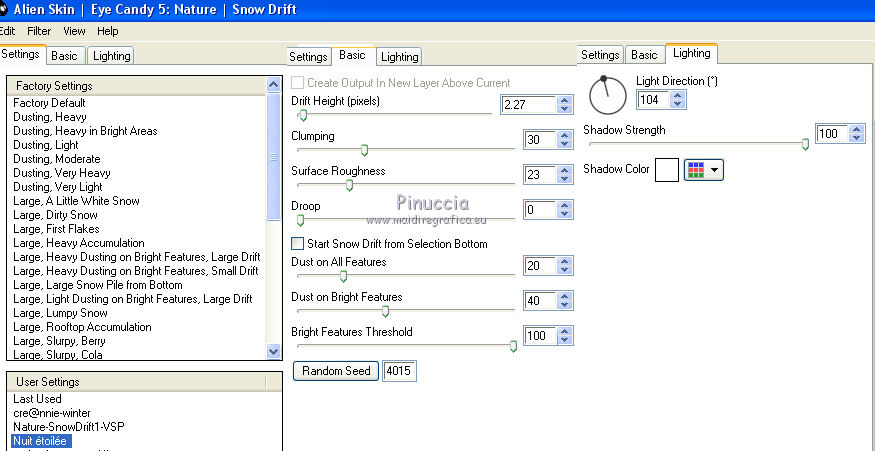
Effects>Plugins>Alien Skin Eye Candy 5 Nature - Snow Drift.
Select the preset Nuit étoiée and ok
21. Close the layer Raster 1.
Layers>Merge>Merge visible.
22. Stay on the layer Merged.
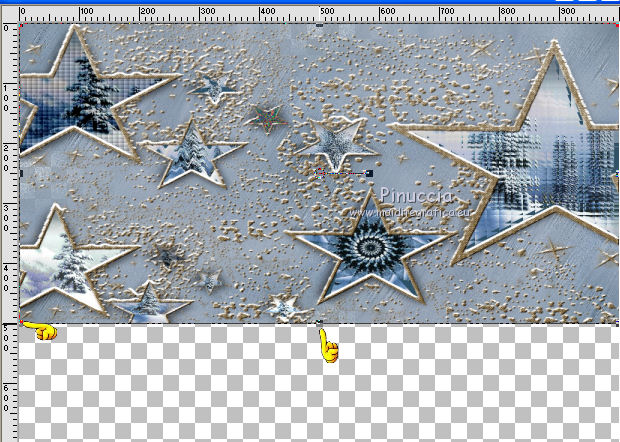
Activate the Pick Tool 
mode Scale 
push the central bottom node to the up until 500 pixels.
23. Open and activate the layer Raster 1.
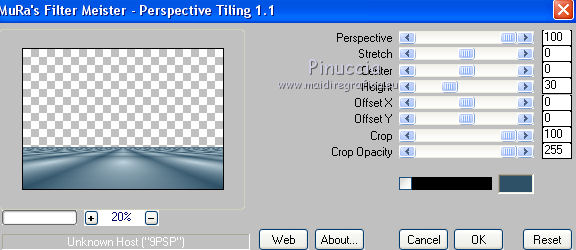
Effects>Plugins>Mura's Meister - Perspective Tiling.
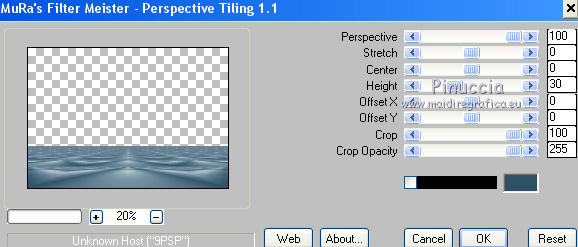
Repeat Effects>Plugins>Mura's Meister - Perspective Tiling, same settings.
24. Activate the Magic Wand Tool  feather 20, feather 20,
and click on the transparent part to select it.
Press on the keyboard 4-5 times CANC 
Selections>Select None.
25. Effects>Plugins>Alien Skin Eye Candy 5 Nature - Snow Drift, same settings, 2 times.
26. Copy>Paste as new layer your tubes and place them 
Effects>3D Effects>Drop Shadow, at your choice.
27. Image>Add borders, 2 pixels, symmetric, dark color.
Image>Add borders, 5 pixels, symmetric, light color.
Image>Add borders, 2 pixels, symmetric, dark color.
Selections>Select All.
Image>Add borders, 25 pixels, symmetric, color white.
Effects>3D Effects>Drop Shadow, same settings.
 
Selections>Invert.
Effects>Plugins>Filters Unlimited 2.0 - &<Background Designer IV> - @ Frame Gradient Switcher,
Open the menu of the gradient and select a gradient according to your color;
for me Gradient 54.
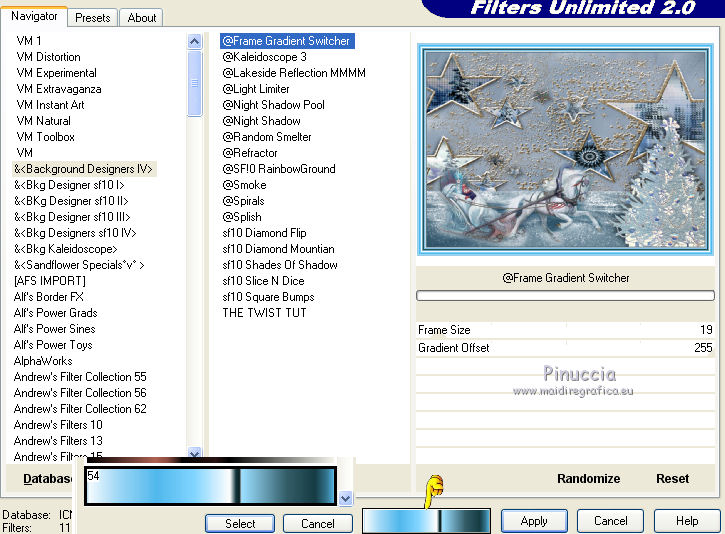
Selections>Select None.
28. Image>Add borders, 2 pixels, symmetric, dark color.
Image>Add borders, 5 pixels, symmetric, light color.
Image>Add borders, 2 pixels, symmetric, dark color.
Selections>Select All.
Image>Add borders, 25 pixels, symmetric, color white.
Effects>3D Effects>Drop Shadow, same settings.
 
Selections>Invert.
Set your foreground color to Pattern
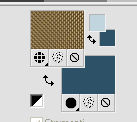
Flood Fill  the selection with your pattern. the selection with your pattern.
29. Effects>Plugins>AAA Frames - Foto Frame.
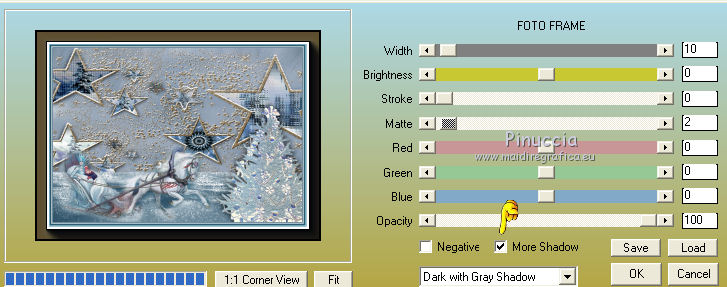
Selections>Select None.
30. Sign your work on a new layer.
Image>Add borders, 2 pixels, symmetric, dark color.
Image>Resize, 1000 pixels width, resize all layer checked.
Adjust>Sharpness>Unsharp Mask
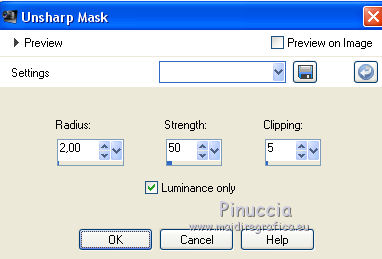

If you have problems or doubts, or you find a not worked link, or only for tell me that you enjoyed this tutorial, write to me.
3 December 2018
|
 ENGLISH VERSION

 ENGLISH VERSION
