|
BRUMES MATINALES
 ENGLISH VERSION ENGLISH VERSION
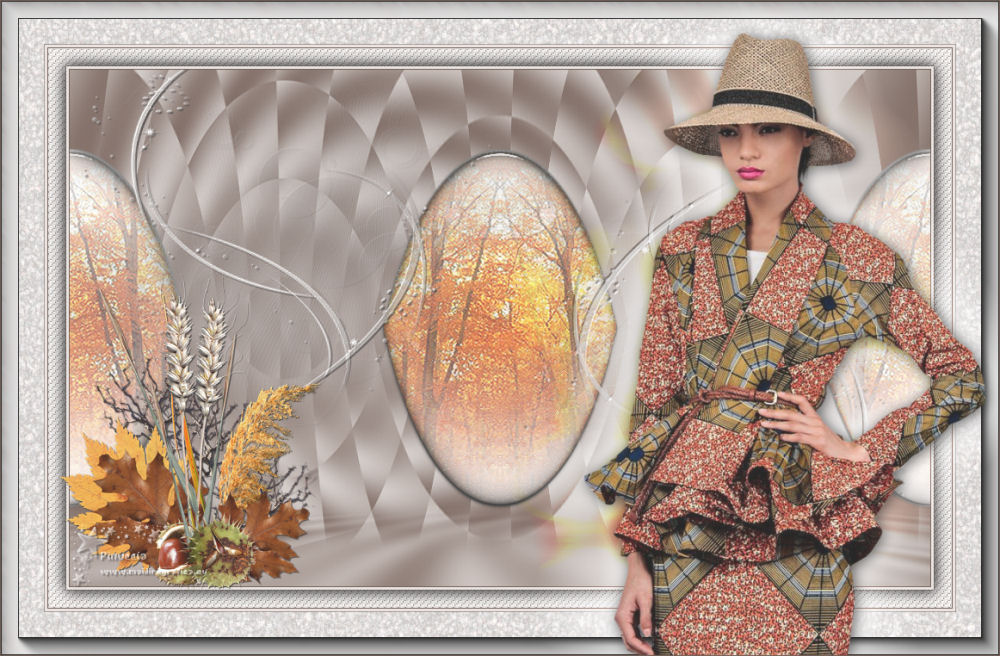
Here you find the original of this tutorial:

This tutorial was translated with PSPX7 but it can also be made using other versions of PSP.
Since version PSP X4, Image>Mirror was replaced with Image>Flip Horizontal,
and Image>Flip with Image>Flip Vertical, there are some variables.
In versions X5 and X6, the functions have been improved by making available the Objects menu.
In the latest version X7 command Image>Mirror and Image>Flip returned, but with new differences.
See my schedule here
Italian translation here
Vos versions here
Material here
You need at your choice:
1 landscape on autumn theme
1 deco tube on autumn theme
1 main tube on autumn theme
The rest of the material here
For the mask thanks Narah.
For the tubes used and not supplied thanks:
landscap: Benelol,
woman: JVDE
Plugins
Filters Unlimited 2.0 here
AAA Frames - Foto Frame here
Mehdi - Vibration 1.1 here
&<Bkg Designer sf10I> - Cut Glass Bug Eye (da importare in Unlimited) here
Mura's Seamless - Emboss at Alpha here
Mura's Meister - Perspective Tiling here
Alien Skin Eye Candy 5 Impact - Glass here
Alien Skin Eye Candy 5 Nature - Water Drops here
Alien Skin Eye Candy 5 Textures - Texture Noise here
Nik Software - Color Efex Pro here
Filters Mura's Seamless can be used alone or imported into Filters Unlimited.
(How do, you see here)
If a plugin supplied appears with this icon  it must necessarily be imported into Unlimited it must necessarily be imported into Unlimited

You can change Blend Modes according to your colors.
Open the mask in PSP and minimize it with the rest of the material.
1. Choose two colors from your material.
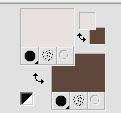
Set your foreground color to a light color; for me #e7e2df,
and your background color to a dark color; for me #5f473b.
2. Open Alpha_Brumes_matinales.
This image, that will be the basis of your work, is not empty,
but contains a selection saved on the alpha channel.
Flood Fill  the transparent image with your light foreground color. the transparent image with your light foreground color.
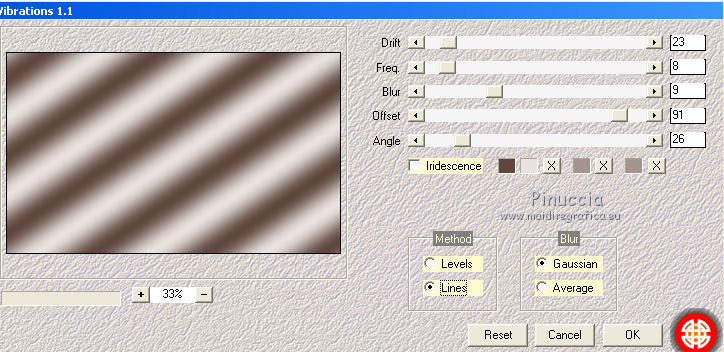
3. Effects>Plugins>Mehdi - Vibrations 1.1
This plugin works with the colors of your materials:
The first is your background color, the second is your foreground color;
keep the last two colors created by the filter.
4. Adjust>Blur>Gaussian Blur - radius 20.

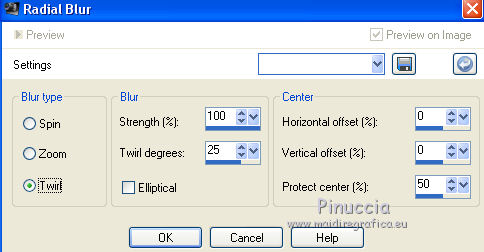
5. Adjust>Blur>Radial Blur.
6. Layers>Duplicate.
Effects>Plugins>Filters Unlimited 2.0 - &<Bkg Designer sf10I> - Cuto glass Bug Eye
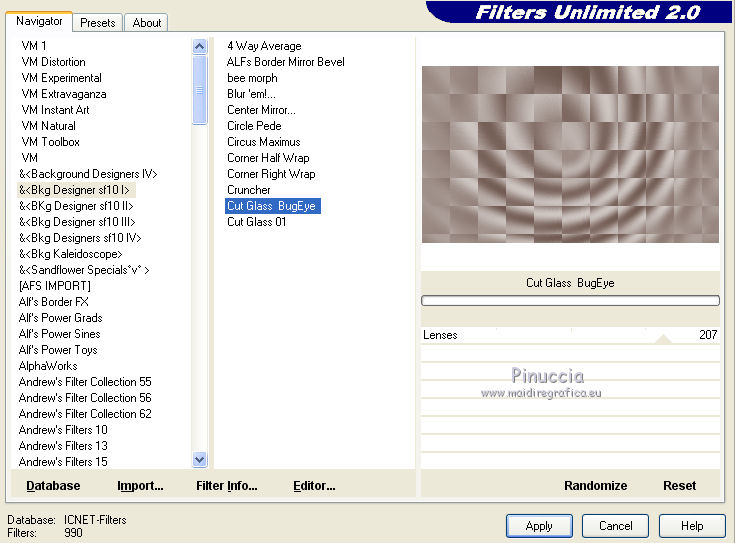
7. Effects>Geometric Effects>Perspective Horizontal.
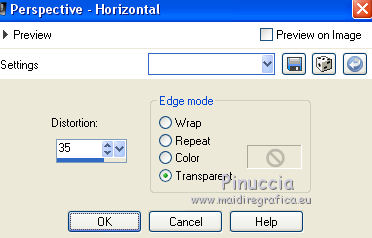
Image>Miroir.
Repeat l'Effet Perspective Horizontal same settings.
8. Effects>Distortion Effects>Polar Coordinates.

9. Effects>Image Effects>Offset.
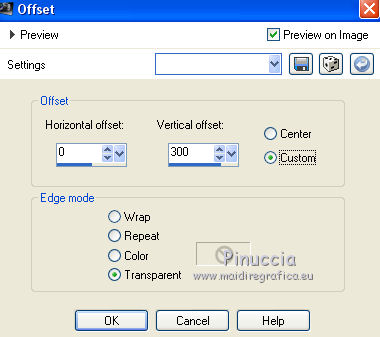
10. Layers>Duplicate.
Image>Flip.
Layers>Merge>Merge Down.
Effects>3D Effects>Drop Shadow, color black,
shadow on new layer checked.

Change the Blend Mode of the shadow's layer to Luminance (Legacy), or according to your colors.
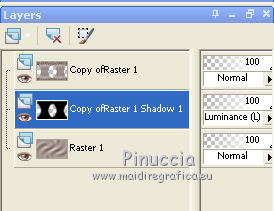
11. Activate the top layer.
Selections>Load/Save Selection >Load Selection from Alpha Channel.
The selection sélection#1 is immediately available. You just have to click Load.
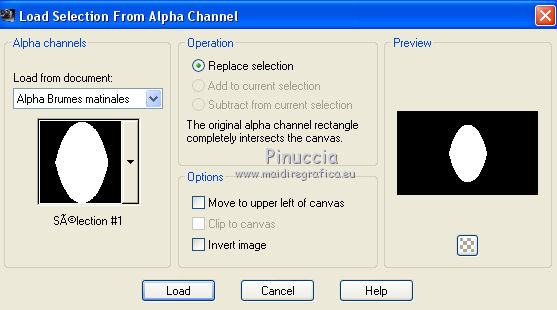
12. Open your landscape tube and go to Edit>Copy.
Go back to your work and go to Edit>Paste as new layer.
Place  on the selection the part of the tube you choose to get visible. on the selection the part of the tube you choose to get visible.
Selections>Invert.
Press CANC on the keyboard 
Again Selections>Invert.
Effects>Plugins>Nik Software - Color Efex
Fog - to the right Method 1, intensity 22
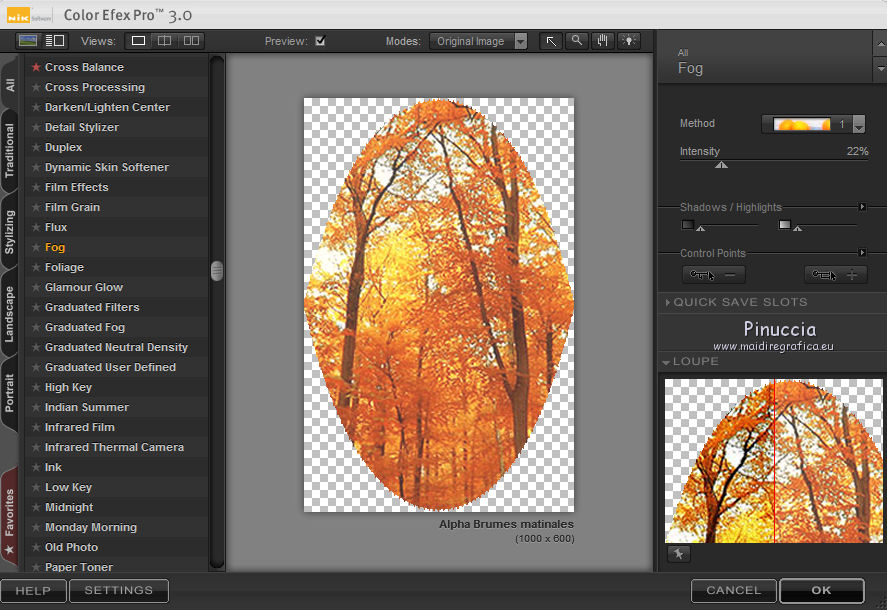
13. Effects>Plugins>Alien Skin Eye Candy 5 Nature - Water Drops
select the preset Small Dew and ok.
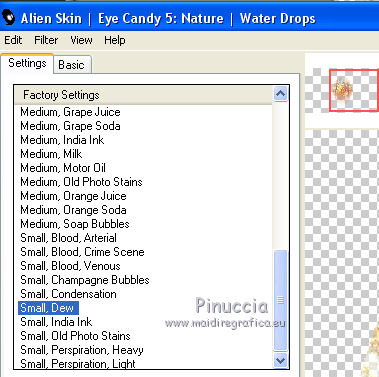
Adjust>Sharpness>Sharpen.
14. Effects>Plugins>Alien Skin Eye Candy 5 Impact - Glass.
select the preset Clear and ok.

Selections>Select None.
15. Effects>Reflection Effects>Rotating Mirror.
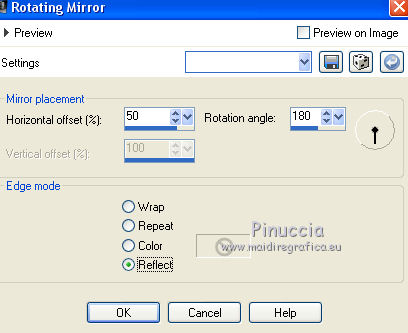
Layers>Duplicate.
Image>Mirror.
Layers>Merge>Merge Down.
Your layers:
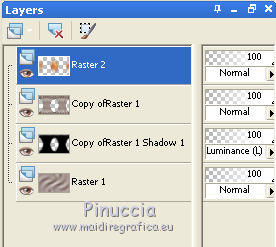
16. Activate the layer Raster 1.
Image>Resize, to 80%, resize all layers not checked.
Effects>Plugins>Mura's Meister - Perspective Tiling.
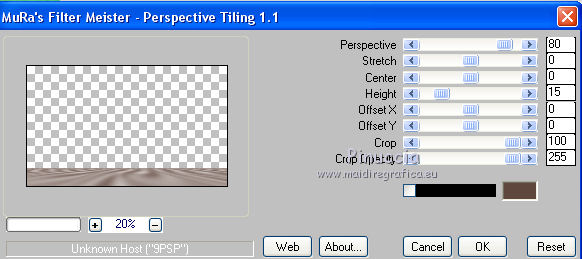
Layers>Arrange>Bring to Top.
17. Activate the Magic Wand Tool  , feather 50 , feather 50

and click on the top transparent part to select it.
Press 4-5 times CANC on the keyboard to soften the bord.
Selections>Select None.
18. Layers>New Raster Layer.
Flood Fill  with your light color. with your light color.
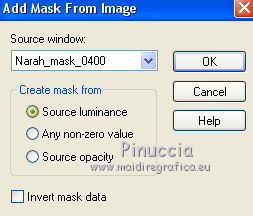
19. Layers>New Mask layer>From image
Open the menu under the source window and you'll see all the files open.
Select the mask Narah_mask_0400
Effects>Edge Effects>Enhance.
Layers>Merge>Merge group.
Image>Resize, to 70%, resize all layers not checked.
Activate the Pick Tool 
and set Position X: -110,00 and Position Y: -5,00.

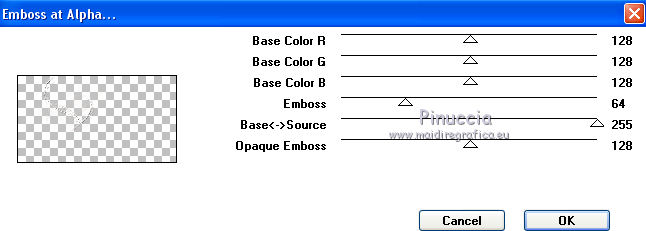
20. Effects>Plugins>Mura's Seamless - Emboss at Alpha, default settings.
21. Effects>3D Effects>Drop Shadow, color black
don't forget to deselect shadow on new layer.
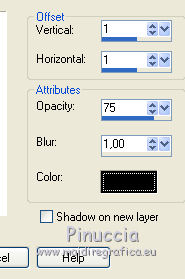
Layers>Duplicate.
Image>Mirror.
Image>Flip.
Activate the Pick Tool 
and set Position X: 408,00 and Position Y: 110,00.

22. Image>Add borders, 1 pixel, symmetric, dark color.
Image>Add borders, 3 pixels, symmetric, light color.
Image>Add borders, 1 pixel, symmetric, dark color.
Image>Add borders, 20 pixels, symmetric, color white.
Select this border with your Magic Wand Tool  , feather and tolerance 0, , feather and tolerance 0,
Effects>Textures Effects>Weave
weave color: background color
gap color: foreground color
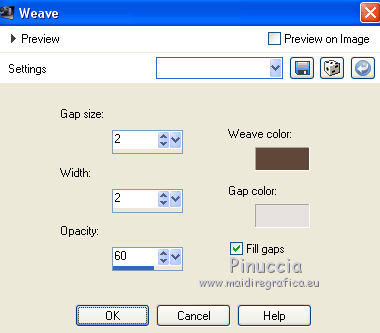
Selections>Invert.
Effects>3D Effects>Drop Shadow, color black.
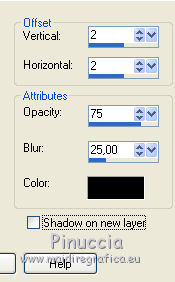
Repeat Drop Shadow, but vertical and horizontal -2.
Selecions>Select None.
23. Image>Add borders, 1 pixel, symmetric, dark color.
Image>Add borders, 3 pixels, symmetric, light color.
Image>Add borders, 1 pixel, symmetric, dark color.
Image>Add borders, 50 pixels, symmetric, color white.
Select this border with your Magic Wand Tool  , feather and tolerance 0, , feather and tolerance 0,
Effects>Plugins>Alien Skin Eye Candy 5 Textures - Texture Noise
select the preset Crumpled Tissue
and under Basic set your light color
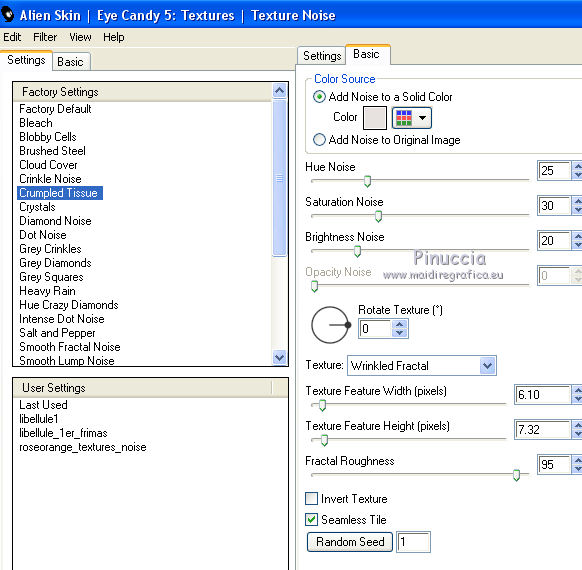
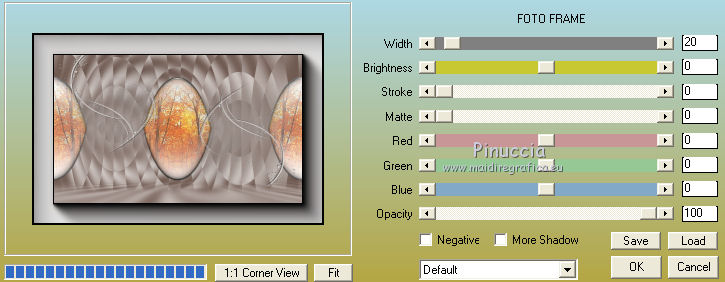
24. Effects>Plugins>AAA Frames - Foto Frame.
Selections>Select None.
25. Add your deco tube,
resize if necessary and move  the tube at the bottom left. the tube at the bottom left.
Effects>3D Effects>Drop Shadow, at your choice.
26. Open your main tube and go to Edit>Copy.
Go back to your work and go to Edit>Paste as new layer.
Resize if necessari (I resized to 90%).
Move  the tube to the right side. the tube to the right side.
Layers>Duplicate, and activate the layer below of the original.
Adjust>Blur>Gaussian Blur - radius 20

Effects>Distortion Effects>Vent - from right, intensity 100
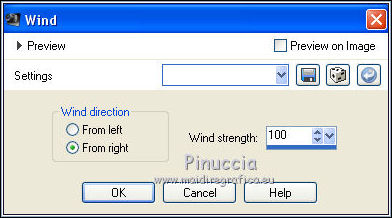
Repeat the Effet Vent from left.

Change the Blend Mode of this layer to Overlay.
Activate the top layer.
Effects>3D Effects>Drop Shadow, color black.

27. Image>Add borders, 1 pixel, symmetric, dark color.
Image>Resize, 1000 pixels width, resize all layers checked.
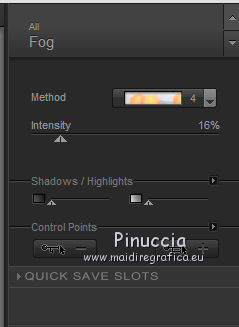
OPTIONAL: Effects>Plugins>Nik Software - Color Efex Pro - Fox
Fog - Method 4, intensity 16
Save as jpg.

If you have problems or doubts, or you find a not worked link, or only for tell me that you enjoyed this tutorial, write to me.
15 September 2018
|
 ENGLISH VERSION

 ENGLISH VERSION
