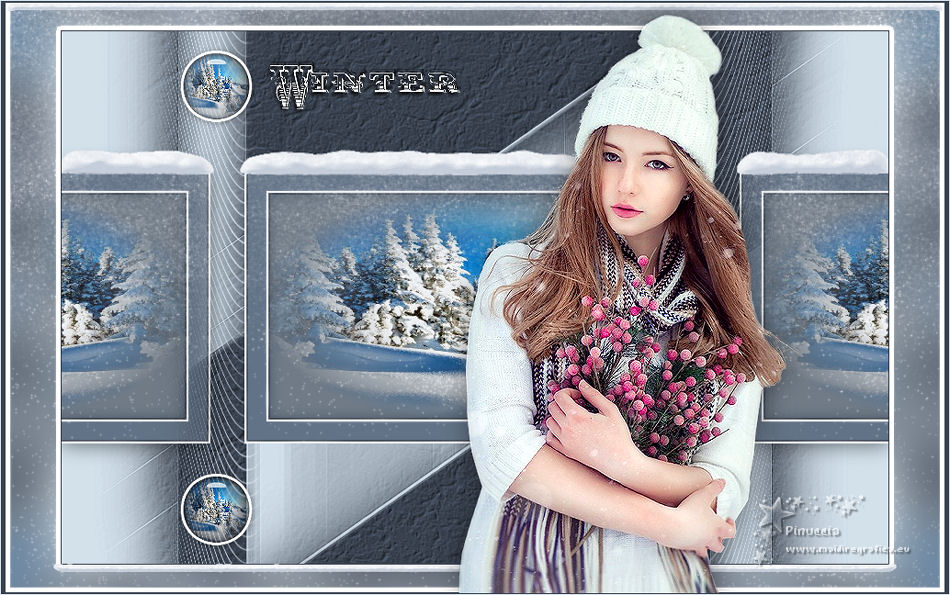
|
WINTER

english version

Thanks Carine for your invitation to translate

This tutorial was written with CorelX17 and translated with CorelX3, but it can also be made using other versions of PSP.
Since version PSP X4, Image>Mirror was replaced with Image>Flip Horizontal,
and Image>Flip with Image>Flip Vertical, there are some variables.
In versions X5 and X6, the functions have been improved by making available the Objects menu.
In the latest version X7 command Image>Mirror and Image>Flip returned, but with new differences.
See my schedule here
italian translation here
your versions here
Material here
Thanks for the tubes Gabry, OBG and Pacha.
(The links of the tubemakers here).
Plugins:
consult, if necessary, my filter section here
Alien Skin Eye Candy 5 Impact - Glass, Gradient Glow here
Alien Skin Eye Candy 5 Nature - Snow Drift here
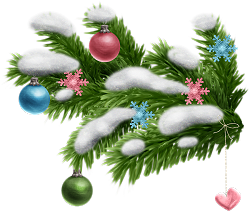
You can change Blend Modes according to your colors.
Copy the preset  in the folder of the plugins Alien Skin Eye Candy 5. in the folder of the plugins Alien Skin Eye Candy 5.
One or two clic on the file (it depends by your settings), automatically the preset will be copied in the right folder.
why one or two clic see here
Copy the texture in the Textures Folder.
Copy the Selection in the Selections Folder.
Open the masks in PSP and minimize them with the rest of the material.
Colors

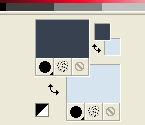
1. Set your foreground color to color 1 #39424f,
and your background color to color 2 #d6e4ef.
2. Open a new transparent image 900 x 580 pixels.
Flood Fill  with your foreground color #39424f. with your foreground color #39424f.
3. Layers>New Raster Layer, Raster 2.
Flood Fill  with your background color #d6e4ef. with your background color #d6e4ef.
4. Layers>New Mask layer>From image
Open the menu under the source window and you'll see all the files open.
Select the mask smArt_maszk_54.

Effects>Edge Effects>Enhance.
Layers>Merge>Merge Group.
5. Layers>New Raster Layer - Raster 2.
Selection Tool 
(no matter the type of selection, because with the custom selection your always get a rectangle)
clic on the Custom Selection 
and set the following settings.

6. Set your background color to white #ffffff.
Flood Fill  the selection with color white. the selection with color white.
7. Selections>Modify>Contract - 2 pixels.
Flood Fill  with your foreground color. with your foreground color.
8. Set your foreground color to il colore 3 #637387.
Selections>Modify>Contract - 2 pixels.
Flood Fill  with your foreground color (color 3). with your foreground color (color 3).
9. Selections>Modify>Contract - 20 pixels.
Flood Fill  with your white background color. with your white background color.
10. Selections>Modify>Contract - 2 pixels.
Set again your foreground color to color 1 #39424f.
Flood Fill  with your foreground color. with your foreground color.
11. Selections>Modify>Contract - 2pixels.
Reduce the opacity of your Flood Fill tool to 35
Set your background color to color 2 (light blue) #d6e4ef.
Flood Fill  with your background color. with your background color.
Place again the opacity of your Flood Fill Tool to 100.
12. Keep selected.
Layers>New Raster Layer - Raster 3.
Open the tube of your landscape and go to Edit>Copy.
minimize the tube.
Go back to your work and go to Edit>Paste into Selection.
Adjust>Sharpness>Sharpen.
13. Adjust>Brightness and Contrast>Brightness and Contrast (according to your tube).

14. Layers>New Raster Layer - Raster 4.
Effects>3D Effects>Cutout.

Selections>Select None.
15. Layers>Merge>Merge Down - 2 times.

16. Layers>Duplicate.
Activate the layer below of the original.
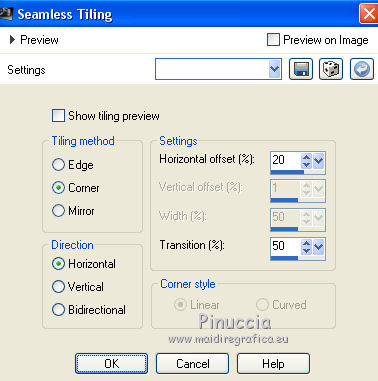
17. Effects>Image Effects>Seamless Tiling.
18. Custom Selection 

Press CANC on the keyboard 
Selections>Select None.
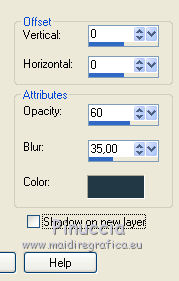
19. Effects>3D Effects>Drop Shadow, color black.
20. Layers>Duplicate.
Image>Mirror.
21. Activate the top layer.
Layers>Merge>Merge Down - 2 times.
22. Activate the bottom layer, Raster 1.
Effects>Texture Effects>Texture, select the texture DP-4075-07.

23. Activate the layer of the mask Gruppo-Raster 2.
Effects>Geometric Effects>Skew.

24. Layers>New Raster Layer - Raster 3.
Set your background color to color white.
Flood Fill  the layer with color white. the layer with color white.
25. Layers>New Mask layer>From image
Open the menu under the source window and you'll see all the files open.
Select the mask W37 MD-mask-112.

Layers>Merge>Merge Group.
26. Change the Blend Mode of this layer to Luminance (legacy)
and reduce the opacity to 85%.

27. Activate the Pick Tool 
and set Position X: 99,00 and Position Y: -1,00.

28. Effects>Distortion Effects>Wave.

29. Layers>Duplicate.
Image>Mirror.
Layers>Merge>Merge Down.
30. On the frame layer:
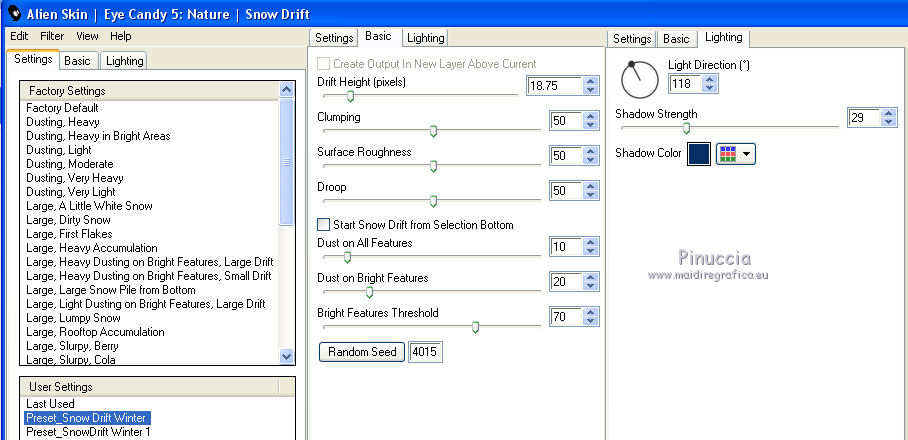
Effects>Plugins>Alien Skin Eye Candy 5 Nature - Snow Drif.
select the preset Snowdrift-Winter and ok
Here below the settings, in case of problems with the preset
31. Layers>Merge>Merge visible.
32. Image>Add borders, 1 pixel, symmetric, foreground color.
33. Selections>Select All.
Edit>Copy (you keep the image in memory).
34. Image>Add borders, symmetric not checked, white color.

35. Selections>Invert.
Selections>Modify>Contract - 5 pixels.
Edit>Paste into Selection.
36. Effects>Reflection Effects>Kaleidoscope.

37. Adjust>Blur>Gaussian Blur - radius 25.

38. Effects>Plugins>Alien Skin Eye Candy 5 Nature - Snow Drif.
Select the preset Snowdrift-Winter 1 and ok.
Here below the settings

Selections>Select None.
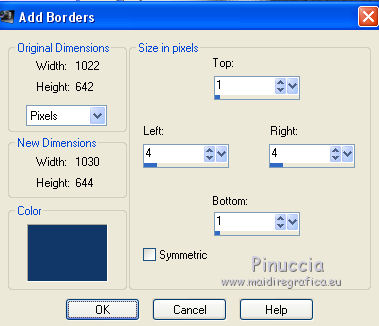
39. Image>Add borders, symmetric not checked, foreground color
40. Layers>New Raster Layer.
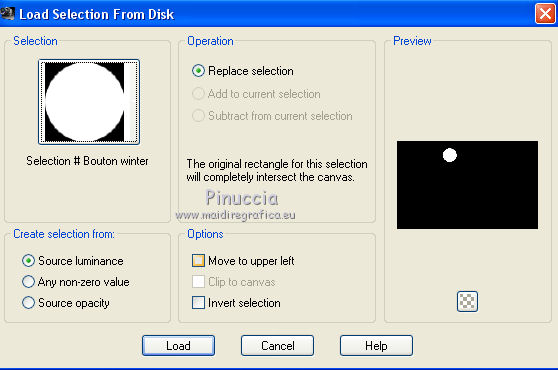
Selection>Load/Save Selection>Load selection from Disk.
Look for and load the selection Sélection#Bouton winter.
Activate your landscape tube and go to Edit>Copy.
Go back to your work and go to Edit>Paste into Selection.
41. Optional, according to your tube:
Adjust>Brightness and Contrast>Brightness and Contrast.

42. Selections>Modify>Contract - 2 pixels.
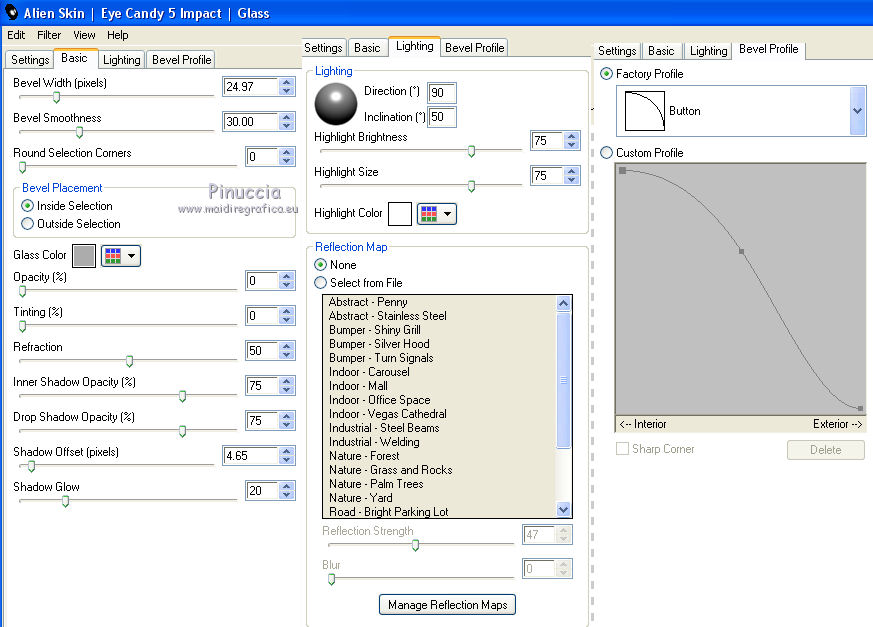
Effects>Plugins>Alien Skin Eye Candy 5 Impact - Glass.
Select the preset Glass-Winter and ok

Here are the settings.
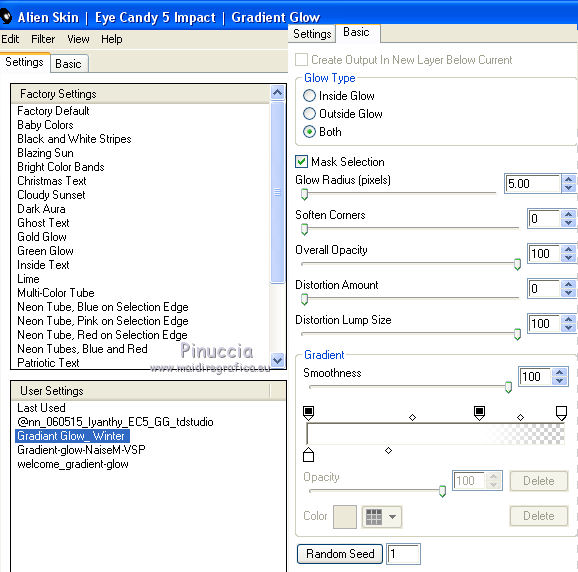
43. Effects>Plugins>Alien Skin Eye Candy 5 Impact - Gradient Glow.
Select the preset Gradient Glow-Winter
44. Adjust>Sharpness>Sharpen.
Selections>Select None.
45. Image>Resize, to 75%, resize all layers not checked.
Activate the Pick Tool 
and set Position X: 193,00 and Position Y: 52,00.

46. Layers>Duplicate
Selt Position Y to 513,00 (Position X is still 193,00)

47. Layers>Merge>Merge down.
Effects>3D Effects>Drop Shadow, color black.

48. Open the tube of the woman by OBG, erase the watermark and go to Edit>Copy.
Go back to your work and go to Edit>Paste as new layer.
Image>Resize, to 78%, resize all layers not checked.
Move  the tube a bit to the right. the tube a bit to the right.
Adjust>Sharpness>Sharpen.
49. Effects>3D Effects>Drop Shadow, color black.

50. Open the wordart PACHA 25 and go to Edit>Copy.
Go back to your work and go to Edit>Paste as new layer.
Image>Resize, to 35%, resize all layers not checked.
51. Activate the Pick Tool 
and set Position X: 288,00 and Position Y: 65,00.

Adjust>Sharpness>Sharpen (optional).
Add borders, 1 pixel, symmetric, foreground color #39424f (color 1).
Image>Add borders, 1 pixel, symmetric, background color #d6e4ef (color 2).
53. Sign your work.
Image>Resize, to 950 pixels width, resize all layers checked.
Save as jpg.
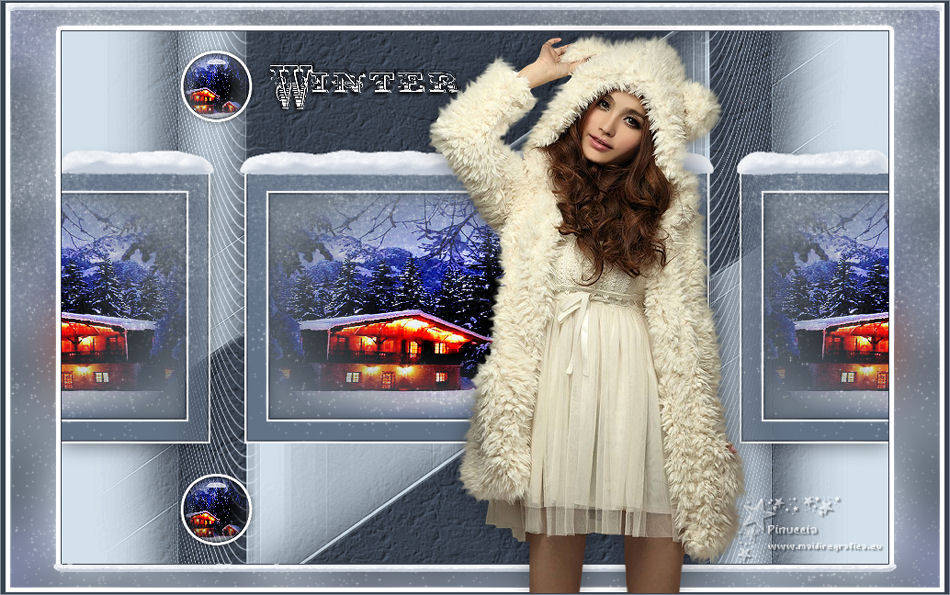
The tube of this version are by Isa and Gabry

If you have problems or doubts, or you find a not worked link, or only for tell me that you enjoyed this tutorial, write to me.
24 November 2018
|

