MAYRA

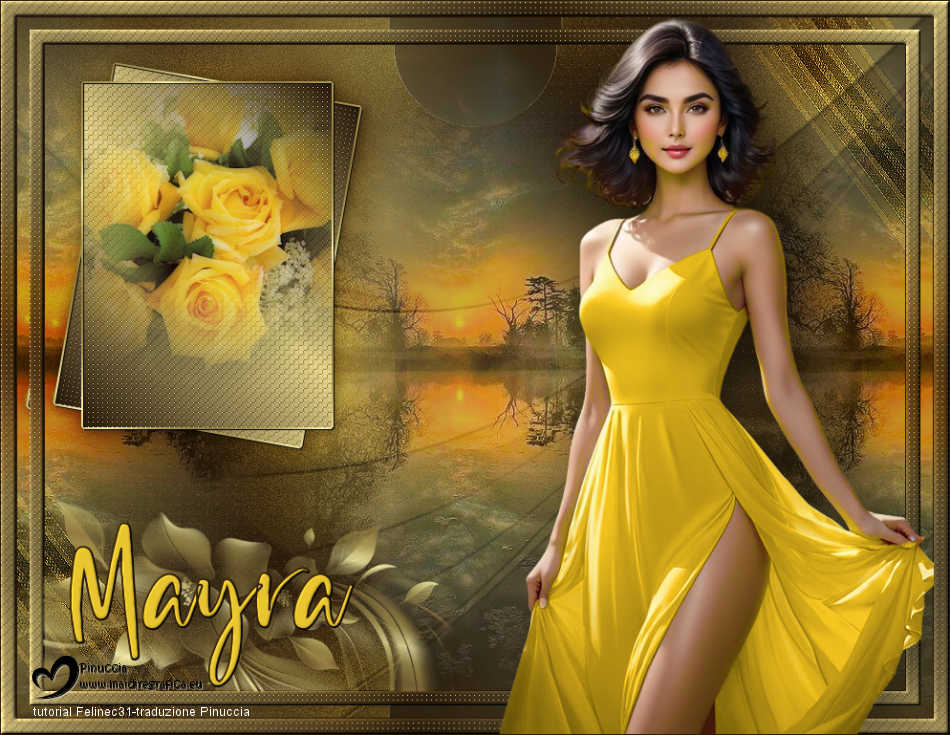
Thanks Carine for your invitation to translate

Clic and move the brush to follow the tutorial.

To print


|
This tutorial was translated with PSPX7 and PSPX2, but it can also be made using other versions of PSP.
Since version PSP X4, Image>Mirror was replaced with Image>Flip Horizontal,
and Image>Flip with Image>Flip Vertical, there are some variables.
In versions X5 and X6, the functions have been improved by making available the Objects menu.
In the latest version X7 command Image>Mirror and Image>Flip returned, but with new differences.
See my schedule here
 italian translation here italian translation here
 your versions here your versions here
Necessary

Thanks for the tubes CallyTubes and Christallin, and for the mask Narah.
The rest of the material is by Felinec31
(The links of the tubemakers here).

consult, if necessary, my filter section here
Filters Unlimited 2.0 here
Mura's Meister - Pole Transform here
AP 01 [Innovations] - Lines SilverLining here
Xero - Porcelain here
Alien Skin Eye Candy 5 Impact - Perspective Shadow here

You can change Blend Modes according to your colors.
In the newest versions of PSP, you don't find the foreground/background gradient (Corel_06_029).
You can use the gradients of the older versions.
The Gradient of CorelX here

Open the mask and the golden pattern in PSP and minimize them with the rest of the material.
1. Open a new transparent image 900 x 675 pixels.
Set your foreground color to #291b0b,
and your background color to #edda8e.
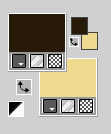
Set your foreground color to a Foreground/Background Gradient, style Linear.
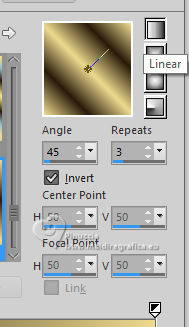
Flood Fill  the transparent image with your Gradient. the transparent image with your Gradient.
2. Adjust>Blur>Gaussian Blur - radius 40.

3. Set your foreground color to Color.
Layers>New Raster layer.
Flood Fill  the layer with your dark foreground color. the layer with your dark foreground color.
Layers>New Mask layer>From image
Open the menu under the source window and you'll see all the files open.
Select the mask Narah_mask_Abstract584.
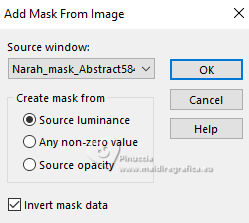
Layers>Merge>Merge Group.
4. Activate the layer Raster 1.
Layers>Duplicate.
Image>Resize, to 70%, resize all layers not checked.
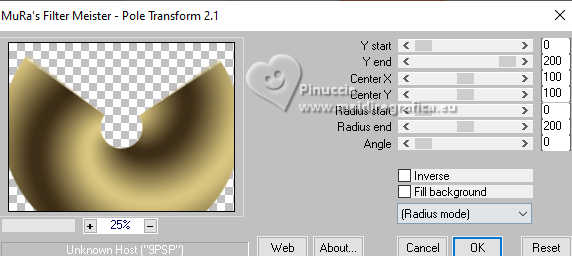
5. Effects>Plugins>Mura's Meister - Pole Transform.
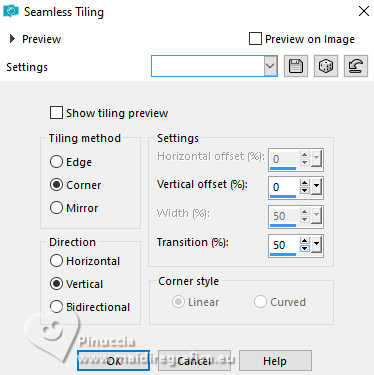
6. Effects>Image Effects>Seamless Tiling.
Effects>Edge Effects>Enhance.
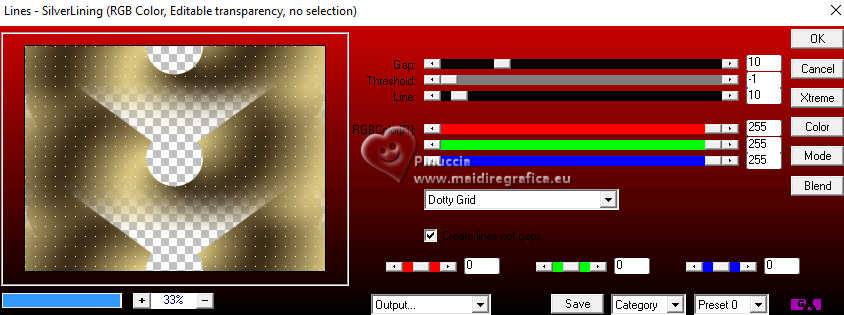
7. Effects>Plugins>AP 01 [Innovations] - Lines SilverLining.
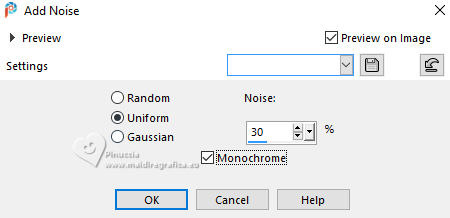
8. Adjust>Add/Remove Noise>Add Noise.
Adjust>Sharpness>Sharpen.
9. Change the Blend Mode of this layer to Hard Light and reduce the opacity to 70/75%.
finally the opacity was adjusted to 60%
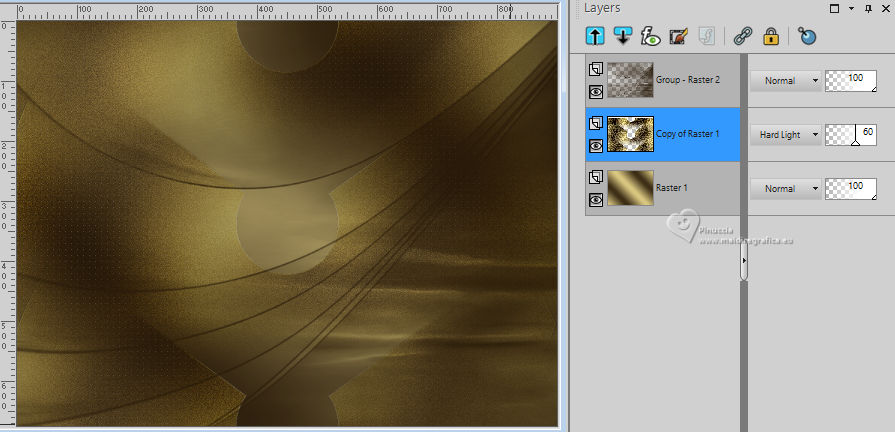
10. Set again your foreground color to Gradient, and change the settings.
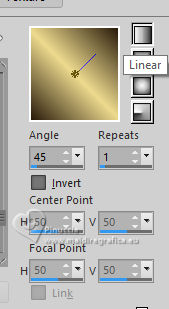
11. Layers>New Raster Layer.
Layers>Arrange>Move Up.
12. Selection Tool 
(no matter the type of selection, because with the custom selection your always get a rectangle)
clic on the Custom Selection 
and set the following settings.
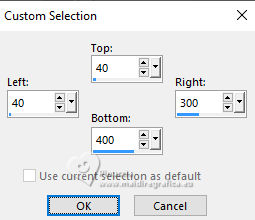
Flood Fill  the selection with your Gradient. the selection with your Gradient.
13. Effects>Texture Effects>Weave
weave color: foreground color
gap color: background color.
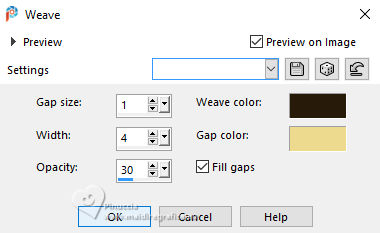
Adjust>Sharpness>Sharpen.
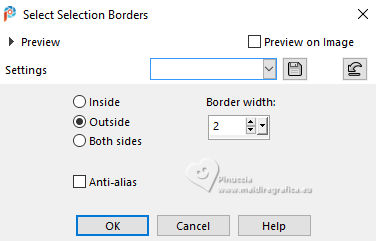
14. Selections>Modify>Select Selection Borders.
15. Set your foreground color to Pattern and select the golden pattern Gold(21)
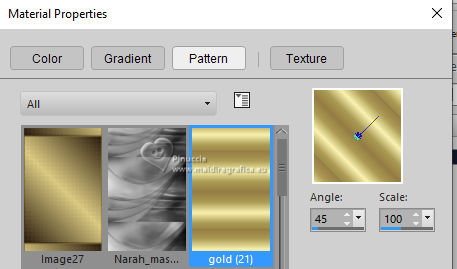
Flood Fill  the selection with the golden pattern. the selection with the golden pattern.
(don't hesitate to enlarge the image well, to better see the narrow space to be filled)
16. Effects>3D Effects>Drop Shadow, color black.

Selections>Select None.
17. Layers>Duplicate.
Activate the layer below.
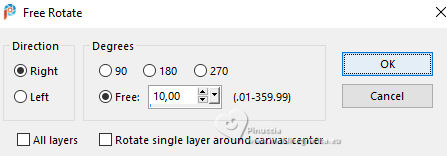
18. Image>Free Rotate - 10 degrees to right.
Activate your top layer.
Layers>Merge>Merge Down.
19. Effects>3D Effects>Drop Shadow, color black.

20. Layers>Duplicate.
21. Adjust>Blur>Gaussian Blur - radius 25.

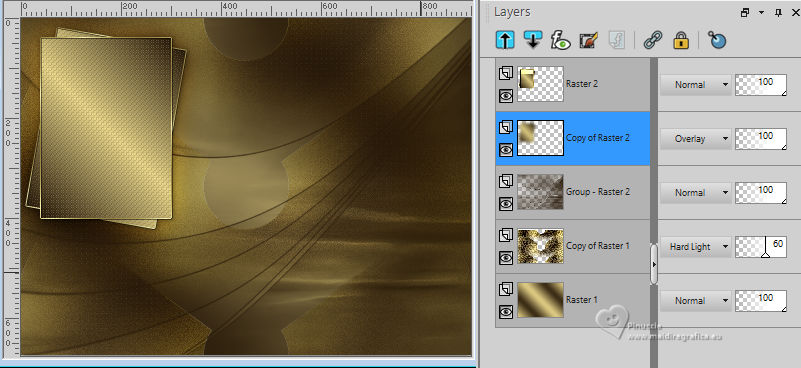
22. Change the Blend Mode of this layer to Overlay.
Layers>Arrange>Move Down.
23. Activate your top layer.
Open the tube Christin_misted_Blumen38_2010 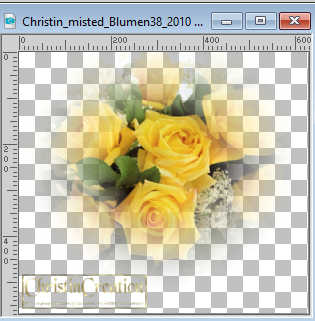
Erase the watermark and go to Edit>Copy.
Go back to your work and go to Edit>Paste as new layer.
Image>Resize, to 65%, resize all layers not checked.
Place  the tube in the center of the frame. the tube in the center of the frame.
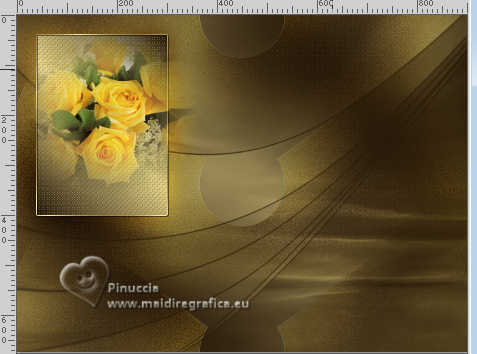
24. Custom Selection  , same settings. , same settings.

25. Selections>Invert.
Press CANC on the keyboard 
Selections>Select None.
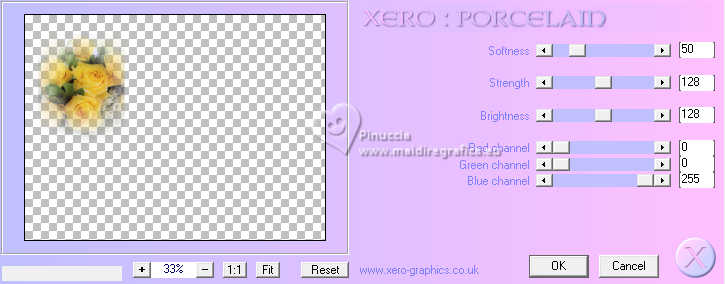
26. Effects>Plugins>Xero - Porcelain, default settings.
Adjust>Sharpness>Sharpen.
27. Layers>Merge>Merge Down.
Activate the mask's layer, Group Raster 2.
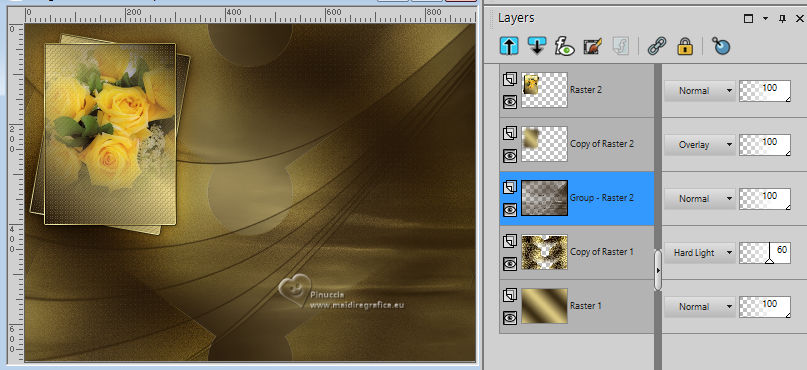
28. Open the landscape Callitubes-128paisagens 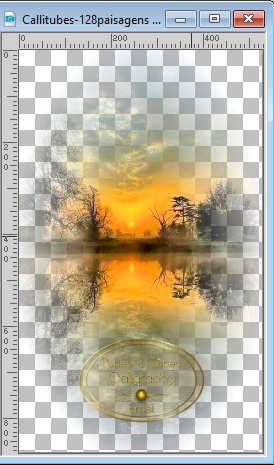
Edit>Coipy.
Go back to your work and go to Edit>Paste as new layer.
Image>Resize, to 80%, resize all layers not checked.
29. Effects>Image Effects>Seamless Tiling, Side by side.

Reduce the opacity of this layer to 70%, or according to your tube.
Adjust>Sharpness>Sharpen.
30. Open Deco 1 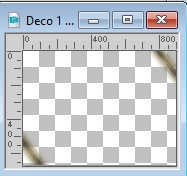
Edit>Copy.
Go back to your work and go to Edit>Paste as new layer.
Is it at its place.
31. Change the Blend Mode of this layer to Overlay.
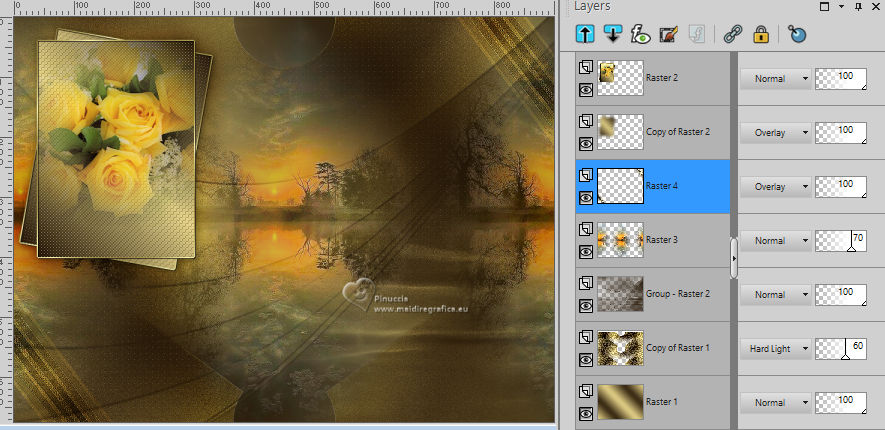
32. Layers>Merge>Merge All.
33. Image>Add borders, 1 pixel, symmetric, foreground color.
Selections>Select All.
Image>Add borders, 15 pixels, symmetric, whatever color.
Selections>Invert.
34. Set your foreground color to Gradient, with the first settings.

Flood Fill  the selection with your Gradient. the selection with your Gradient.
35. Adjust>Blur>Gaussian Blur - radius 20.

36. Effects>Texture Effects>Weave, same settings.

37. Effects>3D Effects>Inner Bevel.
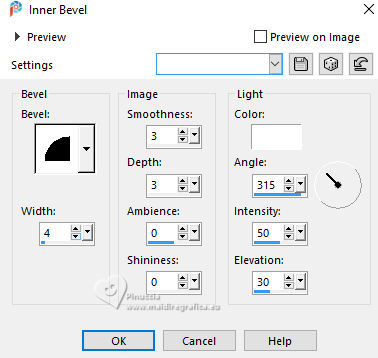
38. Selections>Seleat All.
Edit>Copy
39. Image>Add borders, 30 pixels, symmetric, whatever color.
Selections>Invert.
Edit>Paste into Selection
Selections>Select None.
40. Open the woman's tube Tube Feline31 Juin 01 24 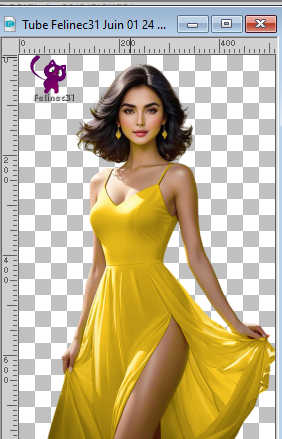
Erase the watermark and go to Edit>Copy.
Go back to your work and go to Edit>Paste as new layer.
41. Activate your Pick Tool 
Position X: 520,00 - Position Y: 17,00.

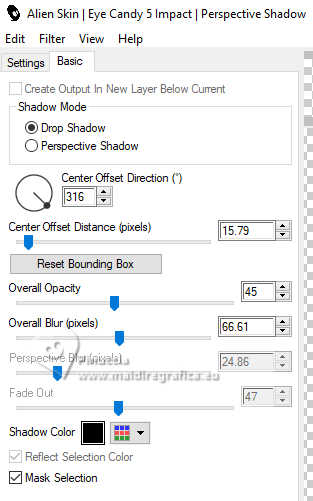
42. Effects>Plugins>Alien Skin Eye Candy 5 Impact - Perspective Shadow.
43. Open the text Mayra Texte 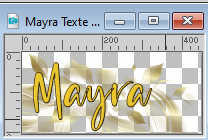
Edit>Copy.
Go back toyour work and go to Edit>Paste as new layer.
Pick Tool 
Position X: 44,00 - Position Y: 520,00.

44. Image>Add borders, 1 pixel, symmetric, foreground color.
45. Sign your work.
46. Image>Resize, 950 pixels width, resize all layers checked.
Save as jpg.
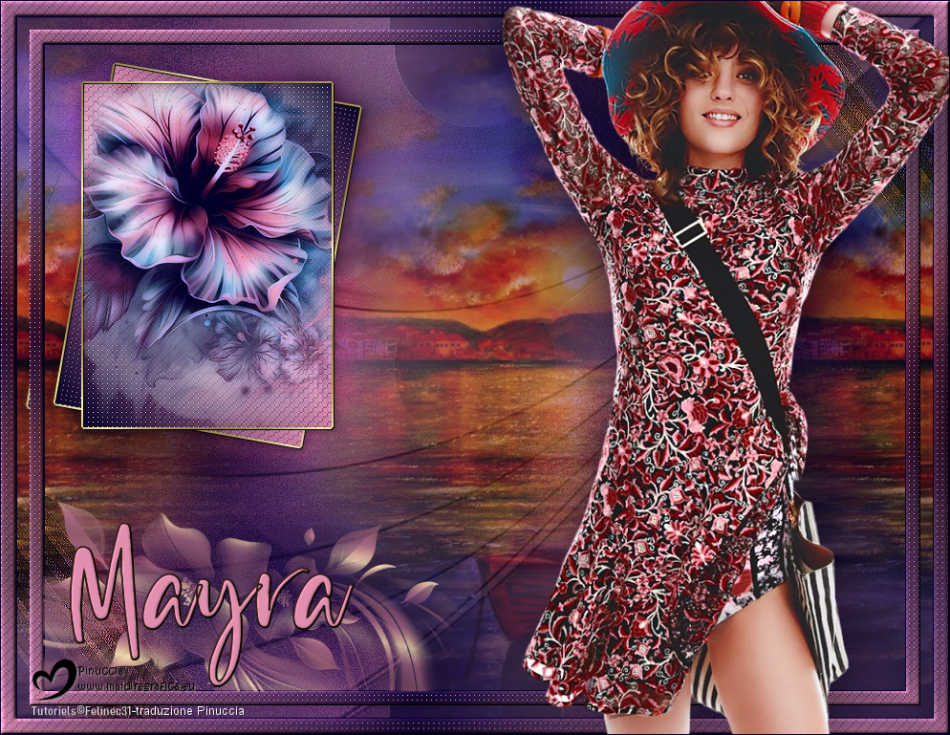
For the tubes of this version thanks Suizabella, Mentali and Silvie

If you have problems or doubts, or you find a not worked link, or only for tell me that you enjoyed this tutorial, write to me.
26 Agosto 2024

|
