EVIDENCE
 english version
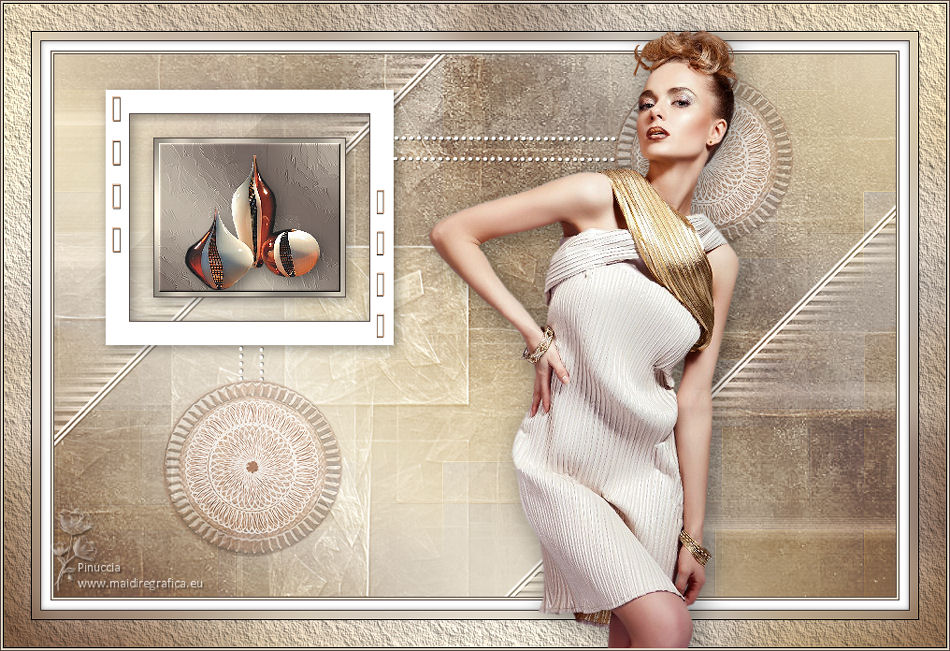
Thanks Carine for your invitation to translate

Clic and move the brush to follow the tutorial.

To print


|
This tutorial was translated with PSPX and PSPX3, but it can also be made using other versions of PSP.
Since version PSP X4, Image>Mirror was replaced with Image>Flip Horizontal,
and Image>Flip with Image>Flip Vertical, there are some variables.
In versions X5 and X6, the functions have been improved by making available the Objects menu.
In the latest version X7 command Image>Mirror and Image>Flip returned, but with new differences.
See my schedule here
 italian translation here italian translation here
 your versions here your versions here
Material here
Thanks: for the tubes Guismo and Babette, and for the masks Linda and Tatie.
(The links of the tubemakers here).
Plugins
consult, if necessary, my filter section here
Mura's Seamless - Emboss at Alpha here
Graphics Plus - Cross Shadow here
Toadies - Weaver here
AAA Frames - Texture Frame here
Filters Unlimited 2.0 here
Filters Mura's Seamless, Toadies and Graphics Plus can be used alone or imported into Filters Unlimited.
(How do, you see here)
If a plugin supplied appears with this icon  it must necessarily be imported into Unlimited it must necessarily be imported into Unlimited

You can change Blend Modes according to your colors.
In the newest versions of PSP, you don't find the foreground/background gradient (Corel_06_029).
You can use the gradients of the older versions.
The Gradient of CorelX here

Copy the Selections in the Selections Folder.
Open the masks in PSP and minimize them with the rest of the material.
1. Set your foreground color to #554643,
and your backgorund color to #e3dac9.
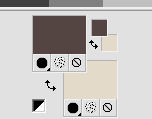
Set your foreground color to a Foreground/Background Gradient, style Linear.
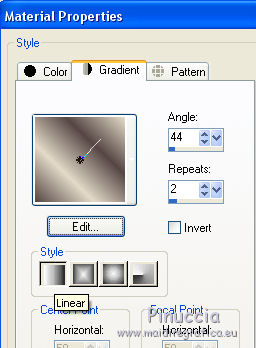
2. Open a new transparent image 900 x 580 pixels
Flood Fill  the transparent image with your Gradient. the transparent image with your Gradient.
3. Adjust>Blur>Gaussian Blur, radius 30.

4. Layers>New Raster Layer.
Flood Fill with your background color.
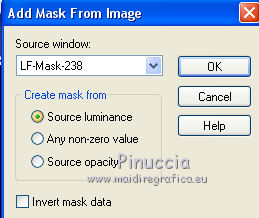
5. Layers>New Mask layer>From image
Open the menu under the source window and you'll see all the files open.
Select the mask LF-Mask-238.
Effects>Edge Effects>Enhance.
Layers>Merge>Merge Group.
6. Layers>New Raster Layer.
Flood Fill with your background color.
7. Layers>New Mask layer>From image
Open the menu under the source window
and select the mask tubtatie_mask910952.
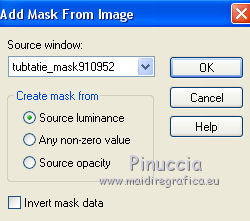
Layers>Merge>Merge >Group.
Change the Blend Mode of this layer to Overlay.
8. Effects>Plugins>Mura's Seamless - Emboss at alpha, default settings.
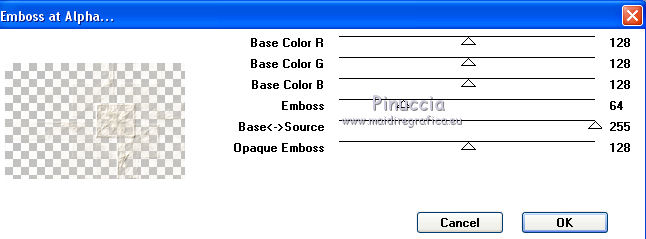
9. Image>Mirror.
10. Effects>3D Effects>Drop Shadow, foreground color #554643.
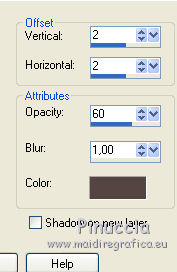
11. Set your foreground color to white.
Layers>New Raster Layer.
Flood Fill con il colore bianco.
12. Layers>New Mask layer>From image
Open the menu under the source window
and select the mask 2BitMask_34.
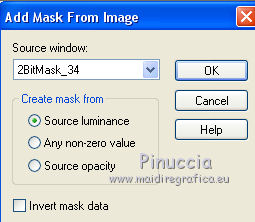
Layers>Merge>Merge Group.
13. Effects>Plugins>Mura's Seamless - Emboss at Alpha, same settings.

14. Effects>3D Effects>Drop Shadow, color black.
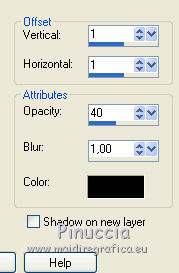
15. Effects>Image Effects>Seamless Tiling.
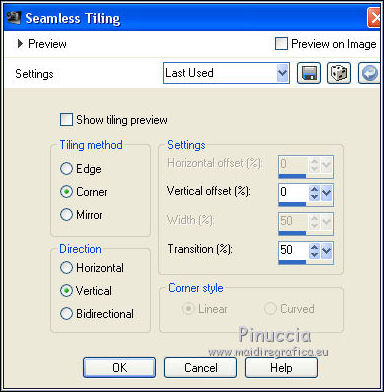
16. Effects>Geometric Effects>Skew.
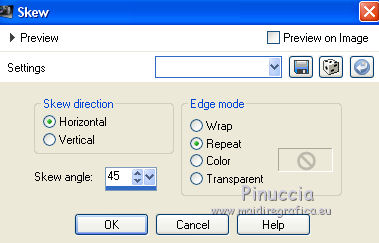
Change the Blend Mode of this layer to Luminance (Legacy).
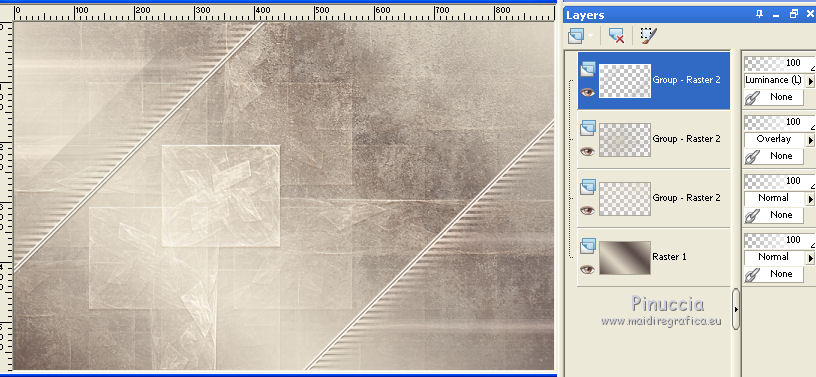
17. Layers>New Raster Layer, Raster 2.
Selections>Load/Save Selection>Load Selection from Disk.
Look for and load the selection Sélection#Evidence1.
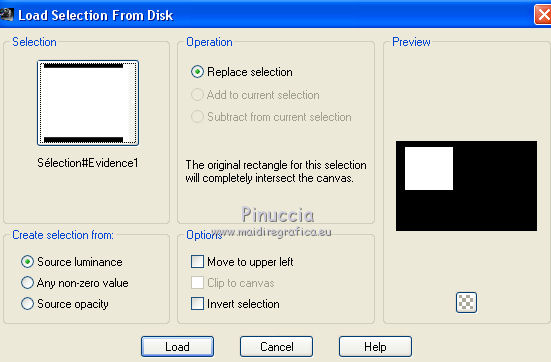
18. Match Mode of your Flood Fill Tool on None

Flood Fill the selection with color white.
19. Selections>Modify>Contract - 25 pixels.
Set again your foreground color with your initial foreground color.

Flood Fill the selection with your foreground color.
20. Selections>Modify>Contract - 1 pixels.
Press CANC on the keyboard  . .
21. Selections>Modify>Contract - 25 pixels.
Flood Fill the selection with your foreground color.
22. Selections>Modify>Contract - 2 pixels.
Flood Fill the selection with your background color.
23. Effects>Plugins>Graphics Plus - Cross Shadow.
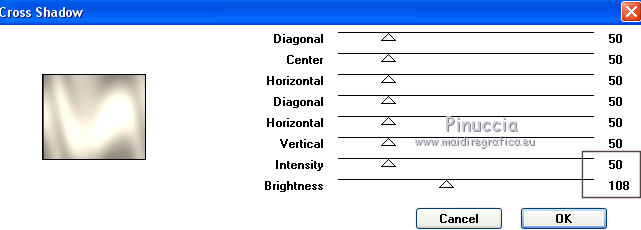
24. Sélections>Modify>Contract - 5 pixels.
Set again your foreground color To Gradient (same settings)
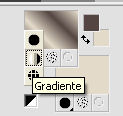
Flood Fill the selection with your gradient.
Adjust>Blur>Gaussian Blur - radius 30.

25. Effects>Art Media Effects>Brush Strokes, color #c0c0c0.
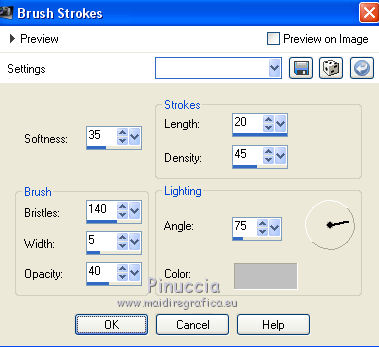
Adjust>Sharpness>Sharpen.
26. Effects>3D Effects>Inner Bevel.
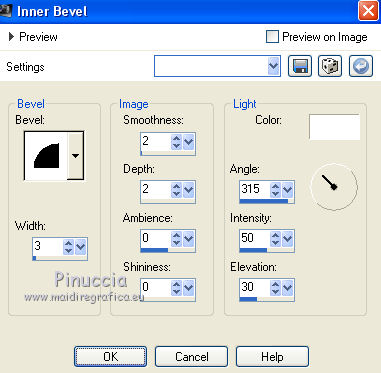
Selections>Select None.
27. Effects>3D Effects>Drop Shadow, color black.
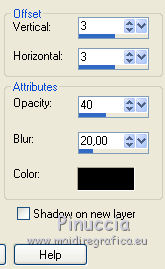
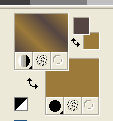
28. Keep your foreground color to #554643,
and change your background color to #9c7a3a.
Keep the initial Gradient with the new color and the same settings.
 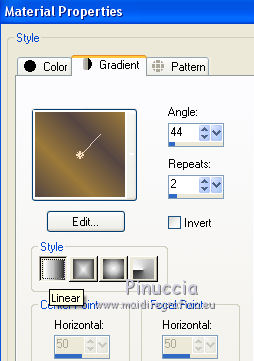
29. Layers>New Raster Layer, Raster 3.
Selections>Load/Save Selection>Load Selection from Disk.
Look for and load the selection Sélection#Evidence2.
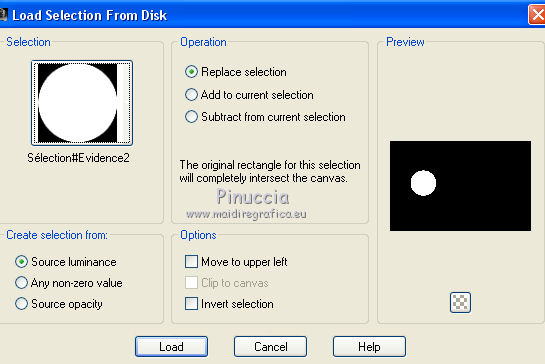
Flood Fill the selection with your gradient.
Selections>Select None.
30. Effects>Plugins>Toadies - Weaver.
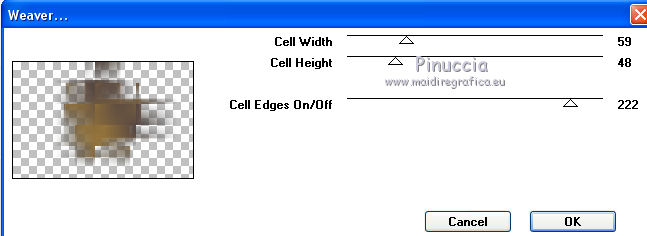
31. Effects>Image Effects>Seamless Tiling.

Change the Blend Mode of this layer to Overlay and reduce the opacity to 60%,
or according to your colors.
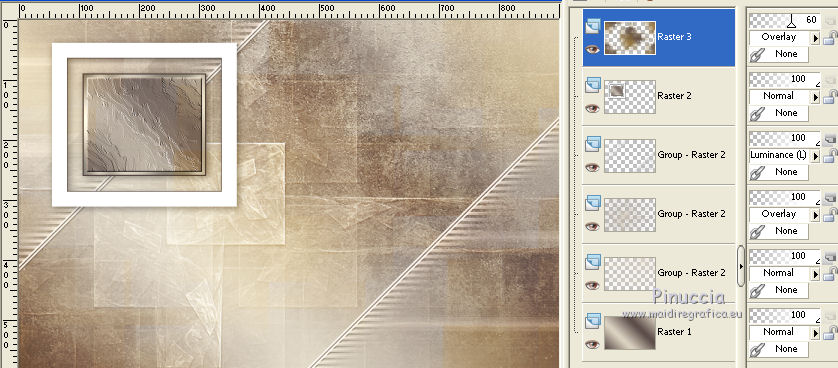
32. Effects>Edge Effects>Enhance.
Layers>Arrange>Move Down (under the frame).
33. Activate your top layer.
Open the tube by Guismo and go to Edit>Copy.
Go back to your work and go to Edit>Paste as new layer.
Image>Resize, to 30%, resize all layers not checked.
Place  the tube in the frame. the tube in the frame.
Adjust>Sharpness>Sharpen.
34. Effects>3D Effects>Drop Shadow, color black.
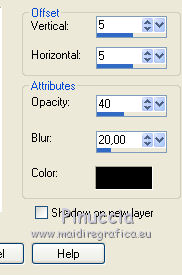
35. Open déco 1 and go to Edit>Copy.
Go back to your work and go to Edit>Paste as new layer.
36. Effects>Image Effects>Offset.
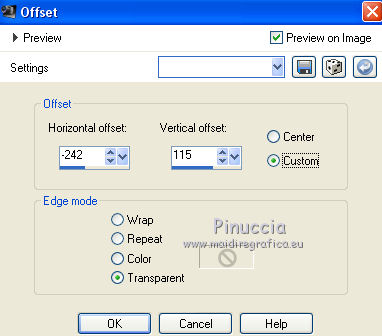
37. Open déco 2 and go to Edit>Copy.
Go back to your work and go to Edit>Paste as new layer.
38. Effects>Image Effects>Offset.
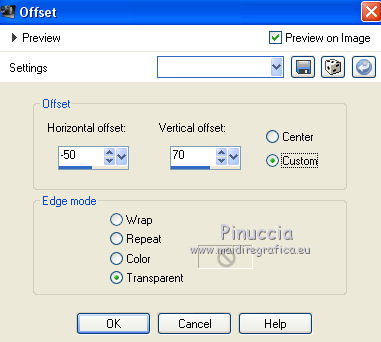
39. Open déco 3 and go to Edit>Copy.
Go back to your work and go to Edit>Paste as new layer.
40. Effects>Image Effects>Offset.
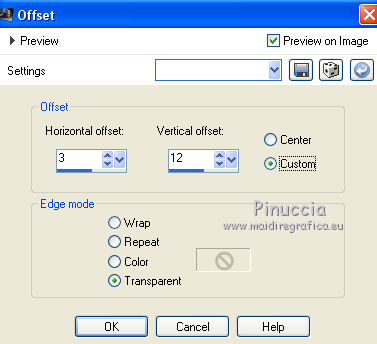
41. Layers>Merge>Merge All.
42. Edit>Copy.
43. For the borders, set again your background color to the initial color #e3dac9.

Image>Add borders, 1 pixel, symmetric, foreground color.
Image>Add borders, 2 pixels, symmetric, background color.
Image>Add borders, 1 pixel, symmetric, foreground color.
Image>Add borders, 10 pixels, symmetric, color white.
Image>Add borders, 1 pixel, symmetric, foreground color.
44. Selections>Select All.
Image>Add borders, 40 pixels, symmetric, color white.
45. Selectoins>Invert.
Edit>Paste into Selection (image of step 42).
46. Adjust>Blur>Gaussian Blur - radius 20.

47. Effects>Plugins>AAA Frames - Texture Frame.
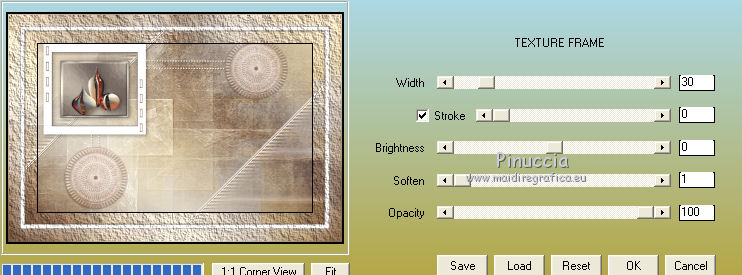
48. Effects>3D Effects>Drop Shadow, color black.
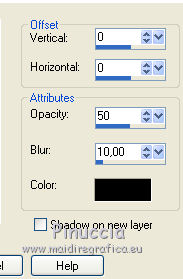
Selections>Select None.
49. Open the woman tube by Babette and go to Edit>Copy.
Go back to your work and go to Edit>Paste as new layer.
Image>Mirror.
Image>Resize, to 65%, resize all layers not checked.
Move  the tube to the right side. the tube to the right side.
50. Effects>3D Effects>Drop Shadow, color black.
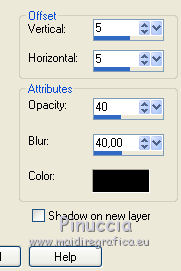
51. Image>Add borders, 2 pixels, symmetric, background color.
Image>Add borders, 1 pixel, symmetric, foreground color.
52. Sign your work on a new layer.
Add, if you want, the author and translator's watermarks.
53. Image>Resize, 900 pixels width, resize all layers not checked.
Save as jpg.
Version with tubes by Beatriz
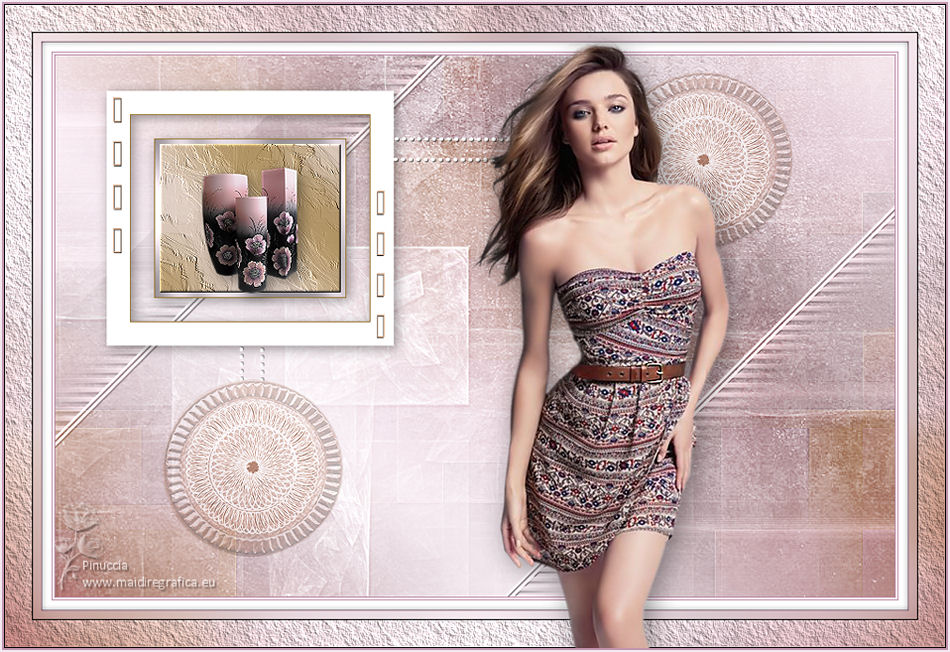

If you have problems or doubts, or you find a not worked link, or only for tell me that you enjoyed this tutorial, write to me.
23 June 2021
|
