CICKA
 english version
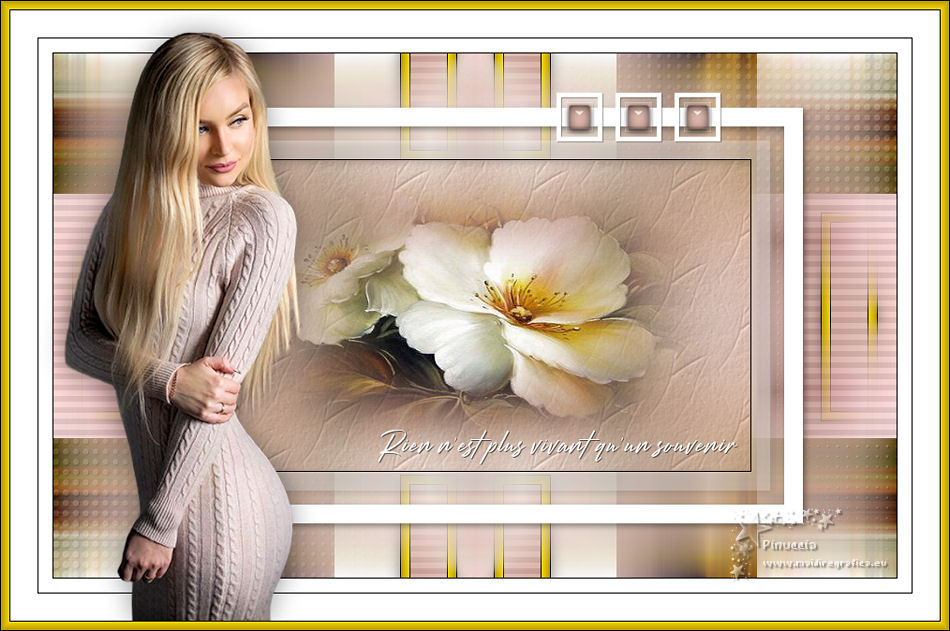
Thanks Carine for your invitation to translate

Clic and move the brush to follow the tutorial.

To print


|
This tutorial was translated with PSPX and PSPX3, but it can also be made using other versions of PSP.
Since version PSP X4, Image>Mirror was replaced with Image>Flip Horizontal,
and Image>Flip with Image>Flip Vertical, there are some variables.
In versions X5 and X6, the functions have been improved by making available the Objects menu.
In the latest version X7 command Image>Mirror and Image>Flip returned, but with new differences.
See my schedule here
 italian translation here italian translation here
 your versions here your versions here
Material here
Thanks: for the tube thanks Cicka, to whom this tutorial is dedicated.
(The links of the tubemakers here).
Plugins
consult, if necessary, my filter section here
Mehdi - Wavy Lab 1.1. here
Mehdi - Sorting Tiles, Weaver here
Plugin Galaxy - Instant Mirror here
Carolaine and Sensibility - CS-HLines here
AAA Frames - Frame Works here

You can change Blend Modes according to your colors.

Copy the Texture in the Textures Folder.
Copy the Selections in the Selections Folder.
Open the mask in PSP and minimize it with the rest of the material.
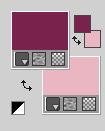
Set your foreground color to #78234d,
and your backgorund color to #eab6c2.
1. Open a new transparent image 900 x 560 pixels.
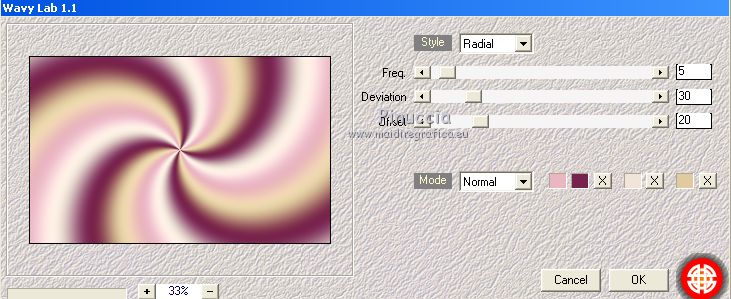
2. Effects>Plugins>Mehdi - Wavy Lab 1.1.
This filters creates gradients with the colors of your Materials palette.
The first is your background color, the second is your foreground color.
Change the last two colors created by the filtre:
the third color with #f1e5d9 and the forth color with #e1caa0.
3. Adjust>Blur>Gaussian Blur - radius 50.

5. Selections>Select All.
Open the tube fleur and go to Edit>Copy.
Go back to your work and go to Edit>Paste into Selection.
Selections>Select None.
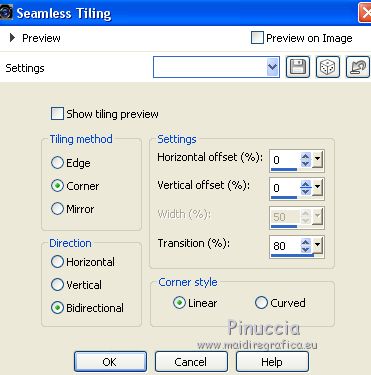
6. Effects>Image Effects>Seamless Tiling.
7. Effects>Plugins>Mehdi - Sorting Tiles.
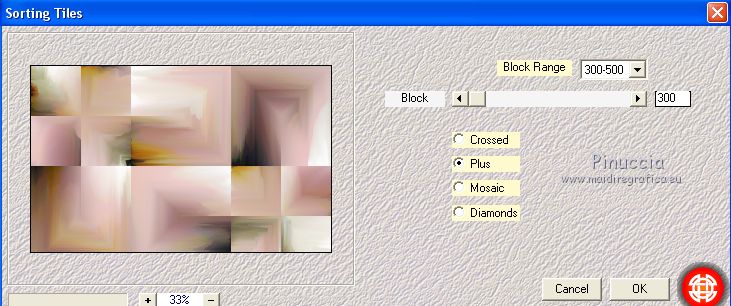
8. Effects>Plugins>Mehdi - Weaver.
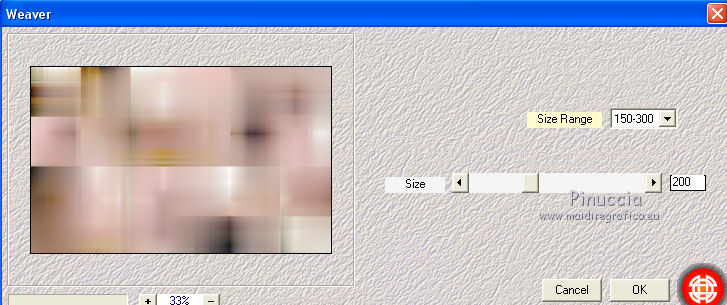
9. Effects>Plugins>Plugin Galaxy - Instant Mirror.
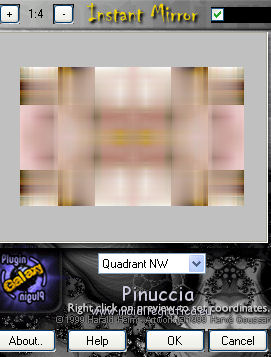
10. Layers>New Raster Layer.
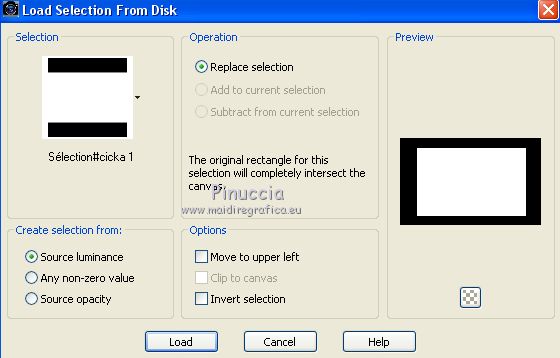
Selections>Load/Save Selection>Load Selection from Disk.
Look for and load the selection #cicka 1.
11. Set your foreground color to white #ffffff,
and your background color to black #000000.
Flood Fill  the selection with color white. the selection with color white.
12. Selections>Modify>Contract - 20 pixels.
Press CANC on the kayboard 
13. Selections>Modify>Contract - 15 pixels.
Reduce the opacity of your Flood Fill Tool to 30%.

14. Flood Fill  the selection with color white. the selection with color white.
Selections>Modify>Contract - 20 pixels.
Press CANC on the keyboard.
Set again the opacity of your Flood Fill Tool to 100.
Flood Fill  the selection with color black. the selection with color black.
15. Selections>Modify>Contract - 1 pixels.
Press CANC on the keyboard.
Keep selected.
16. Activate the layer Raster 1.
Selections>Promote Selection to layer.
17. Adjust>Blur>Gaussian Blur - radius 20.

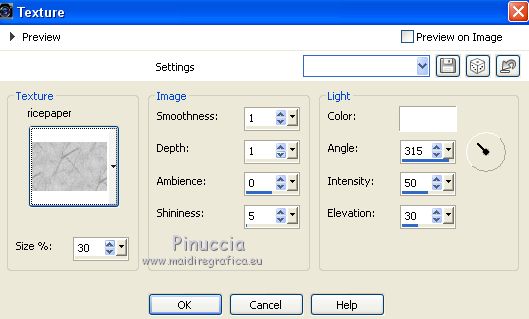
18. Effects>Texture Effects>Texture - select the texture Ricepaper.
19. Edit>Paste into Selection (the tube fleur is still in memory).
Adjust>Sharpness>Sharpen.
Selections>Select None.
20. Activate your top layer, Raster 2.
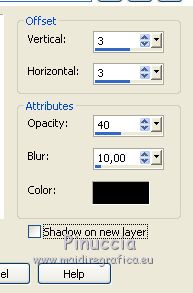
Effects>Effects 3D>Sfalsa ombra, color black.
21. Close the layer Raster 1 and stay on the top layer.
Layers>Merge>Merge visible.
22. Open and activate the layer Raster 1.
Selections>Load/Save Selection>Load Selection from Disk.
Look for and load the selection #cicka 2.
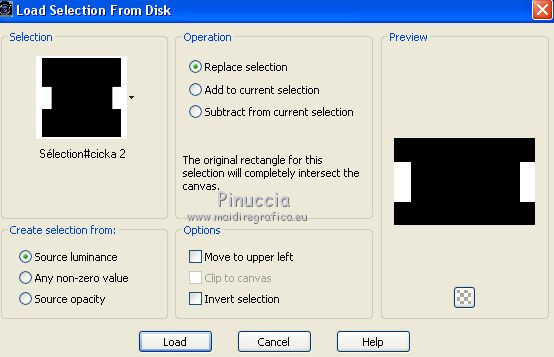
Selections>Promote Selection to layer.
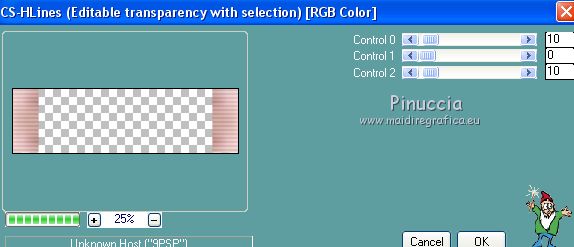
23. Effects>Plugins>Carolaine and Sensibility - CS-HLines.
Selections>Select None.
24. Selections>Load/Save Selection>Load Selection from Disk.
Look for and load the selection #cicka 3.
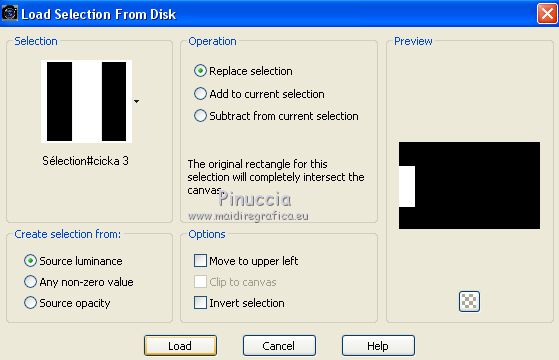
25. Selections>Modify>Contract - 20 pixels.
Selections>Promote Selection to layer.
26. Effects>Plugins>AAA Frames - Frame Works.
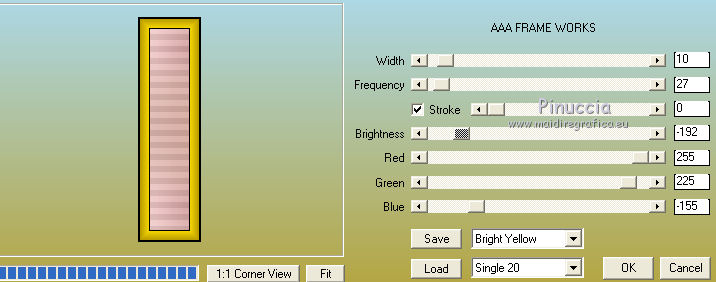
Selections>Select None.
27. Effects>3D Effects>Drop Shadow, color black.
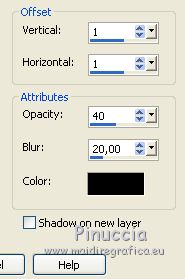
28. Layers>Duplicate.
Image>Mirror.
Layers>Merge>Merge Down.
29. Effects>Image Effects>Seamless Tiling, same settings.

30. Activate the layer Raster 1.
Layers>New Raster Layer.
Flood Fill  the layer with color white. the layer with color white.
Layers>New Mask layer>From image
Open the menu under the source window and you'll see all the files open.
Select the mask NarahsMasks_1604
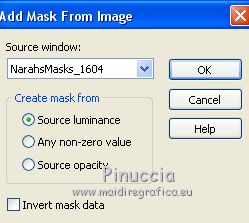
Layers>Merge>Merge Group.
Change the Blend Mode of this layer to Soft Light.
31. Effects>3D Effects>Drop Shadow, color black.
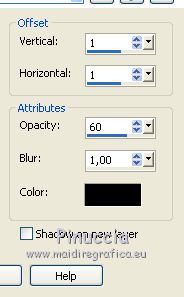
32. Layers>Merge>Merge all.
33. Image>Add borders, 1 pixel, symmetric, color black.
Image>Add borders, 15 pixels, symmetric, color white.
mage>Add borders, 1 pixel, symmetric, color black.
Image>Add borders, 40 pixels, symmetric, color white.
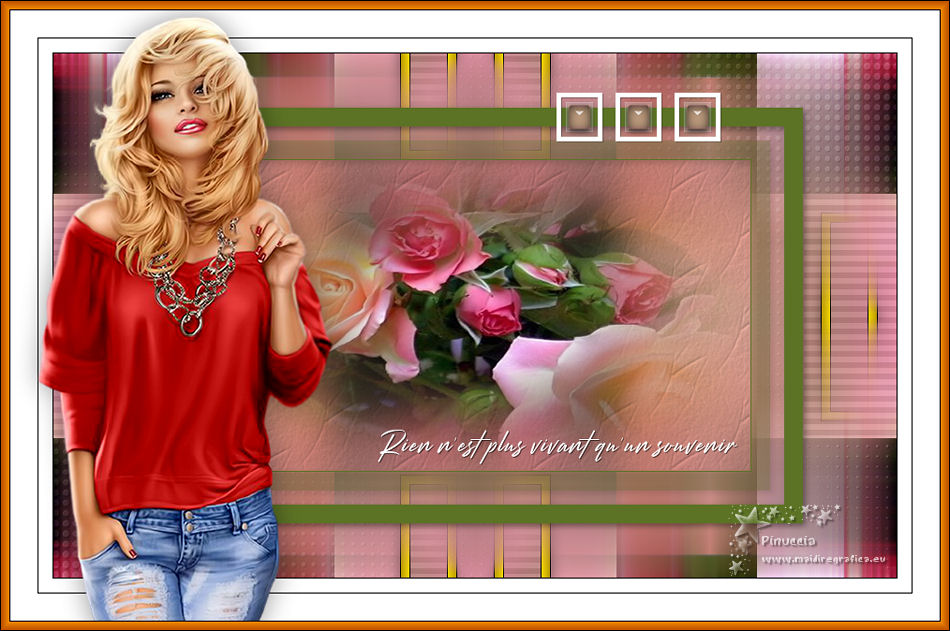
34. Open the tube of the woman cickadesign-2020_pi....850, erase the watermark and go to Edit>Copy.
Go back to your work and go to Edit>Paste as new layer.
Image>Resize, to 93%, resize all layers not checked.
35. K key to activate your Pick Tool 
and set Position X: 68,00 and Position Y: 34,00.

36. Effects>3D Effects>Drop Shadow, color black.
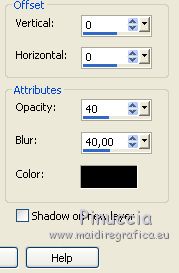
37. Open the tube Deco Cicka and go to Edit>Copy.
Go back to your work and go to Edit>Paste as new layer.
Set Position X: 594,00 and Position Y: 99,00

38. Open Texte souvenir and go to Edit>Copy.
Go back to your work and go to Edit>Paste as new layer.
Set Position X: 403,00 and Position Y: 459.00.

39. Effects>3D Effects>Drop Shadow, color black.
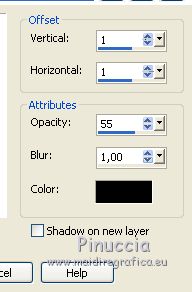
40. Layers>Merge>Merge visible.
41. Effects>Plugins>AAA Frames - Frame Works, same settings.
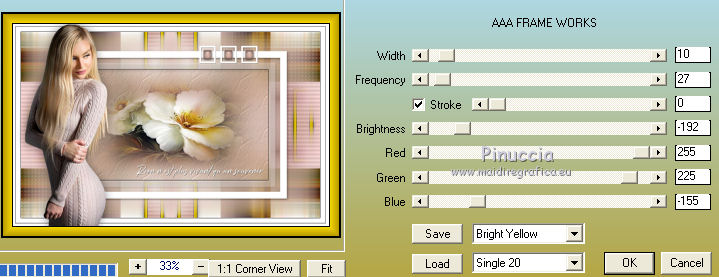
42. Sign your work on a new layer.
Add, if you want, the author and translator's watermarks.
Image>Resize, 900 pixels width, resize all layers checked.
Layers>Merge>Merge All and save as jpg.
Version with tubes by Luz Cristina and Christin.

If you have problems or doubts, or you find a not worked link, or only for tell me that you enjoyed this tutorial, write to me.
13 April 2021
|
