CAPTURE
 english version

Thanks Carine for your invitation to translate

Clic and move the brush to follow the tutorial.

To print


|
This tutorial was translated with PSPX and PSPX3, but it can also be made using other versions of PSP.
Since version PSP X4, Image>Mirror was replaced with Image>Flip Horizontal,
and Image>Flip with Image>Flip Vertical, there are some variables.
In versions X5 and X6, the functions have been improved by making available the Objects menu.
In the latest version X7 command Image>Mirror and Image>Flip returned, but with new differences.
See my schedule here
 italian translation here italian translation here
 your versions here your versions here
Material here
Thanks: for the tubes Beatriz and Syl
(The links of the tubemakers here).
Plugins
consult, if necessary, my filter section here
Filters Unlimited 2.0 here
Mehdi - Sorting Tiles here
Alien Skin Eye Candy 5 Impact - Backlight here
Plugin Galaxy - Instant Mirror here

You can change Blend Modes according to your colors.
In the newest versions of PSP, you don't find the foreground/background gradient (Corel_06_029).
You can use the gradients of the older versions.
The Gradient of CorelX here
Copy the presets  in the folders of the plugin Alien Skin Eye Candy 5 Impact>Settings>Glass/Backlight. in the folders of the plugin Alien Skin Eye Candy 5 Impact>Settings>Glass/Backlight.
One or two clic on the file (it depends by your settings), automatically the preset will be copied in the right folder.
why one or two clic see here

Copy the Selection in the Selections Folder.
Open the masks in PSP and minimize them with the rest of the material.
1. Set your foreground color to #570b17,
and your background color to #d2cecd.
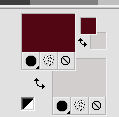
2. Set your foreground color to a Foreground/Background Gradient, style Sunburst.
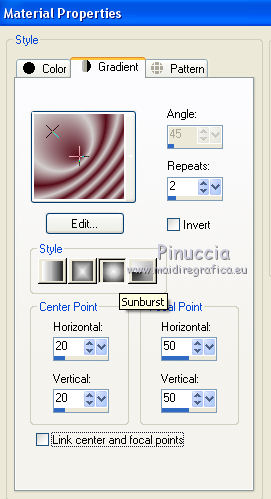
3. Open a new transparent image 900 x 550 pixels.
Flood Fill  the transparent image with your Gradient. the transparent image with your Gradient.
4. Adjust>Blur>Gaussian Blur - radius 40.
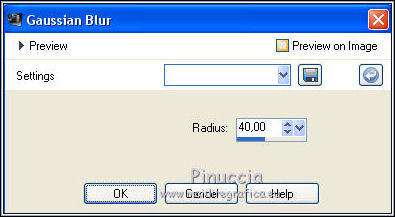
5. Effects>Image Effects>Seamless Tiling.
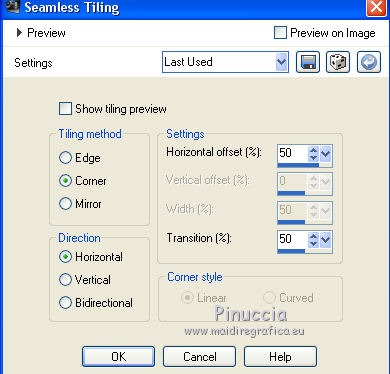
6. Effects>Plugins>Mehdi - Sorting Tiles.
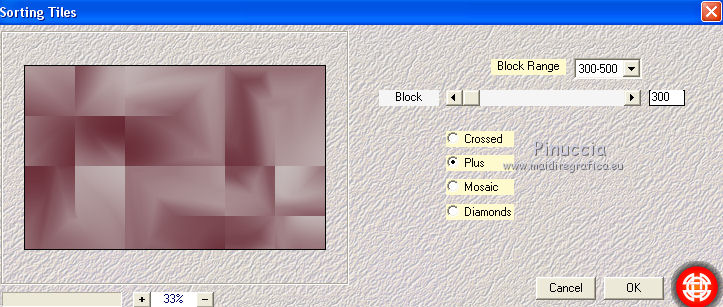
Effects>Edge Effects>Enhance More.
7. Effects>Plugins>Plugin Galaxy - Instant Mirror.
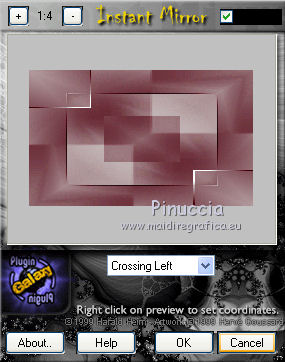
8. Set your background color to white.
Layers>New Raster Layer - Raster 2.
Flood Fill  the layer with color white. the layer with color white.
9. Layers>New Mask layer>From image
Open the menu under the source window and you'll see all the files open.
Select the mask Mask_shokushu.
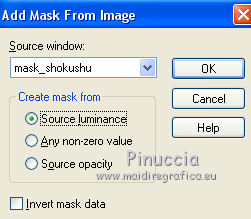
Layers>Merge>Merge Group.
10. Change the Blend Mode of this layer to Overlay and reduce the opacity to 30%.
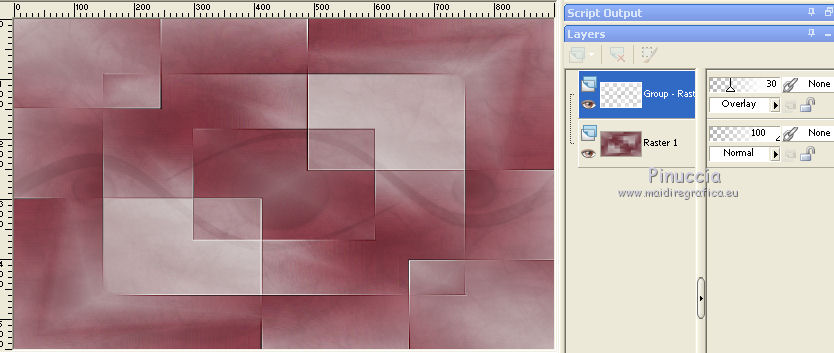
Effects>Edge Effects>Enhance More.
11. Layers>New Raster Layer - Raster 2.
Flood Fill  the layer with color white. the layer with color white.
12. Layers>New Mask layer>From image
Open the menu under the source window
and select the mask maskthelovers_camerontags.
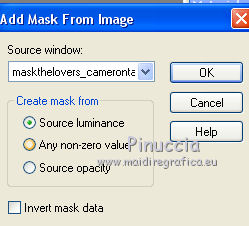
Layers>Merge>Merge Group.
Reduce the opacity of this layer to 50%.
13. Effects>Texture Effects>Weave
weave color: foreground color #570b17,
gap color: background color #d2cecd.
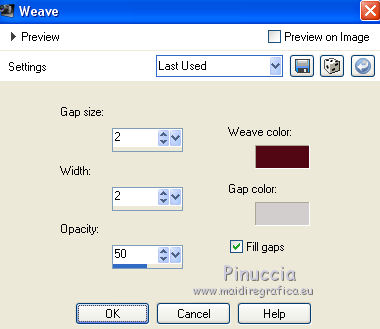
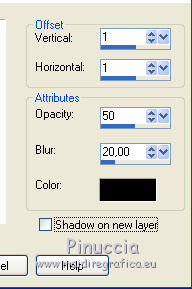
14. Effects>3D Effects>Drop Shadow, color black.
15. Activate the layer Raster 1.
Selections>Load/Save Selection>Load Selection from Disk.
Look for and load the selection SélectionFeli_rond
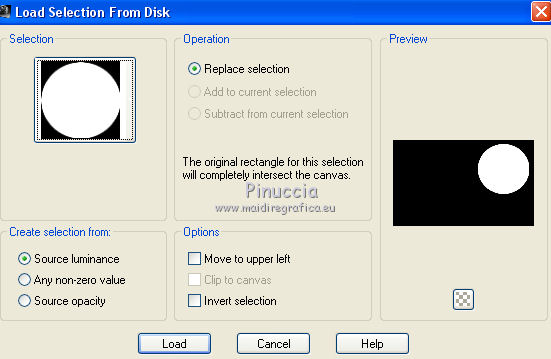
Selections>Promote Selection to layer.
Layers>Arrange>Bring to top.
16. Adjust>Blur>Gaussian Blur - radius 20.

17. Open the landscape by Syl and go to Edit>Copy.
Go back to your work and go to Edit>Paste into Selection.
18. Layers>New Raster Layer.
Effects>Plugins>Alien Skin Eye Candy 5 Impact - Glass
Select the preset Glass_Feli_capture
Here below the settings, in case of problems with the preset.
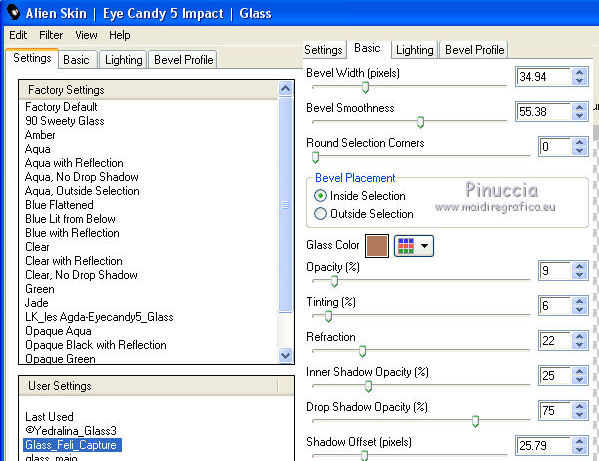
19. Layers>Merge>Merge Down.
20. Selections>Modify>Select Selection Borders.
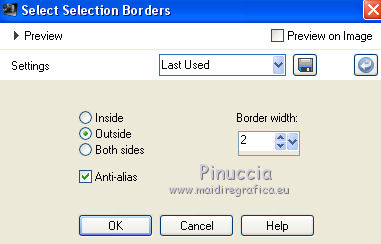
21. Layers>New Raster Layer - Raster 2.
Flood Fill  the selection with color white (2-3 clic). the selection with color white (2-3 clic).
Selections>Select None.
22. Effects>Plugins>Alien Skin Eye Candy 5 Impact - Backlight.
Select the preset Feli_Backlight and ok.
Here below the settings, in case of problems with the preset.
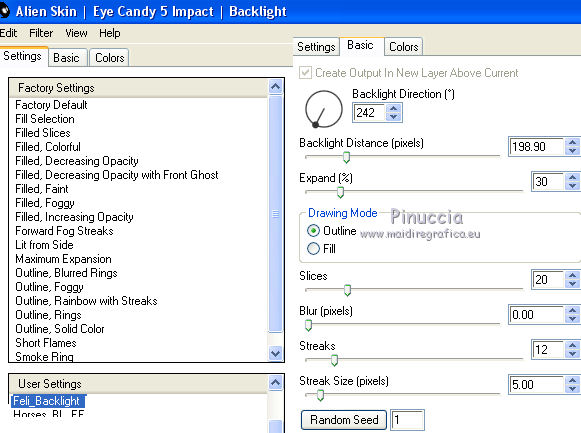
23. Effects>3D Effects>Drop Shadow, color black.
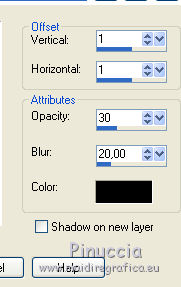
24. Activate again the layer Raster 1.
Layers>New Raster Layer - Raster 3.
Flood Fill  the layer with color white. the layer with color white.
25. Layers>New Mask layer>From image
Open the menu under the source window
and select the mask Astrid Masker 112.
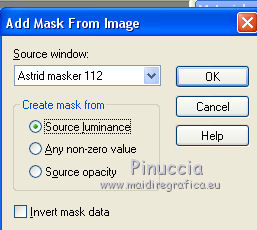
Layers>Merge>Merge Group.
26. Change the Blend Mode of this layer to Overlay and reduce the opacity to 80%.
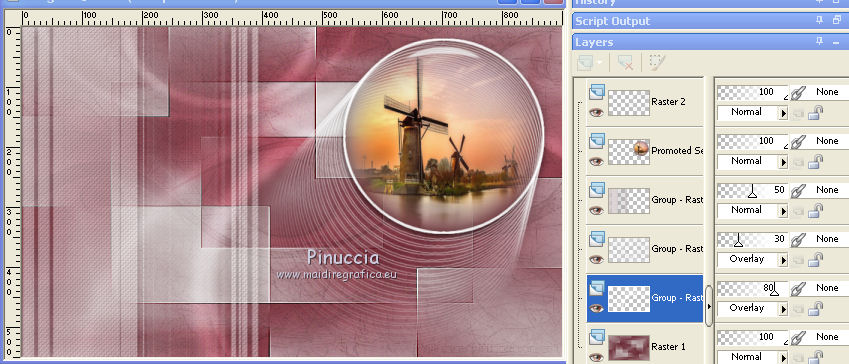
27. Open texte 1 and go to Edit>Copy.
Go back to your work and go to Edit>Paste as new layer.
28. Activate your Pick Tool 
and set Position X: 395,00 and Position Y: 1,00.

29. Activate your top Layer.
Open the wordart by Kalhan, erase the watermark and go to Edit>Copy.
Go back to your work and go to Edit>Paste as new layer.
Image>Resize, 70%, resize all layers not checked.
Image>Negative Image.
30. Set Position X: 550,00 and Position Y: 384,00.

31. Effects>3D Effects>Drop Shadow, color black.
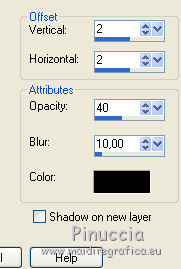
32. Layers>Merge>Merge visible.
33. Effects>Plugins>Filters Unlimited 2.0 - Buttons & Frames - Glass Frame 2.
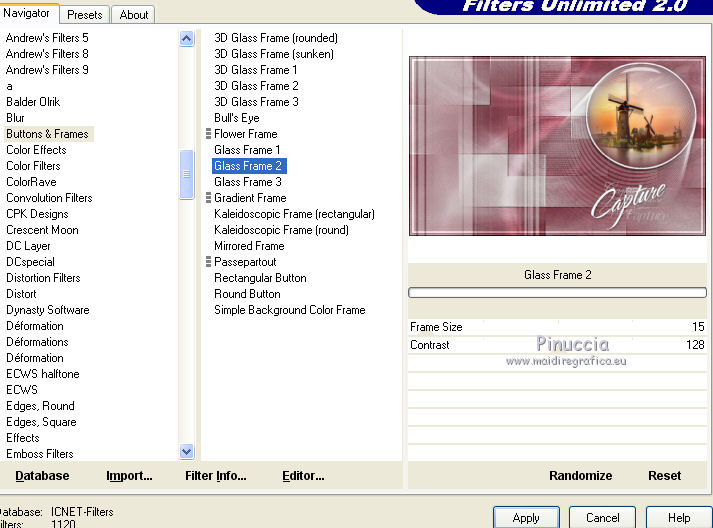
34. Set again your background color to #d2cecd.

Change the settings of your Gradient, style Linear.
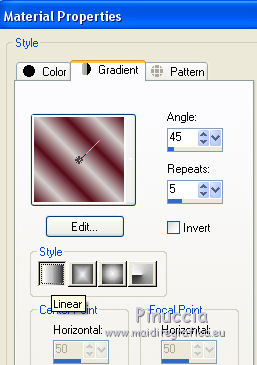
Image>Add borders, 1 pixel, symmetric, foreground color.
Selections>Select All.
Image>Add borders, 20 pixels, symmetric, color white.
Selections>Invert.
Flood Fill  the selection with your Gradient. the selection with your Gradient.
35. Effects>3D Effects>Inner Bevel.
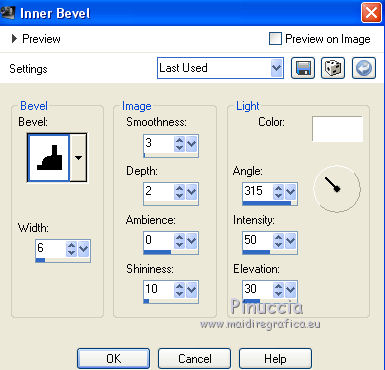
36. Selections>Select All.
Image>Add borders, symmetric not checked, color white.
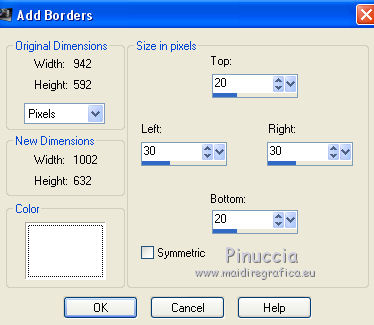
37. Effects>3D Effects>Drop Shadow, color black.
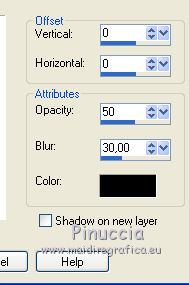
Selections>Select None.
38. Open the tube of the man by Beatriz and go to Edit>Copy.
Go back to your work and go to Edit>Paste as new layer.
Image>Mirror.
Move  the tube to the left side. the tube to the left side.
39. Effects>3D Effects>Drop Shadow, color black.
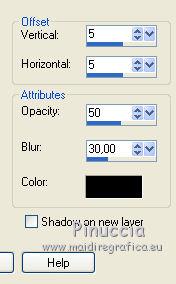
40. Image>Add borders, 1 pixel, symmetric, foreground color.
Image>Add borders, 3 pixels, symmetric, color white.
Image>Add borders, 1 pixel, symmetric, foreground color.
41. Image>Resize, 900 pixels width, resize all layers checked.
Sign your work and save as jpg.
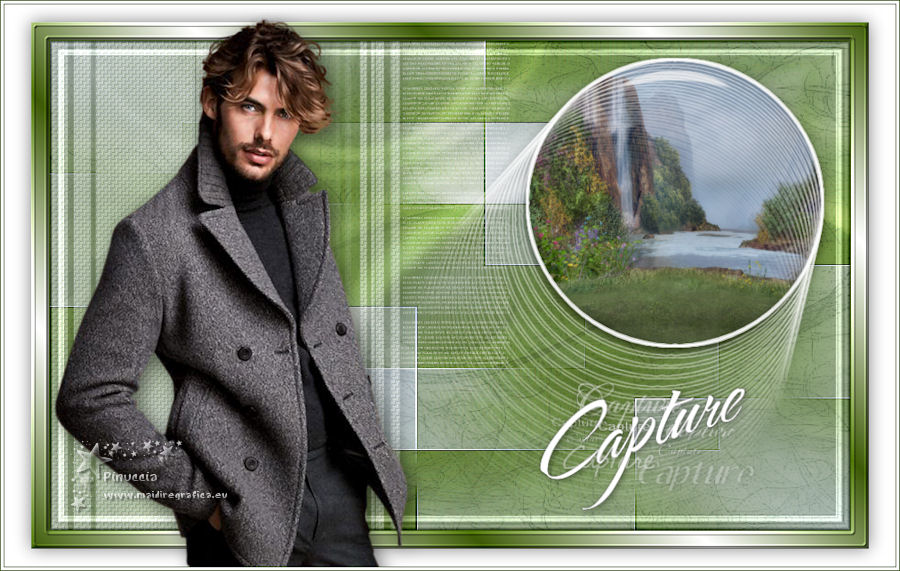
Version with tube by Beatriz

If you have problems or doubts, or you find a not worked link, or only for tell me that you enjoyed this tutorial, write to me.
4 March 2021
|
