UN AIR DE PRINTEMPS

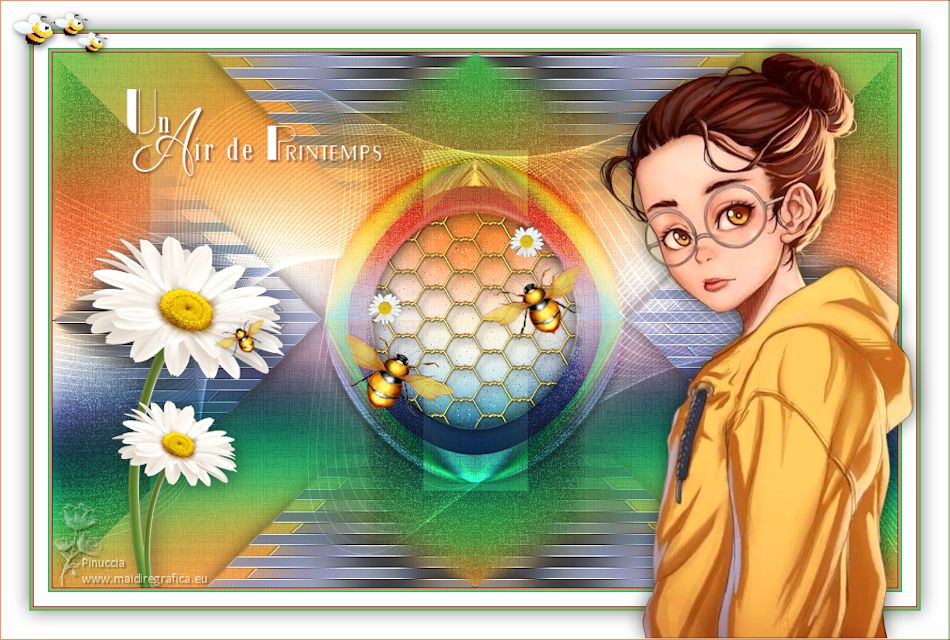
Thanks Carine for your invitation to translate

Clic and move the brush to follow the tutorial.

To print


|
This tutorial was translated with PSPX7 and PSPX2, but it can also be made using other versions of PSP.
Since version PSP X4, Image>Mirror was replaced with Image>Flip Horizontal,
and Image>Flip with Image>Flip Vertical, there are some variables.
In versions X5 and X6, the functions have been improved by making available the Objects menu.
In the latest version X7 command Image>Mirror and Image>Flip returned, but with new differences.
See my schedule here
 italian translation here italian translation here
 your versions here your versions here
Necessary

Thanks for the tubes Tatie and Sabinegraph.
(The links of the tubemakers here).

consult, if necessary, my filter section here
Filters Unlimited 2.0 here
Mehdi - Wavy Lab 1.1. here
Simple - Pizza Slice Mirror here
Alf's Border FX here
DSB Flux - Linear Transmission here
Mura's Meister - Pole Transform here
Filters Alf's Border FX can be used alone or imported into Filters Unlimited.
(How do, you see here)
If a plugin supplied appears with this icon  it must necessarily be imported into Unlimited it must necessarily be imported into Unlimited

You can change Blend Modes according to your colors.

Copy the selections in the Selections Folder.
1. Set your foreground color to #2e3664,
and your background color to #f48b4a

2. Open a new transparent image 900 x 570 pixels.

3. Effects>Plugins>Mehdi - Wavy Lab 1.1.
This filter creates gradients with the colors of your Materials palette.
The first is your background color, the second is your foreground color.
Change the last two colors created by the filtre:
the third color with #30c37c and the forth color with #ffffff.

4. Effects>Image Effects>Seamless Tiling.

5. Adjust>Blur>Gaussian Blur - radius 30.

6. Layers>Duplicate.
Effects>Plugins>Filters Unlimited 2.0 - Alf's Border FX - Border Fade II.

7. Change the Blend Mode of this layer to Overlay and reduce the opacity to 40%.

8. Effects>Plugins>Simple - Pizza Slice Mirror.
This effect works without window; result:

9. Effects>Reflection Effects>Rotating Mirror.

10. Selections>Load/Save Selection>Load Selection from Disk.
Look for and load the selection Sélection C1

Selections>Promote Selection to Layer.
11. Adjust>Blur>Gaussian Blur, same settings.

12. Effects>Plugins>DSB Flux - Linear Transmission.

Effects>Edge Effects>Enhance More.
13. Effects>3D Effects>Drop Shadow, color black.

Selections>Select None.
14. Layers>Duplicate.
Image>Mirror.
Layers>Merge>Merge Down.
15. Effects>Image Effects>Seamless Tiling, default settings.

16. Activate the layer Raster 1.
Effects>Plugins>Filters Unlimited 2.0 - Paper Texture - Papyrus.

Adjust>Sharpness>Sharpen.
You should have this

17. Layers>Merge>Merge visible.
18. Layers>Duplicate.
Effects>Plugins>Mura's Meister - Pole Transform.

19. Effects>Geometric Effects>Circle.

20. Selections>Select All.
Selections>Float.
Selections>Defloat.
21. Selections>Modify>Contract - 40 pixels.
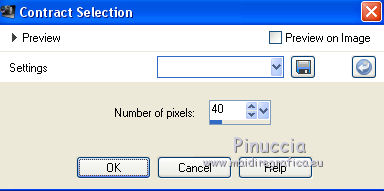
Press CANC on the keyboard 
22. Reduce the opacity of your Flood Fill Tool to 50.
Flood Fill  the selection with your foreground color. the selection with your foreground color.
Set again the opacity of your Flood Fill Tool to 100.
23. Selectsions>Modify>Contract - 40 pixels.
Press CANC on the keyboard.
Selections>Select None.
24. Change the Blend Mode of this layer to Overlay.

25. Effects>3D Effects>Inner Bevel.

26. Effects>3D Effects>Drop Shadow, color black.

27. Image>Resize, to 70%, resize all layers not checked.
Effects>Distortion Effects>Pinch.,
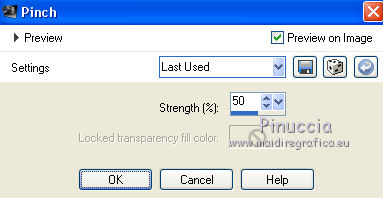
28. Activate the bottom layer, Merged.
Selections>Load/Save Selection>Load Selection from Disk.
Look for and load the selection Sélection C2

Selections>Promote Selection to layer.
29. Adjust>Blur>Gaussian Blur, same settings.

30. Change the Blend Mode of this layer to Hard Light.

31. Adjust>Add/Remove Noise>Add Noise.

32. Layers>New Raster Layer.
Effects>3D Effects>Cutout.

Keep selected.
33. Layers>New Raster Layer.
Open the tube deco Grille 
Edit>Copy.
Go back to your work and go to Edit>Paste into Selection.
Selections>Select None.
34. Effects>3D Effects>Drop Shadow, color black.

Adjust>Sharpness>Sharpen.
35. Activate the bottom layer, Merged.
Open the tube deco 1 
Edit>Copy.
Go back to your work and go to Edit>Paste as new layer.
Don't move it, it is at its place.
Change the Blend Mode of this layer to Dodge and reduce the opacity to 70%.

36. Activate your top layer.
Open the tube bourdon 
Edit>Copy.
Go back to your work and go to Edit>Paste as new layer.
37. K key to activate your Pick Tool 
and set Position X: 310,00 and Position Y: 225,00.

38. Open Déco 2 
Set Position X: 332,00 and Position Y: 176,00.

39. Activate your top layer.
Open the tube 881287grsab14 
Erase the watermark Edit>Copy.
Go back to your work and go to Edit>Paste as new layer.
Image>Resize, to 50%, resize all layers not checked.
Move  the tube at the bottom left. the tube at the bottom left.

Effects>3D Effects>Drop Shadow.

40. Open the tube bourdon 1 
Edit>Copy.
Go back to your work and go to Edit>Paste as new layer.
Move  the tube to the left side, over the flowers. the tube to the left side, over the flowers.

Effets>Effets 3D>Ombre portée, à choix.
41. Layers>Merge>Merge visible.
For those who want to skip the steps of the frame:
Edit>Copy.
Open Cadre  , with a selection active. , with a selection active.
Edit>Paste into Selection.
Selections>Select None.
Continue from step 45.
***
42. For those who want to make the frame:
Image>Add borders, 1 pixel, symmetric, foreground color.
Image>Add borders, 2 pixels, symmetric, background color.
Image>Add borders, 2 pixels, symmetric, green color #30c37c.
Image>Add borders, 15 pixels, symmetric, color white.
Image>Add borders, 1 pixel, symmetric, foreground color.
Image>Add borders, 2 pixels, symmetric, background color.
Image>Add borders, 2 pixels, symmetric, background green color #30c37c.
43. Selections>Select All.
Image>Add borders, 30 pixels, symmetric, color white.
44. Effects>3D Effects>Drop Shadow, color black.
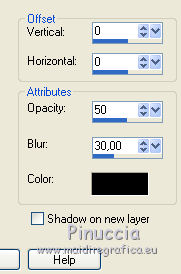
Selections>Select None.
****
45. Open the tube tubtatie_261448842_10 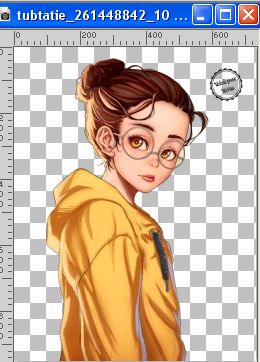
Erase the watermark and go to Edit>Copy.
Go back to your work and go to Edit>Paste as new layer.
Image>Mirror.
Image>Resize, to 68%, resize all layers not checked.
Move  the tube to the right side. the tube to the right side.
46. Effects>3D Effects>Drop Shadow, color black.

47. Open the tube Déco 3 Coin 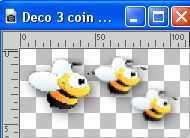
Edit>Copy.
Go back to your work and go to Edit>Paste as new layer.
Move  the tube at the upper left. the tube at the upper left.

48. Open the text texte Felinec31 
Edit>Copy.
Go back to your work and go to Edit>Paste as new layer.
Move  the text at the upper left. the text at the upper left.
49. Effects>3D Effects>Drop Shadow, color #713623.

50. Image>Add borders, 1 pixel, symmetric, background color.
51. Sign your work on a new layer.
Add the author and the translator's watermarks.
52. Image>Resize, 950 pixels width, resize all layers checked.
Save as jpg.
For the tube of this version thanks Silvie and Graphsabine


If you have problems or doubts, or you find a not worked link, or only for tell me that you enjoyed this tutorial, write to me.
18 April 2023

|

