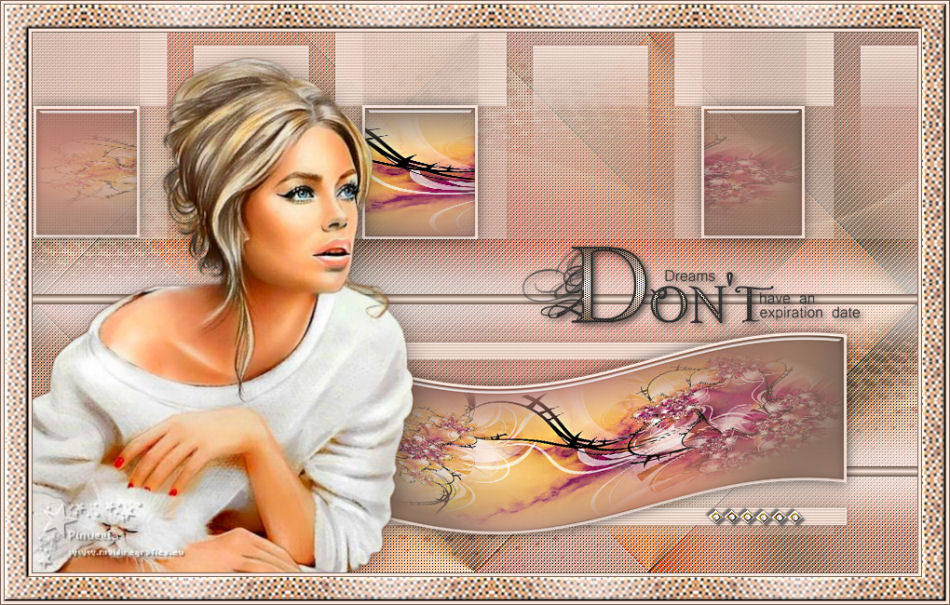
|
CASSANDRE
 english version

Thanks Carine for your invitation to translate

This tutorial was written with CorelX17 and translated with CorelX17, but it can also be made using other versions of PSP.
Since version PSP X4, Image>Mirror was replaced with Image>Flip Horizontal,
and Image>Flip with Image>Flip Vertical, there are some variables.
In versions X5 and X6, the functions have been improved by making available the Objects menu.
In the latest version X7 command Image>Mirror and Image>Flip returned, but with new differences.
See my schedule here
italian translation here
your versions here
Material here
Thanks for the tubes Lori Rhae and Thafs.
(The links of the tubemakers here).
consult, if necessary, my filter section here
Filters Unlimited 2.0 here
Simple - Blintz here
Screenworks - Dot Screen here
Alien Skin Eye Candy 5 Impact - Glass, Gradient Glow here
Filters Simple and Screenworks can be used alone or imported into Filters Unlimited.
(How do, you see here)
If a plugin supplied appears with this icon  it must necessarily be imported into Unlimited it must necessarily be imported into Unlimited

You can change Blend Modes according to your colors.
In the newest versions of PSP, you don't find the foreground/background gradient (Corel_06_029).
You can use the gradients of the older versions.
The Gradient of CorelX here
Copy the preset  in the folders of the plugin Alien Skin Eye Candy 5 Impact>Settings>Glass/Gradient Glow. in the folders of the plugin Alien Skin Eye Candy 5 Impact>Settings>Glass/Gradient Glow.
One or two clic on the file (it depends by your settings), automatically the preset will be copied in the right folder.
why one or two clic see here
Open the masks in PSP and minimize them with the rest of the material.
Colors

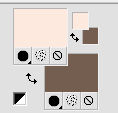
1. Set your foreground color to #fde9df
and your background color to #745e50.
2. Open Alpha Cassandre.
Window>Duplicate, or on the keyboard shift+D, to make a copy.
Close the original.
The copy, that will be the basis of your work, is not empty,
but contains the selections saved on the alpha channel.
3. Selections>Select All.
Open fond_tex_21 and go to Edit>Copy.
Go back to your work and go to Edit>Paste into Selection.
4. Adjust>Blur>Gaussian Blur - radius 30.

Selections>Select None.
5. Effects>Image Effects>Seamless Tiling, default settings.

6. Effects>Plugins>Simple - Blintz.
7. Layers>Duplicate.
Image>Flip.
Reduce the opacity of this layer to 50%.
8. Layers>Merge>Merge Down - Raster 1.
9. Effects>Image Effects>Seamless Tiling, default settings.

Effects>Edge Effects>Enhance More.
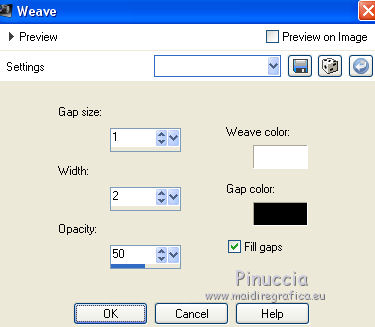
10. Effects>Texture Effects>Weave
weave color white; gap color black
11. Layers>New Raster Layer.
Flood Fill  with your foreground color #fde9df. with your foreground color #fde9df.
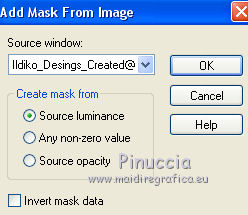
12. Layers>New Mask layer>From image
Open the menu under the source window and you'll see all the files open.
Select the mask Ildiko Design_Create
Layers>Merge>Merge Group.
13. Effects>Texture Effects>Blinds - color 4 #b9a095.
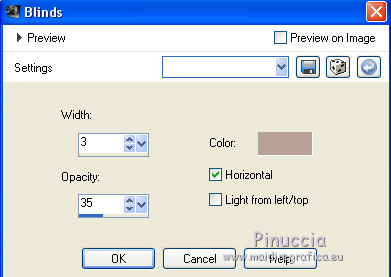
Adjust>Sharpness>Sharpen.
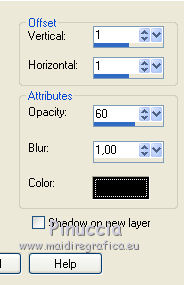
14. Effects>3D Effects>Drop Shadow, background color #745e50 (color 2).
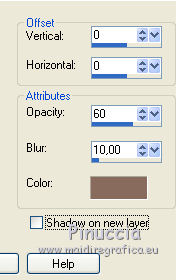
15. Activate the layer Raster 1.
Selections>Load/Save Selection>Load Selection from Alpha Channel.
The selection sélection #1 is immediately available.
You just have to click Load.
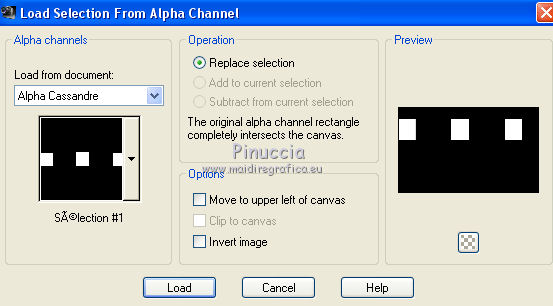
Selections>Promote Selection to Layer.
Layers>Arrange>Bring to Top.
16. Adjust>Blur>Gaussian Blur - radius 30.

17. Layers>New Raster Layer.
Flood Fill  with your foreground color (color 1). with your foreground color (color 1).
18. Selections>Modify>Contract - 3 pixels.
Press CANC on the keyboard 
19. Open the tube fractal_1_tubed_by_thafs and go to Edit>Copy.
Go back to your work and go to Edit>Paste into Selection.
20. Effects>Plugins>Alien Skin Eye Candy 5 Impact - Glass.
Select the preset Glass_CG6 and ok.
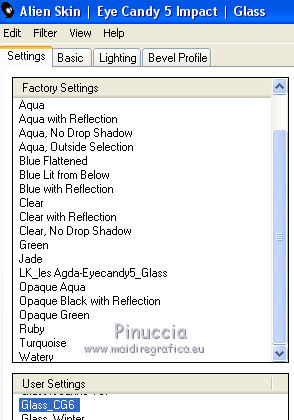
Here below the settings, in case of problems with the preset
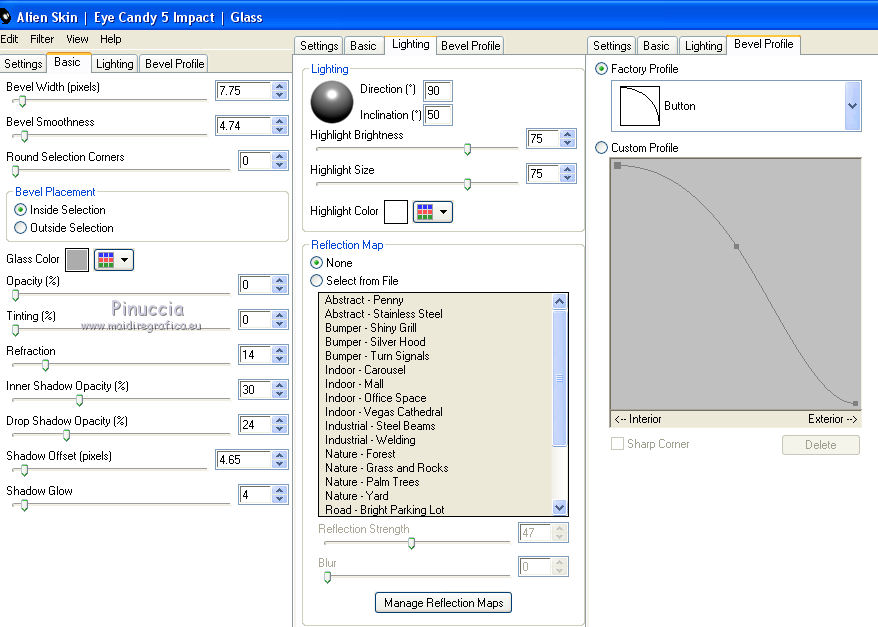
Selections>Select None.
21. Layers>Merge>Merge Down.
22. Effects>3D Effects>Drop Shadow, color black.
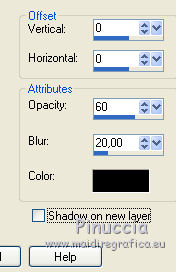
23. Activate again the layer Raster 1.
Selections>Load/Save Selection>Load Selection from Alpha Channel.
Open the Selections Menu and load sélection #2.
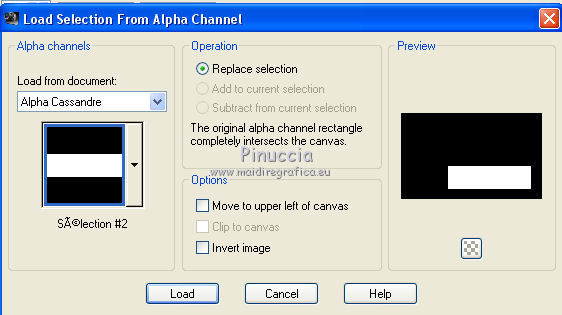
Selections>Promote Selection to layer.
Layers>Arrange>Bring to Top.
24. Adjust>Blur>Gaussian Blur - radius 30

25. Layers>New Raster Layer.
Flood Fill  with your foreground color (color 1). with your foreground color (color 1).
26. Selections>Modify>Contract - 3 pixels.
Press CANC on the keyboard.
27. Edit>Paste into Selection (the tube fractal_1_tubed_by_thafs is still in memory)
28. Effects>Plugins>Alien Skin Eye Candy 5 Impact - Glass, same settings.

Selections>Select None.
29. Layers>Merge>Merge Down.
30. Effects>3D Effects>Drop Shadow, color black.

31. Effects>Distortion Effects>Wave.
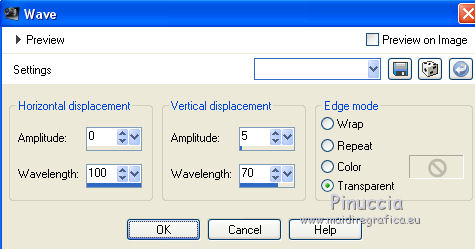
32. Activate the layer Raster 1.
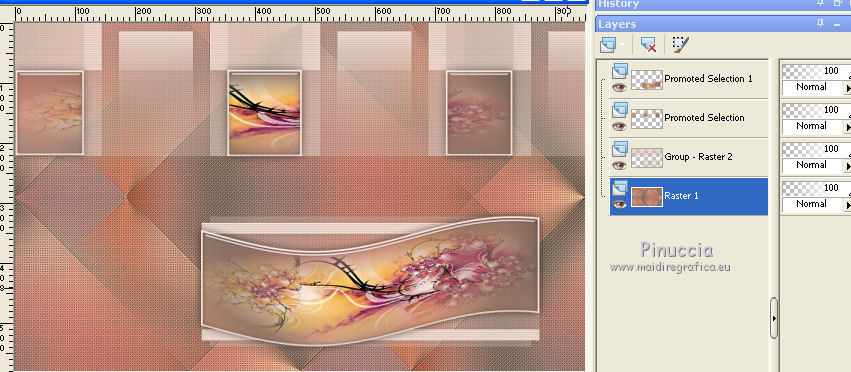
33. Layers>New Raster Layer.
34. Selections>Load/Save Selection>Load Selection from Alpha Channel.
Open the Selections Menu and load sélection #3.
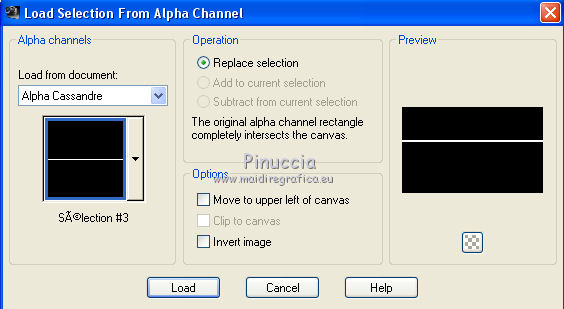
35. Set your foreground color to a Foreground/Background Gradient, style Linear.
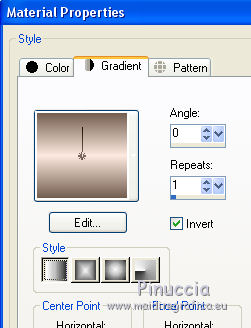
Flood Fill  the selection with your Gradient. the selection with your Gradient.
Selections>Select None.
36. Activate the Pick Tool 
and set Position X: 0,00 and Position Y: 281,00.
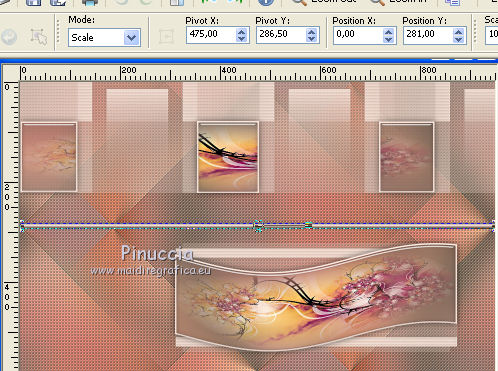
37. Effects>Plugins>Alien Skin Eye Candy 5 Impact - Gradient Glow.
Select the preset glow_Cassandra and ok
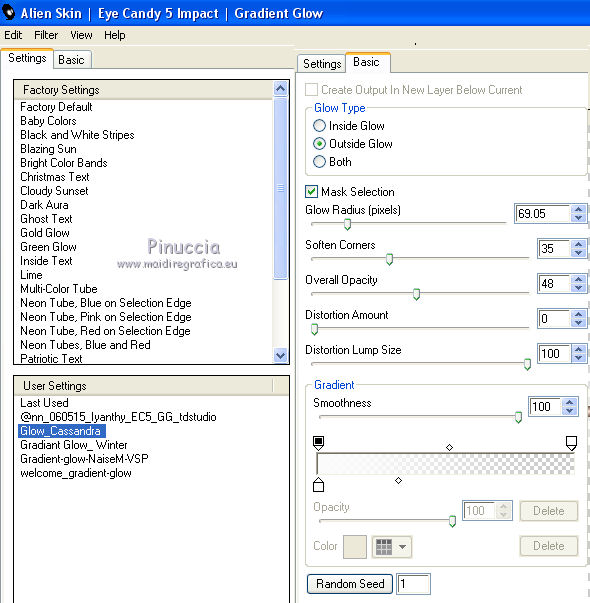
38. Layers>Duplicate.
Set Position X: 0,00 and Position Y: 402,00.

39. Move this layer over the layer Raster 1,
and activate the top layer.
40. Open the wordart dreamsvol3 and go to Edit>Copy.
Go back to your work and go to Edit>Paste as new layer.
Image>Resize, to 55%, resize all layers not checked.
41. Activate the Pick Tool 
and set Position X: 506,00 and Position Y: 227,00.

42. Selections>Select All.
Selections>Float.
Selections>Defloat.
Selections>Modify>Contract - 2 pixels.
Flood Fill  with your Gradient. with your Gradient.
43. Effects>Plugins>Cybia - Screenworks - Dot Screen
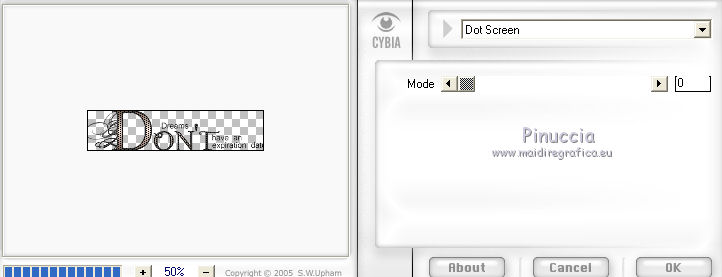
Adjust>Sharpness>Sharpen.
Selections>Select None.
44. Effects>3D Effects>Drop Shadow, color black.
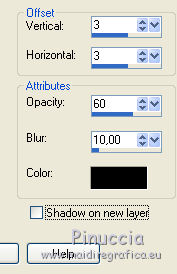
45. Activate the layer Raster 1.
Set your foreground color to white.
Layers>New Raster Layer.
Flood Fill  with color white. with color white.
46. Layers>New Mask layer>From image
Open the menu under the source window
and select the mask Narah_Mask 1175.
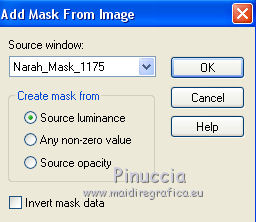
Layers>Merge>Merge Group.
47. Effects>3D Effects>Drop Shadow, color black.
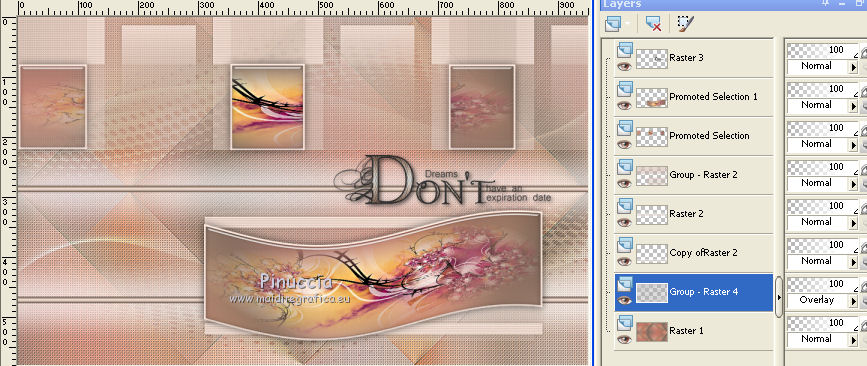
48. Layers>Duplicate.
Image>Flip.
Image>Mirror.
Layers>Merge>Merge Down.
Change the Blend Mode of this layer to Overlay.
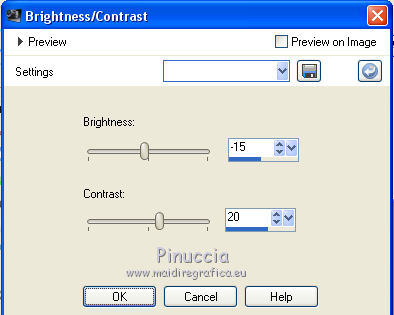
49. Activate the layer Raster 1.
Adjust>Brightness and Contrast>Brightness and Contrast (according to your colors).
50. Activate the top layer.
Open the tube deco and go to Edit>Copy.
Go back to your work and go to Edit>Paste as new layer.
Place  rightly the tube. rightly the tube.
Adjust>Sharpness>Sharpen.
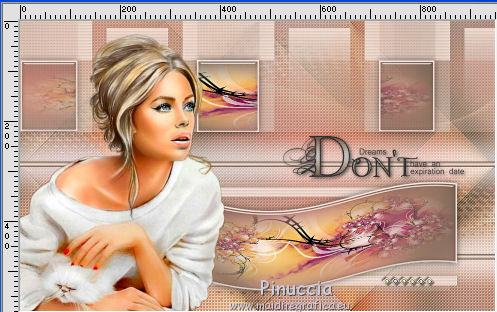
51. Open the tube My Lil Kitty_LR-3-23-18 and go to Edit>Copy.
Go back to your work and go to Edit>Paste as new layer.
Image>Mirror.
Image>Resize, to 97%, resize all layers not checked.
Move  the tube to the left side. the tube to the left side.
52. Effects>3D Effects>Drop Shadow, color black.

53. For the borders, set again your foreground color to color 1 ##fde9df

Image>Add borders,1 pixels, symmetric, background color (color 2)
Image>Add borders,3 pixels, symmetric, foreground color (color 1).
Image>Add borders,1 pixel, symmetric, background color (color 2).
54. Selections>Select All.
Image>Add borders,25 pixels, symmetric, color white.
Selections>Invert.
55. Effects>Reflection Effects>Pattern.
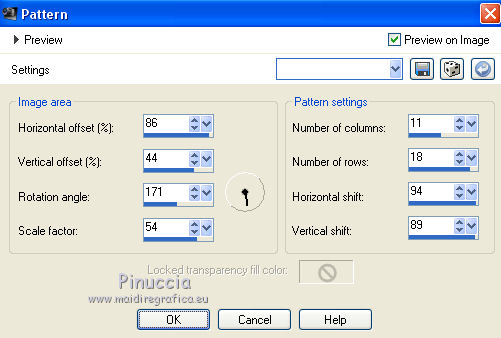
Keep selected.
56. Effects>3D Effects>Inner Bevel.
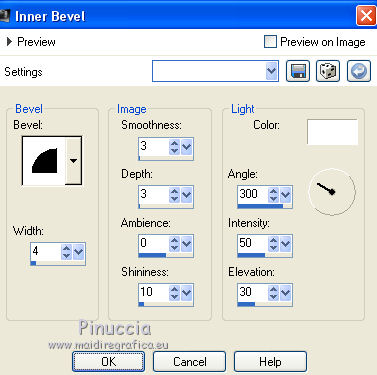
Selections>Select None.
57. Image>Add borders,1 pixels, symmetric, background color (color 2)
Image>Add borders,3 pixels, symmetric, foreground color (color 1).
Image>Add borders,1 pixel, symmetric, background color (color 2).
58. Image>Resize, 950 pixels width, resize all layer checked.
Sign your work and save as jpg.
For the tube of this versions - titled Mina@-Pinuccia.09.15, thanks Mina
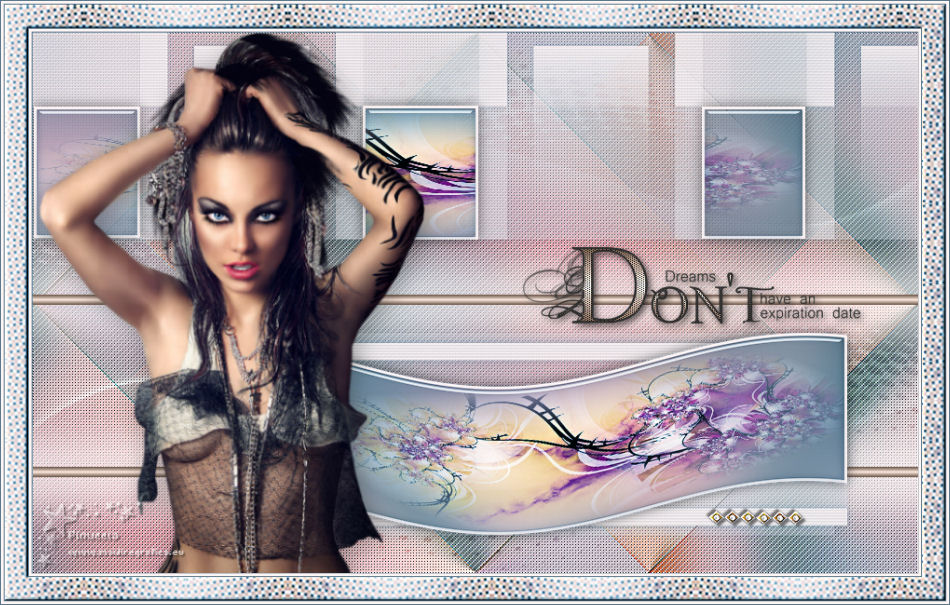

If you have problems or doubts, or you find a not worked link, or only for tell me that you enjoyed this tutorial, write to me.
17 January 2019
|
 english version