|
BONJOUR L'AUTOMNE
 english version

Thanks Carine for your invitation to translate

This tutorial was written with CorelX17 and translated with CorelX17, but it can also be made using other versions of PSP.
Since version PSP X4, Image>Mirror was replaced with Image>Flip Horizontal,
and Image>Flip with Image>Flip Vertical, there are some variables.
In versions X5 and X6, the functions have been improved by making available the Objects menu.
In the latest version X7 command Image>Mirror and Image>Flip returned, but with new differences.
See my schedule here
italian translation here
your versions here
Material here
Thanks for the tubes Maryse, Dimitri and Sara.
(The links of the tubemakers here).
Plugins:
consult, if necessary, my filter section here
Filters Unlimited 2.0 here
Cybia - Screenworks - Mezzo Grain here
Mura's Meister - Perspective Tiling here
AAA Frames - Foto Frame here
Filters Cybia can be used alone or imported into Filters Unlimited.
(How do, you see here)
If a plugin supplied appears with this icon  it must necessarily be imported into Unlimited it must necessarily be imported into Unlimited

You can change Blend Modes according to your colors.
In the newest versions of PSP, you don't find the foreground/background gradient (Corel_06_029).
You can use the gradients of the older versions.
The Gradient of CorelX here
Copy the preset Emboss 3 in the Presets Folder.
Open the masks in PSP and minimize them with the rest of the material.
1. Open Alpha Automne.
Window>Duplicate, or on the keyboard shift+D, to make a copy.
Close the original.
The copy, that will be the basis of your work, is not empty,
but contains the selections saved on the alpha channel.
2. Selections>Select All.
Open the background image AutumnBreew and go to Edit>Copy.
Go back to your work and go to Edit>Paste into Selection.
Selections>Select None.
3. Effects>Image Effects>Seamless Tiling.
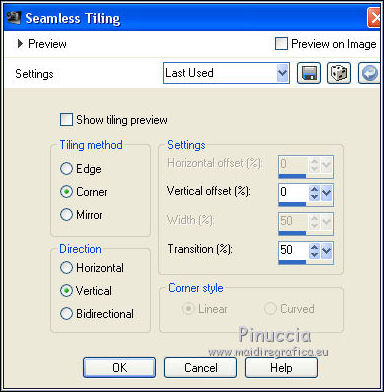
Effects>Edge Effects>Enhance.
4. Layers>New Raster Layer - Raster 2.
Set your foreground color to #65391d.
Flood Fill  with your foreground color #65391d with your foreground color #65391d
5. Layers>New Mask layer>From image
Open the menu under the source window and you'll see all the files open.
Select the mask Akre_FreebiePapers2
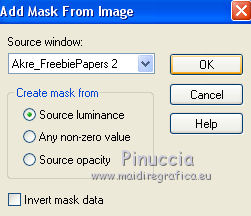
Layers>Merge>Merge Group.
Change the Blend Mode of this layer to Overlay.
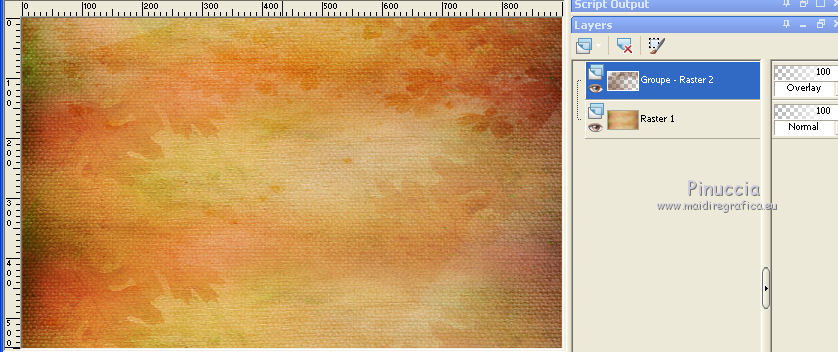
6. Effects>User Defined Filters - select the preset Emboss 3 and ok.

7. Layers>Merge>Merge Down.
8. Layers>New Raster Layer - Raster 2.
Flood Fill  with your foreground color #65391d with your foreground color #65391d
9. Layers>New Mask layer>From image
Open the menu under the source window and you'll see all the files open.
Select the mask 2bitMask_34, Invert data mask checked.
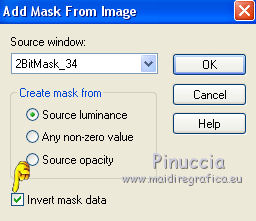
Layers>Merge>Merge Group.
10. Effects>User Defined Filter - Emboss 3.
11. Effects>Image Effects>Seamless Tiling.

12. Layers>Duplicate.
Image>Free Rotate - 90 degrees to left.

13. Selections>Load/Save Selection>Load Selection from Alpha Channel.
The selection sélection #1 is immediately available.
You just have to click Load.
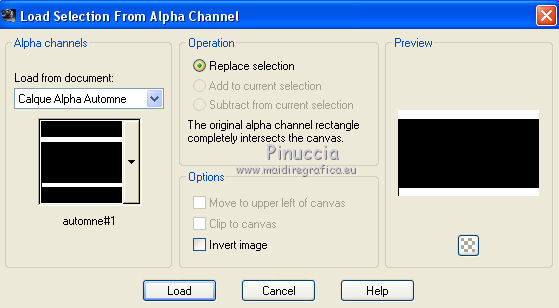
Press CANC on the keyboard 
Selections>Select None.
14. Layers>Merge>Merge Down.
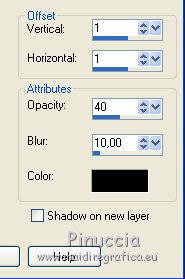
15. Effects>3D Effects>Drop Shadow, color black.
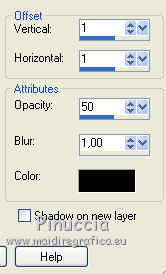
16. Layers>New Raster Layer, Raster 2.
Selections>Load/Save Selection>Load Selection from Alpha Channel.
Open the Selections Menu and load sélection #2.
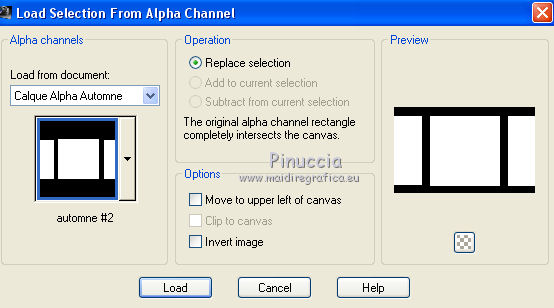
17. Open the landscape tube by Dimitri and go to Edit>Copy.
Go back to your work and go to Edit>Paste into Selection.
Keep selected.
18. Layers>New Raster Layer.
Flood Fill  with your foreground color #65391d. with your foreground color #65391d.
19. Selections>Modify>Contract - 2 pixels.
20. Keep your foreground color to #65391d,
and set your background color to #d08a42
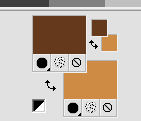
Set your foreground color to a Foreground/Background Gradient, style Linear.
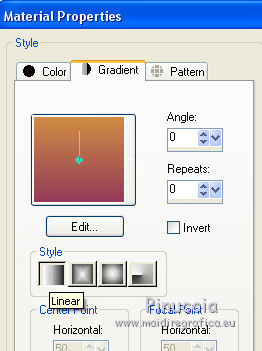
Flood Fill  the selection with your gradient. the selection with your gradient.
21. Selections>Modify>Contract - 10 pixels.
Set again your foreground color to Color
Flood Fill  with your foreground color #65391d,. with your foreground color #65391d,.
22. Selections>Modify>Contract - 2 pixels.
Press CANC on the keyboard 
23. Selections>Invert.
Adjust>Add/Remove Noise>Add Noise.
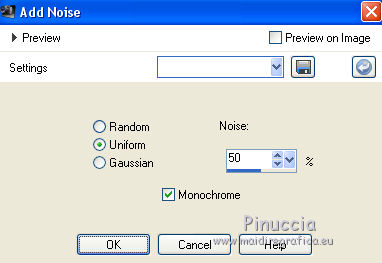
24. Effects>3D Effects>Drop Shadow, color black.
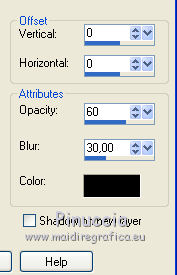
Selections>Select None.
25. Activate the landscape layer, Raster 2.
Selections>Load/Save Selection>Load Selection from Alpha Channel.
Open the Selections Menu and load sélection #3.
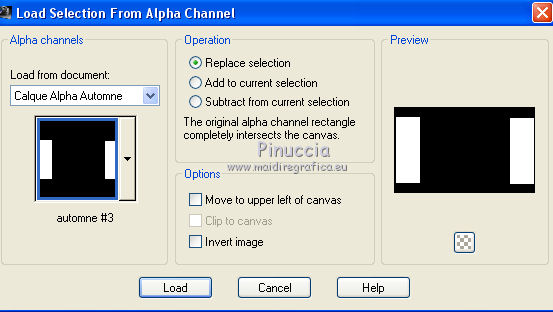
Selections>Promote Selection to Layer.
26. Change the Blend Mode of this layer to Overlay.
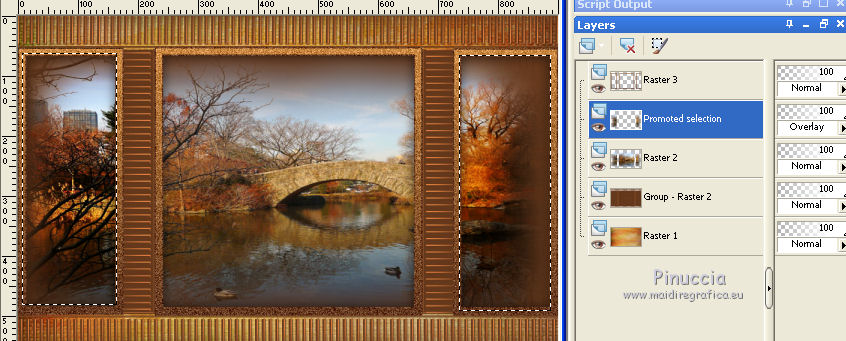
27. Effects>Art Media Effects>Brush Strokes, color #c0c0c0.
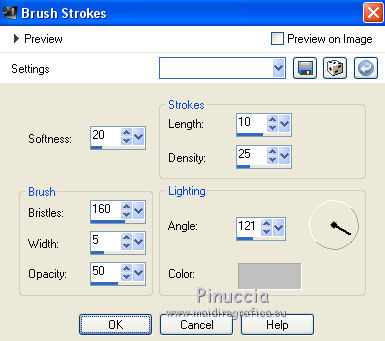
Selections>Select None.
28. Activate the layer Raster 1.
Layers>Duplicate.
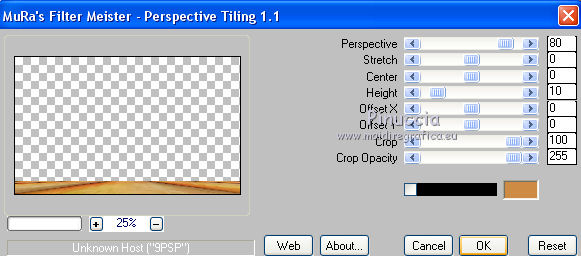
Layers>Arrange>Move Up (over the mask layer, Group Raster 2).
29. Effects>Plugins>Mura's Meister - Perspective Tiling.
30. Image>Add borders, 1 pixel, symmetric, color #e6c573.
Image>Add borders, 2 pixels, symmetric, foreground color #65391d.
Image>Add borders, 1 pixel, symmetric, color #e6c573.
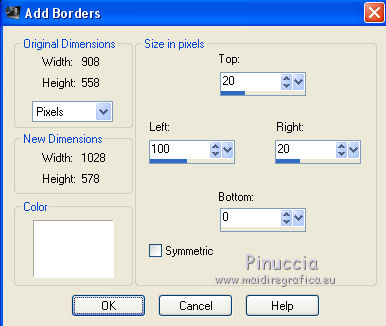
31. Selections>Select All.
Image>Add borders, symmetric not checked, color white.
32. Selections>Invert.
Set again your foreground color to Gradient

Flood Fill  the selection with your gradient. the selection with your gradient.
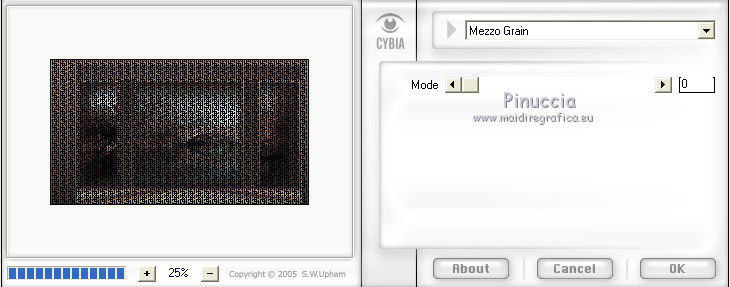
33. Effects>Plugins>Cybia - Screenworks - Mezzo Grain
34. Selections>Invert.
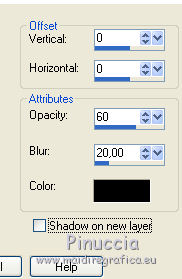
Effects>3D Effects>Drop Shadow, color black.
Selections>Select None.
35. Open tube Automn Seeds 1 and go to Edit>Copy.
Go back to your work and go to Edit>Paste as new layer.
Image>Resize, to 85%, resize all layers not checked.
36. Activate the Pick Tool 
and set Position X: 635,00 and Position Y: 302,00.

37. Open the tube deco 1 and go to Edit>Copy.
Go back to your work and go to Edit>Paste as new layer.
38. Activate the Pick Tool 
and set Position X: 647,00 and Position Y: 532,00.

39. Open Texte Automne and go to Edit>Copy.
Go back to your work and go to Edit>Paste as new layer.
Move  it to the left side. it to the left side.
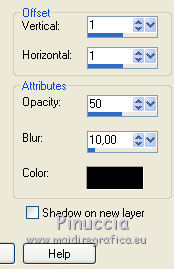
40. Effects>3D Effects>Drop Shadow, color black.
41. Open the squirrel tube by Sara and go to Edit>Copy.
Go back to your work and go to Edit>Paste as new layer.
Image>Resize, to 28%, resize all layers not checked.
Move  the tube at the bottom right. the tube at the bottom right.
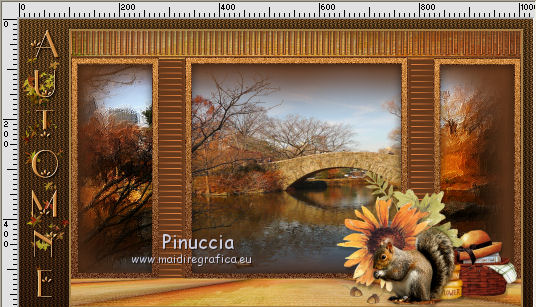
42. Effects>3D Effects>Drop Shadow, color black.
43. Image>Add borders, 2 pixels, symmetric, color #e6c573.
Selections>Select All.
Edit>Copy (to keep in memory your work).
Image>Add borders, 20 pixels, symmetric, color white.
44. Selections>Invert.
Edit>Paste into Selection.
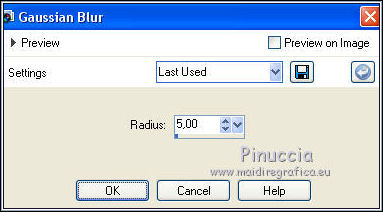
45. Adjust>Blur>Gaussian Blur - radius 5.
Selections>Select None.
46. Open the tube by Maryse, erase the watermark and go to Edit>Copy.
Go back to your work and go to Edit>Paste as new layer.
Image>Resize, to 75%, resize all layers not checked.
Place  rightly the tube, see my example. rightly the tube, see my example.
47. Layers>Duplicate.
Adjust>Blur>Gaussian Blur - radius 10.

Change the Blend Mode of this layer to Multiply.
Layers>Arrange>Move Down.
49. Layers>Merge>Merge visible.
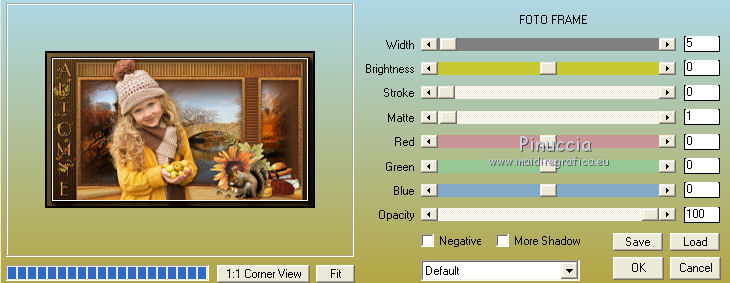
50. Effects>Plugins>AAA Frames - Foto Frame.
51. Sign your work.
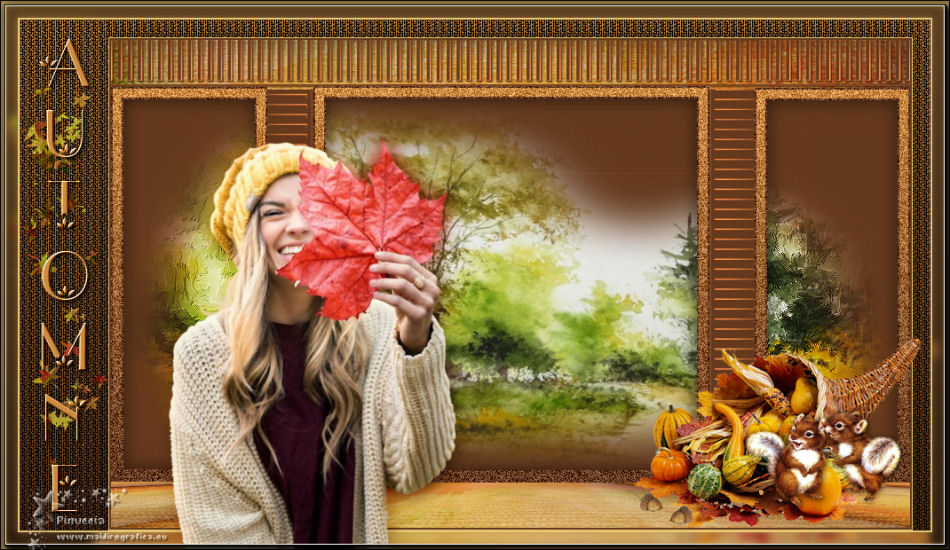
Image>Resize, 950 pixels width, resize all layers checked.
Save as jpg.
The tubes of this version are by Wieskes and Jewel

If you have problems or doubts, or you find a not worked link, or only for tell me that you enjoyed this tutorial, write to me.
29 August 2018
|
 english version
