|
LAURE


Thanks Evalynda for the invitation to translate your tutorials

This tutorial was written with PSPX8 and translated with PSPX7 and PSPX3, but it can also be made using other versions of PSP.
Since version PSP X4, Image>Mirror was replaced with Image>Flip Horizontal,
and Image>Flip with Image>Flip Vertical, there are some variables.
In versions X5 and X6, the functions have been improved by making available the Objects menu.
In the latest version X7 command Image>Mirror and Image>Flip returned, but with new differences.
See my schedule here
italian translation here
For this tutorial, you will need:
Material here
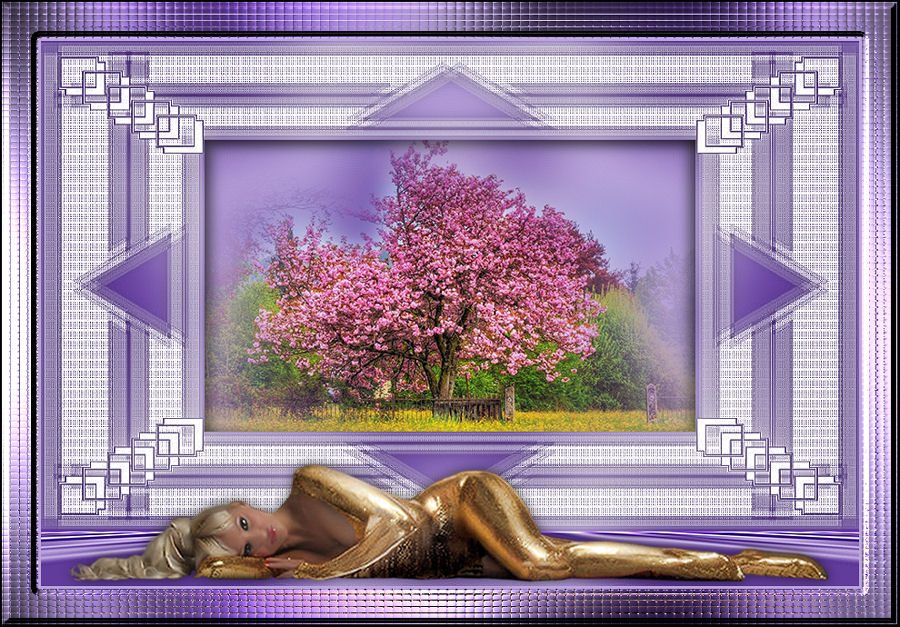
Thanks for the mask Valyscrappassion; for the woman Nikita and for the landscape Colybrix.
(The links of the tubemakers here).
Plugins:
consult, if necessary, my filter section here
Filters Unlimited 2.0 here
Graphics Plus - Cross Shadow, Kaleidoscope here
Mura's Meister - Perspective Tiling here
Filters Graphics Plus can be used alone or imported into Filters Unlimited.
(How do, you see here)
If a plugin supplied appears with this icon  it must necessarily be imported into Unlimited it must necessarily be imported into Unlimited

You can change Blend Modes according to your colors.
In the newest versions of PSP, you don't find the foreground/background gradient (Corel_06_029).
You can use the gradients of the older versions.
The Gradient of CorelX here
Open the mask in PSP and minimize it with the rest of the material.
Set your foreground color to light color #bca7dd
and your background color to dark color #613c9b.
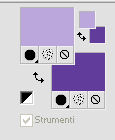
Set your foreground color to a Foreground/Background Gradient, style Rectangular.
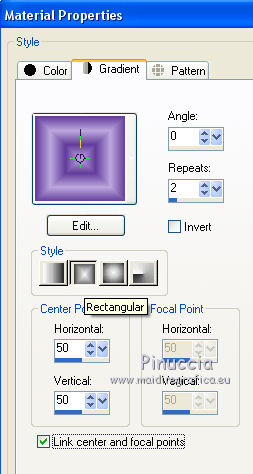
1. Open a new transparent image 900 x 600 pixels.
Flood Fill  the transparent image with your Gradient. the transparent image with your Gradient.
2. Effects>Plugins>Graphics Plus - Kaleidoscope.
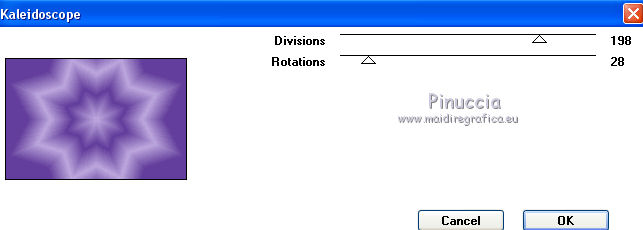
Adjust>Blur>Gaussian Blur - radius 20.

Effects>Edge Effects>Enhance More.
3. Layers>Duplicate.
Effects>Plugins>Mura's Meister - Perspective Tiling.
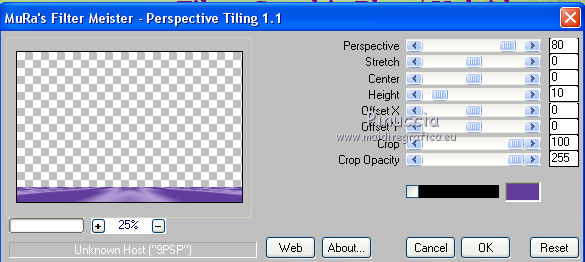
Adjust>Sharpness>Sharpen More - 2 times.
4. Set your foreground color to white #ffffff.
Layers>New Raster Layer.
Flood Fill  the layer with color white. the layer with color white.
Layers>New Mask layer>From image
Open the menu under the source window and you'll see all the files open.
Select the mask vsp119.
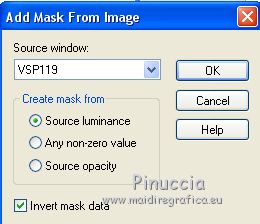
Effects>Edge Effects>Enhance.
Layers>Merge>Merge Group.
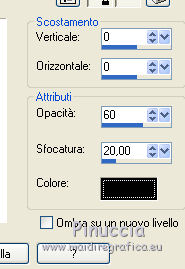
Effects>3D Effects>Drop Shadow,color black.
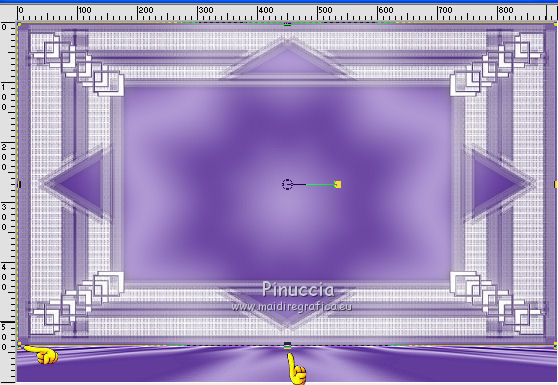
5. K key on the keyboard to activate the Pick Tool 
If you don't see the Rules, go to View>Rules.
Mode Scale 
pull the botton central node up to 540 pixels.
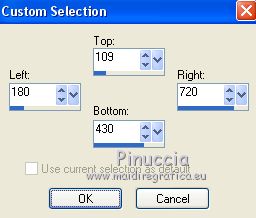
6. Selection Tool 
(no matter the type of selection, because with the custom selection your always get a rectangle)
clic on the Custom Selection 
and set the following settings.
7. Layers>New Raster Layer.
Effects>3D Effects>Cutout.
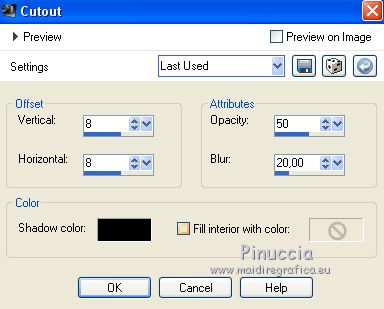
Keep selected.
Layers>New Raster Layer.
Effects>3D Effects>Cutout
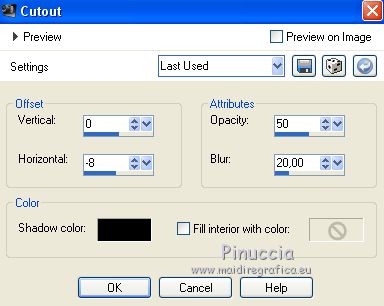
Keep always selected.
Layers>Merge>Merge Down.
8. Open the landscape tube and go to Edit>Copy.
Go back to your work and go to Edit>Paste as new layer.
Image>Resize, to 94%, resize all layers not checked.
Move  the tube a bit higher. the tube a bit higher.
Selections>Invert.
Press CANC on the keyboard 
Selections>Select None.
Selezione>Deseleziona.
9. Open the woman tube and go to Edit>Copy.
Go back to your work and go to Edit>Paste as new layer.
Image>Resize, 2 times to 110%, resize all layers not checked.
Objects>Align>Bottom
If you are working with a previous version that doesn't make the Object menu available,
use your Move Tool  to move the tube down. to move the tube down.
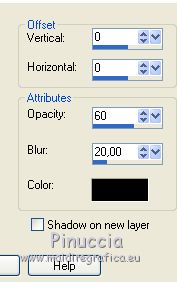
Effects>3D Effects>Drop Shadow,same settings.
10. Set again your foreground color to light color #bca7dd.

Change the settings of your Gradient, style Linear.
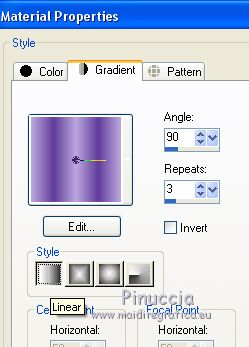
Image>Add borders, 3 pixels, symmetric, light color.
Selections>Select All.
Image>Add borders, 40 pixels, symmetric, color white.
Selections>Invert.
Flood Fill  the selection with your Gradient. the selection with your Gradient.
11. Effects>Plugins>Graphics Plus - Cross Shadow, default settings.

12. Effects>Texture Effects>Mosaic - Glass.
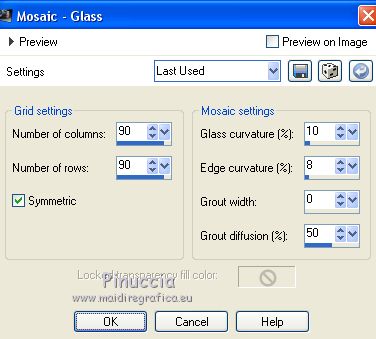
Selections>Promote Selection to Layer.
Effects>3D Effects>Inner Bevel.
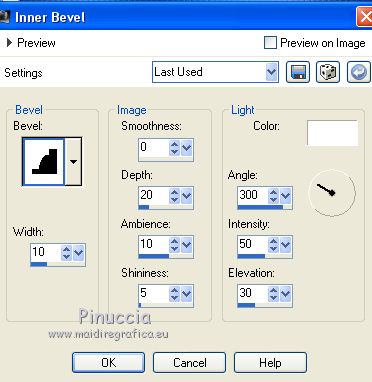
Selections>Select None.
Image>Add borders, 2 pixels, symmetric, color black.
13. Image>Resize, 900 pixels width, resize all layers checked.
14. Add, if you want, a text.
15. Sign your work and save as jpg.
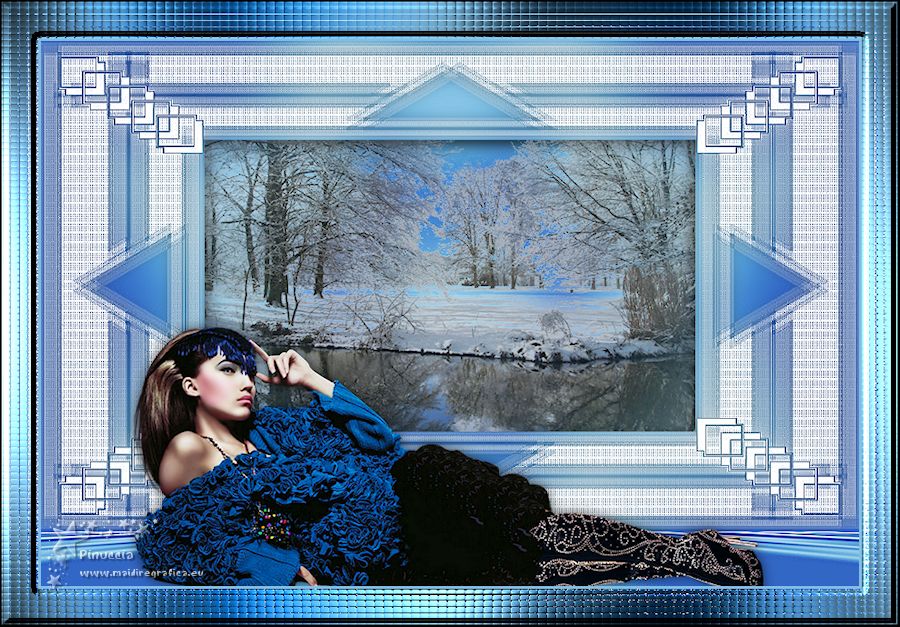
The tubes of this version are by Tocha and Nikita

If you have problems or doubts, or you find a not worked link, or only for tell me that you enjoyed this tutorial, write to me.
11 March 2019
|

