|
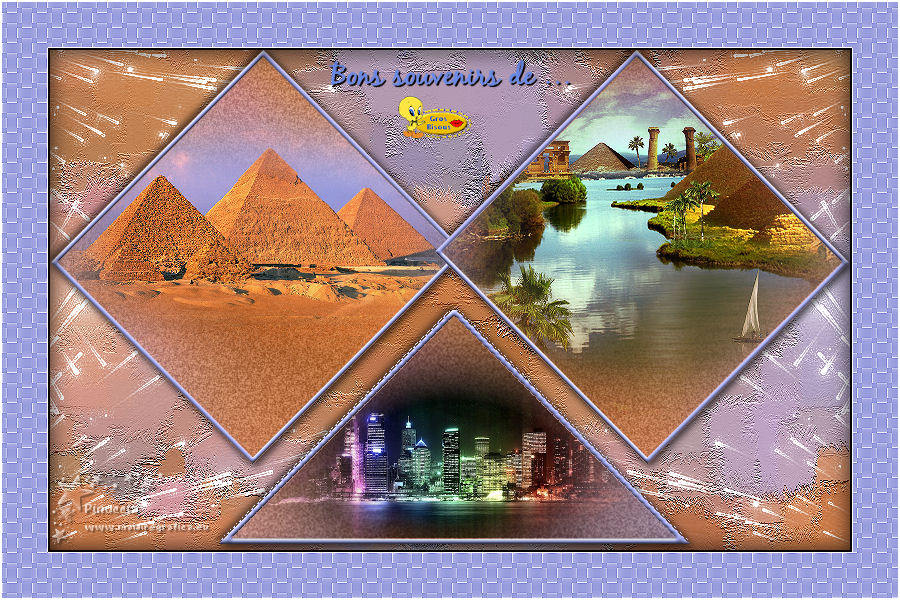
BONS SOUVENIRS DE...
 GOOD MEMORIES OF.... GOOD MEMORIES OF....

Thanks Evalynda for the invitation to translate your tutorials

This tutorial was written with PSPX8 and translated with PSPX7 and PSPX3, but it can also be made using other versions of PSP.
Since version PSP X4, Image>Mirror was replaced with Image>Flip Horizontal,
and Image>Flip with Image>Flip Vertical, there are some variables.
In versions X5 and X6, the functions have been improved by making available the Objects menu.
In the latest version X7 command Image>Mirror and Image>Flip returned, but with new differences.
See my schedule here
 italian translation here italian translation here
For this tutorial, you will need:
Material here
Thanks for the tubes Colybrix, Valy, Nikita and for the mask Narah.
(The links of material creators here).
Plugins:
consult, if necessary, my filter section here
Mehdi - Sorting Tiles here

You can change Blend Modes according to your colors.
In the newest versions of PSP, you don't find the foreground/background gradient (Corel_06_029).
You can use the gradients of the older versions.
The Gradient of CorelX here
(Don't forget to erase the watermarks of the tubes and don't save the modifications when you'll close them)
Open the mask in PSP and minimize it with the rest of the material.
1. Set your foreground color to light color #e4884e,
and your background color to dark color #989ddd
(two contrasting colors)
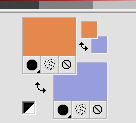
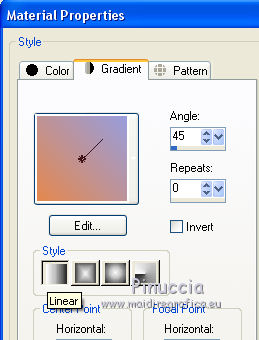
Set your foreground color to a Foreground/Background Gradient, style Linear.
Note: if you use your own photos or images instead of landscape misted, skip step 6.
1. Open a new transparent image 800 x 500 pixels,
Flood Fill  the transparent image with your Gradient. the transparent image with your Gradient.
Open the tube by Colybrix Egypte1-coly and go to Edit>Copy.
Go back to your work and go to Edit>Paste as new layer.
2. Effects>Image Effects>Seamless Tiling, default settings.

3. Adjust>Blur>Gaussian Blur - radius 30.

4. Effects>Plugins>Mehdi - Sorting Tiles.
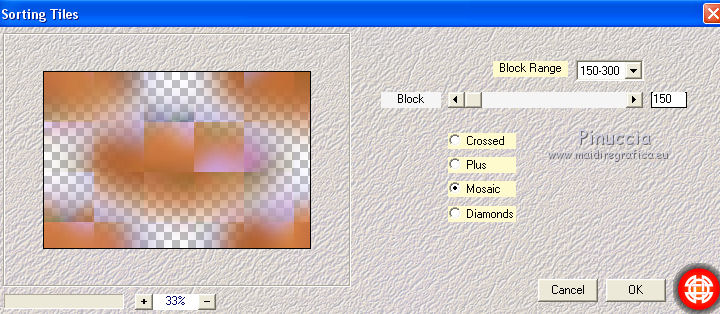
Layers>Merge>Merge Down.
Effects>Edge Effects>Enhance More.
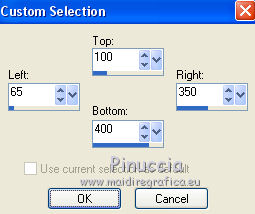
5. Selection Tool 
(no matter the type of selection, because with the custom selection your always get a rectangle)
clic on the Custom Selection 
and set the following settings.
Selections>Promote Selection to Layer.
if you are using your own photos, go to step 7
6. Keep selected.
Adjust>Blur>Gaussian Blur - radius 20.

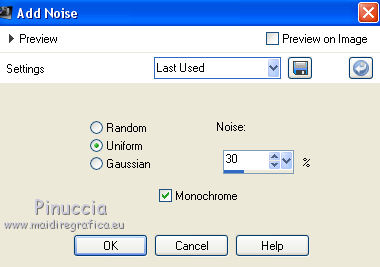
Adjust>Add/Remove Noise>Add Noise.
7. Selections>Select None.
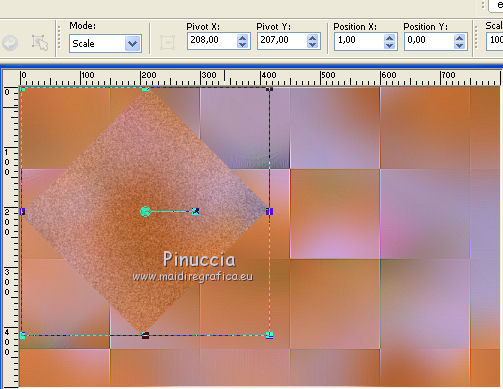
Image>Free Rotate - 45 degrees to right.

Objects>Align>Top
If you're working with a previous version, that doesn't make the Objects menu available,
K key on the keyboard to activate your Pick Tool 
and set Position Y to 0,00.
Rename this layer "table".
8. Selections>Select All.
Selections>Float.
Selections>Defloat.
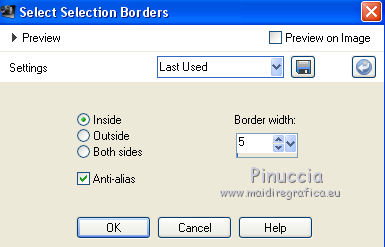
Selections>Modify>Select Selection Borders.
9. Selections>Promote Selection to layer.
Flood Fill  the selection with your background color. the selection with your background color.
Effects>3D Effects>Inner Bevel.
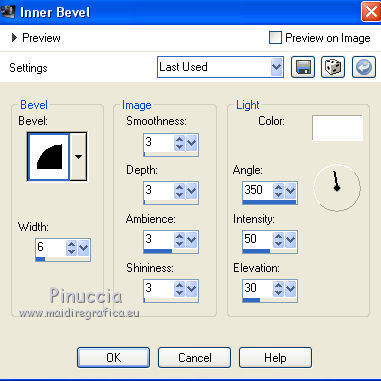
Selections>Select None.
Rename this layer "frame".
10. Activate your Magic Wand Tool  , tolerance and feather 0, , tolerance and feather 0,
and click in the frame to select it.
Edit>Paste as new layer (the tube Egypte1-coly is still in memory).
Image>Resize, to 60%, resize all layers not checked.
Optional: Adjust>Sharpness>Sharpen.
Place  the tube in the selection, as you like. the tube in the selection, as you like.
Selections>Invert.
Press CANC on the keyboard 
Selections>Select None.
11. Activate the layer "table".
Layers>Duplicate.
Rename this layer "table 2".
Layers>Arrange>Bring to Top.
Image>Mirror.
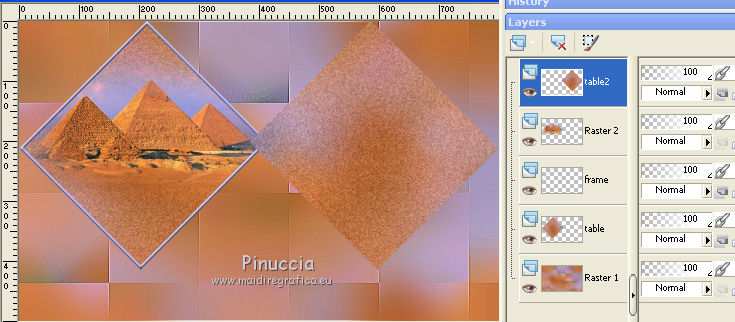
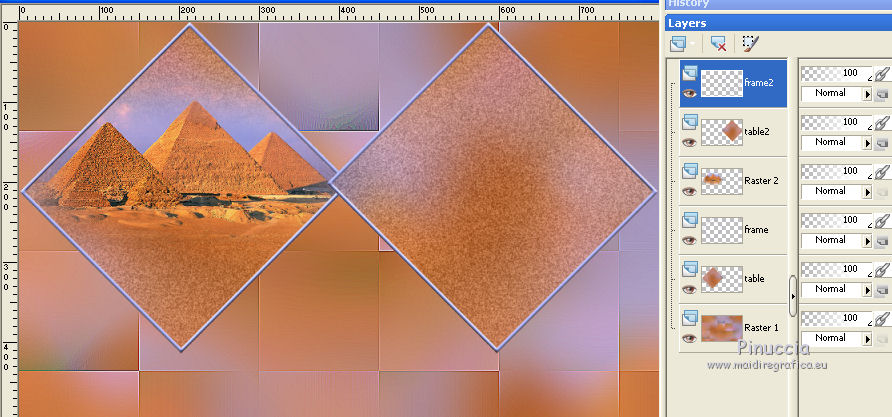
12. Activate the layer "frame".
Layers>Duplicate.
Rename this layer "frame 2".
Layers>Arrange>Bring to Top.
Image>Mirror.
13. Activate your Magic Wand Tool  , tolerance and feather 0, , tolerance and feather 0,
and click in the frame to select it.
Open the tube by Valy misted PaysageVSP36 and go to Edit>Copy.
Go back to your work and go to Edit>Paste as new layer.
Image>Resize, to 50%, resize all layers not checked.
Optional: Adjust>Sharpness>Sharpen.
Move  the tube in the selection, as you like. the tube in the selection, as you like.
Selections>Invert.
Press CANC on the keyboard.
Selections>Select None.
14. Activate the layer "table".
Layers>Duplicate.
Layers>Arrange>Bring to Top.
15. Custom Selection 
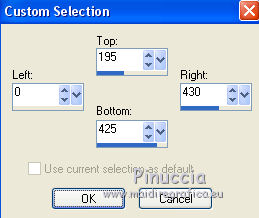
Press CANC on the keyboard.
Selections>Select None.
16. Image>Resize, to 120%, resize all layers not checked.
Pick Tool 
and set Position X: 170,00 and Position Y: 260,00.
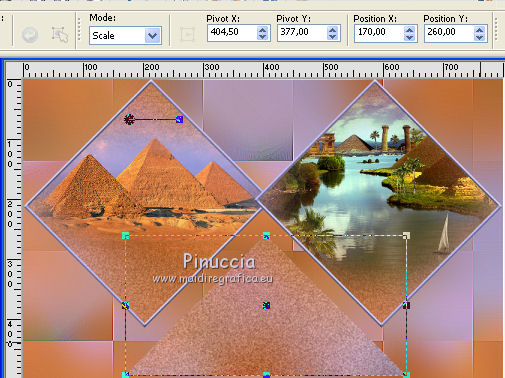
17. Activate your Magic Wand Tool 
and click on the empty part, outside the triangle, to select it.
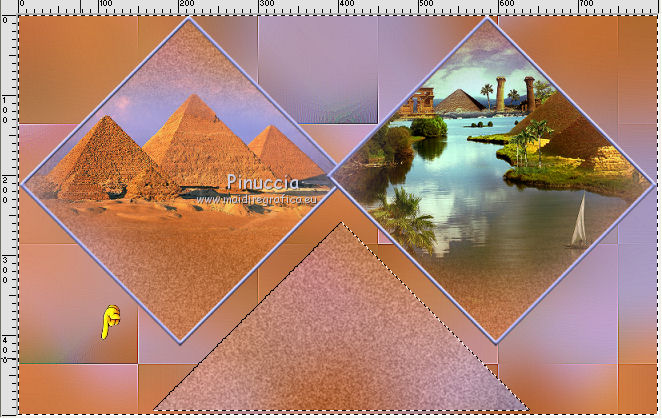
Selections>Invert.
Selections>Modify>Select Selection Borders, same settings.

Selections>Promote Selection to layer.
Flood Fill  the selection with your background color. the selection with your background color.
18. Effects>3D Effects>Inner Bevel, same settings.

Selections>Select None.
19. Activate your Magic Wand Tool 
and click in the triangular frame to select it.
Open the Nikita's landscape and go to Edit>Copy.
Go back to your work and go to Edit>Paste as new layer.
Image>Resize, to 50%, resize all layers not checked.
Optional: Adjust>Sharpness>Sharpen.
Move  the tube in the selection as you like. the tube in the selection as you like.
Selections>Invert.
Press CANC on the keyboard.
Selections>Select None.
20. Close the bottom layer, Raster 1 - and stay on the top layer.
Layers>Merge>Merge visible.
21. Effects>3D Effects>Drop Shadow, color black.
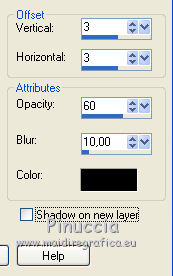
Repeat Drop Shadow, vertical and horizontal -3.
22. Open the text and go to Edit>Copy.
Go back to your work and go to Edit>Paste as new layer.
Place  the text as you like, or see my example. the text as you like, or see my example.
23. Open and activate the bottom layer.
Effects>Art Media Effects>Brush Strokes.
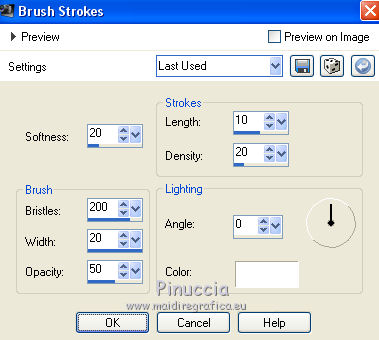
Adjust>Sharpness>Sharpen.
24. Set your foreground color to white.
Layers>New Raster Layer.
Flood Fill  the layer with color white. the layer with color white.
Layers>New Mask layer>From image
Open the menu under the source window and you'll see all the files open.
Select the mask NarahsMasks_1646
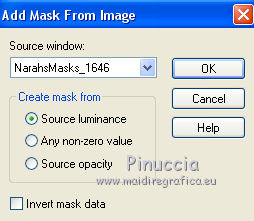
Effects>Edge Effects>Enhance More.
Layers>Merge>Merge Group.
Layers>Duplicate.
Image>Mirror.
25. Image>Add borders, 2 pixels, symmetric, color black.
Selections>Select All.
Image>Add borders, 46 pixels, symmetric, background color.
Selections>Invert.
Effects>Texture Effects>Weave
weave color: white
gap color: background color.
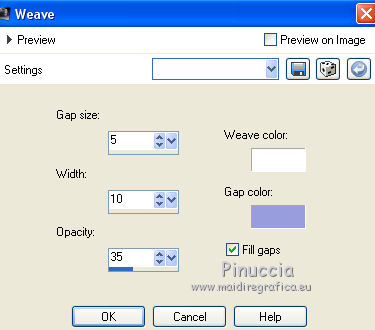
Effects>Edge Effects>Enhance.
26. Effects>3D Effects>Drop Shadow, color black.
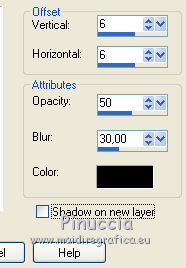
Repeat Drop Shadow, vertical and horizontal -6.
Selections>Select None.
Image>Add borders, 2 pixels, symmetric, color white.
Sign your work and save as jpg.
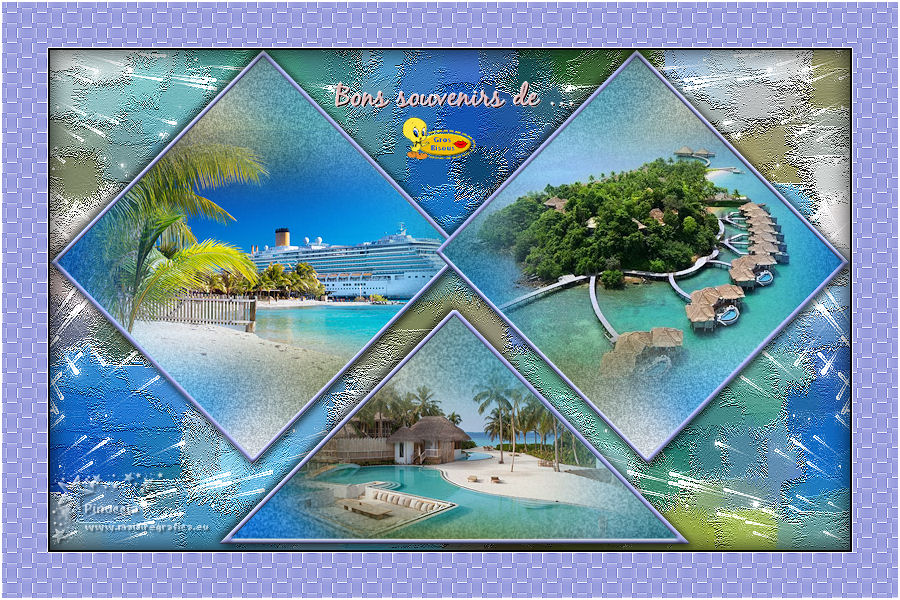
Version with pictures by my uncle Nino.
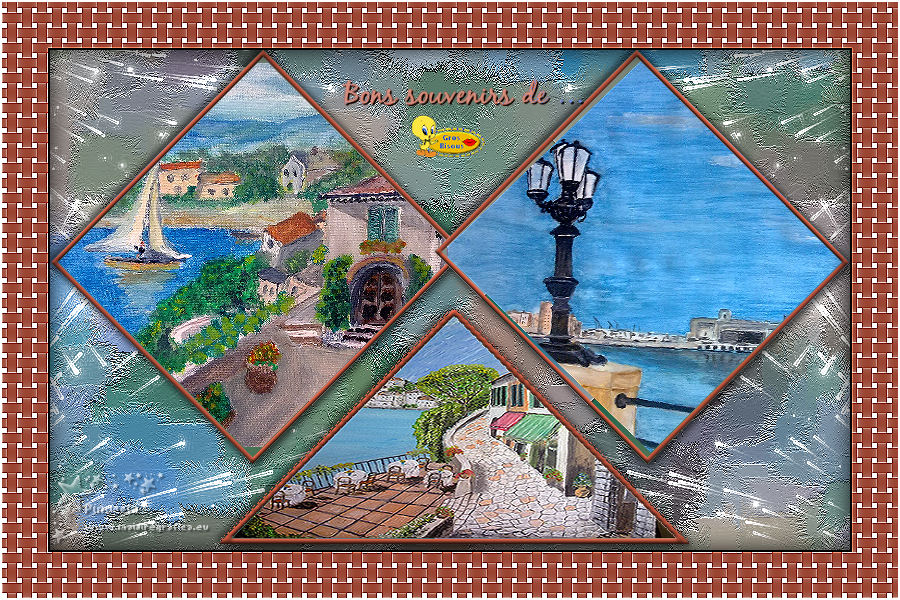
Version with images from the Caraibi tubed by me

If you have problems or doubts, or you find a not worked link,
or only for tell me that you enjoyed this tutorial, write to me.
4 Juillet 2021
|
 GOOD MEMORIES OF....

 GOOD MEMORIES OF....