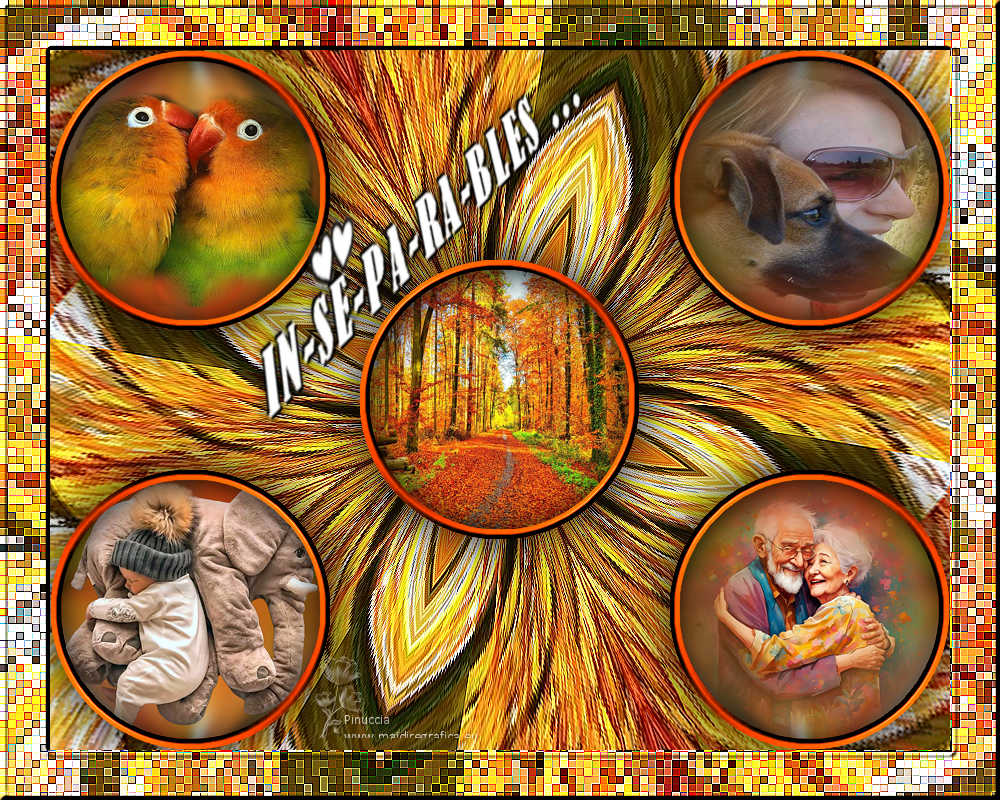
|
INSEPARABLES


Thanks Evalynda for the invitation to translate your tutorials

This tutorial was translated with PSPX and PSPX3, but it can also be made using other versions of PSP.
Since version PSP X4, Image>Mirror was replaced with Image>Flip Horizontal,
and Image>Flip with Image>Flip Vertical, there are some variables.
In versions X5 and X6, the functions have been improved by making available the Objects menu.
In the latest version X7 command Image>Mirror and Image>Flip returned, but with new differences.
See my schedule here
 italian translation here italian translation here
For this tutorial, you will need:

Thanks for one tube Silvie; the other tubes are my misted.
(The links of material creators here).

consult, if necessary, my filter section here
Birgits Chaos - Mosaik here
Filters Unlimited 2.0 here
CPK Designs - Puzzles here
Filters CPK Designs can be used alone or imported into Filters Unlimited.
(How do, you see here)
If a plugin supplied appears with this icon  it must necessarily be imported into Unlimited it must necessarily be imported into Unlimited

You can change Blend Modes according to your colors.

Choose a color from your background image and set is as foreground color.
For me #cc3300

1. Open a new transparent image 900 x 700 pixels.
Selections>Select All.
Open your background color, well colored, for me Image Automne 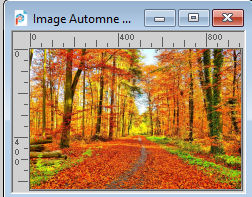
Edit>Copy.
Go back to your work and go to Edit>Paste into Selection.
Selections>Select None.
2. Layers>Duplicate.
Close the layer Raster and go on to work on the layer Copy of Raster 1.
3. Adjust>Blur>Gaussian Blur - radius 35.

Effects>Geometric Effects>Circle.

4. Image>Resize, to 40%, resize all layers not checked.
Activate your Magic Wand Tool 

Click on the transparent part to select it.
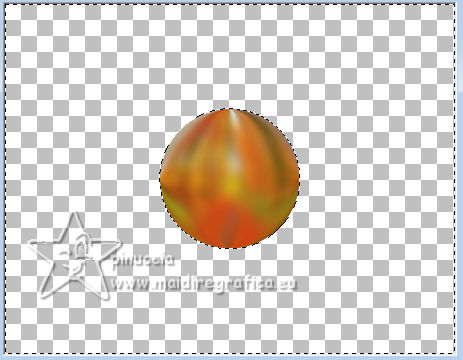
Selections>Invert.
5. Selections>Modify>Select Selection Borders.
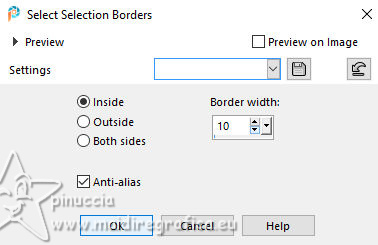
Flood Fill  the selection with your foreground color. the selection with your foreground color.
6. Effects>3D Effects>Inner Bevel.
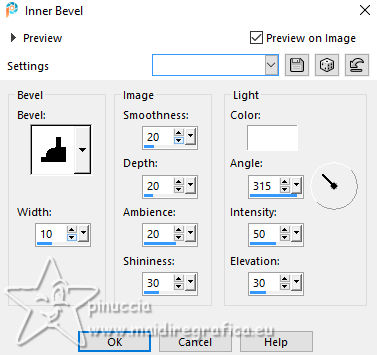
Selections>Select None.
7. Layers>Duplicate.
Objects>Align>Top.
Objects>Align>Left.
or Pick Tool (K) 

8. Layers>Duplicate.
Image>Mirror.
Layers>Duplicate.
Image>Flip.
Layers>Duplicate.
Image>Mirror.
Now the five round frames are ready to be filled.
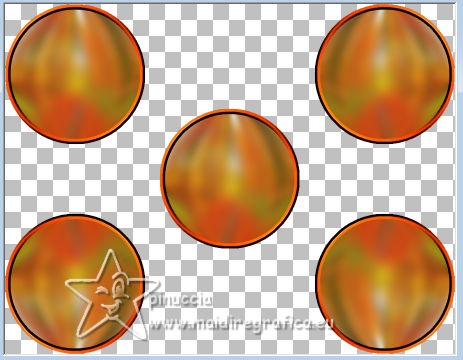
9. Activate the layer of the central frame.
Selections>Select All.
Selections>Float.
Selections>Defloat.
Selections>Modify>Contract - 10 pixels.
Edit>Paste into Selection (your background image is still in memory).
Adjust>Sharpness>Sharpen.
Keep selected.
10. Layers>New Raster Layer.
Effects>3D Effects>Cutout.
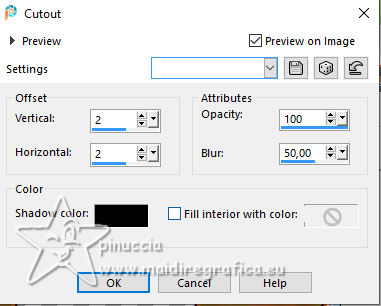
11. Selections>Select None.
Layers>Merge>Merge Down.
12. Repeat the steps 9,10 and 11 for the other frames,
every time with a one of your tubes.
13. Keep your background layer closed, and check tha everything is ok.
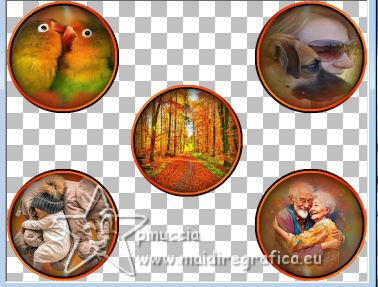
Layers>Merge>Merge visible.
Effects>3D Effects>Drop shadow, color black.
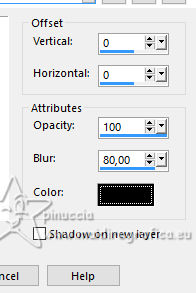
14. Open and activate the layer Raster 1.
before continuing, save your work, because the next filters may close your PSP.
(they have been patched for new operating systems and new PSP versions).
Effects>Plugins>CPK Designs - Puzzler.
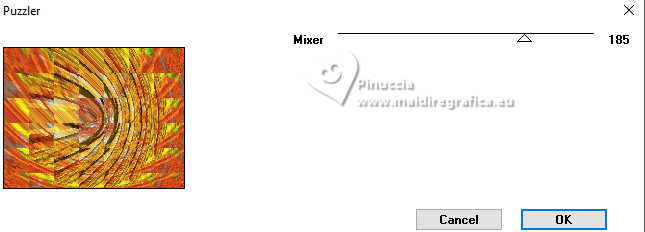
The result depend on, of course, from your image.
Effects>Reflection Effects>Kaleidoscope.
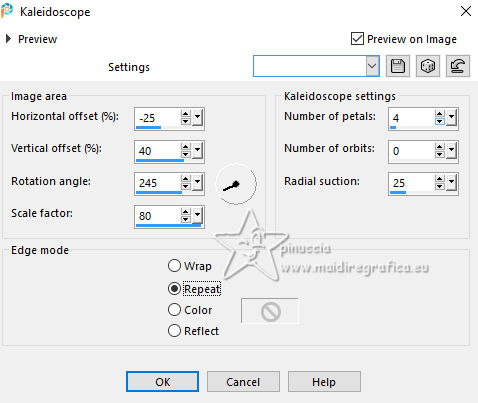
Optional: Effects>Edge Effects>Enhance.
15. Edit>Copy.
Selections>Select All.
Image>Add borders, 50 pixels, symmetric, whatever color.
Selections>Invert.
Edit>Paste into Selection.
16. Effects>Plugins>Birgits Chaos - Mosaik.
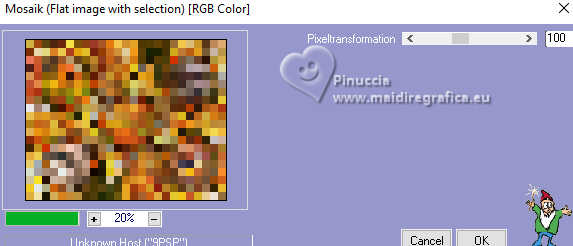
Effects>Edge Effects>Enhance More.
Effects>3D Effects>Inner Bevel, same settings.

Selections>Select All.
17. Open the text titre 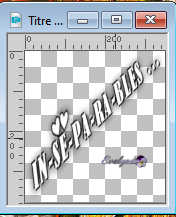
Erase the watermark and go to Edit>Copy.
Go back to your work and go to Edit>Paste as new layer.
(or write a text of your choice).
Pick Tool 

Optionel: Add a deco on your central frame.
18. Sign your work on a new layer.
Layers>Merge>Merge All.
Image>Resize, 900 pixels width, resize all layers checked.
Save as jpg.
For the tubes of this version thanks Beatriz, Lana and Silvie
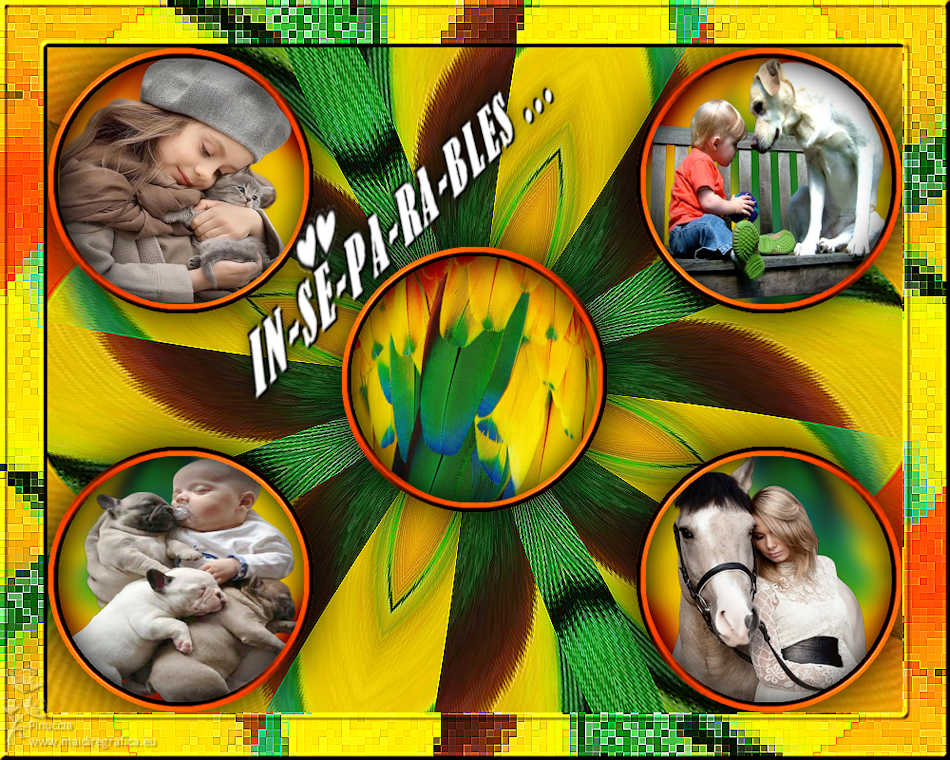

Your versions. Thanks
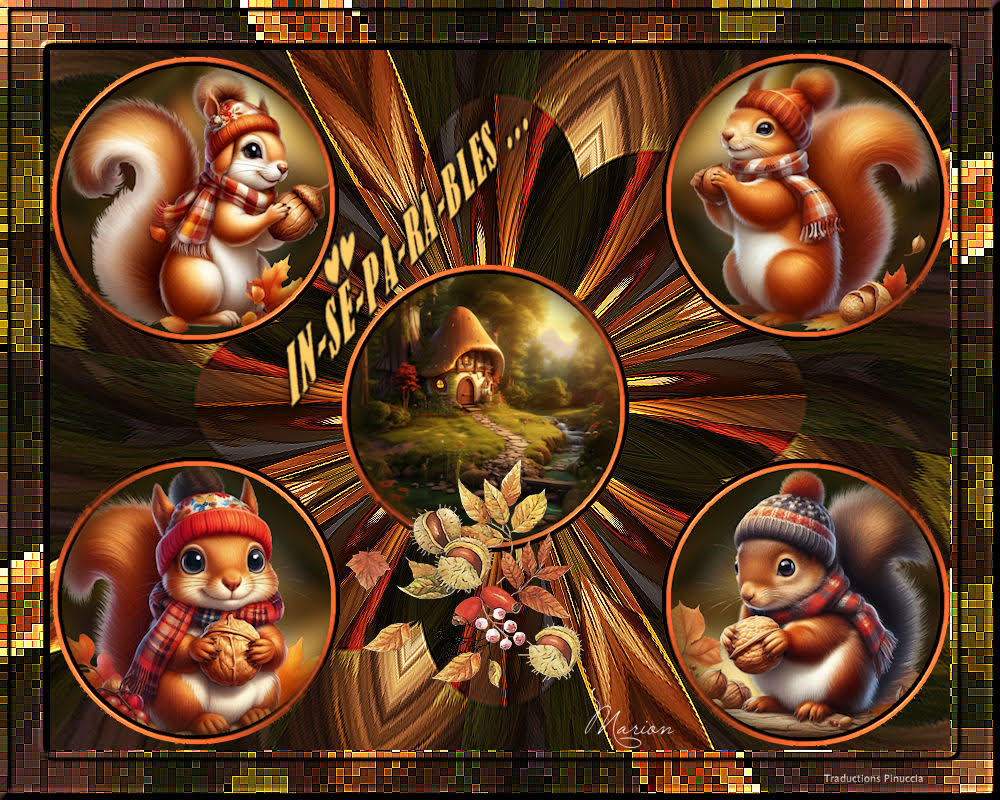
Marion
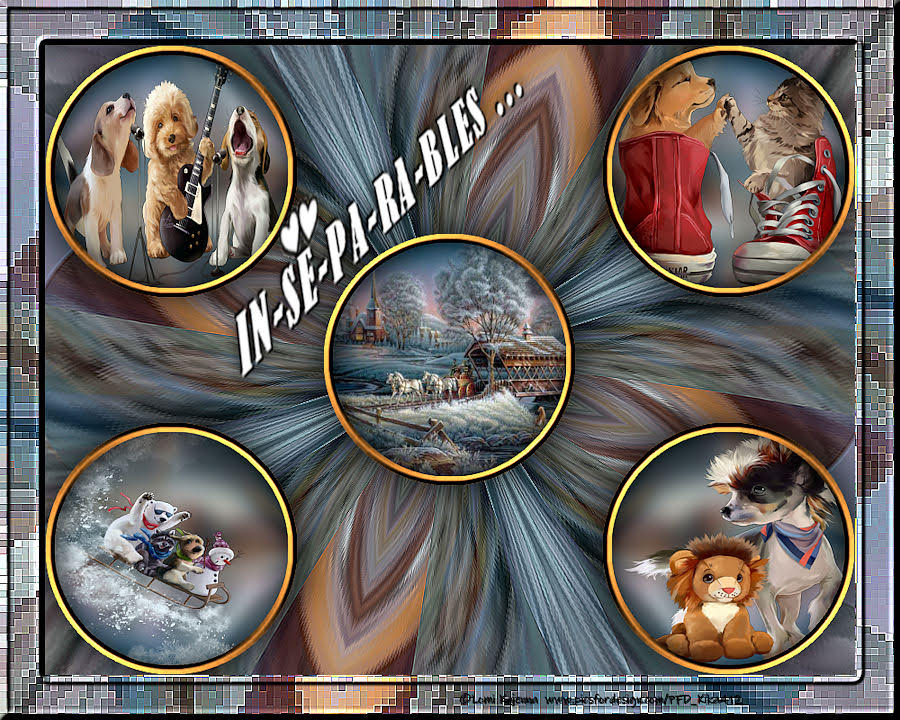
Kika
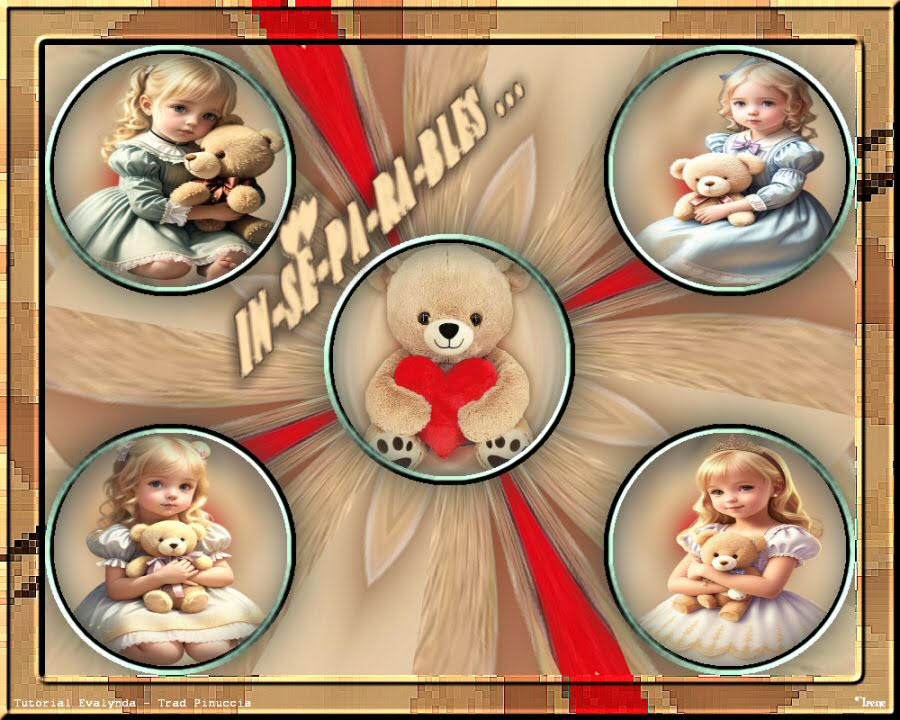
Irene

If you have problems or doubts, or you find a not worked link,
or only for tell me that you enjoyed this tutorial, write to me.
26 November 2023

|

