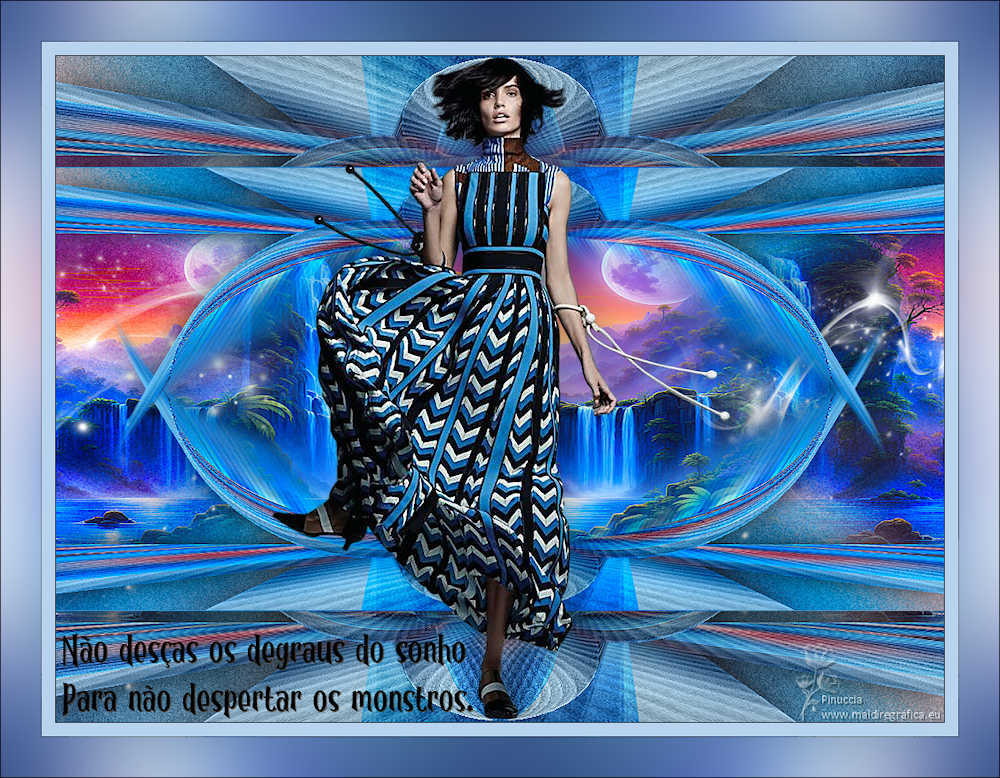
|
DEGRAUS


Thanks Estela for your invitation to translate your tutorials into english

This tutorial, created with PSP2022, was translated with PspX7, but it can also be made using other versions of PSP.
Since version PSP X4, Image>Mirror was replaced with Image>Flip Horizontal,
and Image>Flip with Image>Flip Vertical, there are some variables.
In versions X5 and X6, the functions have been improved by making available the Objects menu.
In the latest version X7 command Image>Mirror and Image>Flip returned, but with new differences.
See my schedule here
 French Translation here French Translation here
 Your versions here Your versions here
For this tutorial, you will need:

For the landscape thanks Mentali.
The rest of the material is by Estela Fonseca
(The links of the tubemakers here).
*It is forbidden to remove the watermark from the supplied tubes, distribute or modify them,
in order to respect the work of the authors

consult, if necessary, my filter section here
Filters Unlimited 2.0 here
Flaming Pear - Flexify 2 here
Toadies - Blast'em!... here
Mura's Meister - Perspective Tiling here
Mura's Meister - Copies here
Alien Skin Eye Candy 5 Impact - Perspective Shadow here
Filters Toadies can be used alone or imported into Filters Unlimited.
(How do, you see here)
If a plugin supplied appears with this icon  it must necessarily be imported into Unlimited it must necessarily be imported into Unlimited

You can change Blend Modes according to your colors.

Colors

1. Open a new transparent image 1000 x 750 pixels.
Selections>Select All.
2. Open the image Gráfico 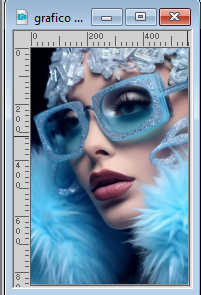
Edit>Copy.
Go back to your work and go to Edit>Paste into Selection.
Selections>Select None.
3. Effects>Image Effects>Seamless Tiling.

Adjust>Blur>Gaussian Blur - radius 50.

4. Effects>Plugins>Filters Unlimited 2.0 - Paper Texture - Cardboard Box, Coarse, default settings
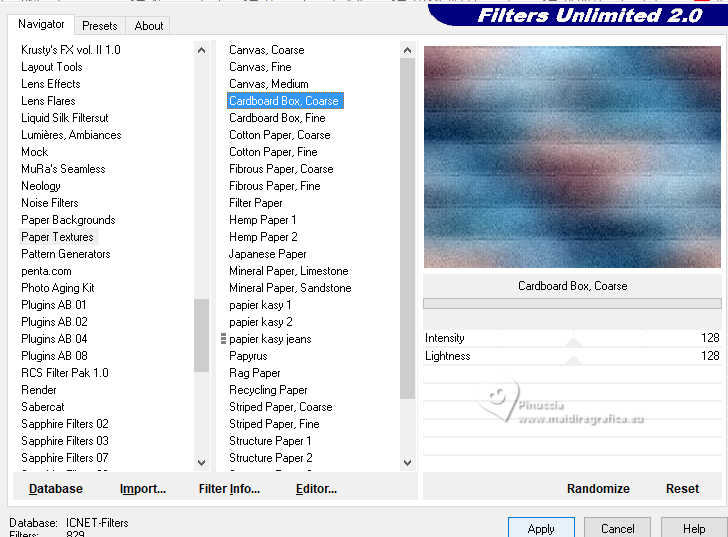
5. Layers>Duplicate.
Image>Free Rotate - 45 degrees to right

6. Layers>Duplicate.
Image>Mirror>Mirror Horizontal.
Change the Blend Mode of this layer to Hard Light.
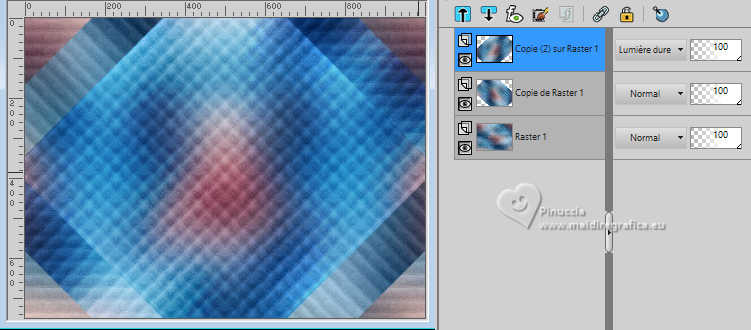
Layers>Merge>Merge Down.
7.Activate your background layer, Raster 1.
Selections>Select All.
8. Activate the layer Copy of Raster 1.
Image>Image>Crop to selection.
9. Effects>Plugins>Mura's Meister - Perspective Tiling.
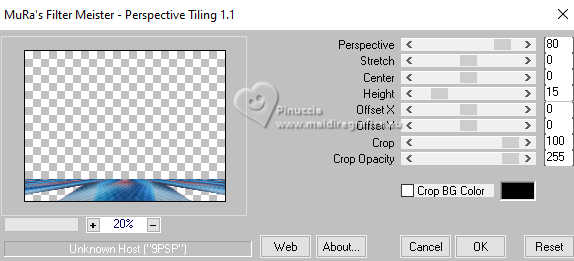
Adjust>Sharpness>Sharpen More.
10. Layers>Duplicate.
Effects>Geometric Effects>Circle.

11. Effects>Plugins>Mura's Meister - Copies.
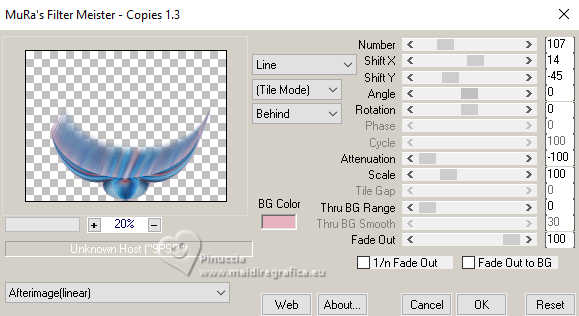
attention please, in this case the color set in BG can make the difference;
for me I set the pink color #e6b2be (chosen in the background);
it's up to you to decide according to your colors.
Effects>Reflexion Effects>Rotating Mirror, default settings.

Adjust>Sharpness>Sharpen More.
12. Layers>Merge>Merge Down.
Layers>Duplicate.
Image>Mirror>Mirror Vertical (Image>Flip).
13. Layers>Merge>Merge Down.
14. Effects>3D Effects>Drop Shadow, color #000000.

15. Open the tube mentali-misted2976 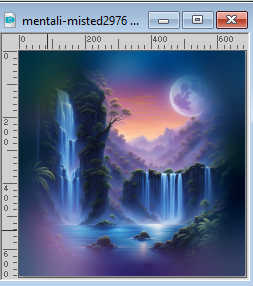
Edit>Copy.
Go back to your work and go to Edit>Paste as new layer.
Adjust>Sharpness>Sharpen More.
16. Activate the layer Raster 1.
Open EF-Degraus_Deco_1 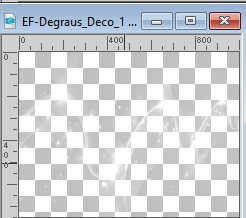
Edit>Copy.
Go back to your work and go to Edit>Paste as new layer.
Don't move it.
17. Activate again the layer Raster 1.
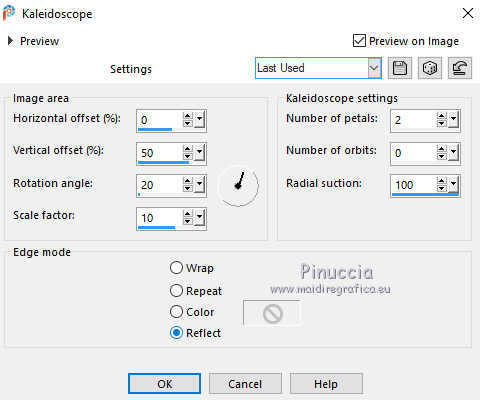
Effects>Reflection Effects>Kaleidoscope.
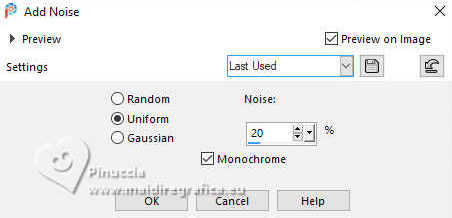
18. Adjust>Add/Remove Noise>Add Noise.
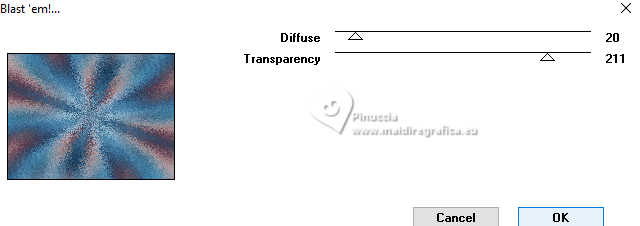
19. Effects>Plugins>Toadies - Blast 'em, default settings.
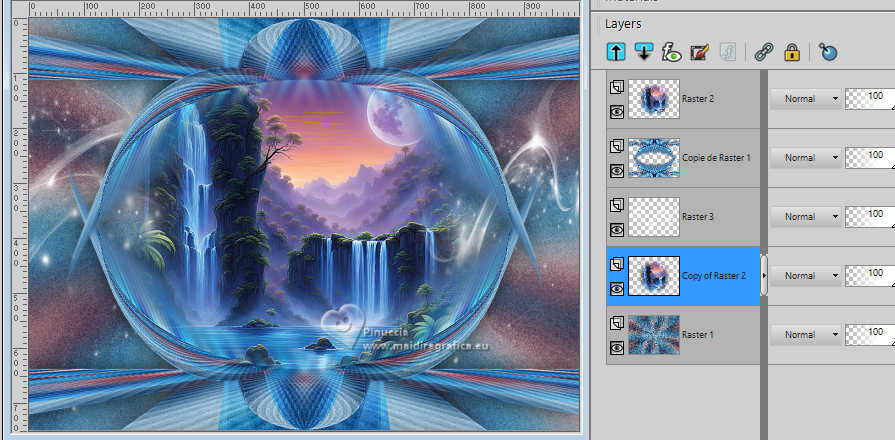
20. Activate your top layer.
Layers>Duplicate.
Layers>Arrange>Move Down - 3 times.
21. Effects>Image Effects>Seamless Tiling, Side by side

Change the Blend Mode of this layer to Hard Light.
Layers>Merge>Merge All.
22. Layers>Duplicate.
Effects>Plugins>Flaming Pear - Flexify 2.
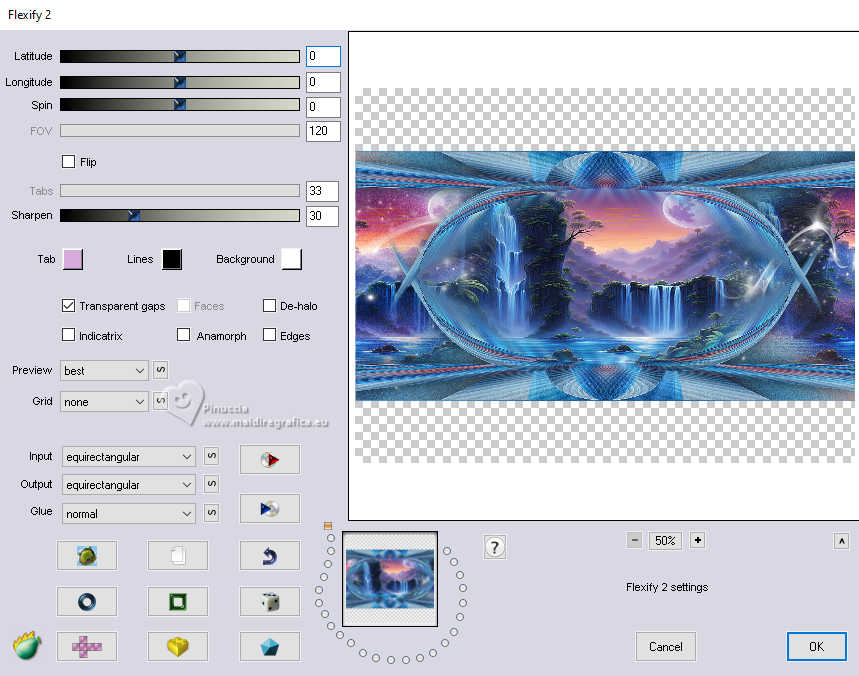
23. Effects>3D Effects>Drop Shadow, color #000000.

Adjust>Hue and Saturation>Vibrancy.
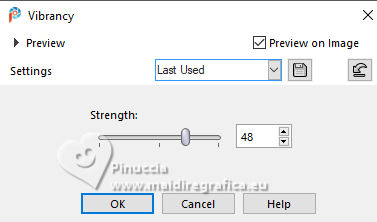
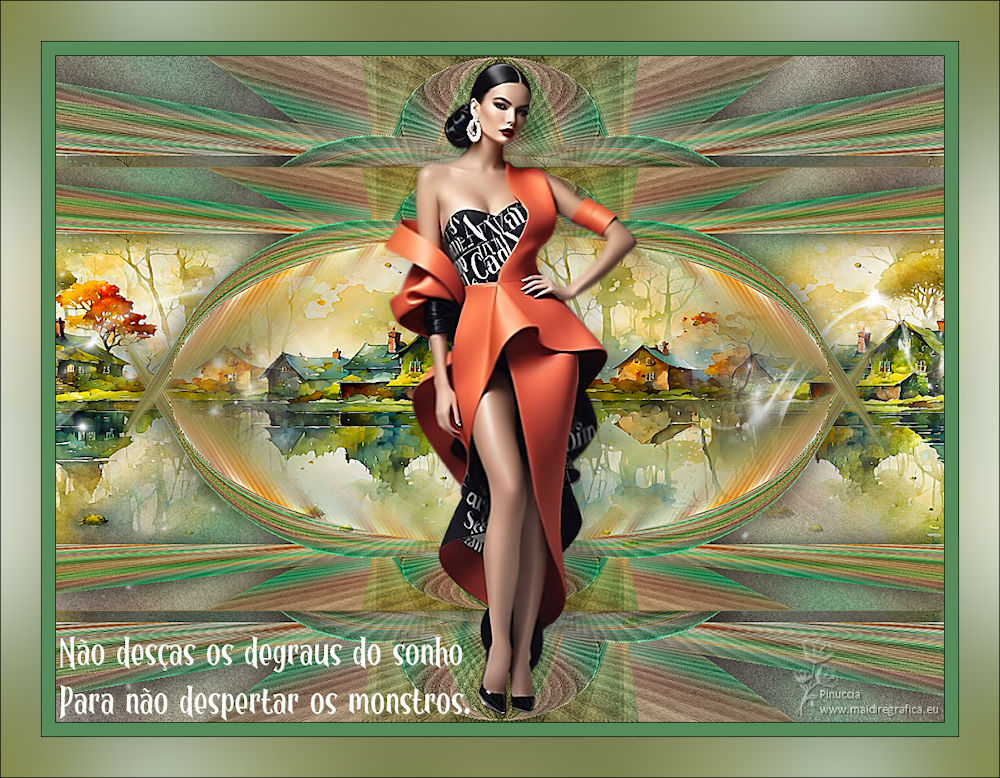
24. Open the woman's tube EF-Tube_Mulher_05_04_2024 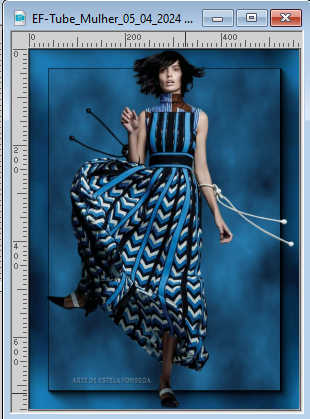
Edit>Copy.
Go back to your work and go to Edit>Paste as new layer.
Adjust>Sharpness>Unsharp Mask, default settings.
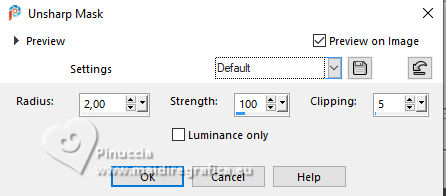
Move  the tube to your liking. the tube to your liking.
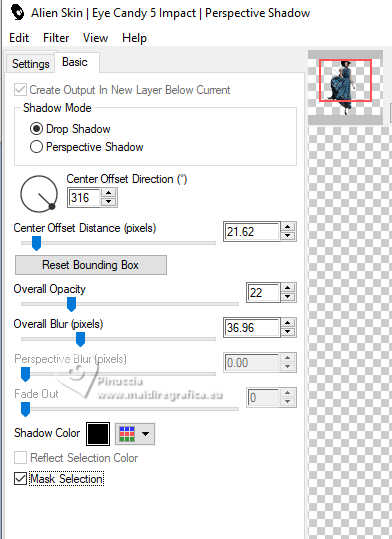
25. Effects>Plugins>Alien Skin Eye Candy 5 Impact - Perspective Shadow.
Select the preset Drop Shadow, Blurry with these settings.
26. Image>Add borders, 1 pixel, symmetric, color 2 #000000.
Image>Add borders, 15 pixels, symmetric, color 1 #b7d3ed  . .
Image>Add borders, 1 pixel, symmetric, color 2 #000000.
Image>Add borders, 45 pixels, symmetric, color 3 #ffffff.
27. Activate your Magic Wand Tool  , tolerance and feather 0, , tolerance and feather 0,
and click in the last border to select it.
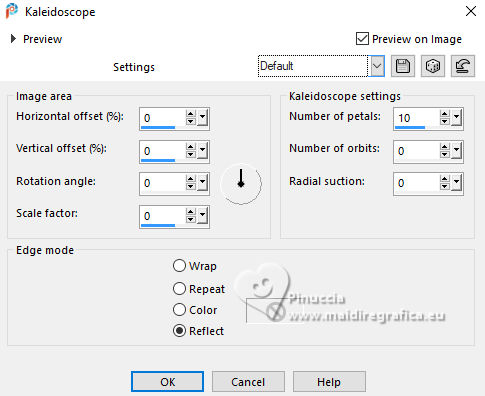
28. Effects>Reflection Effects>Kaleidoscope, default settings.
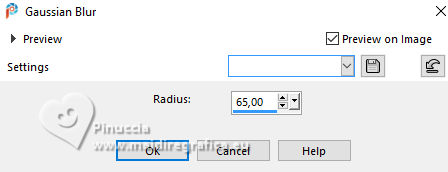
Adjust>Blur>Gaussian Blur - radius 65.
Selections>Select None.
29. Open the tube EF-Degraus_Texto 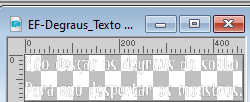
text by Mario Quintana:
Don't go down the steps of the dream.
So as not to awaken the monsters.
Edit>Copy.
Go back to your work and go to Edit>Paste as new layer.
Move  to your liking. to your liking.
For my example, I did: Image>Negative image.
Effects>3D Effects>Drop Shadow, foreground color.

30. Sign your work.
Image>Add borders, 1 pixel, symmetric, color 2 #000000.
Image>Resize, 1000 pixels width, resize all layers checked.
Save as jpg.
For the tubes of this version thanks Luz Cristina and Mentali.


If you have problems or doubts, or you find a not worked link,
or only for tell me that you enjoyed this tutorial, write to me.
7 May 2024

|

