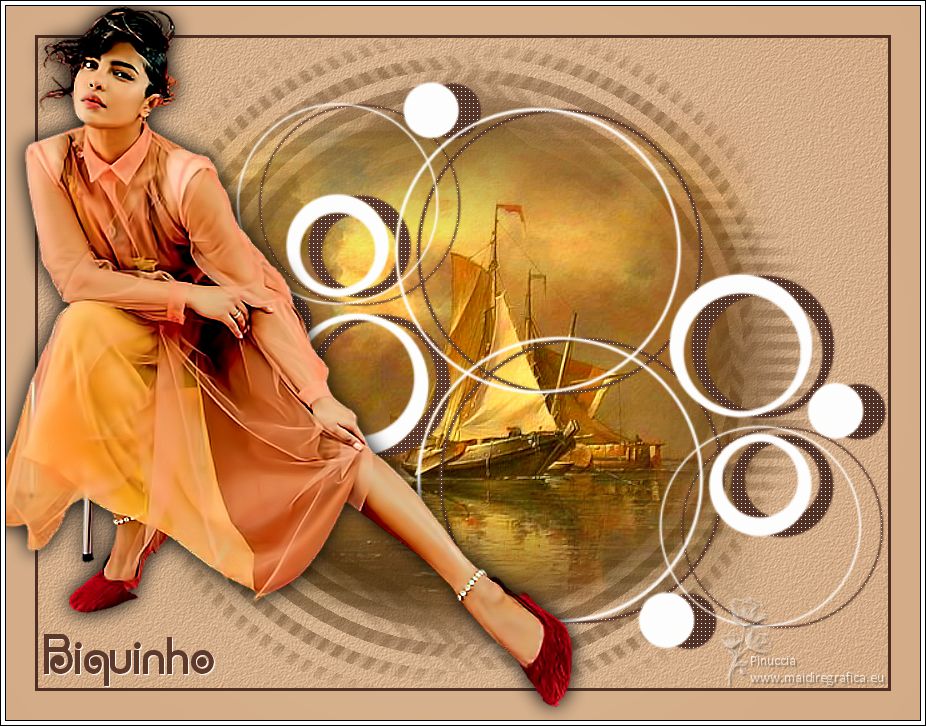
|
BIQUINHO


Thanks Estela for your invitation to translate your tutorials into english

This tutorial was created with PSP2022 and translated with Psp17, but it can also be made using other versions of PSP.
Since version PSP X4, Image>Mirror was replaced with Image>Flip Horizontal,
and Image>Flip with Image>Flip Vertical, there are some variables.
In versions X5 and X6, the functions have been improved by making available the Objects menu.
In the latest version X7 command Image>Mirror and Image>Flip returned, but with new differences.
See my schedule here
For this tutorial, you will need:

For the tube thanks Callitubes and Mtfp.
Shimers Mask 7 (the tube created by this mask).
Creativedesiresmask43.
The rest of the material is by Estela Fonseca.
(The links of the tubemakers here).
*It is forbidden to remove the watermark from the supplied tubes, distribute or modify them,
in order to respect the work of the authors

consult, if necessary, my filter section here
Filters Unlimited 2.0 here
Xero - Tekstya here
DSB Flux - Radial Transmission here
FM Tile Tools - Saturation Emboss here
Nik Software - Color Efex Pro here
AAA Frames - Transparent Frame here

You can change Blend Modes according to your colors.

Open the mask in PSP and minimize it with the rest of the material.
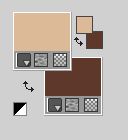
1. Set your foreground color to #dcb997,
and your background color to #5d392c.
2. Open a new transparent image 850 x 650 pixels.
Flood Fill  the transparent image with your foreground color #dcb997. the transparent image with your foreground color #dcb997.
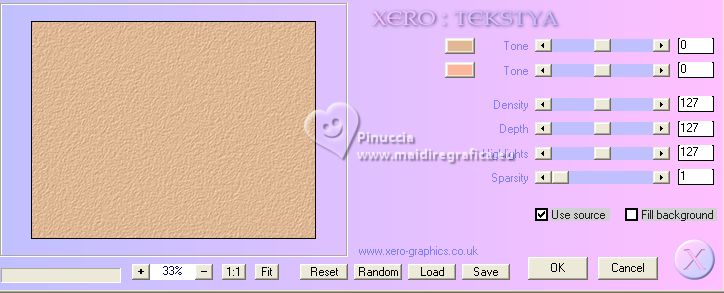
3. Effects>Plugins>Xero - Tekstya
4. Layers>New Raster Layer.
Flood Fill  the layer with your background color #5d392c. the layer with your background color #5d392c.
5. Layers>New Mask layer>From image
Open the menu under the source window and you'll see all the files open.
Select the mask creativedesiresmask43
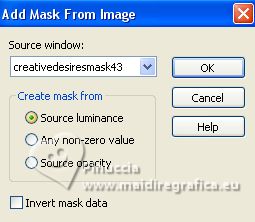
Layers>Merge>Merge Group.
6. Effects>Plugins>Filters Unlimited 2.0 - Special Effects 1 - Square Bumps
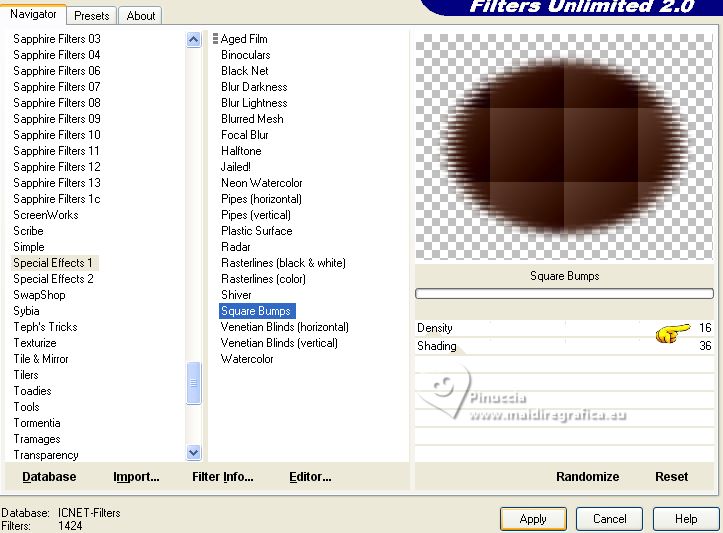
7. Effects>Plugins>DSB Flux - Radial Transmission.
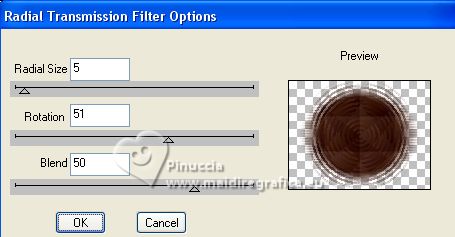
Adjust>Sharpness>Sharpen More.
8. Change the Blend Mode of this layer to Luminance (legacy),
and reduce the opacity to 69%.
9. Adjust>Hue and Saturation>Vibrancy
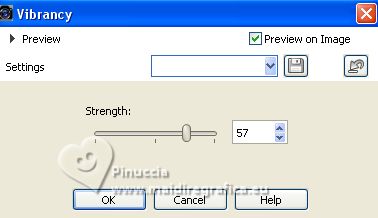
In older versions of PSP, you can't find this effect.
You can use another effect from the Adjust menu or skip this step.
Here below the difference before and after applying the effect
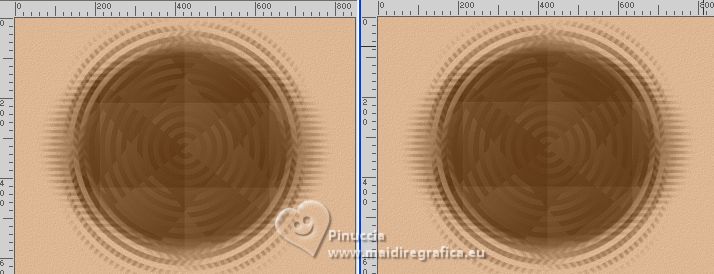
10. Open the tube mtfp_misted_scenic 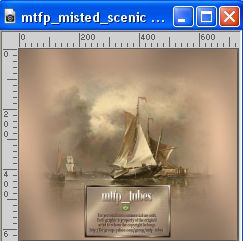
Edit>Copy.
Go back to your work and go to Edit>Paste as new layer.
Adjust>Hue and Saturation>Vibrancy, same settings

11. Effects>Plugins>FM Tile Tools - Saturation Emboss, default settings.

12. Open EF-Biquinho_Mask 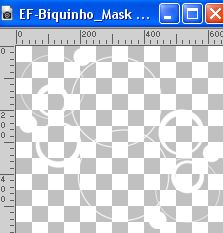
Edit>Copy.
Go back to your work and go to Edit>Paste as new layer.
this effects is created by the mask shimmers mask 6 image 9 that you find in the material
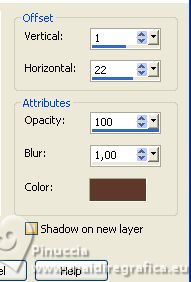
13. Effects>3D Effects>Drop Shadow, background color #5d392c.
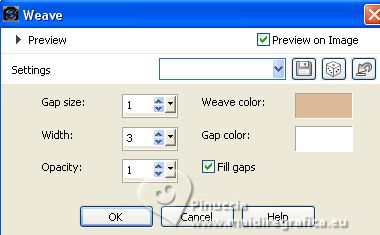
14. Effects>Texture Effects>Weave
weave color foreground color #dcb997
gap color: white #ffffff.
15. Objects>Align>Right
or with your Pick Tool 
set Position Y: 186,00 and Position Y: 38,00
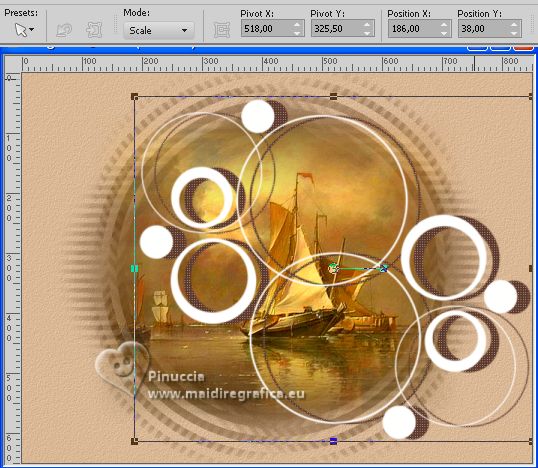
16. Image>Add borders, 3 pixels, symmetric, dark color.
Image>Add borders, 35 pixels, symmetric, light color.
17. Open the tube Callitubes-2686mulheres 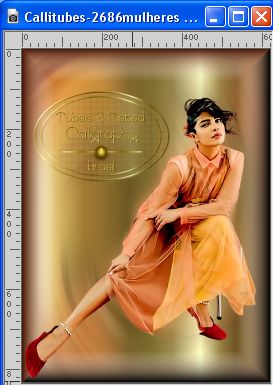
Edit>Copy.
Go back to your work and go to Edit>Paste as new layer.
Image>Mirror.
Move  the tube to the left side. the tube to the left side.
18. Effects>3D Effects>Drop Shadow, color #000000.
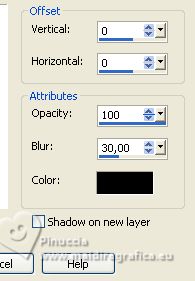
19. Layers>Merge>Merge visible.
20. Effects>Plugins>Nik Software - Color Efex Pro - Darken/Lighten Center.
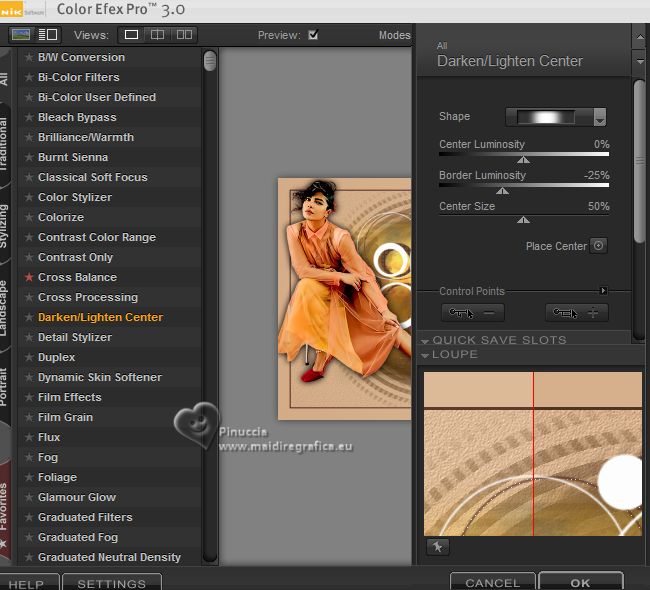
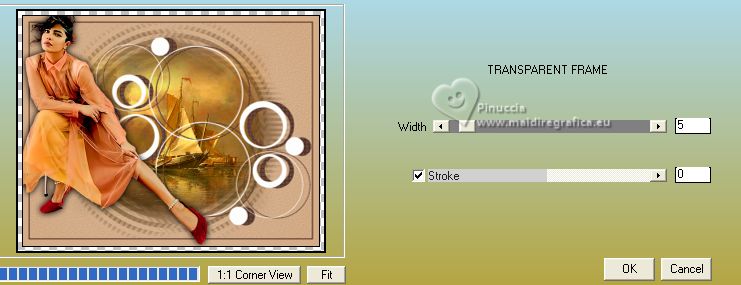
21. Effects>Plugins>AAA Frames - Transparente Frame.
22. Open the text Texto 
Edit>Copy.
Go back to your work and go to Edit>Paste as new layer.
Move  the text at the bottom left. the text at the bottom left.
23. Layers>Merge>Merge All.
Sign your work and save as jpg.
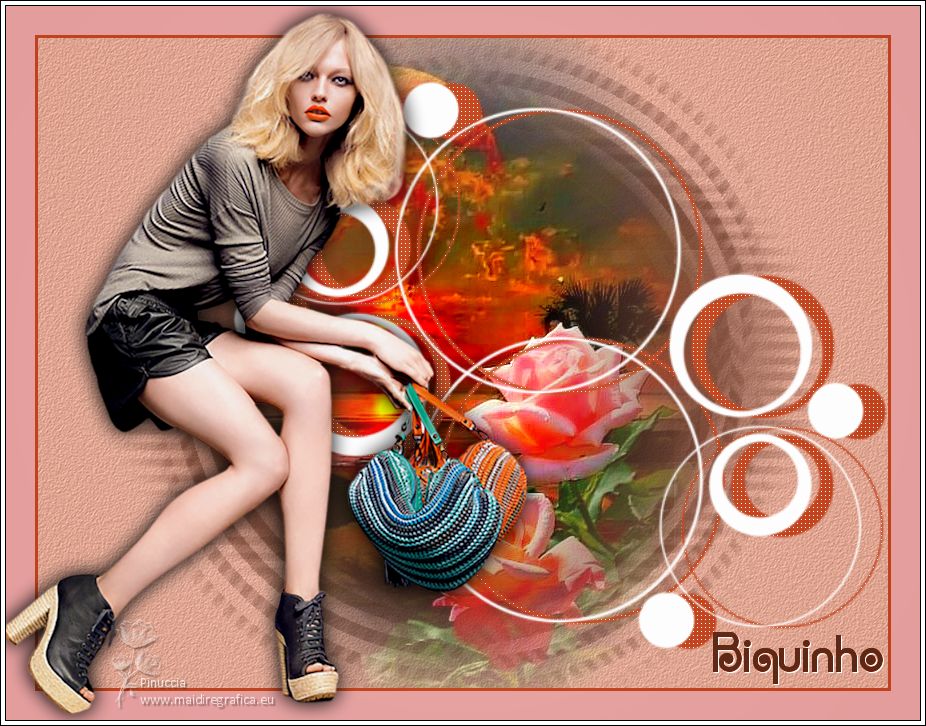
For the tubes of these versions thanks Suizabella


If you have problems or doubts, or you find a not worked link, or only for tell me that you enjoyed this tutorial, write to me.
22 August 2023

|

