|
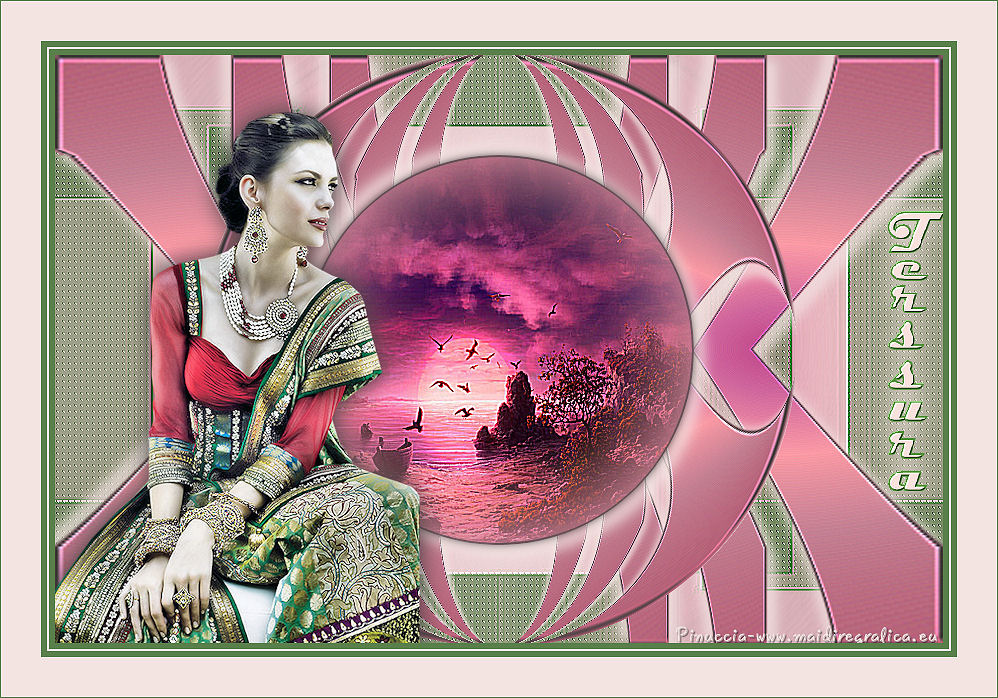
TERSSURA


Thanks Emilieta for your invite to translate your tutorials into english.
Here you can find the original tutorial.

This tutorial has been translated with PSPX2, but it can also be made using other versions of PSP.
Since version PSP X4, Image>Mirror was replaced with Image>Flip Horizontal,
and Image>Flip with Image>Flip Vertical, there are some variables.
In versions X5 and X6, the functions have been improved by making available the Objects menu.
In the latest version X7 command Image>Mirror and Image>Flip returned, but with new differences.
See my schedule here
french translation here
your versions here
Material here
The woman tube is by Eugenia Clo
The rest of the material is by Emilieta
(The links of the tubemakers here).
Plugins
consult, if necessary, my filter section here
Carolaine and Sensibility - CS-LDots here
FM Tile Tools - Saturation Emboss here

You can change Blend Modes according to your colors.
Copy the gradient in the Gradients Folder.
Copy the Preset Emboss 3 in the Presets Folder.
Copy the selections in the Selections Folder.
Open the mask in PSP and minimize it with the rest of the material.
1. Open a new transparente image 900 x 600 pixels.
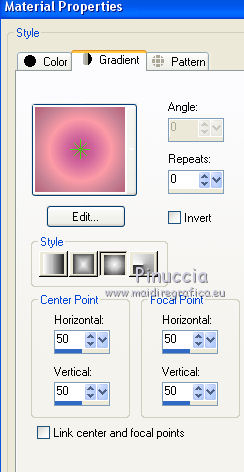
2. Set your foreground color to Gradient and select the gradient Pinkshalvet_CC, style Sunburst.
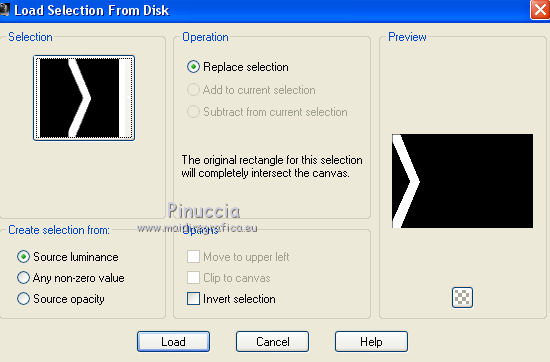
3.Selections>Load/Save Selection>Load Selection from Disk.
Look for and load the selection Tri.lateral.
Flood Fill  the selection with your Gradient. the selection with your Gradient.
Selections>Modify>Contract - 2 pixels.
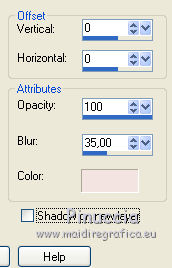
Effects>3D Effects>Drop Shadow, color #404040.
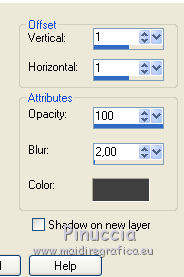
Repeat Drop Shadow, but vertical and horizontal -1.
Effects>Edge Effects>Enhance More.
Selections>Select None.
3. Layers>Duplicate.
Effects>Image Effects>Offset.
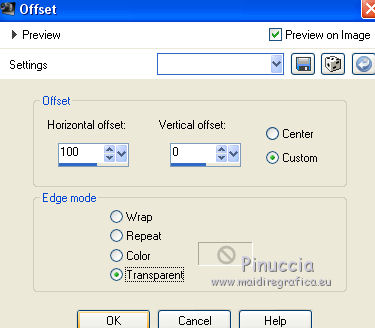
Layers>Duplicate.
Repeat Effects>Image Effects>Offset, same settings.

Layers>Merge>Merge visible.
4. Layers>Duplicate.
Image>Mirror.
Layers>Merge>Merge visible.
5. Effects>Distortion Effects>Pinch

Layers>Duplicate.
Adjust>Blur>Radial Blur
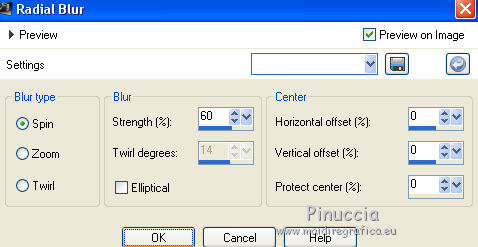
Layers>Arrange>Move Down.
6. Layers>New Raster Layer.
Layers>Arrange>Bring to top.
Set your background color to #597f4b.
Flood Fill  the layer with your background color. the layer with your background color.
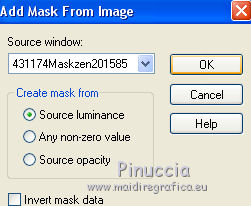
Layers>New Mask layer>From image
Open the menu under the source window and you'll see all the files open.
Select the mask 431174Maskzen201585.
Layers>Merge>Merge Group.
Effects>Edge Effects>Enhance More.
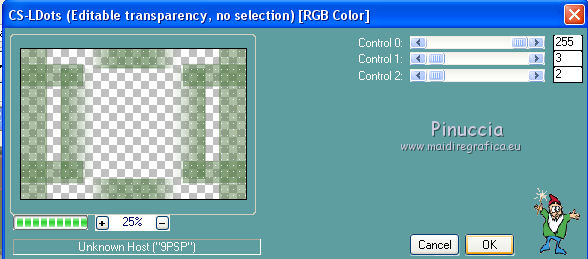
7. Effects>Plugins>Carolaine and Sensibility - CS_LDots.
Layers>Arrange>Move Down.
Adjust>Sharpness>Sharpen.
8. Layers>New Raster Layer.
Set your background color to #f3e4e2.
Flood Fill  the layer with color #f3e4e2. the layer with color #f3e4e2.
Layers>Arrange>Send to Bottom.
Close the layer Merged
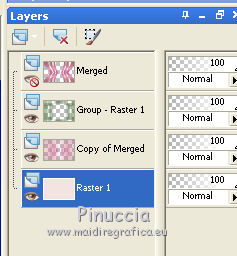
Layers>Merge>Merge visible.
Effects>User Defined Filter - select the preset Emboss 3 and ok.

Open again and activate the closed layer.
Effects>3D Effects>Drop Shadow, color #f3e4e2.
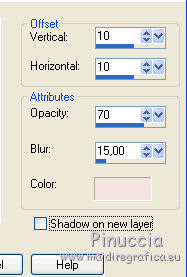
Repeat Drop Shadow, but vertical and horizontal -10.
Layers>Duplicate.
Effects>Geometric Effects>Circle.

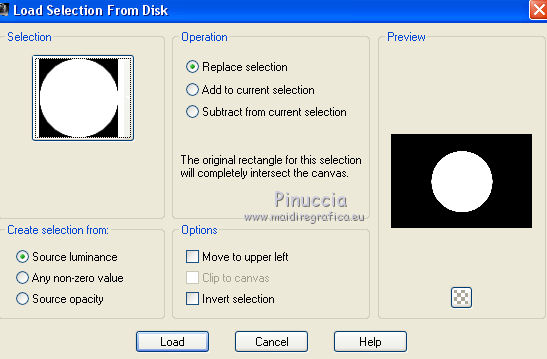
9. Selections>Load/Save Selection>Load Selection from Disk.
Look for and load the selection circulo/triangulos
Layers>New Raster Layer.
Flood Fill  the selection with your Gradient. the selection with your Gradient.
Keep selected.
Layers>New Raster Layer.
Open the landscape tube - Edit>Copy.
Go back to your work and go to Edit>Paste into Selection.
Adjust>Sharpness>Sharpen More - 2 times.
Layers>Duplicate.
Selections>Modify>Contract - 2 pixels.
Effects>3D Effects>Drop Shadow, color #404040.
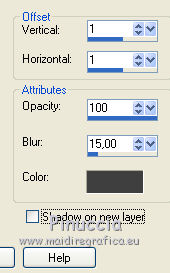
Repeat Drop Shadow, but vertical and horizontal -1.
Selections>Select None.
Close the top layers and keep visible the layers "merged".
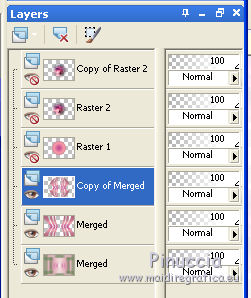
Layers>Merge>Merge visible.
10. Close this layer and open the layers of the circles.
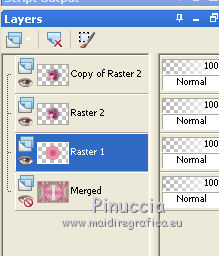
Layers>Merge>Merge visible.
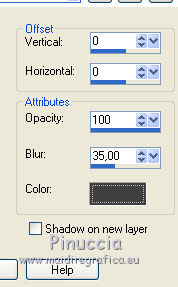
Effects>3D Effects>Drop Shadow, color #f3e4e2.

Répéter Ombre portée, vertical et horizontal -10.
Open the bottom layer et keep selected the top layer.
11. Open the tube of the woman and go to Edit>Copy.
Go back to your work and go to Edit>Paste as new layer.
Image>Resize, to 80%, resize all layers not checked.
Move  the tube at the bottom left. the tube at the bottom left.
Effects>3D Effects>Drop Shadow, color #404040.
12. Open the texte - Edit>Copy.
Go back to your work and go to Edit>Paste as new layer.
Move  the text to the right side. the text to the right side.
Effects>Plugins>FM Tile Tools - Saturation Emboss, default settings.

Effects>3D Effects>Drop Shadow, same settings, but color #f3e4e2.
13. Sign your work on a new layer.
14. Layers>New Raster Layer.
Set your foreground color to the green color #597f4b.
Flood Fill  the layer with color #597f4b. the layer with color #597f4b.
Selections>Select All.
Selections>Modify>Contract - 6 pixels.
Press CANC on the keyboard 
Effects>Edge Effects>Enhance More - 2 times.
Selections>Select None.
15. Image>Add borders, 2 pixels, symmetric, background color #f3e4e2.
Image>Add borders, 6 pixels, symmetric, foreground color #597f4b.
Image>Add borders, 40 pixels, symmetric, background color #f3e4e2.
Image>Add borders, 1 pixel, symmetric, foreground color #597f4b.
Adjust>Sharpness>Sharpen.
Save as jpg.

If you have problems or doubts, or you find a not worked link, or only for tell me that you enjoyed this tutorial, write to me.
11 May 2018
|

