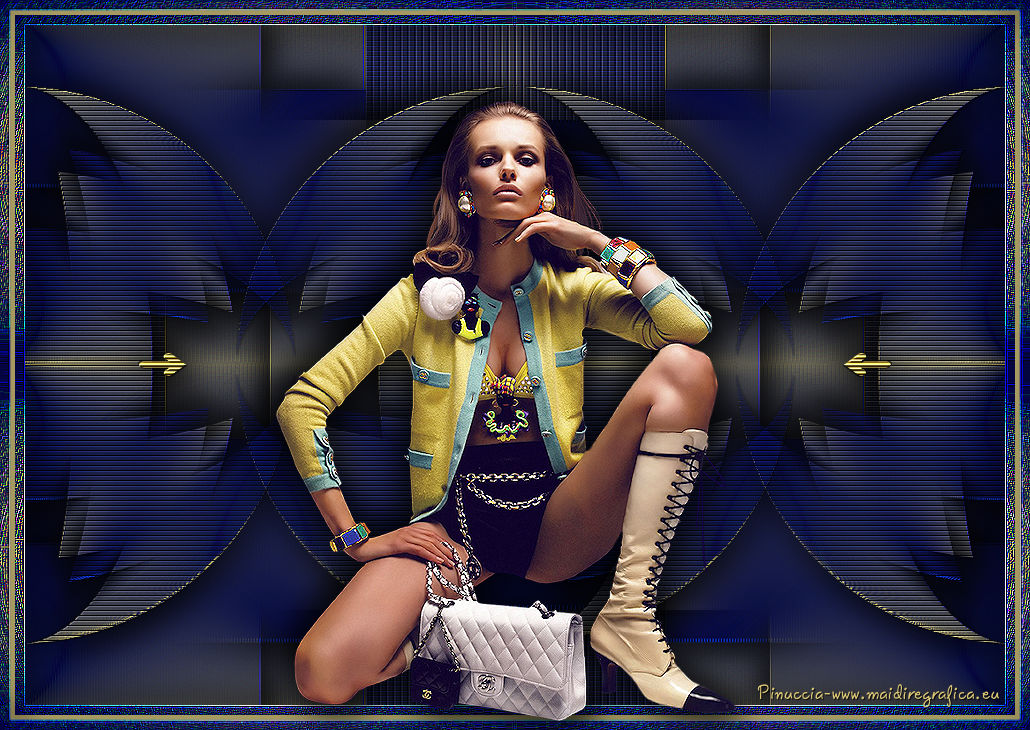
|
INNOVATION


Thanks Emilieta for your invite to translate your tutorials into english.
Here you can find the original tutorial.

This tutorial has been translated with PSPX3, but it can also be made using other versions of PSP.
Since version PSP X4, Image>Mirror was replaced with Image>Flip Horizontal,
and Image>Flip with Image>Flip Vertical, there are some variables.
In versions X5 and X6, the functions have been improved by making available the Objects menu.
In the latest version X7 command Image>Mirror and Image>Flip returned, but with new differences.
See my schedule here
french translation here
Your versions here
Material here
For the woman tube thanks Gabry.
Plugins
consult, if necessary, my filter section here
Innovation 1.5 - LiftOff, Effect Mesh, Silverlining here
FM Tile Tools - Blend Emboss here

You can change Blend Modes according to your colors.
In the newest versions of PSP, you don't find the foreground/background gradient (Corel_06_029).
You can use the gradients of the older versions.
The Gradient of CorelX here
1. Open a new transparent image 1000 x 700 pixels.
Set your foreground color to white #ffffff,
Set your background color to #0a28e0.
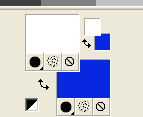
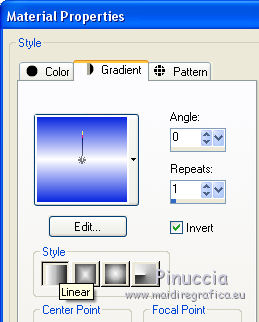
Set your foreground color to a Foreground/Background Gradient, style Linear.
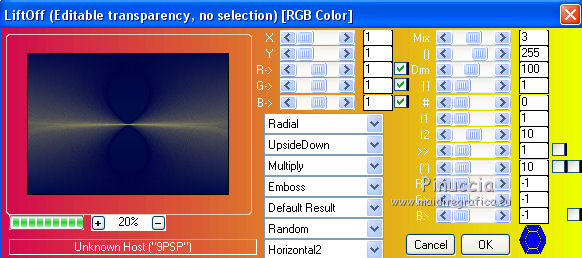
2. Effects>Plugins>Innovation 1.5 - LiftOff.
Image>Resize, to 70%, resize all the layers not checked.
3. Effects>Image Effects>Seamless Tiling.
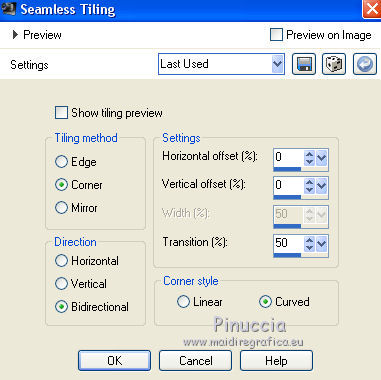
4. Effects>Plugins>FM Tile Tools - Blend Emboss, default settings.

5. Effects>Plugins>Innovation 1.5 - Effect Mesh.
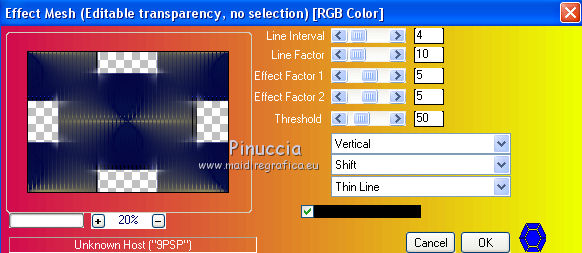
6. Effects>Plugins>FM Tile Tools - Blend Emboss, default settings.
7. Layers>Duplicate.
Image>Resize, to 70%, resize all the layers not checked.
8. Effects>Image Effects>Seamless Tiling, same settings.

9. Effects>3D Effects>Drop Shadow.
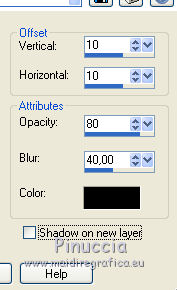
Repeat Drop Shadow, vertical and horizontal -10.
10. Layers>Duplicate.
Effects>Geometric Effects>Circle.

Image>Resize, to 80%, resize all the layers not checked.
11. Effects>3D Effects>Drop Shadow.
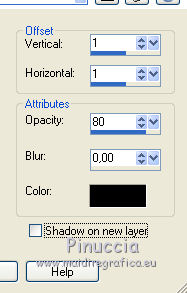
Repeat Drop Shadow, vertical and horizontal -1.
Again Effects>3D Effects>Drop Shadow.

Repeat Drop Shadow, vertical and horizontal -10.
12. Effects>Image Effects>Seamless Tiling.

13. Effects>Plugins>Innovation 1.5 - Silverlining.
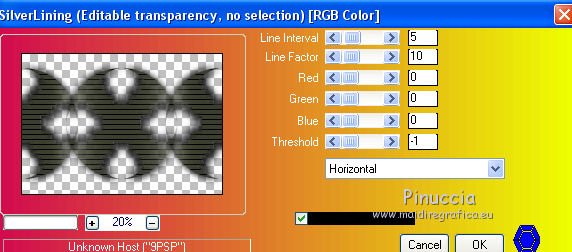
14. Effects>Plugins>FM Tile Tools - Blend Emboss, default settings.
15. Layers>Merge>Merge visible.
16. Layers>New Raster Layer.
Flood Fill  the layer with your Gradient. the layer with your Gradient.
17. Effects>Plugins>Innovation 1.5 - LiftOff, same settings.
Effects>Plugins>FM Tile Tools - Blend Emboss, same settings.
Effects>Plugins>Innovations 1.5 - Silverlining, same settings.
Effects>Plugins>FM Tile Tools - Blend Emboss, same settings.
18. Layers>Duplicate.
Image>Free Rotate - 90 degrees to left.

19. K key to activate the Pick tool 
mode Scale 
push the central right and left nodes until the borders.
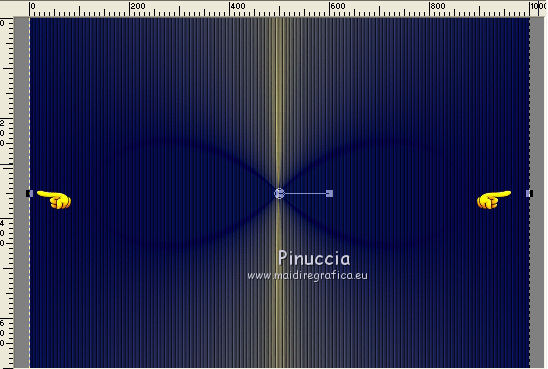
Reduce the opacity of this layer to 50%.
Layers>Merge>Merge down.
Layers>Arrange>Send to Bottom.
Effects>Plugins>FM Tile Tools - Blend Emboss, default settings.
20. Layers>New Raster Layer.
Layers>Arrange>Bring to Top.
21. Change the Gradient settings
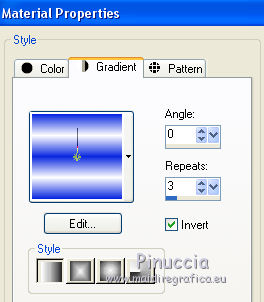
Flood Fill  the layer with your Gradient. the layer with your Gradient.
22. Effects>Plugins>Innovation 1.5 - LiftOff, same settings.
Selections>Select All.
Selections>Modify>Contract - 10 pixels.
Press CANC on the keyboard 
Selections>Invert.
Effects>Edge Effects>Enhance More.
23. Effects>Plugins>FM Tile Tools - Blend Emboss, default settings.
Effects>Edge Effects>Enhance More.
Effects>3D Effects>Drop Shadow, same settings.
Selections>Select None.
24. Edit>Copy.
25. Image>Add borders, 15 pixels, symmetric, avec une couleur jaune.
Activate the Magic Wand Tool 
and clic on the border to select it.
Edit>Paste into Selection.
Selections>Select None.
26. Open the tube of the arrows - Edit>Copy.
Go back to your work and go to Edit>Paste as new layer.
27. Effects>3D Effects>Drop Shadow.

Repeat Drop Shadow, vertical and horizontal -10.
Effects>Plugins>FM Tile Tools - Blend Emboss, default settings.
28. Open the tube of the woman - Edit>Copy.
Go back to your work and go to Edit>Paste as new layer.
Image>Resize, to 85%, resize all the layers not checked.
Adjust>Sharpness>Sharpen - 2 times.
Place  the tube in the middle. the tube in the middle.
29. Effects>3D Effects>Drop Shadow.

Repeat Drop Shadow, vertical and horizontal -10.
30. Sign your work on a new layer.
31. Layers>Merge>Merge All.
Adjust>Sharpness>Sharpen.
Save as jpg.
The tube of this version is by Guismo
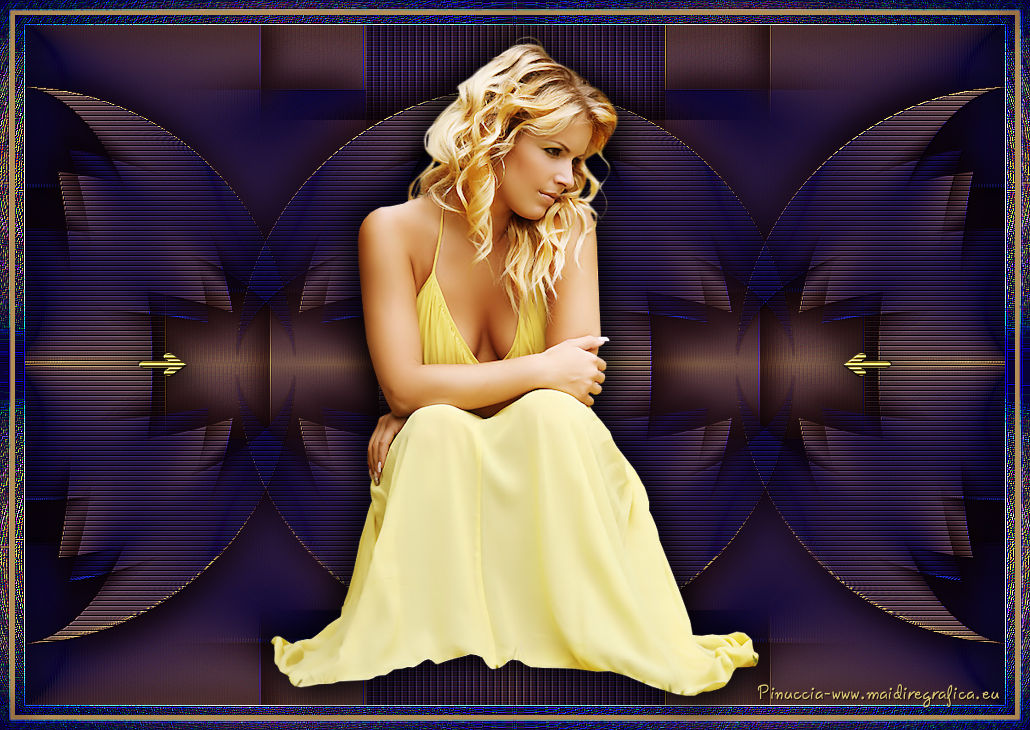

If you have problems or doubts, or you find a not worked link, or only for tell me that you enjoyed this tutorial, write to me.
31 January 2018
|

