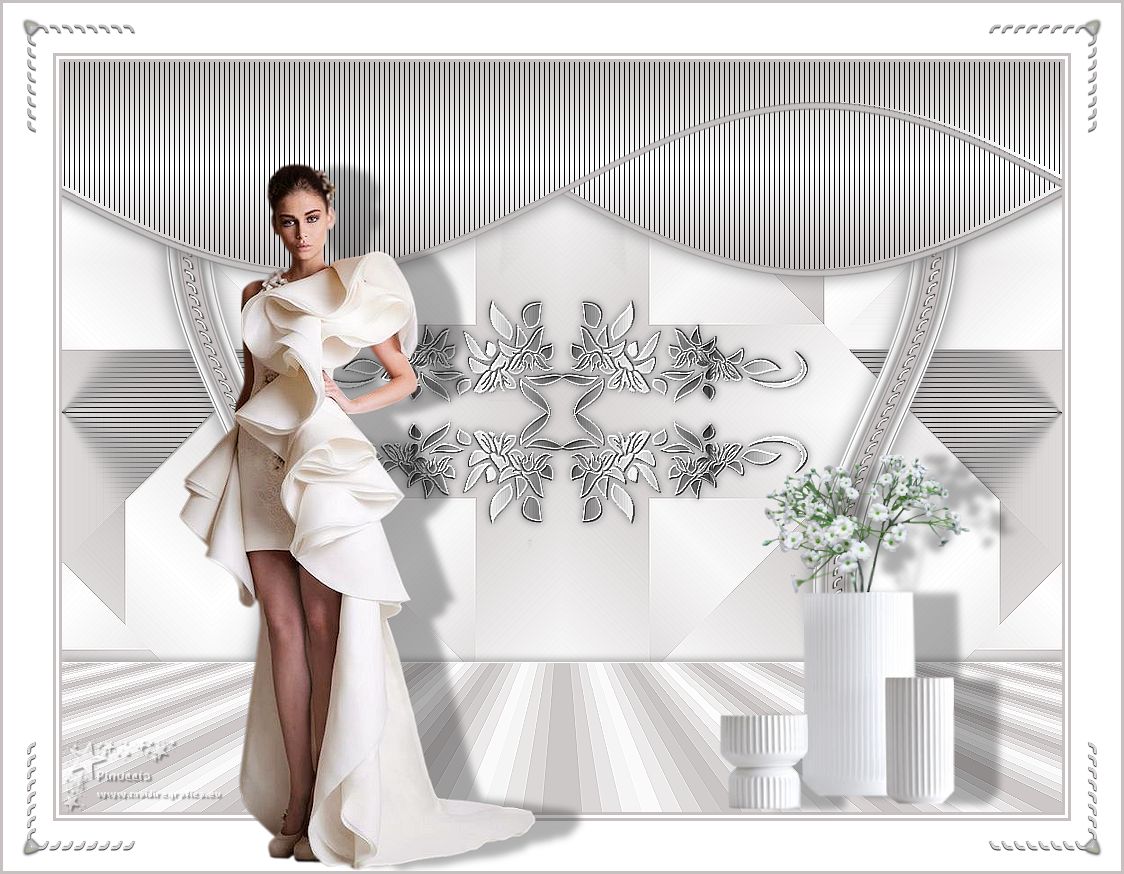
|
GLAMOUR


Thanks Emilieta for your invite to translate your tutorials into english.
Here you can find the original tutorial.

This tutorial has been translated with PSPX2, but it can also be made using other versions of PSP.
Since version PSP X4, Image>Mirror was replaced with Image>Flip Horizontal,
and Image>Flip with Image>Flip Vertical, there are some variables.
In versions X5 and X6, the functions have been improved by making available the Objects menu.
In the latest version X7 command Image>Mirror and Image>Flip returned, but with new differences.
See my schedule here
french translation here
your versions here
Material here
For the tubes of the woman and the vases thanks Kamil.
The mask found on the net.
The rest of the material is by Emilieta
(The links of the tubemakers here).
Plugins
consult, if necessary, my filter section here
FM Tile Tools - Blend Emboss here
Filters Unlimited 2.0 here
Mura's Seamless - Tiling with Shrink here
Mura's Meister - Perspective Tiling here
Simple - Blintz here
AP 01 [Innovations] - Lines SilverLining here
Filters Mura's Seamless and Simple can be used alone or imported into Filters Unlimited.
(How do, you see here)
If a plugin supplied appears with this icon  it must necessarily be imported into Unlimited it must necessarily be imported into Unlimited

You can change Blend Modes according to your colors.
In the newest versions of PSP, you don't find the foreground/background gradient (Corel_06_029).
You can use the gradients of the older versions.
The Gradient of CorelX here
Open the mask in PSP and minimize it with the rest of the material.
1. Open a new transparent image 1000 x 700 pixels.
Set your foreground color to #c6c0c0,
and your background color to white #ffffff.
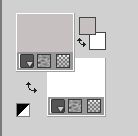
Set your foreground color to a Foreground/Background Gradient, style Linear.
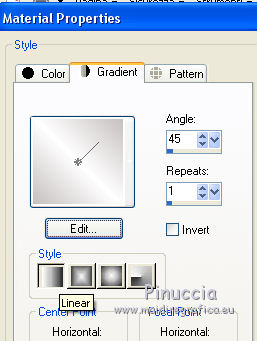
Flood Fill  the transparent image with your Gradient. the transparent image with your Gradient.
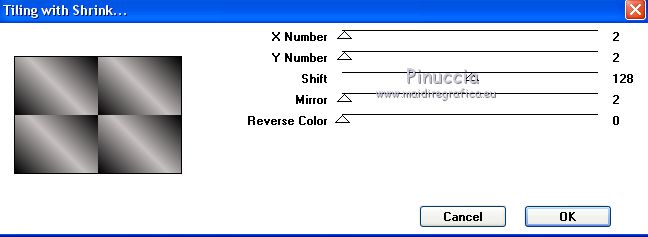
2. Effects>Plugins>Mura's Seamless - Tiling with Shrink
3. Effects>Reflection Effects>Kaleidoscope.
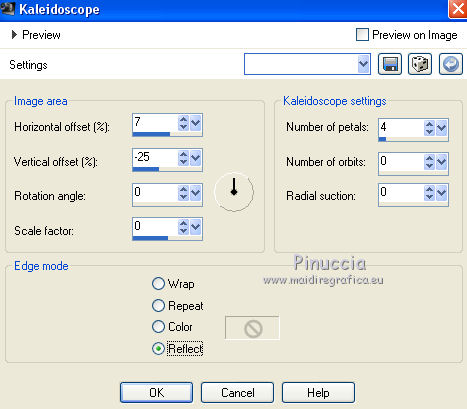
Effects>Plugins>Simple - Blintz.
Image>Flip.
Repeat Effects>Plugins>Simple - Blintz
4. Effects>Reflections Effects>Rotating Mirror.

Effects>Edge Effects>Enhance.
5. Activate the Magic Wand Tool 

Click on the right and left gray triangles.
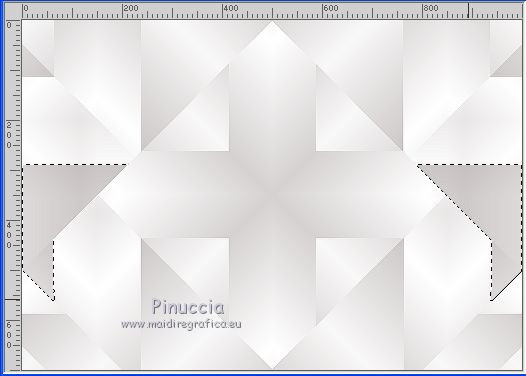
Selections>Promote Selection to Layer.
Selections>Select None.
6. Effets>Modules Externer>AP [Lines] - Lines - Lines SilverLining.
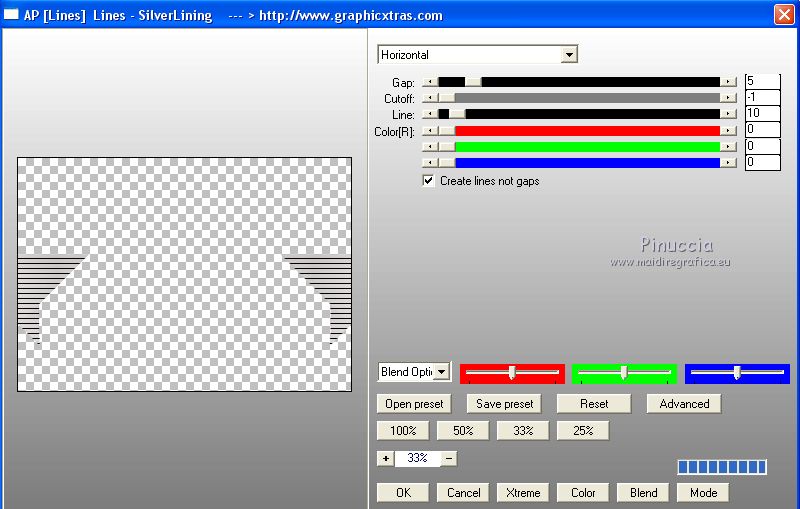
7. Effects>Image Effects>Seamless Tiling, default settings.

8. Effects>3D Effects>Drop Shadow, color #808080.
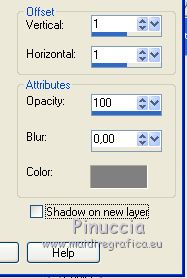
Repeat Drop Shadow, vertical and horizontal -1.
9. Selection Tool 
(no matter the type of selection, because with the custom selection your always get a rectangle)
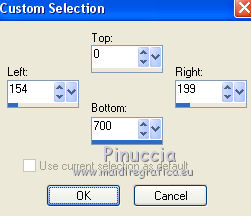
clic on the Custom Selection 
and set the following settings.
10. Layers>New Raster Layer.
Flood Fill  the layer with your Gradient. the layer with your Gradient.
Selections>Modify>Contract - 3 pixels.
Effects>3D Effects>Drop Shadow, color #808080.

Repeat Drop Shadow, vertical and horiziontal -1.
Selections>Select None.
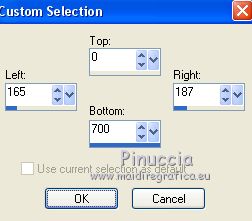
11. Custom Selection 
Layers>New Raster Layer.
Set your foreground color to Color.
Flood Fill  the layer with your foreground color. the layer with your foreground color.
Selections>Modify>Contract - 3 pixels.
Effects>3D Effects>Drop Shadow, same settings.

Repeat Drop Shadow, vertical and horizontal -1.
Selections>Select None.
12. Effects>3D Effects>Drop Shadow, color #808080.
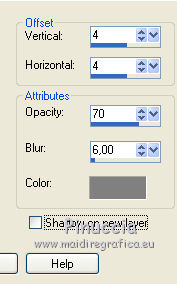
Repeat Drop Shadow, vertical and horizontal -4.
Layers>Merge>Merge Down.
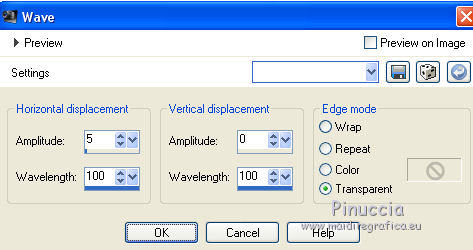
13. Effects>Distortion Effects>Wave.
14. Open the tube Adorno-onda and go to Edit>Copy.
Go back to your work and go to Edit>Paste as new layer.
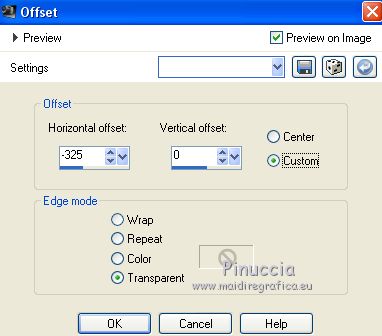
15. Effects>Image Effects>Offset.
16. Layers>Merge>Merge Down.
Layers>Duplicate.
Image>Mirror.
Layers>Merge>Merge down.
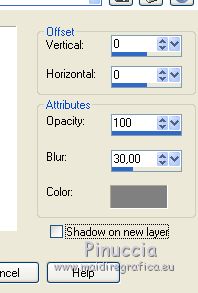
Effects>3D Effects>Drop Shadow, color #808080.
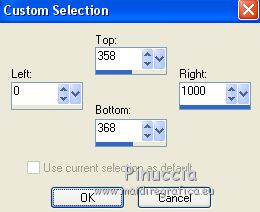
17. Custom Selection 
Layers>New Raster Layer.
Flood Fill  with your foreground color. with your foreground color.
Selections>Select None.
18. Effects>Distortion Effects>Pinch.

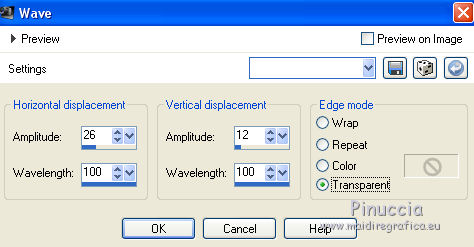
19. Effects>Distortion Effects>Wave.
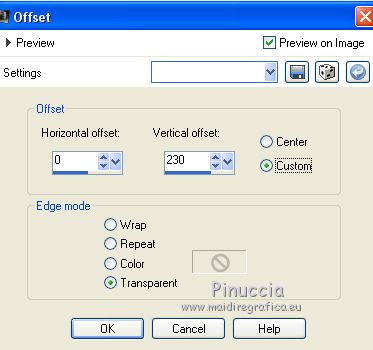
20. Effects>Image Effects>Offset.
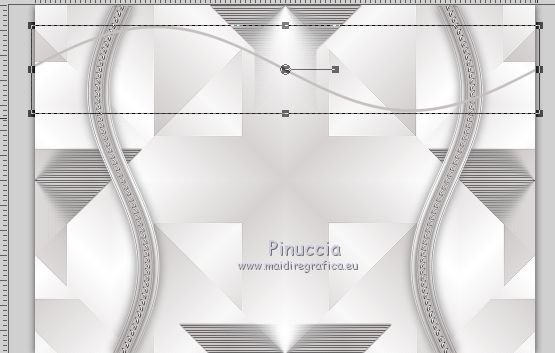
21. Activate the Pick Tool 
mode Scale 
push the right and left central nodes out the borders
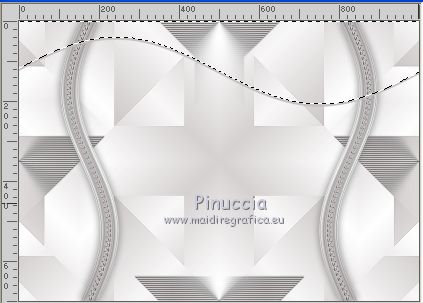
22. Activate the Magic Wand Tool  , tolerance 0, , tolerance 0,
and click on the top part of the wave
23. Layers>New Raster Layer.
Set again your foreground color to Gradient and change Angle to 0
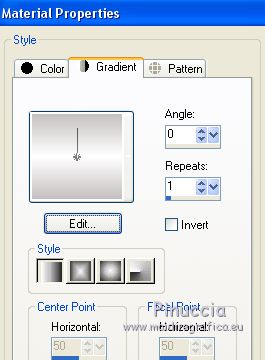
Flood Fill  the layer with your Gradient. the layer with your Gradient.
24. Effets>Modules Externer>AP [Lines] - Lines - Lines SilverLining.
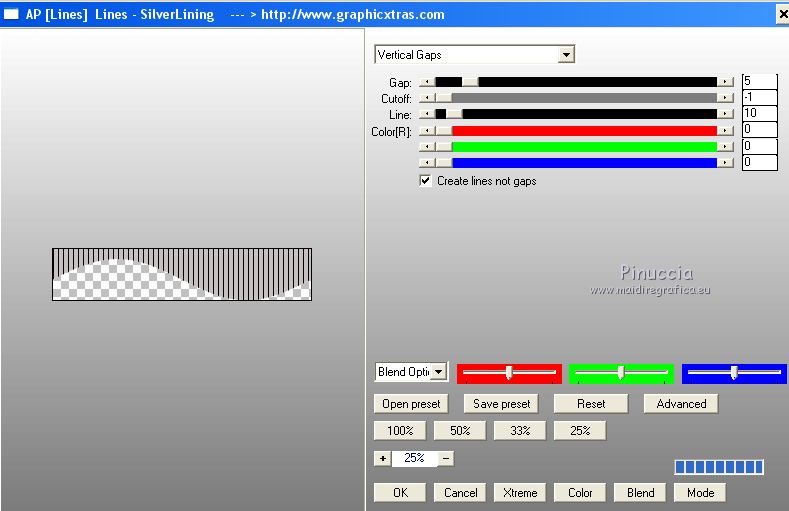
Selections>Select None.
25. Activate the layer below of the wave - Raster 3.
Effects>3D Effects>Drop Shadow, color #808080.

Repeat Drop Shadow, vertical and horizontal -1.
Activate the layer above, Raster 4.
Layers>Merge>Merge Down.
Layers>Duplicate.
Image>Mirror.
Layers>Merge>Merge Down.
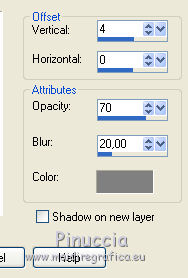
26. Effects>3D Effects>Drop Shadow, color #808080.
27. Layers>Merge>Merge visible.
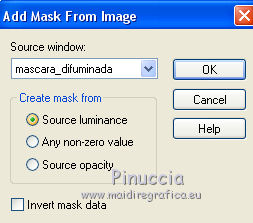
28. Layers>New Mask layer>From image
Open the menu under the source window and you'll see all the files open.
Select the mask mascara_difuminada.
Layers>Merge>Merge Group.
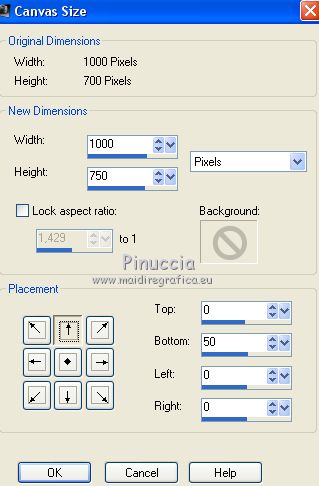
29. Image>Canvas Size - 1000 x 750 pixels
30. Change another time the settings of your Gradient.
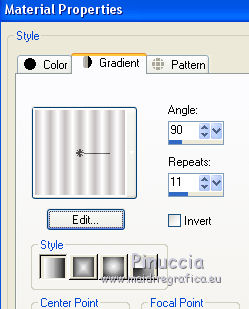
Layers>New Raster Layer.
Flood Fill  the layer with your gradient. the layer with your gradient.
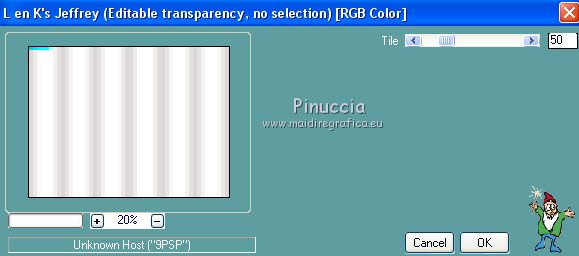
31. Effects>Plugins>L&K's - L&K's Jeffrey
32. Effects>Plugins>Mura's Meister - Perspective Tiling
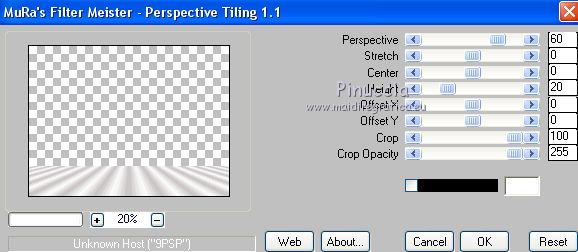
Effects>Edge Effects>Enhance.
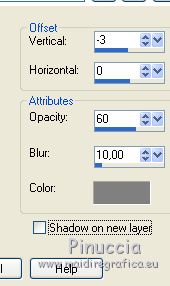
33. Effects>3D Effects>Drop Shadow, color #808080.
34. Open the tube florar and go to Edit>Copy.
Go back to your work and go to Edit>Paste as new layer.
Effects>3D Effects>Drop Shadow, color #808080.
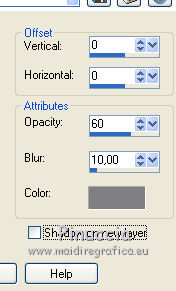
Edit>Repeat Drop Shadow.
35. Effects>Plugins>FM Tile Tools - Blend Emboss, default settings.

36. Effects>Image Effects>Offset.
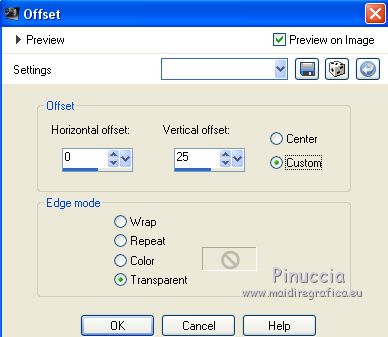
37. Layers>Merge>Merge All.
38. Image>Add borders, 3 pixels, symmetric, foreground color.
Image>Add borders, 3 pixels, symmetric, color white.
Image>Add borders, 3 pixels, symmetric, foreground color.
Image>Add borders, 50 pixels, symmetric, color white.
39. Open the tube of the vases and go to Edit>Copy.
Go back to your work and go to Edit>Paste as new layer.
Layers>Duplicate - 2 times.
Layers>Merge>Merge down - 2 times.
Effects>Image Effects>Offset.
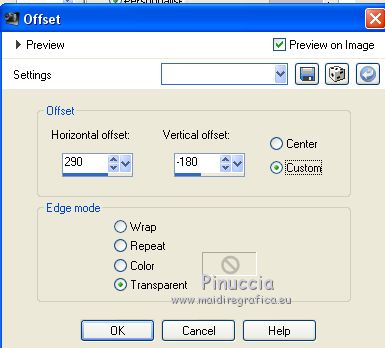
40. Effects>3D Effects>Drop Shadow, color #202020.
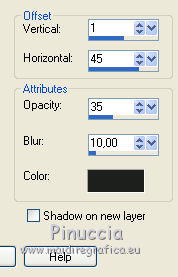
41. Open the tube of the woman and go to Edit>Copy.
Go back to your work and go to Edit>Paste as new layer.
Image>Resize, to 90%, resize all layers not checked.
Adjust>Sharpness>Sharpen.
Effects>Image Effects>Offset.
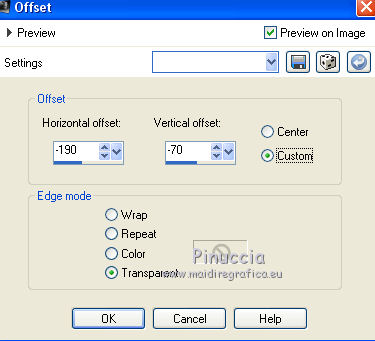
Effects>3D Effects>Drop Shadow, same settings.
42. Open the tube Equinero and go to Edit>Copy.
Go back to your work and go to Edit>Paste as new layer.
Don't move it.
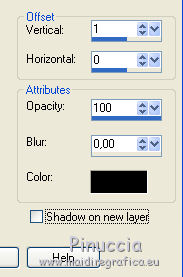
Effects>3D Effects>Drop Shadow, color #202020.
43. Sign your work on a new layer.
Image>Add borders, 3 pixels, symmetric, foreground color.
Save as jpg.

If you have problems or doubts, or you find a not worked link, or only for tell me that you enjoyed this tutorial, write to me.
2 December 2018
|

