|
VENUS

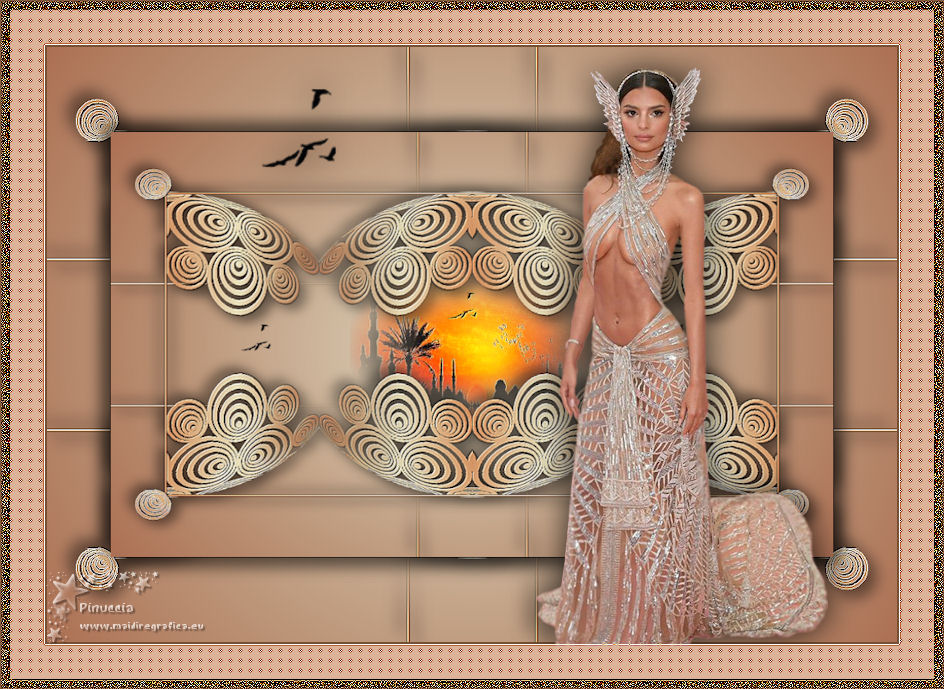
Thanks Emilieta for your invite to translate your tutorials into english.

This tutorial has been translated with PSPX7, but it can also be made using other versions of PSP.
Since version PSP X4, Image>Mirror was replaced with Image>Flip Horizontal,
and Image>Flip with Image>Flip Vertical, there are some variables.
In versions X5 and X6, the functions have been improved by making available the Objects menu.
In the latest version X7 command Image>Mirror and Image>Flip returned, but with new differences.
See my schedule here
french translation here
your versions here
Material here
The tubes are by Emilieta
(The links of the tubemakers here).
Plugins
consult, if necessary, my filter section here
FM Tile Tools - Saturation Emboss, here
Flaming Pear - Flexify 2 here
AP Lines - Lines SilverLining here
Alf's Border FX - Border Fade II here
Filters Alf's Border FX can be used alone or imported into Filters Unlimited.
(How do, you see here)
If a plugin supplied appears with this icon  it must necessarily be imported into Unlimited it must necessarily be imported into Unlimited

You can change Blend Modes according to your colors.
Copy the Gradient in the Gradients Folder.
1. Open a new transparent image 1000 x 700 pixels.
2. Open the tube Tube-Lia.circulos and go to Edit>Copy.
Go back to your work and go to Edit>Paste as new layer.
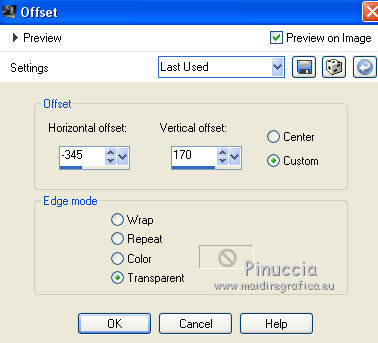
Effects>Image Effects>Offset.
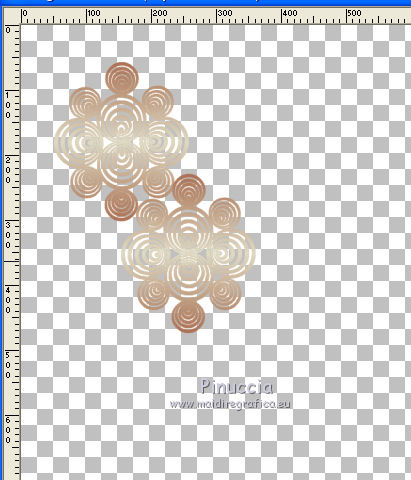
Layers>Duplicate.
Move  the image as below. the image as below.
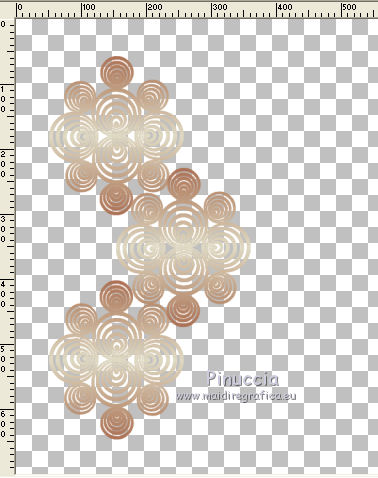
3. Activate the layer below of the original.
Layers>Duplicate.
Image>Flip.
Place  the image as below. the image as below.
4. Layers>Merge>Merge visible.
5. Effects>3D Effects>Drop Shadow, color black.
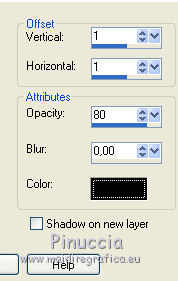
Repeat Drop Shadow, vertical and horizontal -1.
6. Layers>Duplicate.
Image>Mirror.
Layers>Merge>Merge visible.
7. Effects>Plugins>Flaming Pear - Flexify 2
attention: Anamorph is selected
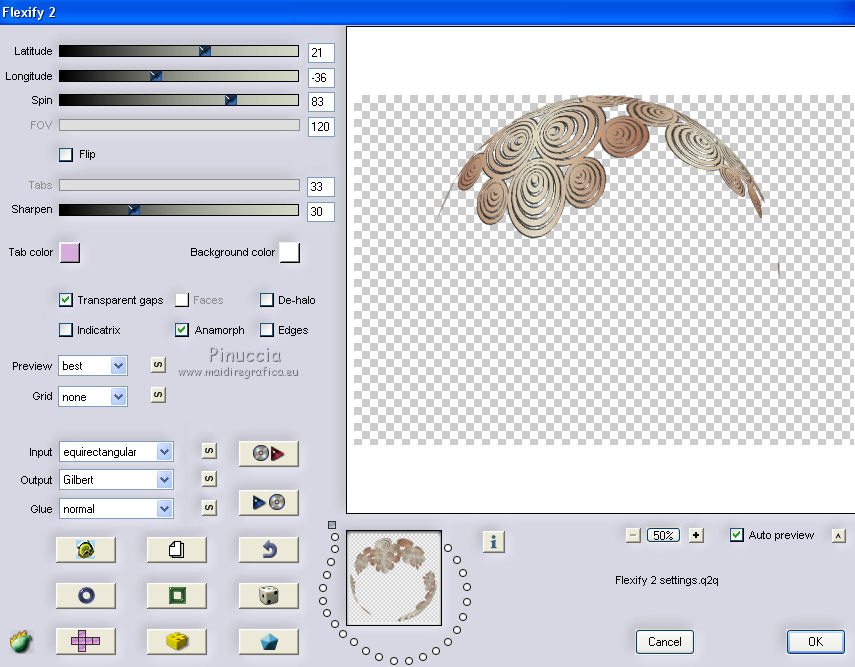
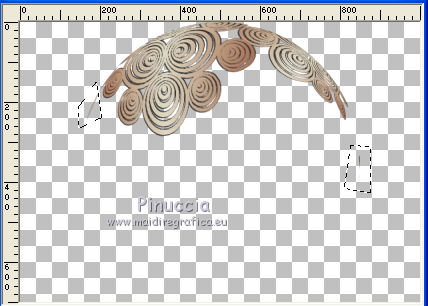
Activate your Eraser Tool  or Freehand Selection Tool or Freehand Selection Tool 
and erase the little signs to the left and to the right.
8. Image>Resize, to 85%, resize all layers not checked.
Effects>Reflection Effects>Rotating Mirror.

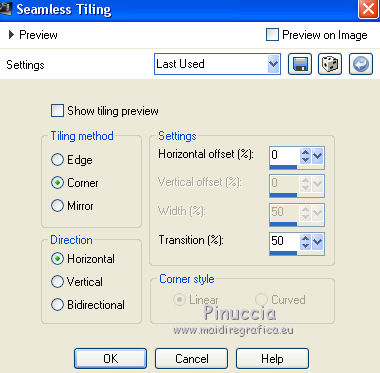
9. Effects>Image Effects>Seamless Tiling.
10. Again Image>Resize, to 85%, resize all layers not checked.
Adjust>Sharpness>Sharpen.
Layers>Duplicate.
Image>Flip.
Adjust>Sharpness>Sharpen.
11. Layers>Merge>Merge visible.
12. Layers>New Raster Layer.
Selection Tool 
(no matter the type of selection, because with the custom selection your always get a rectangle)
clic on the Custom Selection 
and set the following settings.
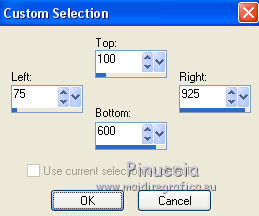
13. Set your foreground color to Gradient and select the gradient Subtle-FK, style Sunburst.
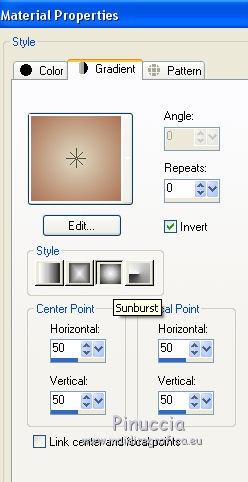
Flood Fill  the selection with your Gradient. the selection with your Gradient.
Selections>Modify>Contract - 2 pixels.
Press CANC on the keyboard 
Selections>Select None.
14. Effects>3D Effects>Drop Shadow.

Repeat Drop Shadow, vertical and horizontal -1.
Adjust>Sharpness>Sharpen.
15. Layers>Duplicate.
Effects>Image Effects>Seamless Tiling, default setting.

Layers>Arrange>Send to Bottom.
16. Layers>Merge>Merge visible.
17. Layers>New Raster Layer.
Flood Fill  the layer with your Gradient. the layer with your Gradient.
Layers>Arrange>Send to Bottom.
18. Activate the top layer.
Open the tube esquineros and go to Edit>Copy.
Go back to your work and go to Edit>Paste as new layer.
Adjust>Sharpness>Sharpen - 2 times.
Layers>Merge>Merge Down.
Effects>Plugins>FM Tile Tools - Saturation Emboss, default settings.

19. Effects>3D Effects>Drop Shadow.
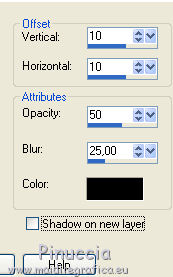
Repeat Drop Shadow, vertical and horizontal -10.
29. Open the tube of the landscape and go to Edit>Copy.
Go back to your work and go to Edit>Paste as new layer.
Image>Resize, to 85%, resize all layers not checked.
Adjust>Sharpness>Sharpen - 2 times.
Effects>Plugins>FM Tile Tools - Saturation Emboss, default settings.

Layers>Arrange>Move Down.
30. Layers>Merge>Merge visible.
31. Layers>Duplicate.
Image>Resize, 83%, resize all layers not checked.
32. Activate your Pick Tool 
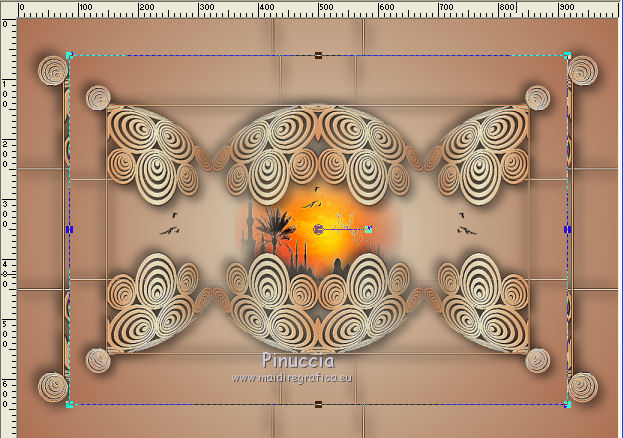
mode Échelle 
push the nodes to the edges of the previous image and to the edges of the corners
(I reduced the opacity a little to see better the image below)
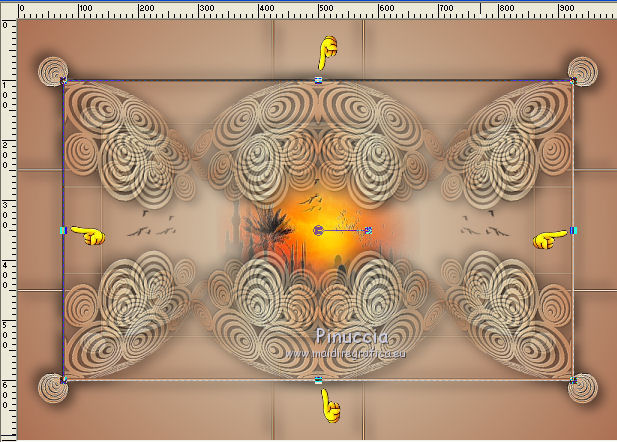
Don't forget to sed again the opacity to 100, if you did it
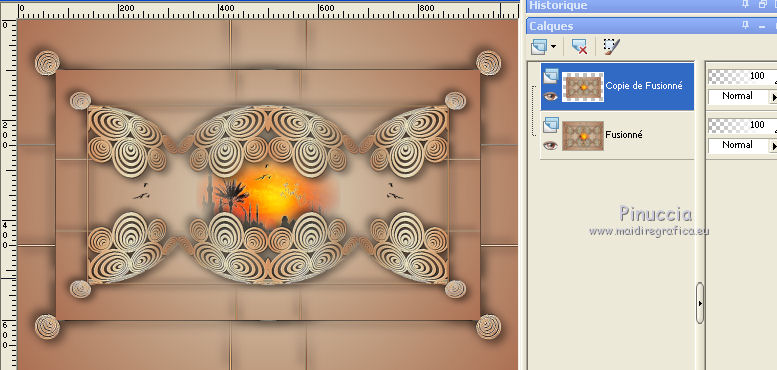
33. Effects>3D Effects>Drop Shadow, last settings.
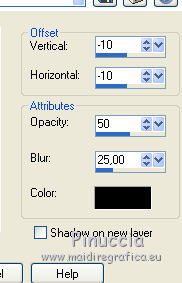
Repeat Drop Shadow in positive.

34. Layers>Merge>Merge visible.
Image>Resize, to 85%, resize all layers checked.
35. Set your foreground color to #774f32,
and your background color to #dcb299.
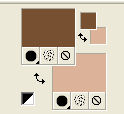
36. Image>Add borders, 2 pixels, symmetric, foreground color.
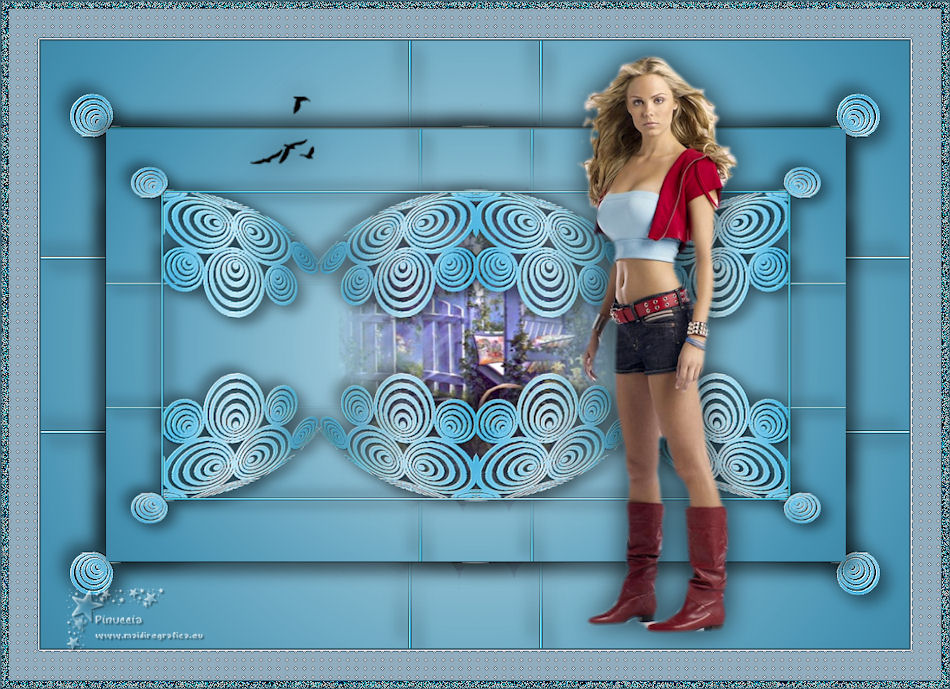
37. Open the tube of the woman and go to Edit>Copy.
Go back to your work and go to Edit>Paste as new layer.
Image>Resize, to 75%, resize all layers not checked.
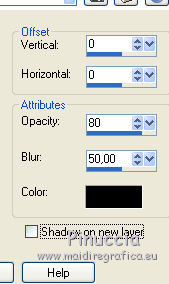
38. Effects>3D Effects>Drop Shadow.
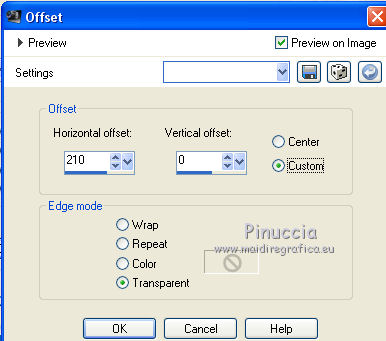
39. Effects>Image Effects>Offset.
40. Open the tube of the birds and go to Edit>Copy.
Go back to your work and go to Edit>Paste as new layer.
Image>Resize, to 140%, resize all layers not checked.
Move  the tube upwards. the tube upwards.
Effects>3D Effects>Drop Shadow, same settings.
41. Image>Add borders, 35 pixels, symmetric, background color.
Activate your Magic Wand Tool 
and click on the border to select it.
42. Effects>Plugins>AP 01 Innovations - Lines SilverLining.
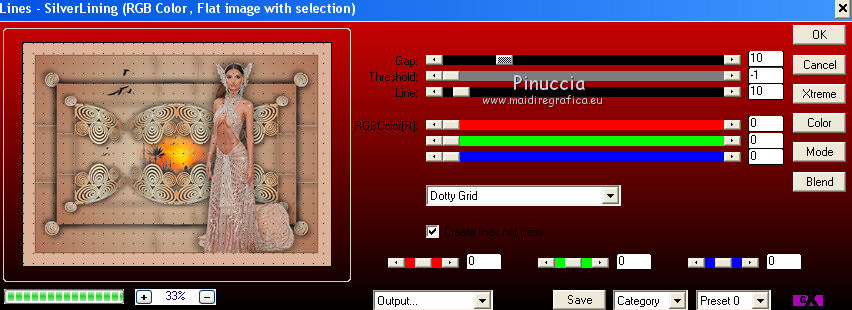
Effects>Edge Effects>Enhance - 2 times.
Selections>Select None.
43. Image>Add borders, 10 pixels, symmetric, foreground color.
Select this border with your Magic Wand Tool 
Effects>Plugins>Filters Unlimited 2.0 - Alf's Border FX - Border Fade II.
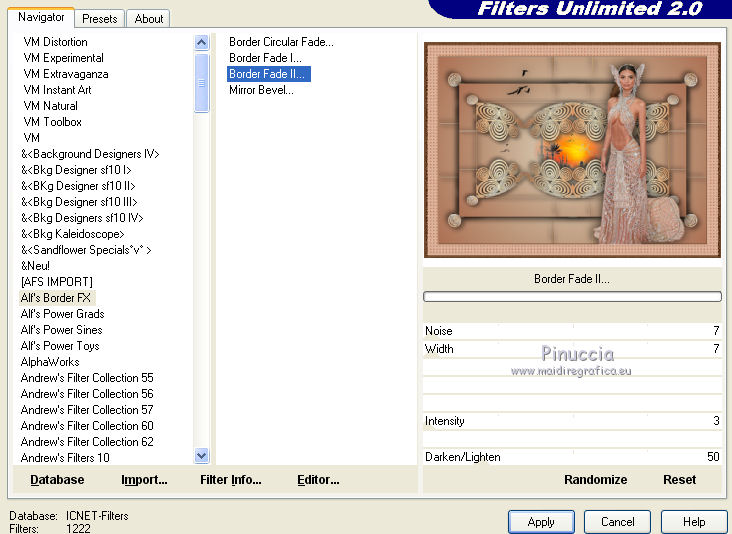
Effects>Edge Effects>Enhance.
Adjust>Sharpness>Sharpen.
Selections>Select None.
44. Sign your work on a new layer.
Layers>Merge>Merge All and save as jpg.
Version with tubes by Aclis and Thafs.

If you have problems or doubts, or you find a not worked link, or only for tell me that you enjoyed this tutorial, write to me.
28 July 2019
|