|
THE SUN

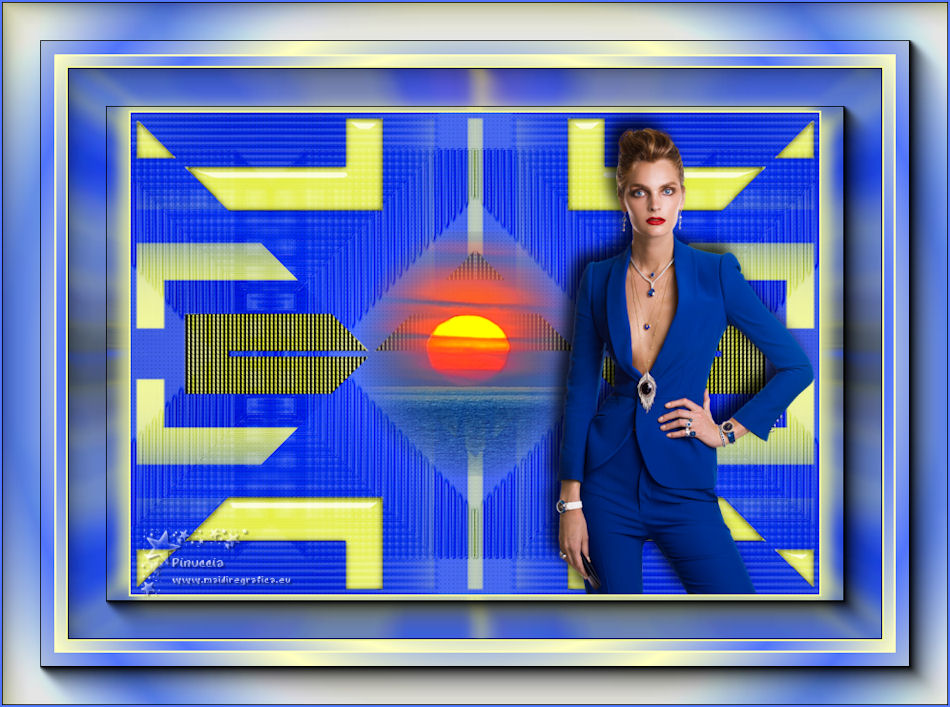
Thanks Emilieta for your invite to translate your tutorials into english.

This tutorial has been translated with PSPX7, but it can also be made using other versions of PSP.
Since version PSP X4, Image>Mirror was replaced with Image>Flip Horizontal,
and Image>Flip with Image>Flip Vertical, there are some variables.
In versions X5 and X6, the functions have been improved by making available the Objects menu.
In the latest version X7 command Image>Mirror and Image>Flip returned, but with new differences.
See my schedule here
french translation here
your versions here
Material here
Thanks for the tube Cady and for one mask Cameron.
The rest of the material is by Emilieta
(The links of the tubemakers here).
Plugins
consult, if necessary, my filter section here
Filters Unlimited 2.0 - here
Simple - Pizza Slice Mirror here
FM Tile Tools - Saturation Emboss here
AP 01 [Innovations] - Lines SilverLining here
AAA Frames - Foto Frame here
Alien Skin Eye Candy 5 Impact - Glass here

You can change Blend Modes according to your colors.
In the newest versions of PSP, you don't find the foreground/background gradient (Corel_06_029).
You can use the gradients of the older versions.
The Gradient of CorelX here
Open the masks in PSP and minimize them with the rest of the material.
1. Open a new transparent image 1000 x 700 pixels.
Set your foreground color to #5175fb,
and your background color to #3e5ce4.
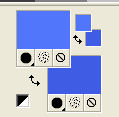
Set your Foreground color to a Foreground/Background Gradient, Sunburst.
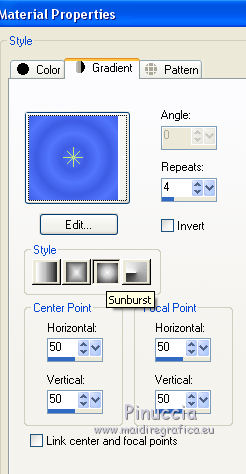
Flood Fill  the transparent image with your Gradient. the transparent image with your Gradient.
Effects>3D Effects>Enhance.
2. Layers>New Mask layer>From image
Open the menu under the source window and you'll see all the files open.
Select the mask MaskCameron87.
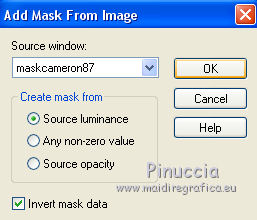
Layers>Merge>Merge Group.
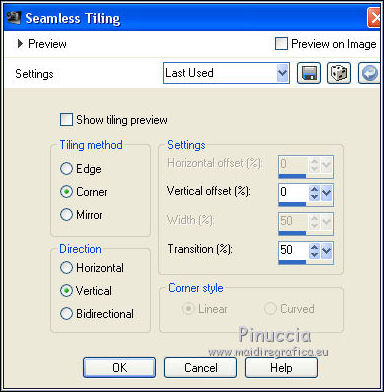
3. Effects>Image Effects>Seamless Tiling.
4. Effects>Plugins>Simple - Pizza Slice Mirror.
5. Set your background color to #f0f59d.
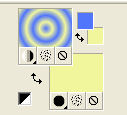
Layers>New Raster Layer.
Flood Fill  the layer with color #f0f59d. the layer with color #f0f59d.
Layers>Arrange>Send to Bottom.
6. Keep this layer selected.
Activate your Freehand Selection Tool 
and select the 4 angels as below.
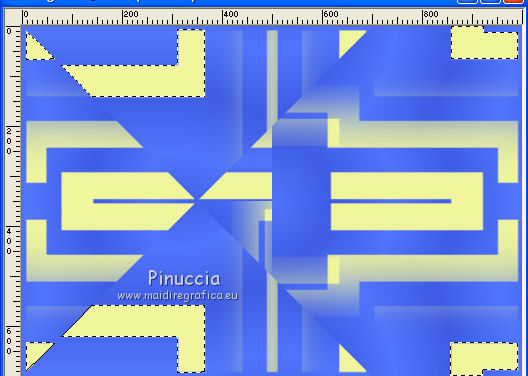
it's more fun to do it yourself, but if you have difficulty to select,
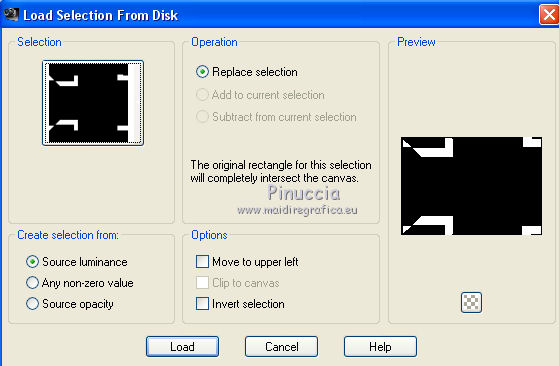
you can use the selection 1 I have prepared and added to the material.
Selections>Load/Save Selection>Load Selection from Disk.
Look for and select the selection The Sun 1.
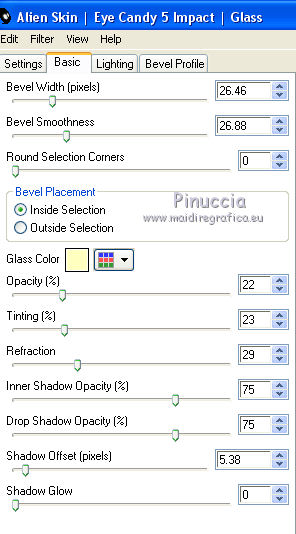
7. Effects>Plugins>Alien Skin Eye Candy 5 Impact - Glass - background color.
8. Effects>3D Effects>Drop Shadow, color #000000.
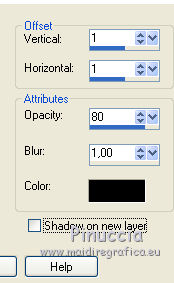
Repeat Drop Shadow, vertical and horizontal -1.
Selections>Select None.
9. Activate your Freehand Selection Tool 
and select the central part (don't forget the little zones).
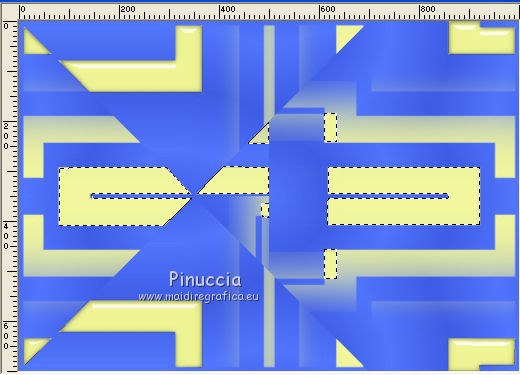
as at step 6, you can use my selection:
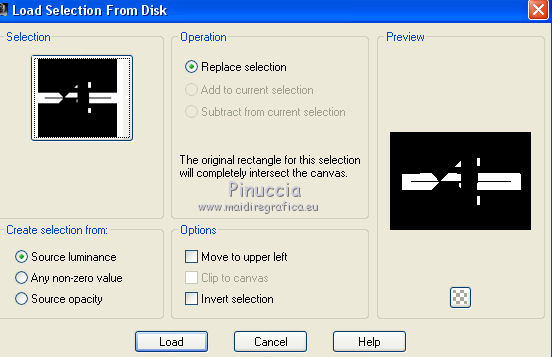
Selections>Load/Save Selection>Load Selection from Disk.
Look for and select the selection The Sun 2.
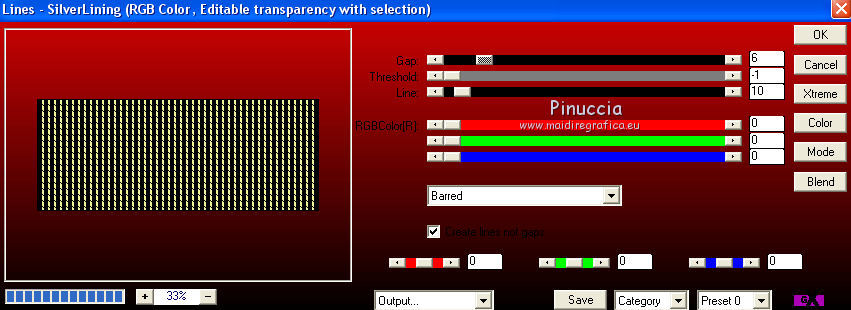
10. Effects>Plugins>AP 01 [Innovations] - Lines SilverLining.
11. Effects>3D Effects>Drop Shadow, same settings.
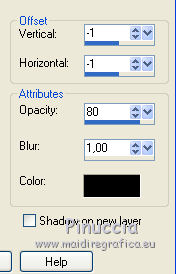
Repeat Drop Shadow, in positive

12. Activate the layer above of the mask.
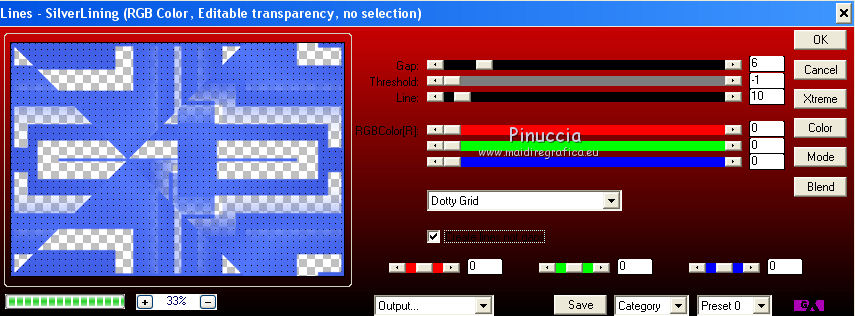
Effects>Plugins>AP 01 [Innovations] - Lines SilverLining.
13. Layers>Merge>Merge visible.
14. Effects>Reflection Effects>Rotating Mirror.

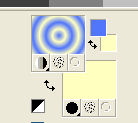
15. Set your background color to #ffffc0.
Layers>New Raster Layer.
Flood Fill  the layer with color #ffffc0. the layer with color #ffffc0.
16. Layers>New Mask layer>From image
Open the menu under the source window
and select the mask Lia-150.
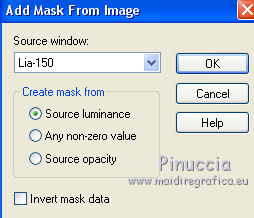
Layers>Merge>Merge Group.
17. Effects>3D Effects>Enhance.
18. Effects>3D Effects>Drop Shadow, same settings.
 
19. Effects>Plugins>FM Tile Tools - Saturation Emboss, default settings.

Change the Blend Mode of this layer to Burn.
Adjust>Sharpness>Sharpen.
20. Open the landscape tube, erase the watermark, and go to Edit>Copy.
Go back to your work and go to Edit>Paste as new layer.
Layers>Duplicate.
Effects>Plugins>FM Tile Tools - Saturation Emboss, default settings.
21. Layers>Merge>Merge visible.
22. Image>Resize, to 85%, resize all layers cheched.
23. Set again your background color to #f0f59d.

Image>Add borders, 2 pixels, symmetric, background color #f0f59d.
24. Layers>Duplicate.
Image>Resize, to 85%, resize all layers not checked.
25. Effects>3D Effects>Drop Shadow, background color #f0f59d.
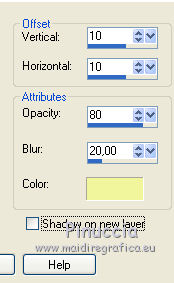
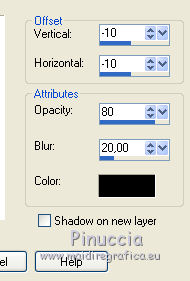
Repeat Drop Shadow, vertical and horizontal -10.
26. Activate the bottom layer.
Adjust>Blur>Radial Blur.
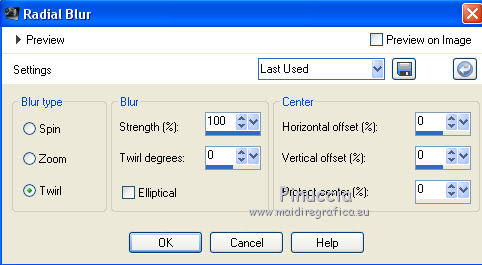
Effects>3D Effects>Enhance.
27. Layers>Merge>Merge visible.
28. Open the woman tube, erase the watermark, and go to Edit>Copy.
Go back to your work and go to Edit>Paste as new layer.
Image>Resize, to 70%, resize all layers not checked.
Image>Mirror.
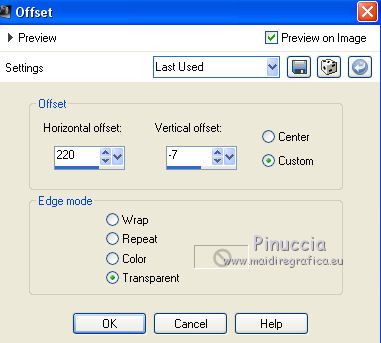
29. Effects>Image Effects>Offset.
30. Effects>3D Effects>Drop Shadow, color black #000000.
31. Sign your work on a new layer.
Layers>Merge>Merge visible.
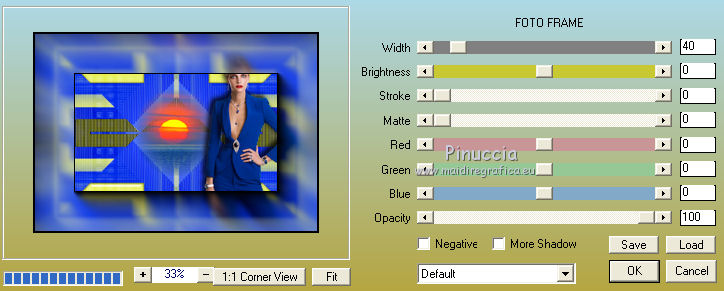
32. Effects>Plugins>AAA Frames - Foto Frame.
33. Image>Add borders, 2 pixels, symmetric, background color #f0f59d.
Image>Add borders, 10 pixels, symmetric, color #ffffff.
34. Activate your Magic Wand Tool 
and click on the white bord to select it.
Flood Fill  the selection with your gradient (now blu and yellow) the selection with your gradient (now blu and yellow)

Selections>Select None.
35. Image>Add borders, 2 pixels, symmetric, background color #f0f59d.
Image>Add borders, 55 pixels, symmetric, color #ffffff.
Select the white border with your Magic Wand Tool 
Flood Fill  the selection with your gradient. the selection with your gradient.
Selections>Select None.
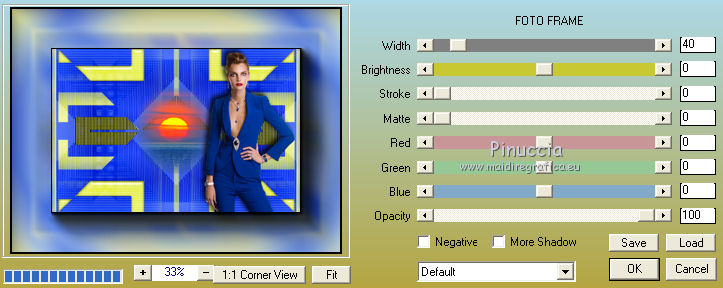
36. Effects>Plugins>AAA Frames - Foto Frame, same settings.
37. Image>Add borders, 2 pixels, symmetric, blu foreground color.
38. Save as jpg.
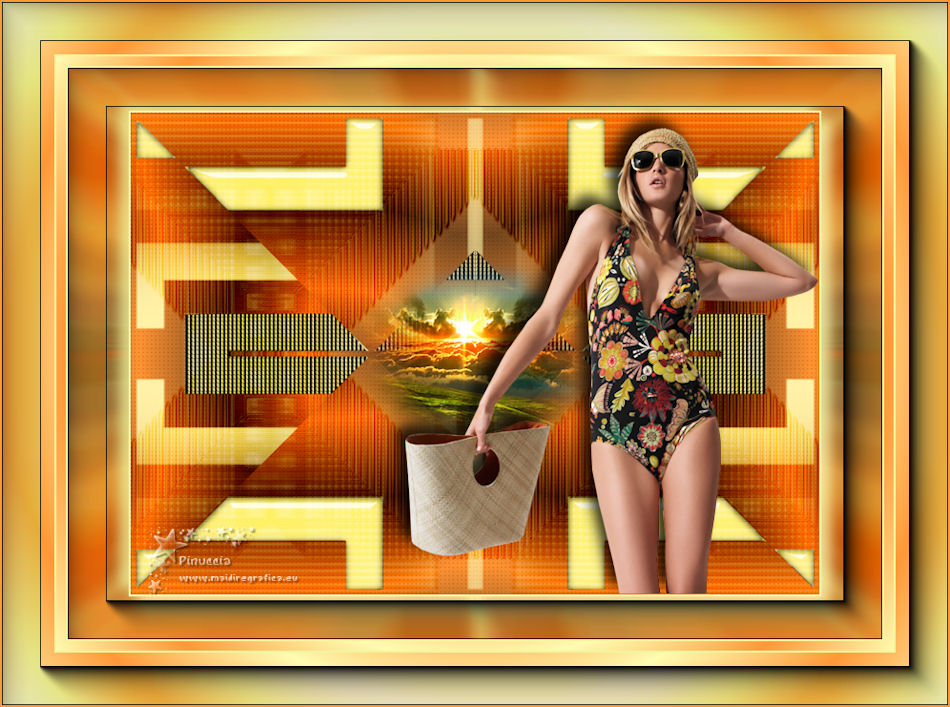
Version with tubes by Stephane and Devilinside

If you have problems or doubts, or you find a not worked link, or only for tell me that you enjoyed this tutorial, write to me.
20 July 2019
|