|
IMPOSSIBLE

Thanks Emilieta for your invite to translate your tutorials into english.

This tutorial has been translated with PSPX7, but it can also be made using other versions of PSP.
Since version PSP X4, Image>Mirror was replaced with Image>Flip Horizontal,
and Image>Flip with Image>Flip Vertical, there are some variables.
In versions X5 and X6, the functions have been improved by making available the Objects menu.
In the latest version X7 command Image>Mirror and Image>Flip returned, but with new differences.
See my schedule here
french translation here
your versions here
Material here
The woman tube is by Isa
The rest of the material is by Emilieta
(The links of the tubemakers here).
Plugins
consult, if necessary, my filter section here
Filters Unlimited 2.0 here
Italian Editors Effect - Vetro here
AAA Frames - Foto Frame here
L&K's - L&K's Jeffrey here
Simple - Pizza Slice Mirror here
Filters Italian Editors and Simple can be used alone or imported into Filters Unlimited.
(How do, you see here)
If a plugin supplied appears with this icon  it must necessarily be imported into Unlimited it must necessarily be imported into Unlimited

You can change Blend Modes according to your colors.
In the most recent versions of PSP, you cannot find the foreground/background gradient or Corel_06_029.
You can use the gradient from earlier versions.
here the CorelX Gradients.
Copy the gradient Pastels 3 in the Gradients Folder.
1. Open CanalAlfa_imposible.
2. Set your foreground color to #b89f28.
and your background color to #eec626.

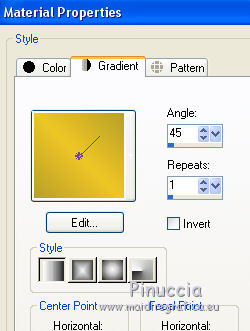
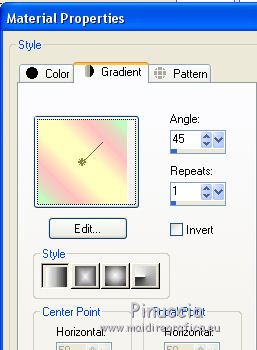
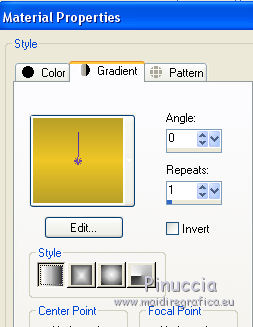
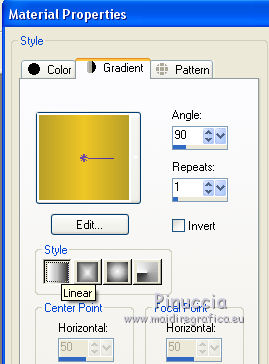
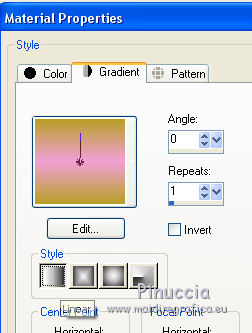
Set your foreground color to a Foreground/Background Gradient, style Linear.
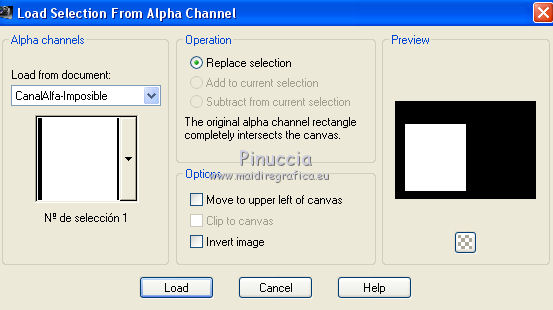
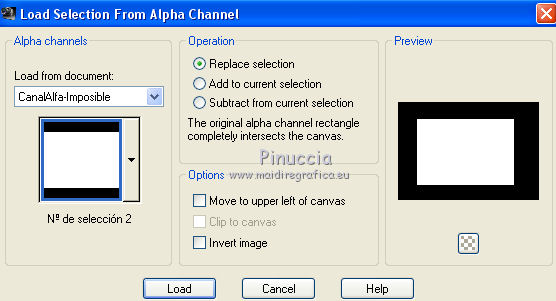
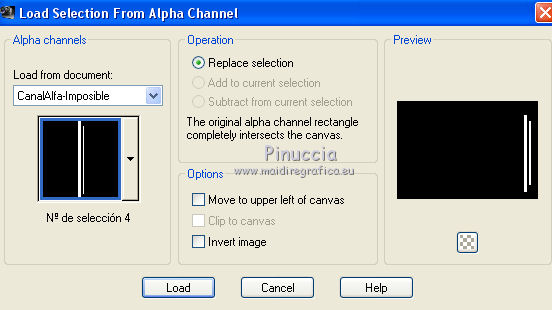
3. Selections>Load/Save Selection>Load Selection from Alpha Channel.
The selection #1 is immediately available.
You have just click Load.
Flood Fill  the selection with your gradient. the selection with your gradient.
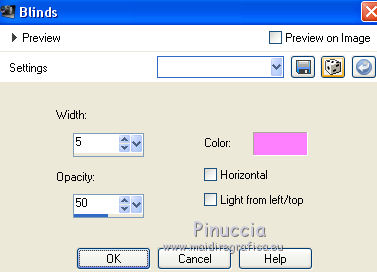
4. Effects>Texture Effects>Blinds - color #ff80ff.
Effects>Edge Effects>Enhance.
Selections>Select None.
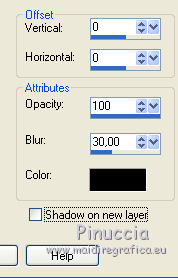
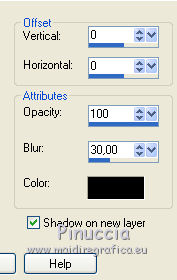
5. Effects>3D Effects>Drop Shadow.
6. Layers>New Raster Layer.
Selections>Load/Save Selection>Load Selection from Alpha Channel.
Open the selections menu and load the selection #2.
7. Set your Gradient to the Gradient Pastels 3, same settings.
Flood Fill the selection with your gradient.
Selections>Select None.
8. Effects>Texture Effects>Blinds, same color #ff80ff.

Effects>Edge Effects>Enhance.
Effects>3D Effects>Drop Shadow, same settings.
9. Layers>New Raster Layer.
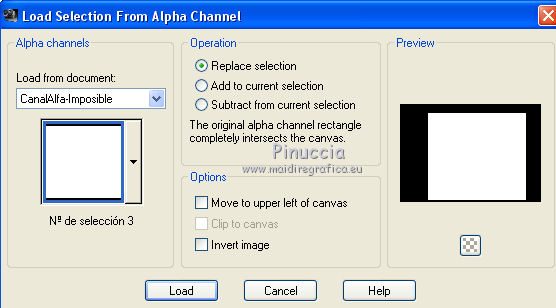
Selections>Load/Save Selection>Load Selection from Alpha Channel.
Open the selections menu and load the selection #3.
10. Set again your foreground color to the Foreground/Background Gradient, this time Angle 0.
Flood Fill the selection with your gradient.
Selections>Select None.
11. Layers>Duplicate.
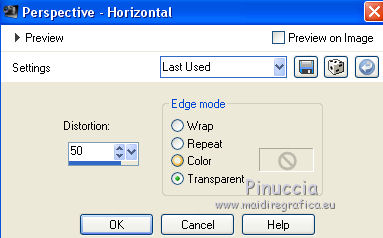
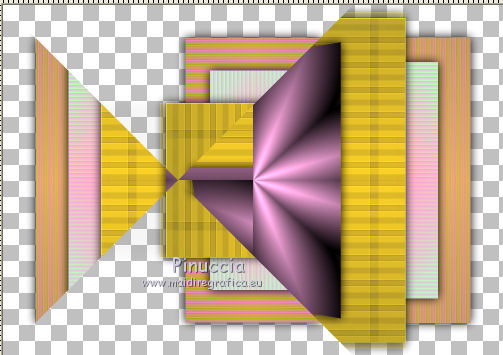
Effects>Geometric Effects>Perspective horizontal.
12. Effects>Plugins>Italian Editors Effect - Fiore

13. Effects>3D Effects>Drop Shadow, same settings.
14. Activate the layer above of the original, Raster 2.
Effects>Plugins>L&K's - L&K Jeffrey.

Effects>Edge Effects>Enhance.
Effects>3D Effects>Drop Shadow, same settings.
15. Layers>Merge>Merge visible.
16. Effects>Plugins>Simple - Pizza Slice Mirror.
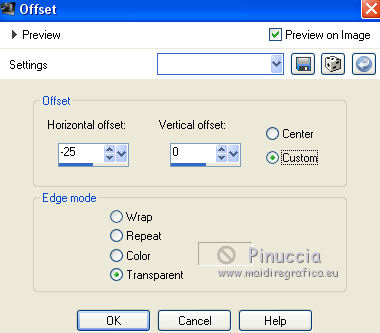
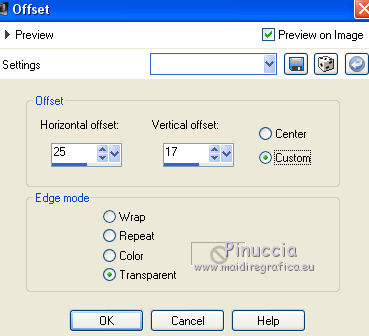
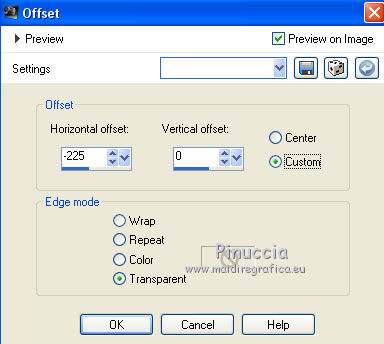
Effects>Image Effects>Offset.
Effects>3D Effects>Drop Shadow, same settings.
17. Layers>New Raster Layer.
Selections>Load/Save Selection>Load Selection from Alpha Channel.
Open the selections menu and load the selection #4.
18. Set again your foreground color with the gradient Pastel 3.
Flood Fill the selection with your gradient.
19. Effects>Texture Effects>Blinds, last settings.
Effects>Edge Effects>Enhance.
Effects>3D Effects>Drop Shadow, same settings.
20. Effects>Image Effects>Offset.
21. Layers>Duplicate.
Effects>Image Effects>Seamless Tiling, default settings.

22. Again change the gradient with the Foreground/Background Gradient, Angle 90
Layers>New Raster Layer.
Flood Fill the layer with your Gradient.
Layers>Arrange>Send to Bottom.
Effects>Edge Effects>Enhance More - 2 times.
23. Open the landscape tube and go to Edit>Copy.
Go back to your work and go to Edit>Paste as new layer.
Effects>Image Effects>Offset.
24. Layers>Duplicate.
Adjust>Sharpness>Sharpen.
Layers>Merge>Merge Down.
25. This layer is under the layer Merged.

26. Set your background color to #f0a1d6.

Change the settings of your Foreground/Background Gradient, Angle 0
Layers>New Raster Layer.
Layers>Arrange>Bring to Top.
Flood Fill the layer with your Gradient.
Selections>Select All.
Selections>Modify>Contract - 4 pixels.
Press CANC on the keyboard 
Selections>Select None.
Effects>Edge Effects>Enhance More.
27. Layers>Merge>Merge visible.
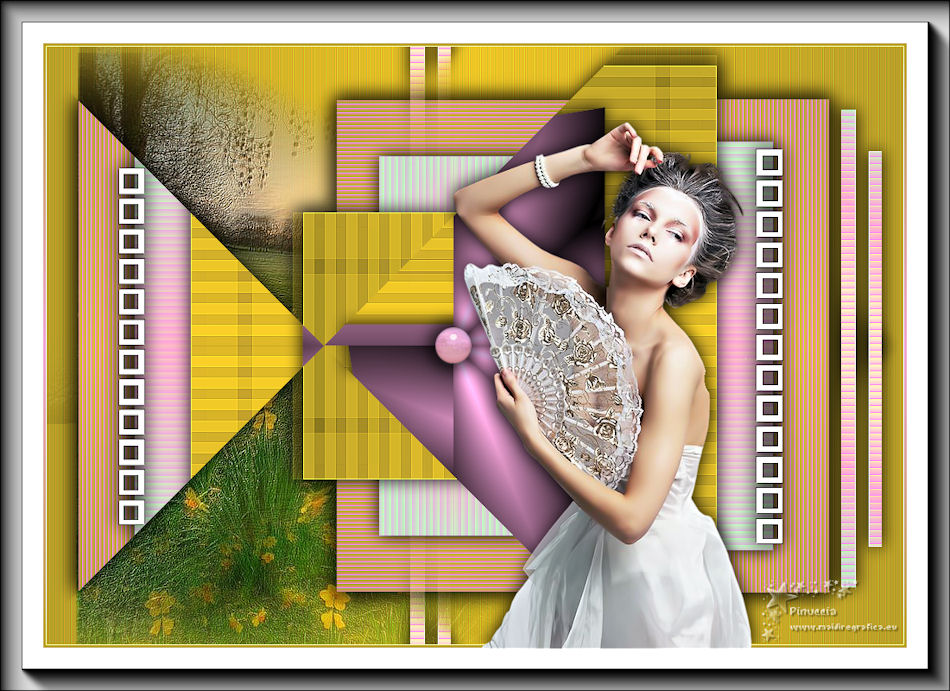
28. Image>Add borders, 50 pixels, symmetric, color white.
29. Effects>Plugins>AAA Frames - Foto Frame.

Repeat Effets>Modules Externes>AAA Frames - Foto Frame, same settings.
30. Open the tube cuadritos and go to Edit>Copy.
Go back to your work and go to Edit>Paste as new layer.
Move  the tube to the right side. the tube to the right side.

31. Layers>Duplicate.
Image>Mirror.
Activate the Selection Tool 
and select the top cadre

Press CANC on the keyboard.
Selections>Select None.
Image>Resize, to 98%, resize all layers not checked.
Place rightly the cadres

Layers>Merge>Merge Down.
Effects>3D Effects>Drop Shadow.
32. Open the tube Boton and go to Edit>Copy.
Go back to your work and go to Edit>Paste as new layer.
Place rightly the tube.

33. Open the woman tube, erase the watermark and and go to Edit>Copy.
Go back to your work and go to Edit>Paste as new layer.
Image>Mirror.
Image>Resize, to 85%, resize all layers not checked.
Adjust>Sharpness>Shapen.
Move the tube on the border.
Effects>3D Effects>Drop Shadow, same settings, but Shadow on new layer checked
On the shadow layer:
Activate your Selection Tool 
and select the shadow on the border

Press CANC on the keyboard.
Selections>Select None.
34. Sign your work on a new layer.
Layers>Merge>Merge All.
If you don't want realize the animation, save as jpg.
35. If you want realize the animation
Layers>Promote Background Layer.
Activate your Lasso Tool 
and select the fan

Layers>Duplicate - 2 times.
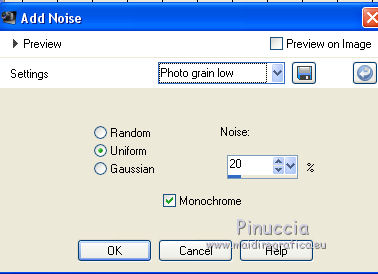
36. Activate the first layer.
Adjust>Add/Remove Noise>Add Noise
preset Photo grain low
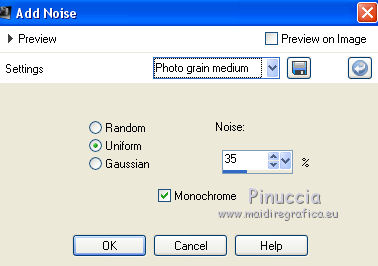
37. Vous positionner sur le deuxième calque.
Adjust>Add/Remove Noise>Add Noise
preset Photo grain medium
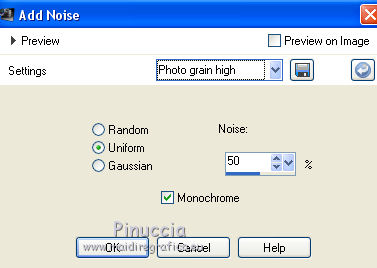
38. Vous positionner sur le troisième calque
Adjust>Add/Remove Noise>Add Noise
preset Photo grain high
Selections>Select None.
39. Apply the stars on every layer, over the roses, at your choice.
You can copy/paste as new layer the supplied tube sparkles,
or use it as Picture Tubes 
40. Save as Animation Shop (*psp)

41. Open Animation Shop and open your image.
And you'll get an animation composed by 3 frames.
Keep the frame to 10.
Check the result clicking on View animation 
and save as jpg.

If you have problems or doubts, or you find a not worked link, or only for tell me that you enjoyed this tutorial, write to me.
17 April 2019
|


