|
CUBICO


Thanks Emilieta for your invite to translate your tutorials into english.
This tutorial has been translated with PSPX7, but it can also be made using other versions of PSP.
Since version PSP X4, Image>Mirror was replaced with Image>Flip Horizontal,
and Image>Flip with Image>Flip Vertical, there are some variables.
In versions X5 and X6, the functions have been improved by making available the Objects menu.
In the latest version X7 command Image>Mirror and Image>Flip returned, but with new differences.
See my schedule here
french translation here
your versions here
Material here
The landscape photo is by Paqui Lopez.
Thanks for the tube Beatriz and for the masks Ildiko, Narah, Emi.
(The links of the tubemakers here).
Plugins
consult, if necessary, my filter section here
FM Tile Tools - Saturation Emboss, here
Mehdi - Sorting Tiles here
Kohan Filter - Autointerlacer here
AAA Frames - Foto Frame here
Filters Unlimited 2.0 here
Filters Alf's Border FX can be used alone or imported into Filters Unlimited.
(How do, you see here)
If a plugin supplied appears with this icon  it must necessarily be imported into Unlimited it must necessarily be imported into Unlimited

You can change Blend Modes according to your colors.
Copy the Gradient in the Gradients Folder.
Open the masks in PSP and minimize them with the rest of the material.
1. Open a new transparent image 1000 x 700 pixels.
2. Set your foreground color to Gradient, and select the gradient pinkish tinge_CC, style Linear.
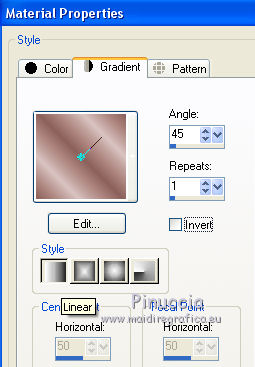
Flood Fill  the image with your gradient. the image with your gradient.
Effects>Edge Effects>Enhance More - 2 times.
3. Layers>Duplicate.
Image>Mirror.
Reduce the opacity of this layer to 50%.
Layers>Merge>Merge visible.
4. Effects>Plugins>Mehdi - Sorting Tiles.

5. Effects>Plugins>Kohan's filters - Autointerlacer

6. Effects>Reflection Effects>Rotating Mirror.

7. Set your foreground color to #f4f3d4.
Layers>New Raster Layer.
Flood Fill  the layer with your foreground color. the layer with your foreground color.
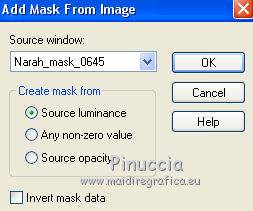
Layers>New Mask layer>From image
Open the menu under the source window and you'll see all the files open.
Select the mask Narah_Mask_0645.
Layers>Merge>Merge Group.
8. Image>Resize, to 85%, resize all layers not checked.
Effects>Reflection Effects>Rotating Mirror, same settings.

Image>Resize, 2 times to 85%, resize all layers not checked.
9. Image>Free Rotate - 90 degrees to left.

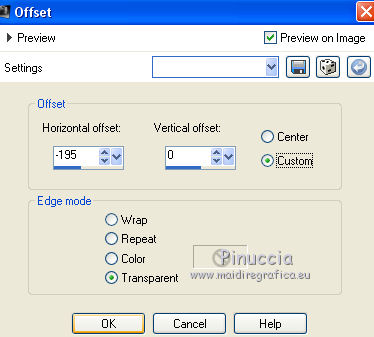
10. Effects>Image Effects>Offset.
11. Effects>Reflection Effects>Rotating Mirror, same settings.

Again Image>Resize, to 85%, resize all layers not checked.
Effects>Edge Effects>Enhance.
Reduce the opacity of this layer to 75%.
12. Effects>3D Effects>Drop Shadow.
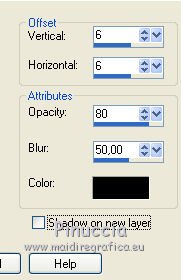
Repeat Drop Shadow, vertical and horizontal -6.
13. Open the déco Adorno - Edit>Copy.
Go back to your work and go to Edit>Paste as new layer.
Place  rightly the tube, rightly the tube,
or Effects>Image Effects>Offset.
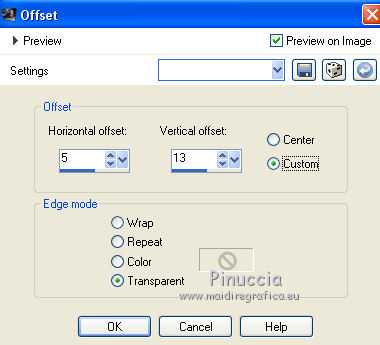
Layers>Merge>Merge Down.
14. Open the landscape by Paqui Lopez.
Layers>New Mask layer>From image
Open the menu under the source window
and select the mask Emimask-circulo-G.
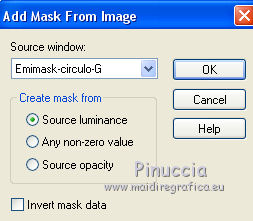
Layers>Merge>Merge Group.
15. Edit>Copy.
Go back to your work and go to Edit>Paste as new layer.
Image>Resize, to 60%, resize all layers not checked.
Place  the tube on the left circle. the tube on the left circle.

Layers>Duplicate.
Image>Mirror.
Layers>Merge>Merge down.
Adjust>Sharpness>Sharpen.
16. Close the layer Merged
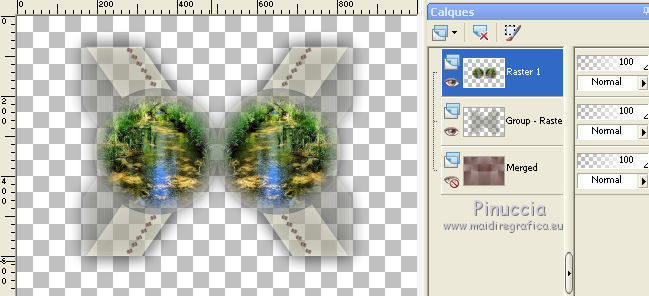
Layers>Merge>Merge visible.
Edit>Cut.
Edit>Paste as new layer and the image will be rightly in the middle of the image.
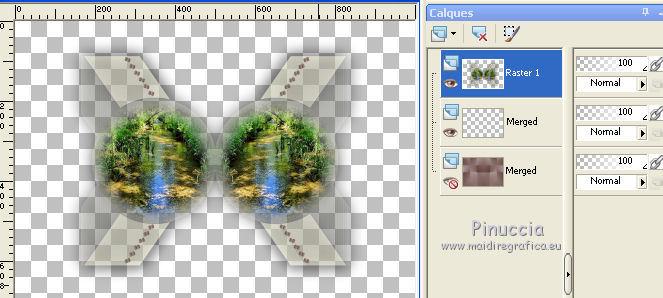
Delete the empty layer.
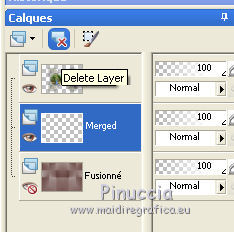
Open again the layer Merged and activate the top layer.
17. Open adorno-2 and go to Edit>Copy.
Go back to your work and go to Edit>Paste as new layer.
Layers>Duplicate.
Effects>Image Effects>Seamless Tiling.
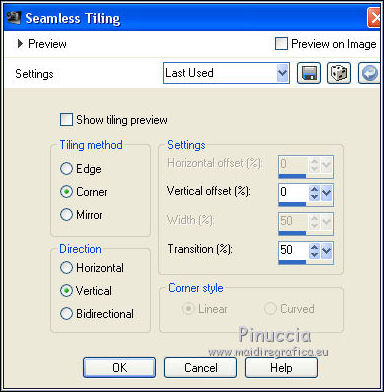
Layers>Duplicate - 2 times.
18. Effects>Plugins>FM Tile Tools - Saturation Emboss, default settings.

19. Layers>Merge>Merge Down - 3 times.
20. Layers>New Raster Layer.
Flood Fill  the layer with your foreground color #f4f3d4. the layer with your foreground color #f4f3d4.
Layers>New Mask layer>From image
Open the menu under the source window
and select the mask Ildikocreate0022_mask.
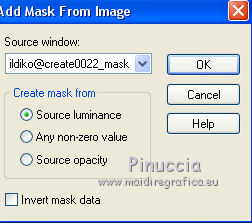
Layers>Merge>Merge Group.
21. Move this layer under the landscape's layer.
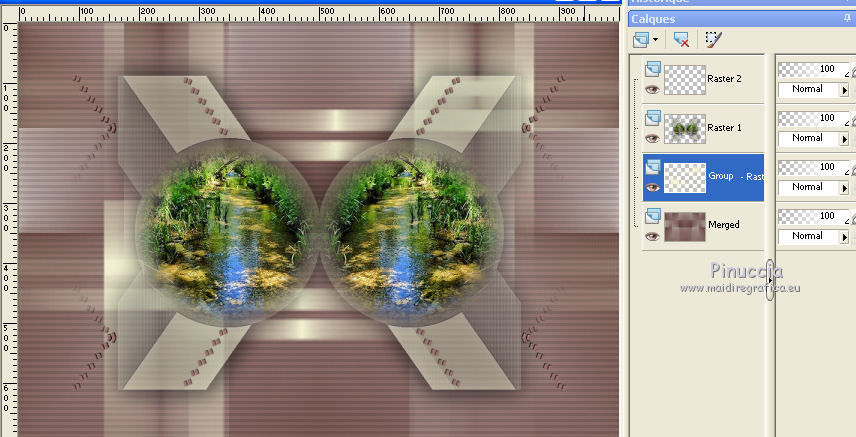
Effects>Reflection Effects>Rotating Mirror, same settings.

22. Activate the landscape's layer.
Layers>Duplicate.
Layers>Merge>Merge visible.
23. Image>Resize, to 85%, resize all layers checked.
24. Image>Add borders, 45 pixels, symmetric, foreground color #f4f3d4.
25. Effects>Plugins>AAA Frames - Foto Frame - 2 times with these settings.

26. Open the tube of the woman and go to Edit>Copy.
Go back to your work and go to Edit>Paste as new layer.
Image>Resize, to 80%, resize all layers not checked.
Adjust>Sharpness>Sharpen.
Effects>3D Effects>Drop Shadow.
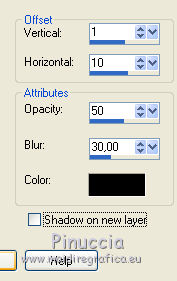
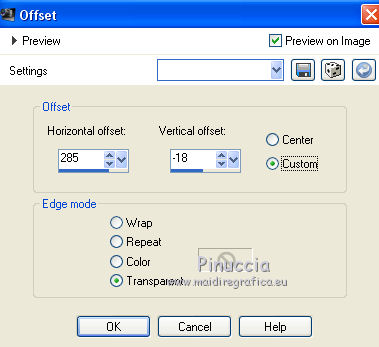
27. Effects>Image Effects>Offset.
28. Sign your work on a new layer.
Layers>Merge>Merge All.
29. Image>Add borders, 2 pixels, symmetric, foreground color #f4f3d4.
Save as jpg.
Version with tube by Gabry


If you have problems or doubts, or you find a not worked link, or only for tell me that you enjoyed this tutorial, write to me.
6 August 2019
|