|
BEATRIZ

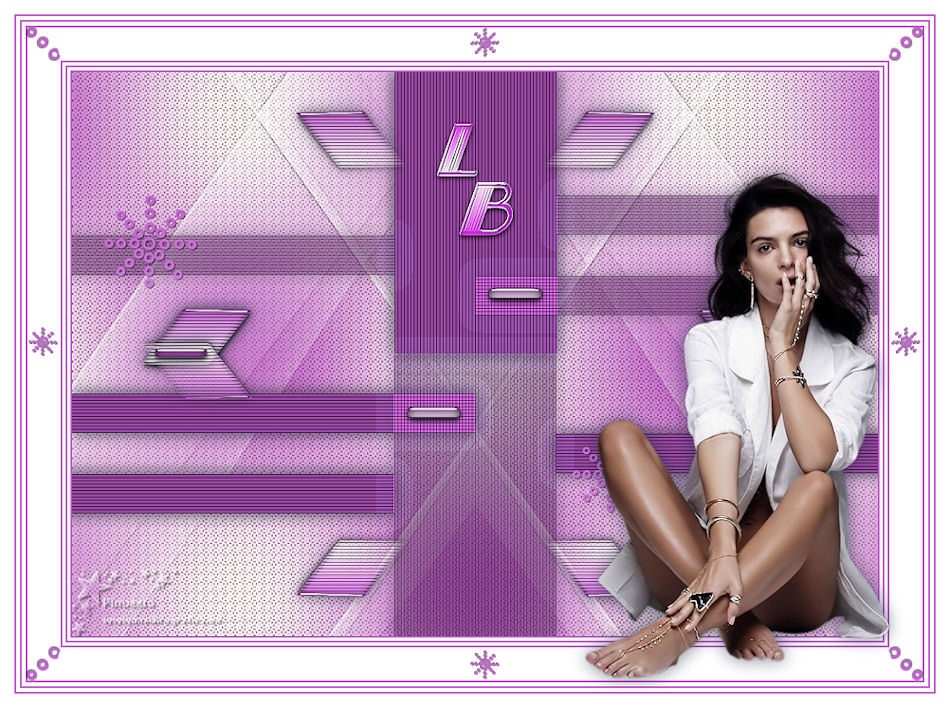
Thanks Emilieta for your invite to translate your tutorials into english.

This tutorial has been translated with PSPX7, but it can also be made using other versions of PSP.
Since version PSP X4, Image>Mirror was replaced with Image>Flip Horizontal,
and Image>Flip with Image>Flip Vertical, there are some variables.
In versions X5 and X6, the functions have been improved by making available the Objects menu.
In the latest version X7 command Image>Mirror and Image>Flip returned, but with new differences.
See my schedule here
french translation here
your versions here
Material here
Thanks for the tube beatriz and for the mask Narah.
The rest of the material is by Emilieta
(The links of the tubemakers here).
Plugins
consult, if necessary, my filter section here
Alien Skin Eye Candy 5 Impact - Glass here
AP 01 - Lines SilverLining here
DSB Flux - Radial Transmission here
FM Tile Tools - Saturation Emboss here
Mehdi - Wavy Lab 1.1 here

You can change Blend Modes according to your colors.
In the newest versions of PSP, you don't find the foreground/background gradient (Corel_06_029).
You can use the gradients of the older versions.
The Gradient of CorelX here
Copy the preset  in the folder of the plugins Alien Skin Eye Candy 5. in the folder of the plugins Alien Skin Eye Candy 5.
One or two clic on the file (it depends by your settings), automatically the preset will be copied in the right folder.
why one or two clic see here
Open the mask in PSP and minimize it with the rest of the material.
1. Open Calque Alpha_LB.
Window>Duplicate or, on the keyboard, shift+D to make a copy.

Close the original.
The copy, that will be the basis of your work, is not empty,
but contains the selections saved on the alpha channel.
Set your foreground color to white #ffffff.
and your background color to #c05ecd.
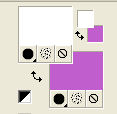
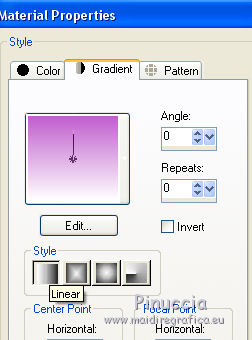
Set your foreground color to a Foreground/Background Gradient, style Linear.
Flood Fill  the transparent image with your Gradient. the transparent image with your Gradient.
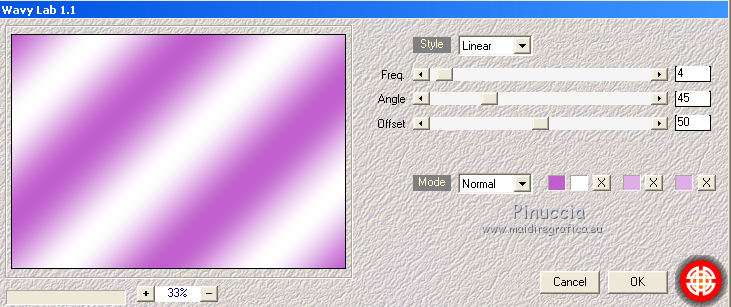
2. Effects>Plugins>Mehdi - Wavy Lab 1.1.
This filter creates gradients with the colors of your Materials palette:
the first is your background color, the second is your foreground color.
Keep the last two colors created by the filter.
3. Layers>Duplicate.
Image>Mirror.
Reduce the opacity of this layer to 50.
4. Layers>Merge>Merge visible.
Effects>Edge Effects>Enhance.
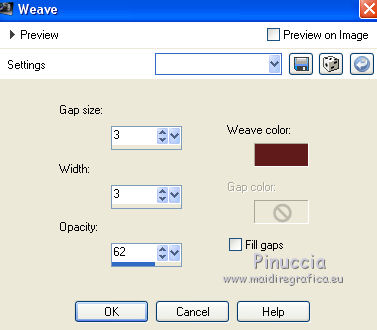
5. Effects>Texture Effects>Weave
weave color #601c1c.
6. Selections>Load/Save Selection>Load Selection from Alpha Channel.
The selection #1 is immediately available. You just have to click Load.
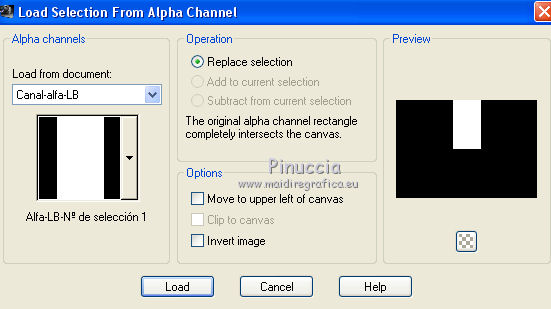
Selections>Promote Selection to layer.
Flood Fill  with your background color. with your background color.
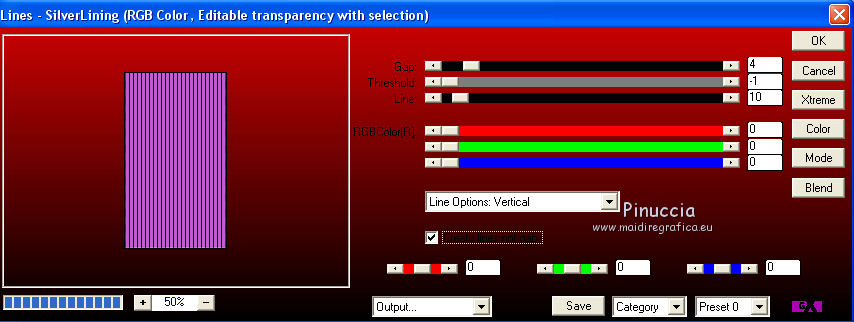
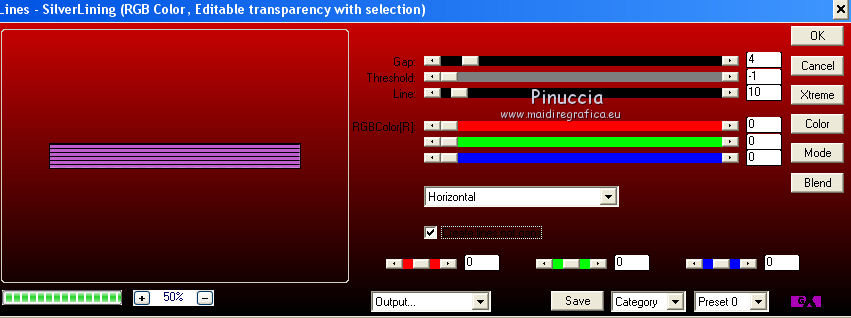
7. Effects>Plugins>AP 01 Innovations - Lines SilverLining.
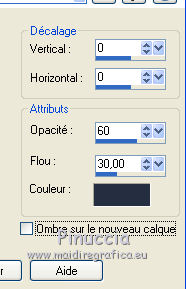
8. Effects>3D Effects>Drop Shadow.
Selections>Select None.
9. Selections>Load/Save Selection>Load Selection from Alpha Channel.
Open the Selections menu and load selection #2.
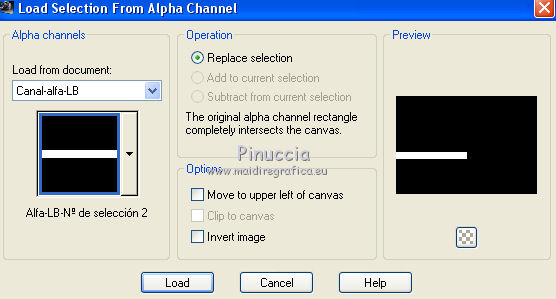
Selections>Promote Selection to Layer.
Flood Fill  with your background color. with your background color.
10. Effects>Plugins>AP01 Innovations - Lines SilverLining.
Effects>3D Effects>Drop Shadow, same settings.
Selections>Select None.
11. Layers>Duplicate.
Image>Mirror.
Effects>Image Effects>Offset.
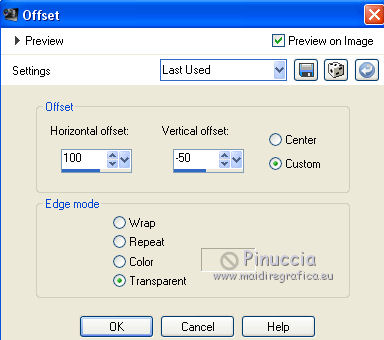
12. Layers>Duplicate.
Image>Mirror.
Effects>Image Effects>Offset.
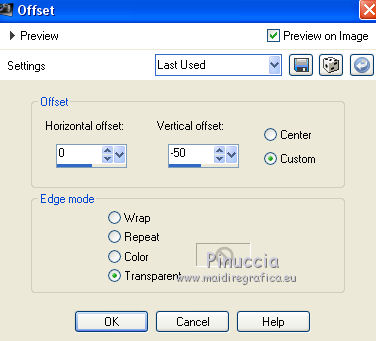
13. Close the layer Merged.
Layers>Merge>Merge visible.
Open again the layer Merged and keep selected the top layer.
14. Layers>Duplicate.
Effects>Plugins>DSB Flux - Radial Transmission.
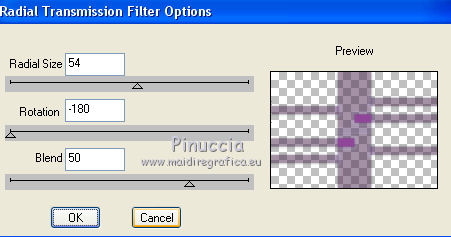
Adjust>Sharpness>Sharpen.
Layers>Merge>Merge Down.
15. Layers>New Raster Layer.
Set your foreground color to Color.
Flood Fill  the layer with color white. the layer with color white.
Layers>New Mask layer>From image
Open the menu under the source window and you'll see all the files open.
Select the mask Narah-mask-1427.
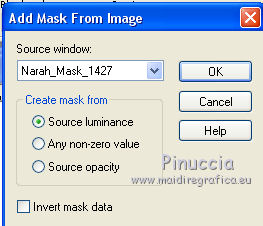
Layers>Merge>Merge group.
Layers>Arrange>Move Down.
Effects>Edge Effects>Enhance More.
16. Selections>Load/Save Selection>Load Selection from Alpha Channel.
Open the Selections menu and load selection #3.
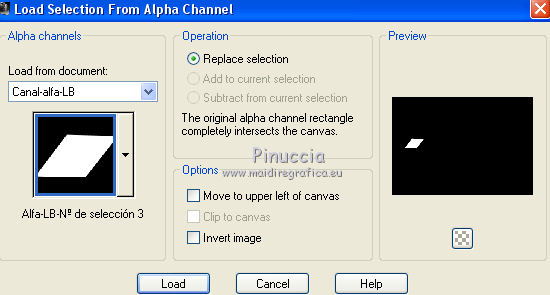
Selections>Promote Selection to Layer.
Layers>Arrange>Bring to Top.
Set your foreground color to Gradient.
Flood Fill  with your Gradient. with your Gradient.
17. Effects>Plugins>AP01 Innovations - Lines SilverLining, same settings (Horizontal).
18. Effects>Plugins>Alien Skin Eye Candy 5 Impact - Glass.
select the preset Vyp_Rosy_Glass and ok.
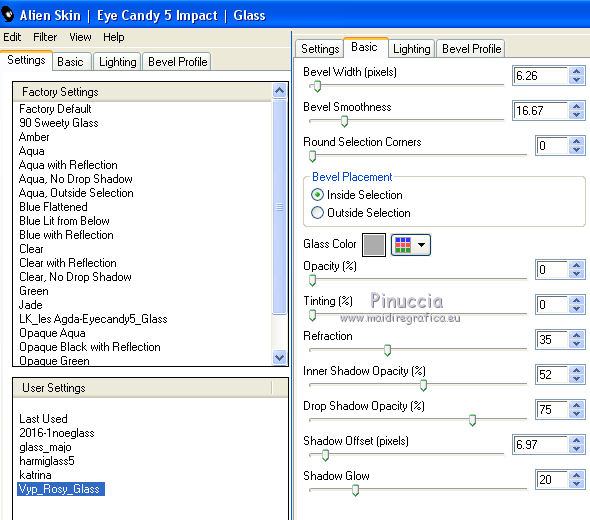
Effects>3D Effects>Drop Shadow, same settings.
Selections>Select None.
Layers>Duplicate.
Image>Mirror.
Layers>Merge>Merge Down.
19. Layers>Duplicate.
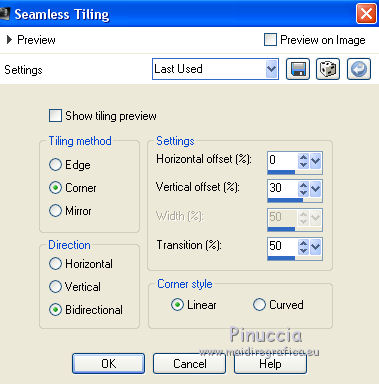
Effects>Image Effects>Seamless Tiling.
20. Layers>Duplicate.
Image>Flip.
Adjust>Sharpness>Sharpen.
21. Open Adorno 1 and go to Edit>Copy.
Go back to your work and go to Edit>Paste as new layer.
Effects>Plugins>Alien Skin Eye Candy 5 Impact - Glass, same settings.
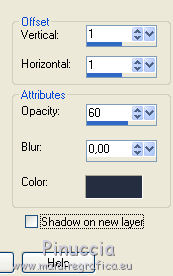
Effects>3D Effects>Drop Shadow.
22. Open adorno-2 and go to Edit>Copy.
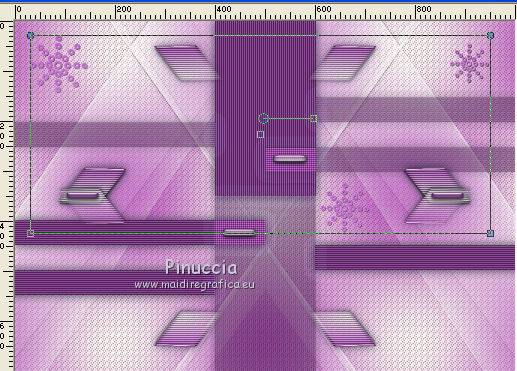
Go back to your work and go to Edit>Paste as new layer.
Move  the tube up. the tube up.
Effects>3D Effects>Drop Shadow, same settings.

23. Open iniciales LB and go to Edit>Copy.
Go back to your work and go to Edit>Paste as new layer.
Effects>Plugins>Alien Skin Eye Candy 5 Impact - Glass, same settings.
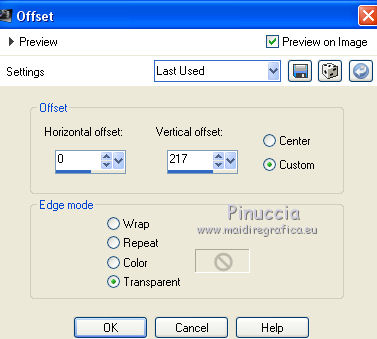
Effects>Image Effects>Offset.
24. Effects>Plugins>FM Tile Tools - Saturation Emboss, default settings.

25. Image>Add borders, 2 pixels, symmetric, background color.
Image>Add borders, 4 pixels, symmetric, color white.
Image>Add borders, 2 pixels, symmetric, background color.
Image>Add borders, 4 pixels, symmetric, color white.
Image>Add borders, 2 pixels, symmetric, background color.
26. Image>Resize, to 85%, resize all layers checked.
Adjust>Sharpness>Sharpen.
27. Image>Add borders, 35 pixels, symmetric, color white.
Image>Add borders, 2 pixels, symmetric, background color.
Image>Add borders, 4 pixels, symmetric, color white.
Image>Add borders, 2 pixels, symmetric, background color.
Image>Add borders, 4 pixels, symmetric, color white.
Image>Add borders, 2 pixels, symmetric, background color.
28. Open adorno marco and go to Edit>Copy.
Go back to your work and go to Edit>Paste as new layer.
29. Image>Add borders, 15 pixels, symmetric, color white.
30. Open the woman tube and go to Edit>Copy.
Go back to your work and go to Edit>Paste as new layer.
Image>Resize, to 80%, resize all layers not checked.
Image>Mirror.
Adjust>Sharpness>Sharpen.
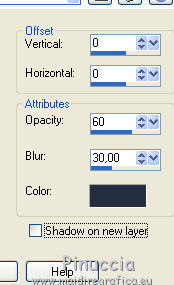
Effects>3D Effects>Drop Shadow.
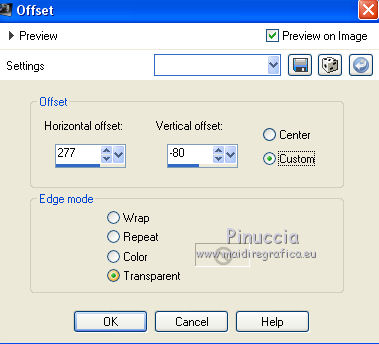
Effects>Image Effects>Offset.
31. Sign your work on a new layer.
Layers>Merge>Merge All and save as jpg.

If you have problems or doubts, or you find a not worked link, or only for tell me that you enjoyed this tutorial, write to me.
12 July 2019
|