|
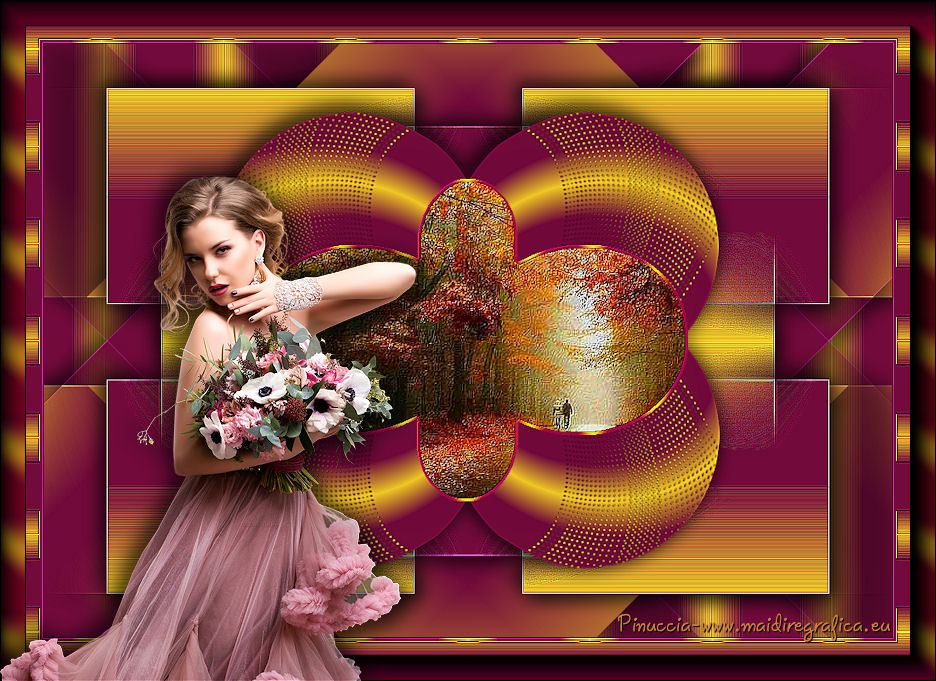
CELOSIA


Thanks Emilieta for your invite to translate your tutorials into english.
Here you can find the original tutorial.

This tutorial has been translated with PSPX2, but it can also be made using other versions of PSP.
Since version PSP X4, Image>Mirror was replaced with Image>Flip Horizontal,
and Image>Flip with Image>Flip Vertical, there are some variables.
In versions X5 and X6, the functions have been improved by making available the Objects menu.
In the latest version X7 command Image>Mirror and Image>Flip returned, but with new differences.
See my schedule here
french translation here
your versions here
Material here
The tube is by Animabelle.
The landscape come from the net.
Plugins
consult, if necessary, my filter section here
Flaming Pear - Flexify 2 here
AAA Frames - Foto Frame here
FM Tile Tools - Blend Emboss, Saturation Emboss here

You can change Blend Modes according to your colors.
Copy the Gradient in the Gradients Folder.
Open the mask in PSP and minimize it with the rest of the material.
1. Open a new transparent image 1000 x 700 pixels.
Set your foreground color to Gradient and select the gradient "Celosia", style Linear.
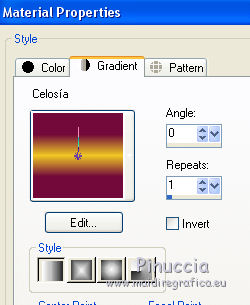
Set your background color to #720a3b, and the gradient will get the tones of this color.
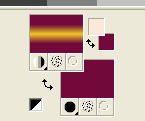
Flood Fill  the transparent image with your gradient. the transparent image with your gradient.
2. Layers>New Raster Layer.
Change the settings of the gradient: angle 45.
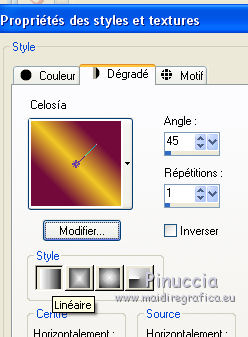
Flood Fill  the layer with your gradient. the layer with your gradient.
3. Layers>New Mask layer>From image
Open the menu under the source window and you'll see all the files open.
Select the mask imagen-42
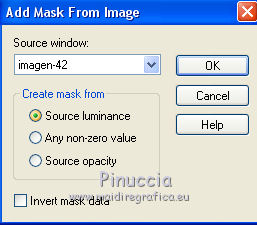
Layers>Merge>Merge group.
4. Effects>3D Effects>Drop Shadow.
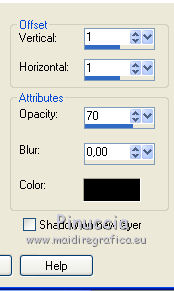
Repeat Drop Shadow, vertical and horizontal -1.
5. Effects>Plugins>FM Tile Tools - Blend Emboss, default settings.

Layers>Merge>Merge down.
6. Activate the Pick Tool 
if you work with PSP 9 the Deformation Tool 
mode Scale 
push the top central node down until 200 pixels
and the bottom central node up until 500 pixels
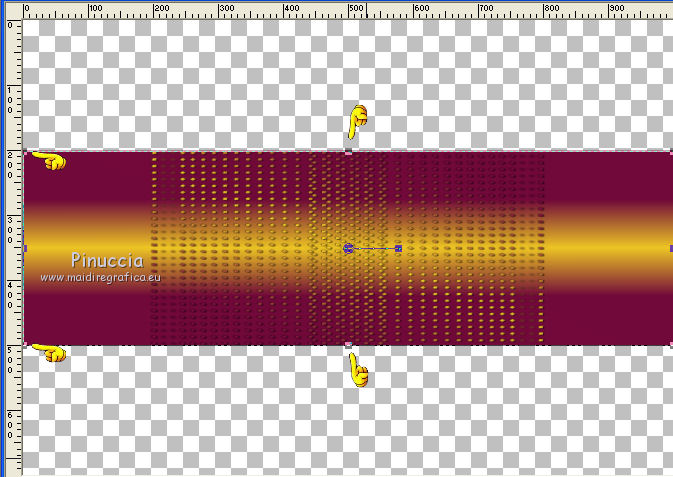
the right central node to the left until 850 pixels
and the left central node to the right until 150 pixels.
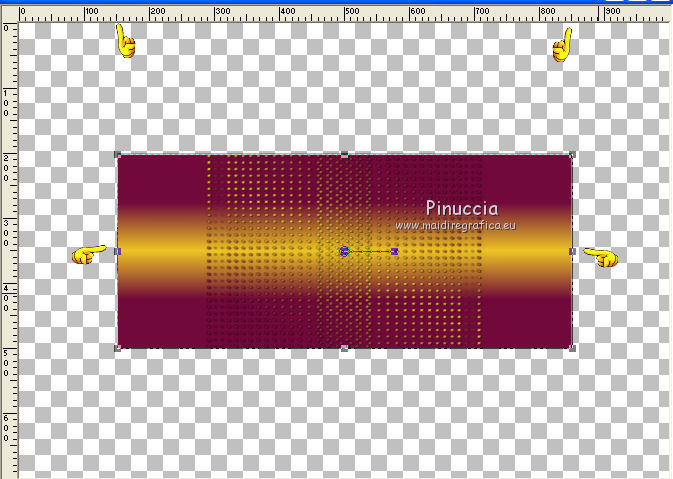
7. Effects>Plugins>Flaming Pear - Flexify 2
attention please, Anamorph is checked.
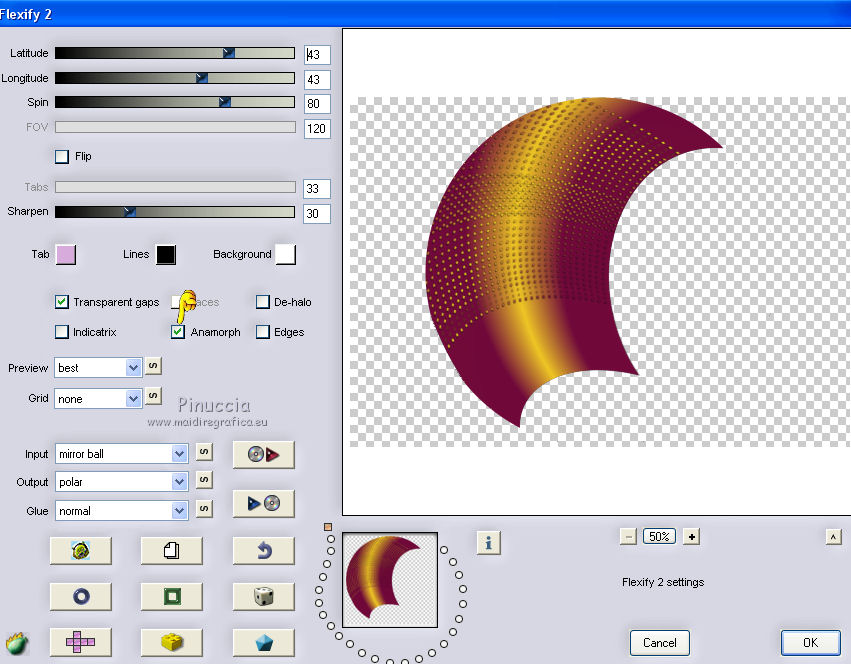
8. Image>Resize, to 45%, resize all layers not checked.
Layers>Duplicate.
Image>Mirror.
Place  the image with the top points merged. the image with the top points merged.
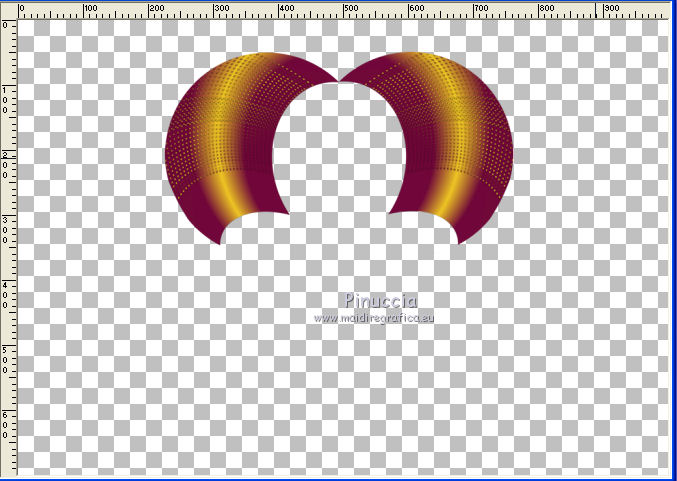
Layers>Merge>Merge down.
9. Layers>Duplicate.
Image>Flip.
Place  the images with the points merged. the images with the points merged.
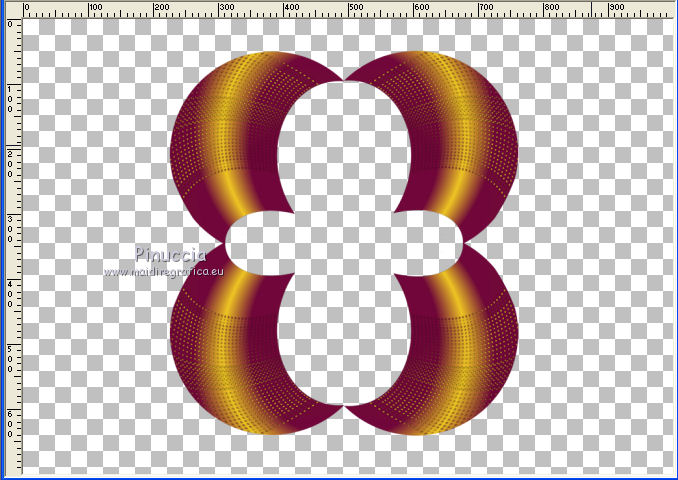
Layers>Merge>Merge down.
10. Image>Free Rotate - 90 degrees to right, or to left (it's the same thing).

Adjust>Sharpness>Sharpen More.
11. Edit>Cut (this cuts and keep in memory).
Edit>Paste as new layer.
And the image automatically will be in the middle of the canvas.
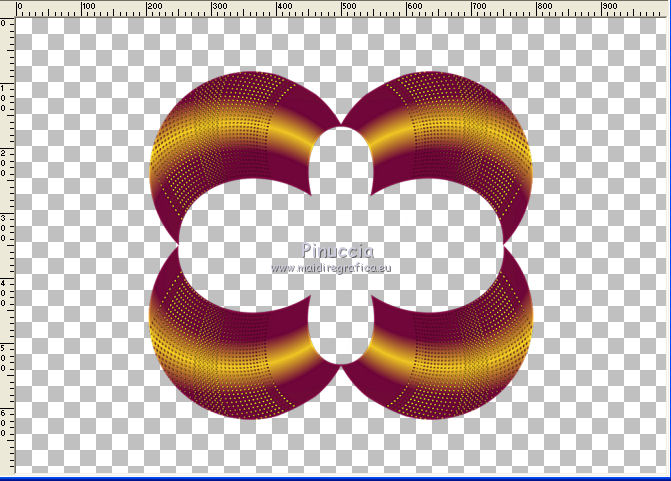
If you want, you may delete the layer below, that now is empty.
12. Activate the Magic Wand Tool 
and click in the middle of the image to select it.
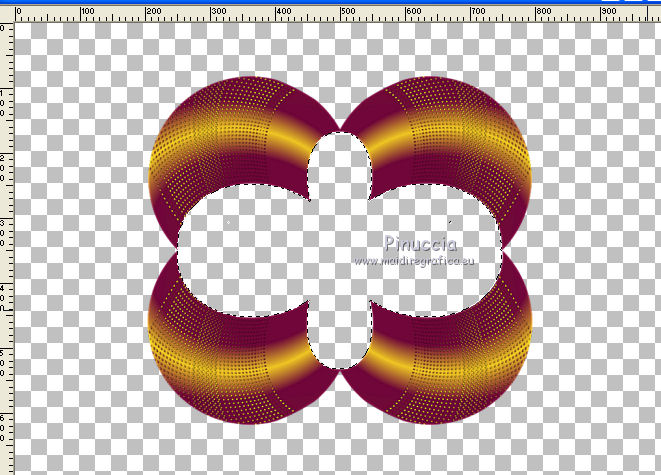
13. Selections>Load/Save Selection>Save Selection to Disk.
Give a name to the selection
(don't worry for the left image; it is not important).
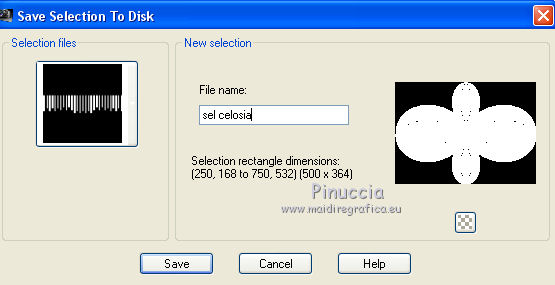
Selections>Select None.
14. Effects>3D Effects>Drop Shadow
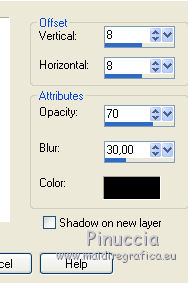
Repeat Drop Shadow, but vertical and horizontal -8.
15. Change again the settings of the gradient, angle 90.
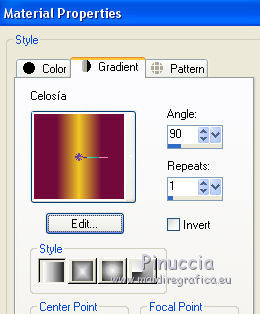
16. Layers>New Raster Layer.
Flood Fill  the layer with the gradient. the layer with the gradient.
Image>Resize, to 85%, resize all layers not checked.
17. Effects>Image Effects>Seamless Tiling.
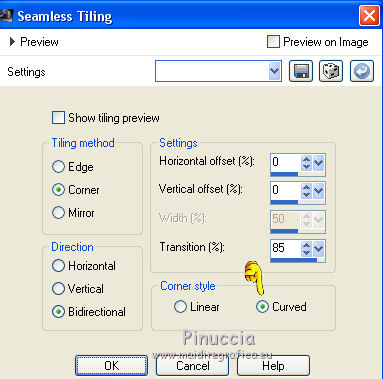
Effects>Edge Effects>Enhance More.
18. Effects>Geometric Effects>Skew
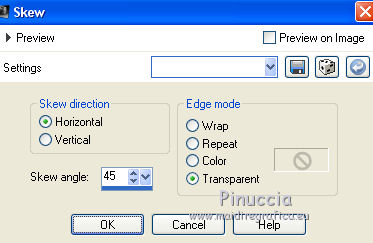
Layers>Duplicate.
Image>Mirror.
Reduce the opacity of this layer to 50%.
Layers>Merge>Merge down.
Effects>3D Effects>Drop Shadow, same settings.
19. Layers>New Raster Layer.
Set again the Angle of your Gradient to 0

Flood Fill  the layer with the gradient. the layer with the gradient.
Image>Resize, to 85%, resize all layers not checked.
Effects>Image Effects>Seamless Tiling, same settings.
Again Image>Resize, to 85%, resize all layers not checked.
Effects>Edge Effects>Enhance More - 2 times.
Effects>3D Effects>Drop Shadow.

Repeat Ombre portée, vertical and horizontal -8.
20. Layers>New Raster Layer.
Change again the settings of the gradient, angle 90, repeats 13
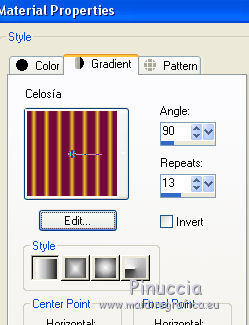
Flood Fill  the layer with your gradient. the layer with your gradient.
Layers>Arrange>Send to Bottom.
Effects>Edge Effects>Enhance More - 2 times.
Activate the layer of the figure, Raster 1
Layers>Arrange>Bring to Top.
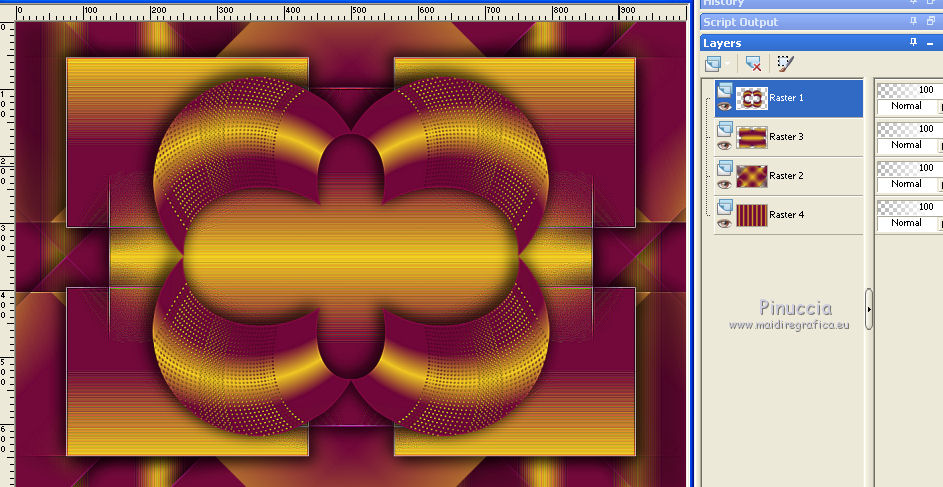
21. Selections>Load/Save Selection>Load Selection from Disk.
Look for and select the selection you saved before
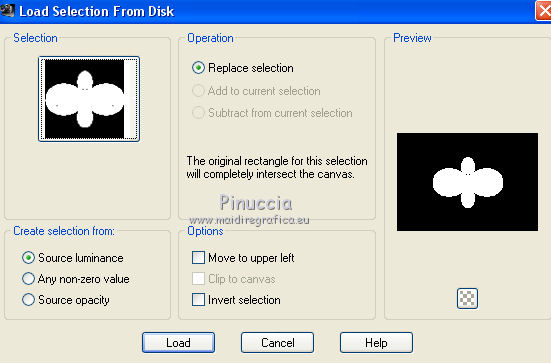
22. Open the landscape - Edit>Copy.
Go back to your work and go to Edit>Paste as new layer.
Selections>Invert.
Press CANC on the keyboard 
Again Selection>Invert.
23. Layers>New Raster Layer.
Flood Fill  with the last gradient. with the last gradient.
Selections>Modify>Contract - 3 pixels.
Press CANC on the keyboard.
One more time Selections>Invert.
Effects>3D Effects>Drop Shadow.

Repeat Ombre portée, vertical and horizontal -1.
Selections>Select None.
Layers>Merge>Merge down.
Adjust>Sharpness>Sharpen.
Effects>Plugins>FM Tile Tools - Saturation Emboss.

24. Layers>Merge>Merge visible.
25. Image>Resize, to 85%, resize all layers checked.
26. Image>Add borders, 3 pixels, symmetric, color black.
Activate the Magic Wand Tool 
and click on the bord to select it.
Flood Fill  the selection with the gradient. the selection with the gradient.
Effects>3D Effects>Drop Shadow.

Repeat Drop Shadow, vertical and horizontal -1.
Effects>Edge Effects>Enhance More.
Selections>Select None.
27. Change the settings of the gradient, angle 0, repeats 13.
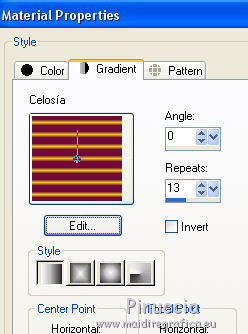
Image>Add borders, 40 pixels, symmetric, color black.
Select this border with your Magic Wand Tool 
Flood Fill  the selection with your gradient. the selection with your gradient.
Effects>Edge Effects>Enhance More - 2 times.
Selections>Select None.
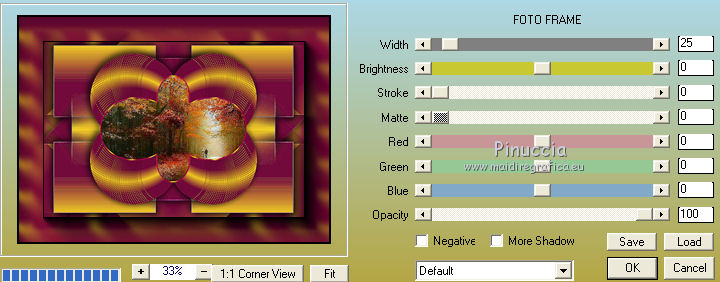
28. Effects>Plugins>AAA Frames - Foto Frame - 2 times avec these settings.
29. Sign your work on a new layer.
30. Open the tube of the woman - Edit>Copy.
Go back to your work and go to Edit>Paste as new layer.
Image>Resize, to 60%, resize all layers not checked.
Image>Mirror.
Move  the tube at the bottom left. the tube at the bottom left.
Effects>3D Effects>Drop Shadow.

Repeat Drop Shadow, vertical and horizontal -8.
Adjust>Sharpness>Sharpen.
31. Layers>Merge>Merge All and save as jpg.

If you have problems or doubts, or you find a not worked link, or only for tell me that you enjoyed this tutorial, write to me.
9 March 2018
|

