|
CASCADA

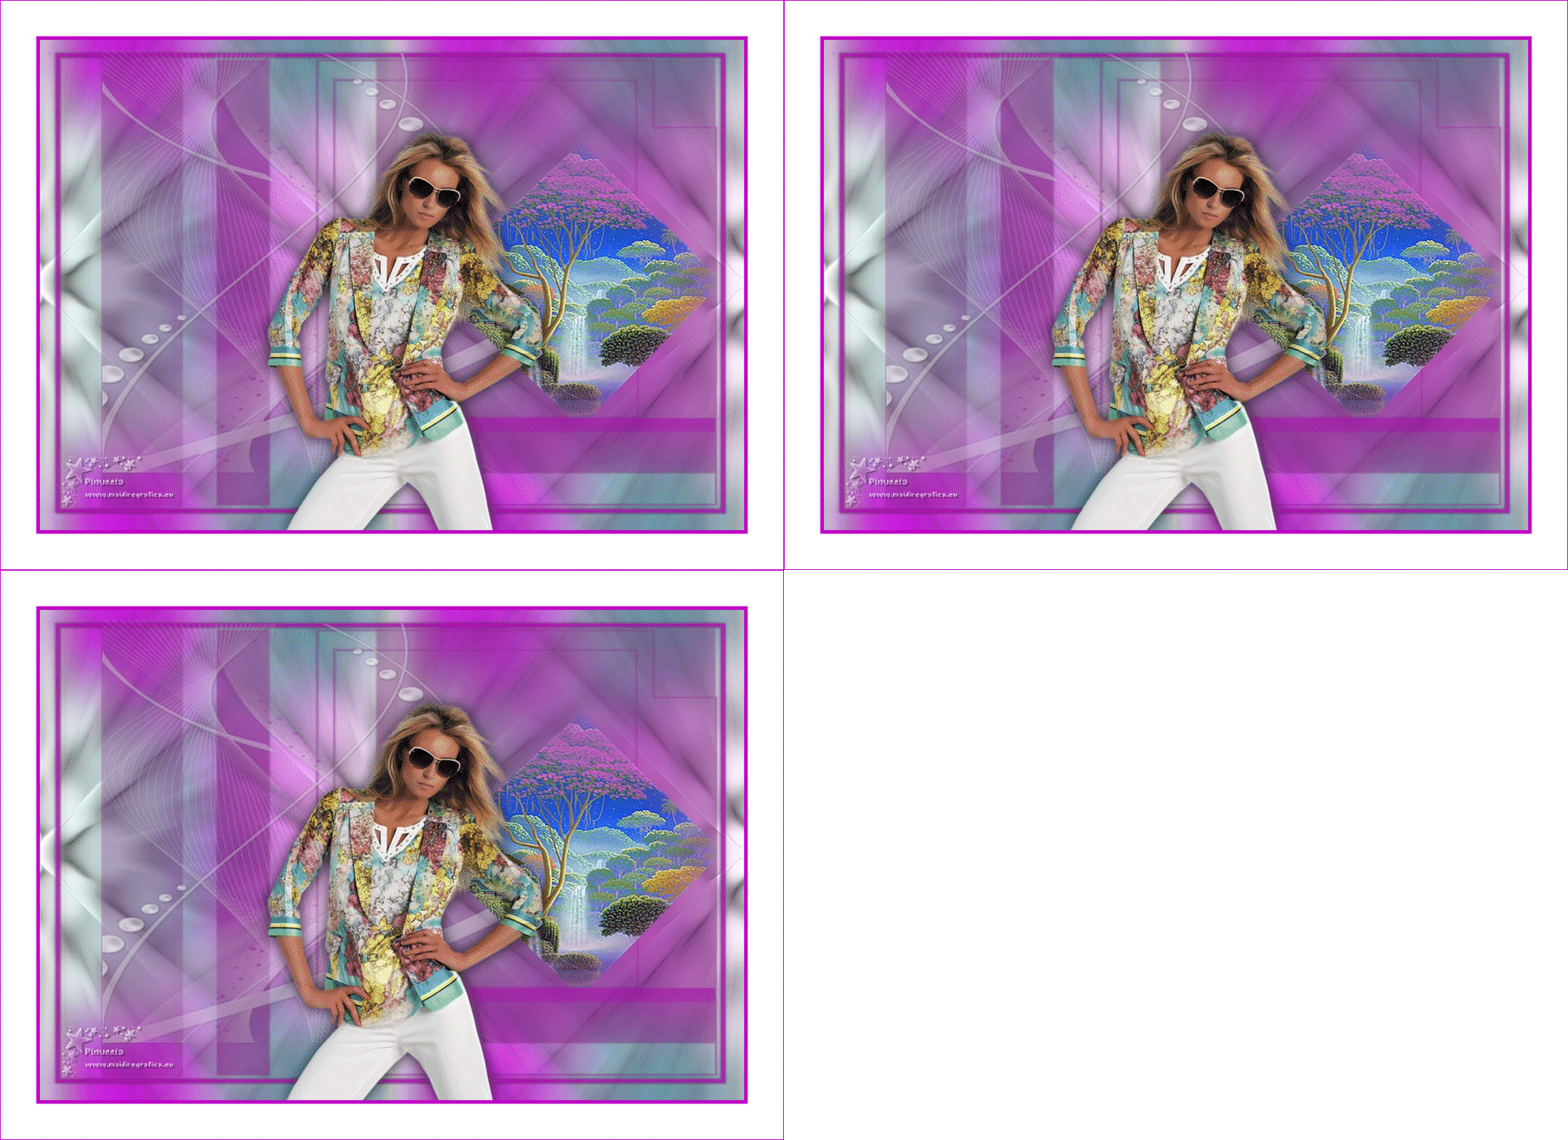
Thanks Emilieta for your invite to translate your tutorials into english.
The original here

This tutorial has been translated with PSPX2, but it can also be made using other versions of PSP.
Since version PSP X4, Image>Mirror was replaced with Image>Flip Horizontal,
and Image>Flip with Image>Flip Vertical, there are some variables.
In versions X5 and X6, the functions have been improved by making available the Objects menu.
In the latest version X7 command Image>Mirror and Image>Flip returned, but with new differences.
See my schedule here
french translation here
your versions here
Material here
For the tube of the woman thanks Colybrix.
The landscape is by Emilieta.
(The links of the tubemakers here).
Plugins
consult, if necessary, my filter section here
FM Tile Tools - Saturation Emboss here
Eye Candy 4000 - Jiggle here
Redfield - Lattice XP here
Animation Shop here

You can change Blend Modes according to your colors.
Copy the Selection in the Selections Folder.
Open the masks in PSP and minimize them with the rest of the material.
1. Open a new transparent image 1000 x 700 pixels.
2. Set your foreground color to #c22222 or #c000c0 (for me #c000c0),
and your background color to #ffffff.
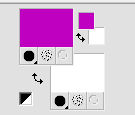
Third color #4d928f  . .
Create a Gradient with these three colors.
Click on Modify>New and give a name to the Gradient.
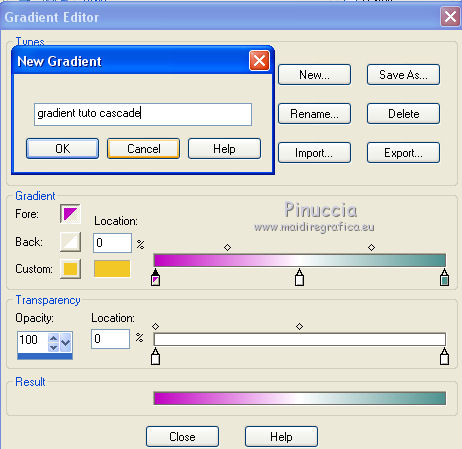
Set the purple color to 0%, the white to 50% and the green color to 100%
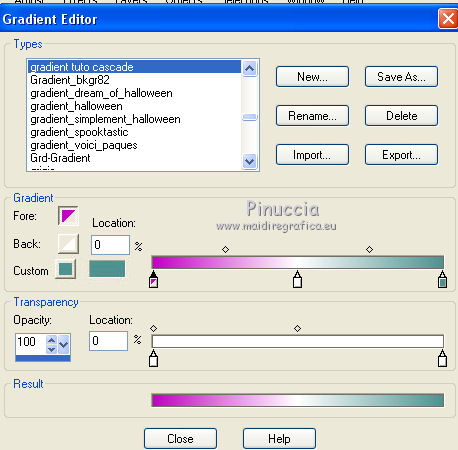
if you have problems to create the gradient,
copy this Gradient in your Gradients Folder
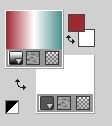
Set your foreground color to this Gradient, style Linear, angle 90, repeats 0.
 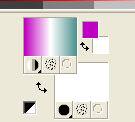
If you change your foreground color, also the gradient will change color
3. Flood Fill  the transparent image with your gradient. the transparent image with your gradient.
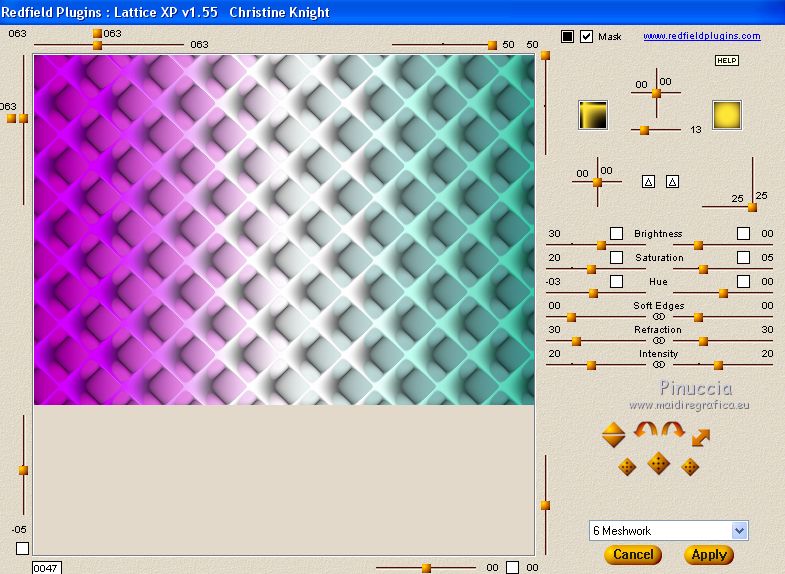
4. Effects>Plugins>Redfield - Lattice X P
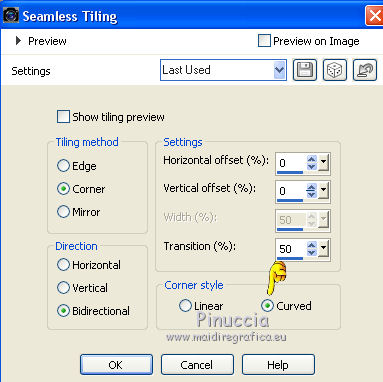
5. Effects>Image Effects>Seamless Tiling.
6. Adjust>Blur>Radial Blur.
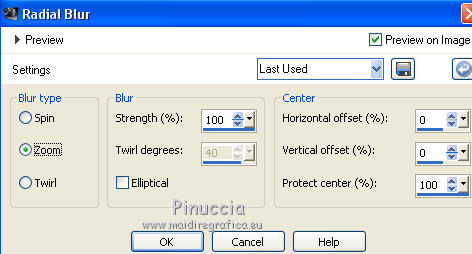
7. Effects>Image Effects>Seamless Tiling

Effects>Edge Effects>Enhance.
8. Effects>Plugins>FM Tile Tools - Saturation Emboss, default settings.

9. Layers>New Raster Layer.
Flood Fill  with your white background color. with your white background color.
Image>Resize, to 85%, resize all layers not checked.
10. Layers>New Mask layer>From image
Open the menu under the source window and you'll see all the files open.
Select the mask ae9....
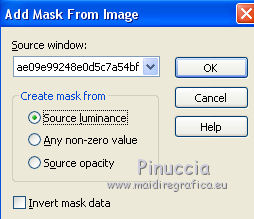
Layers>Merge>Merge Group.
Adjust>Sharpness>Sharpen More.
11. Effects>3D Effects>Drop Shadow, color #404040.
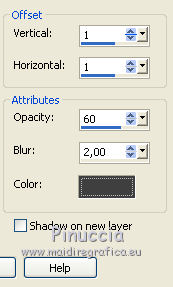
12. Layers>New Raster Layer.
Set your foreground color to Color.
Flood Fill  the layer with your foreground color. the layer with your foreground color.
13. Layers>New Mask layer>From image
Open the menu under the source window and select the mask Bettymask2.
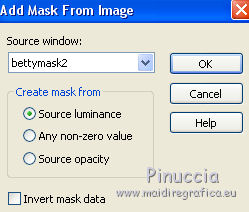
Layers>Merge>Merge Group.
14. Effects>3D Effects>Drop Shadow, same settings.

Repeat Drop Shadow, vertical and horizontal -1.
15. Activate the layer below of the first mask.
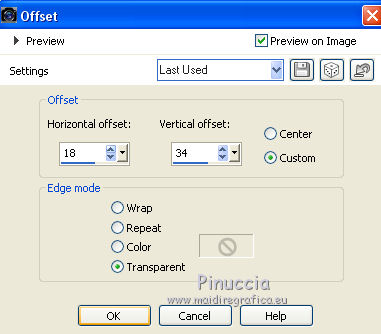
Effects>Image Effects>Offset.
16. Activate the Erase Tool 
and erase the lignes over the bord
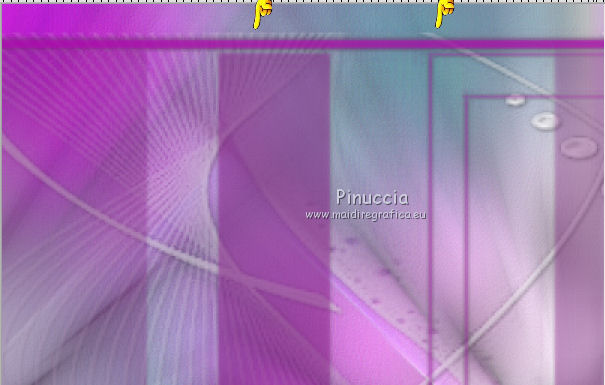
You should have this
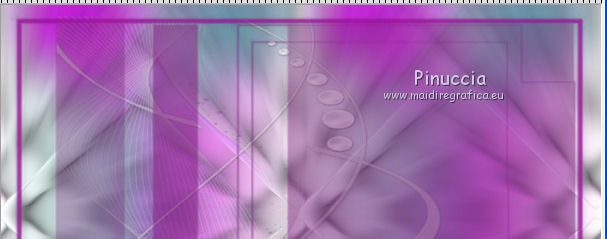
17. Layers>Arrange>Bring to Top.
Reduce the opacity of this layer to 80%.
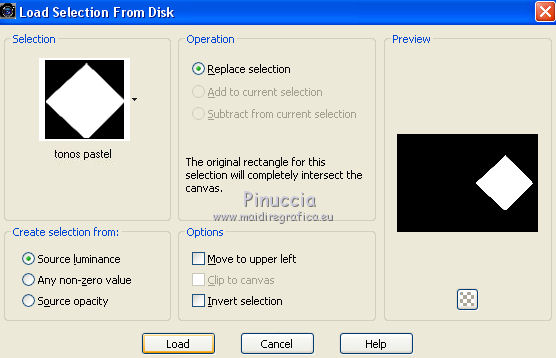
18. Selections>Load/Save Selection>Load Selection from Disk.
Look for and load the selection Tonos pastel.
19. Layers>New Raster Layer.
Open the landscape and go to Edit>Copy.
Go back to your work and go to Edit>Paste into Selection.
Adjust>Sharpness>Sharpen More.
Selections>Select None.
Layers>Duplicate.
20. Open the tube of the woman and go to Edit>Copy.
Go back to your work and go to Edit>Paste as new layer.
Image>Resize, to 75%, resize all layers not checked.
21. Effects>Image Effects>Offset.
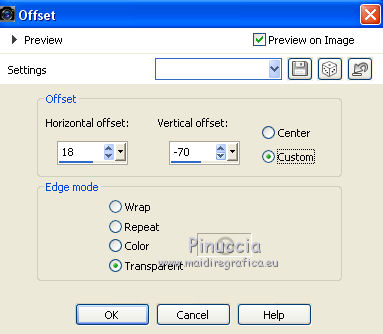
22. Effects>3D Effects>Drop Shadow
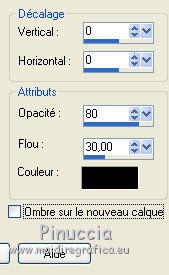
23. Layers>New Raster Layer.
Flood Fill  with your foreground color. with your foreground color.
Selections>Select All.
Selections>Modify>Contract - 5 pixels.
Press CANC on the keyboard 
Selections>Select None.
24. Sign your work on a new layer.
25. Image>Add borders, 50 pixels, symmetric, color white.
Image>Add borders, 1 pixel, symmetric, foreground color.
26. Activate the Freehand Selection  , point to point, , point to point,
and select the water of the wallfall.
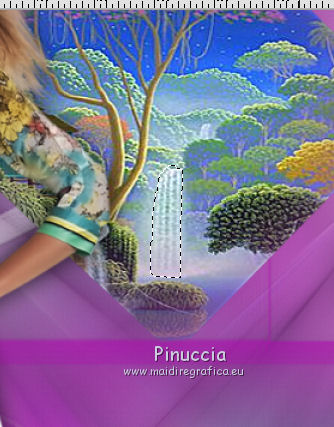
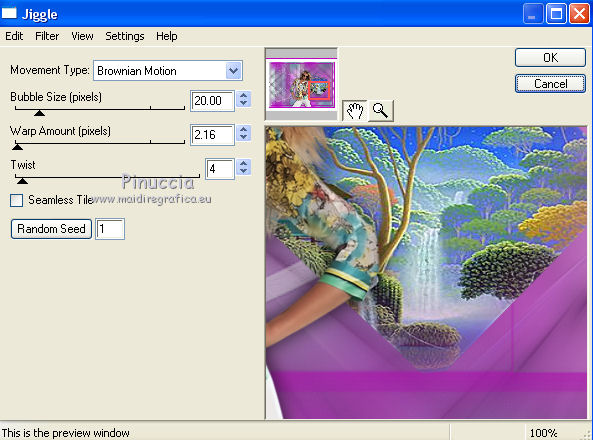
27. Layers>Duplicate - 2 times.
Activate the bottom layer.
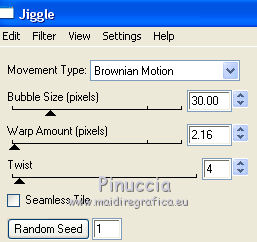
Effects>Plugins>Eye Candy 4000 - Jiggle
28. Activate the first copy layer.
Effects>Plugins>Eye Candy 4000 - Jiggle, Bubble Size 30 and ok
29. Vous positionner sur le calque de la deuxième copie.
Effects>Plugins>Eye Candy 4000 - Jiggle, Bubble Size 40 and ok

Selections>Select None.
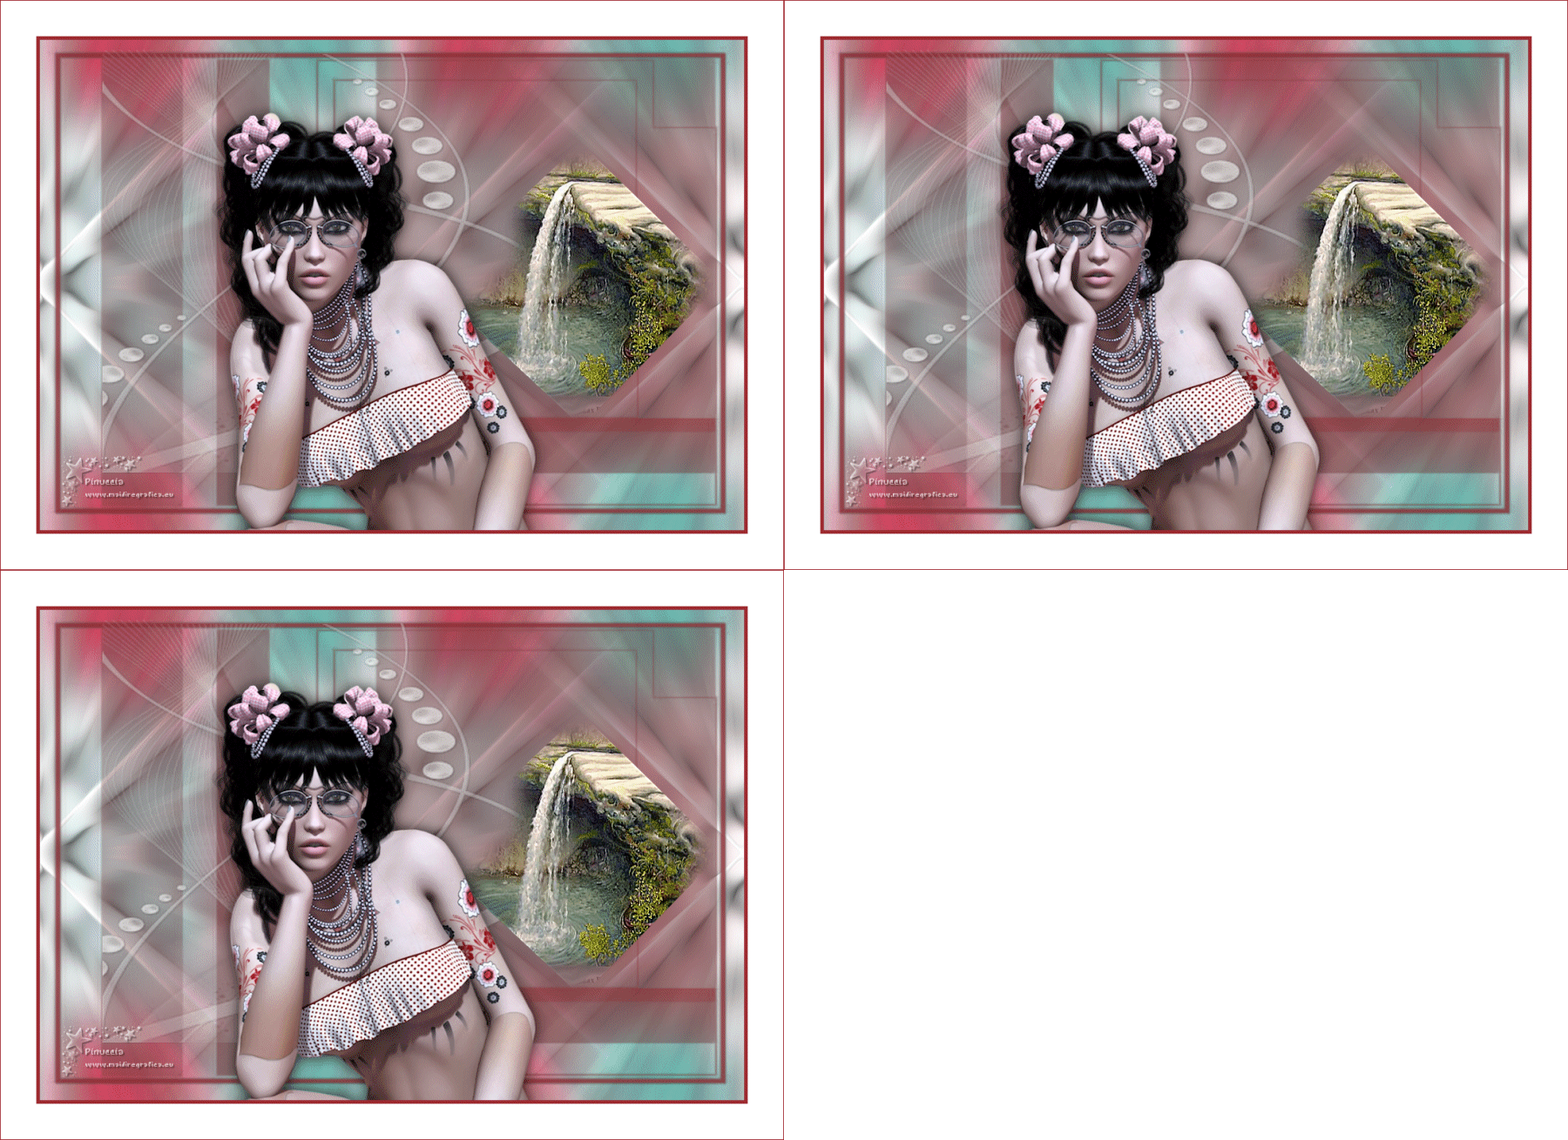
30. Save as Animation shop (*PSP)

31. Open Animation Shop and the image you have just saved.
Edit>Select All.
Animation>Frame Properties and set between 10 and 15; for me 12.
32. Check the result clicking on View animation 
and save as gif
The tube of this version is by A PSP Devil

If you have problems or doubts, or you find a not worked link, or only for tell me that you enjoyed this tutorial, write to me.
4 February 2019
|