|
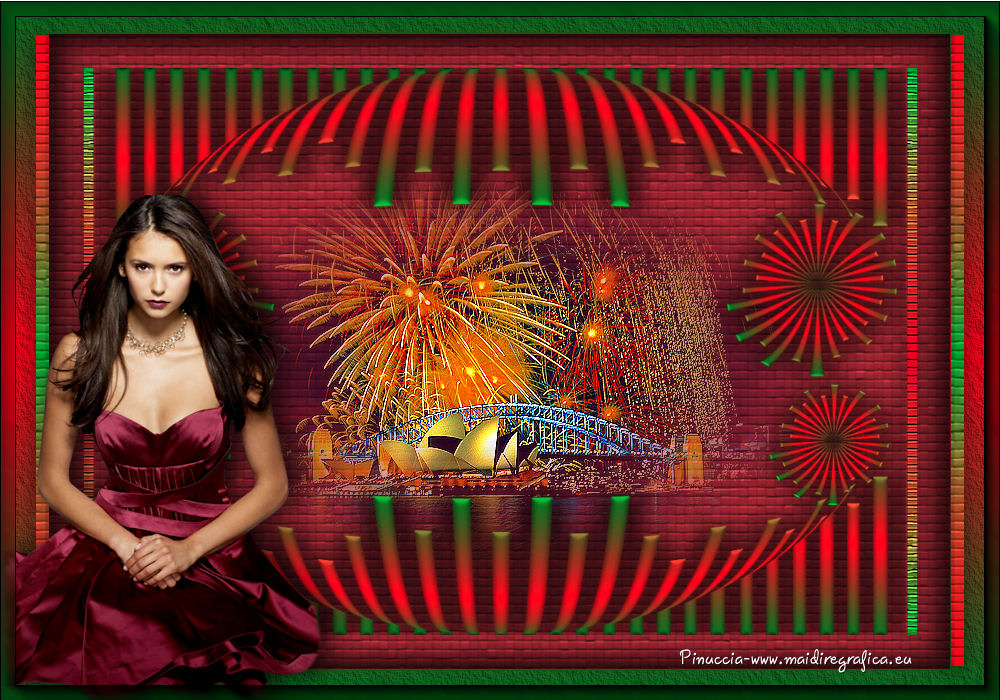
AUSTRALIA


Thanks Emilieta for your invite to translate your tutorials into english.
Here you can find the original tutorial.

This tutorial has been translated with PSPX3, but it can also be made using other versions of PSP.
Since version PSP X4, Image>Mirror was replaced with Image>Flip Horizontal,
and Image>Flip with Image>Flip Vertical, there are some variables.
In versions X5 and X6, the functions have been improved by making available the Objects menu.
In the latest version X7 command Image>Mirror and Image>Flip returned, but with new differences.
See my schedule here
french translation here
Your versions here
Material here
Tube 2635-Krikor-Jabotian by LB Tubes
Adornos and tube Madroños Emilieta.
Mask 431174maskzen201585 (I don't know the author).
Plugins
consult, if necessary, my filter section here
Textures - Patchwork here
AAA Frames - Foto Frame, Texture Frame here
Flaming Pear - Flexify 2 here

You can change Blend Modes according to your colors.
Copy the Gradient in the Gradients Folder.
Copy the Selection in the Selections Folder.
1. Open a new transparent image 1000 x 700 pixels.
Selections>Load/Save Selection>Load Selection from Disk.
Look for and load the selection sel barras.
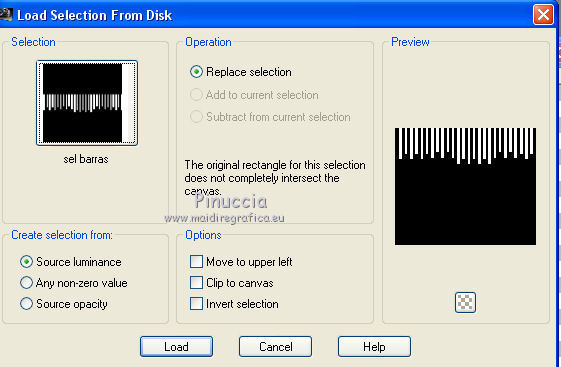
2. Set your foreground color to Gradient and select the Gradient Red_Dark_green, style Linear.
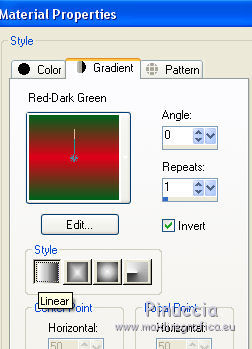
Flood Fill  the selection with your Gradient. the selection with your Gradient.
Selections>Select None.
3. Effects>3D Effects>Inner Bevel.
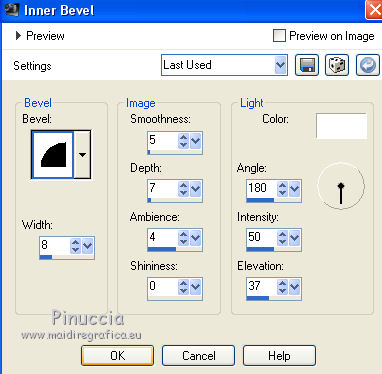
4. Layers>Duplicate.
Image>Flip.
5. Layers>Merge>Merge visible.
6. Layers>Duplicate.
Effects>Plugins>Flaming Pear - Flexify 2.
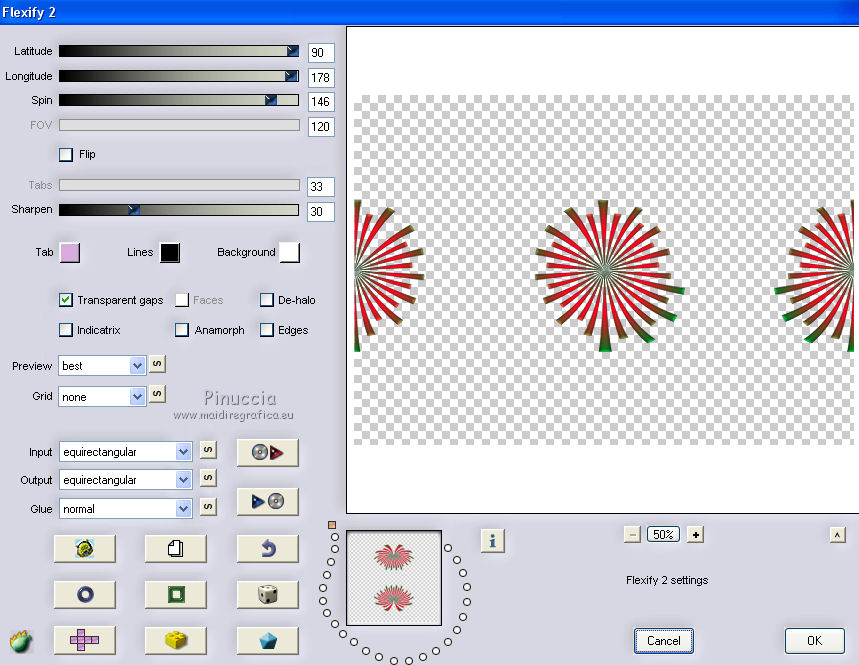
7. Activate the Freehand Selection Tool 
and select the left and the right formes.
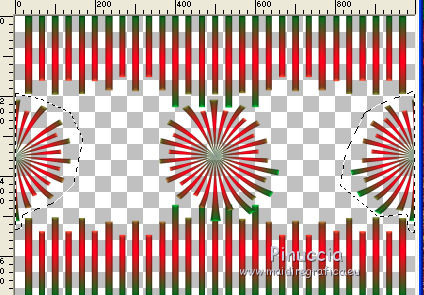
Press CANC on the keyboard 
Selections>Select None.
8. Activate the layer below, Merged.
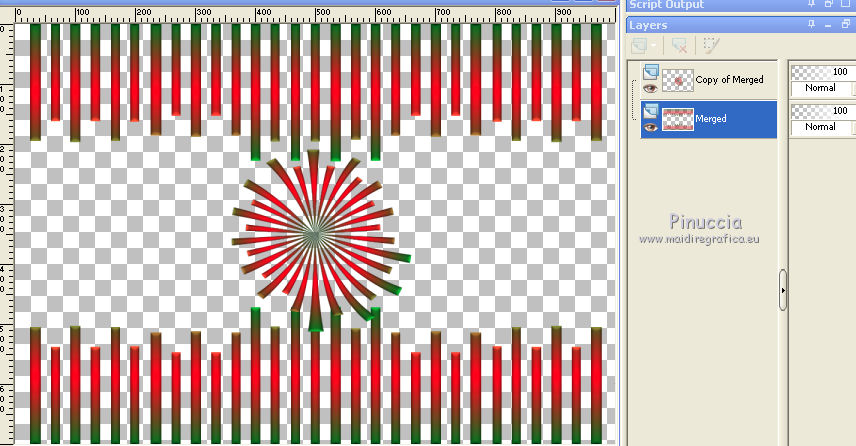
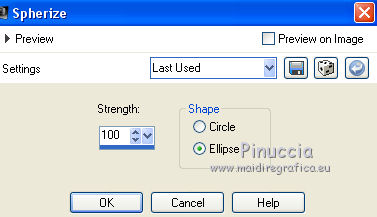
Effects>Geometric Effects>Spherize.
9. Activate the layer of the copy.
Layers>Duplicate.
Image>Resize, to 70%, resize all layers not checked.
Move  the image to the left side, see my example. the image to the left side, see my example.
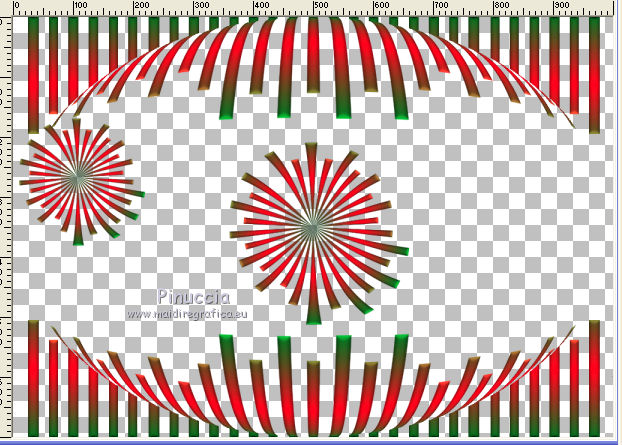
Layers>Arrange>Move Down - 2 times.
Layers>Duplicate.
Image>Mirror.
10. Layers>Duplicate.
Image>Resize, to 70%, resize all layers not checked.
Move  this image down, see my example. this image down, see my example.
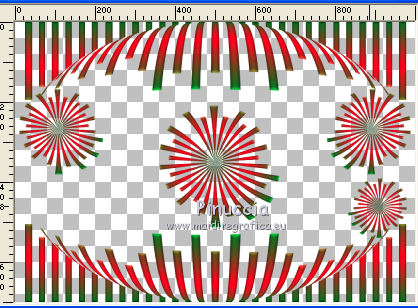
Adjust>Sharpness>Sharpen.
11. Layers>Duplicate.
Image>Mirror.
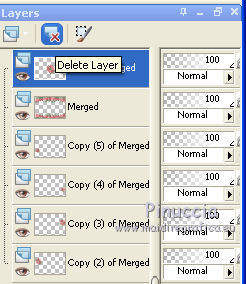
12. Activate the top layer and delete this layer.
13. Activate the layer Merged.
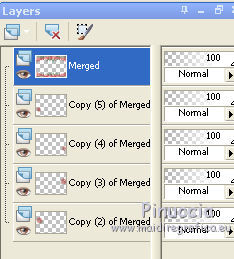
Layers>Arrange>Send to Bottom.
14. Layers>Merge>Merge visible.
Effects>3D Effects>Drop Shadow.
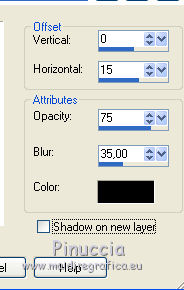
Repeat Drop Shadow, horizontal -15.
15. Image>Resize, to 90%, resize all layers not checked.
16. Layers>New Raster Layer.
Set your background color to #61171e
(or, if your use another Gradient, with the darker color of your Gradient).
Flood Fill  the layer with your background color. the layer with your background color.
Layers>Arrange>Send to Bottom.
17. Effects>Plugins>Textures - Patchwork.
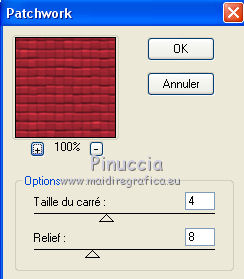
18. Selection Tool 
(no matter the type of selection, because with the custom selection your always get a rectangle)
clic on the Custom Selection 
and set the following settings.
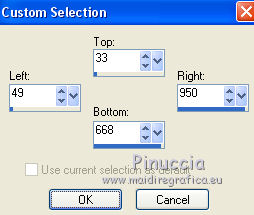
Selections>Invert.
19. Layers>New Raster Layer.
Flood Fill  the layer with your Gradient. the layer with your Gradient.
Selections>Modify>Contract - 2 pixels.
20. Effects>Plugins>AAA Frames - Texture Frame.
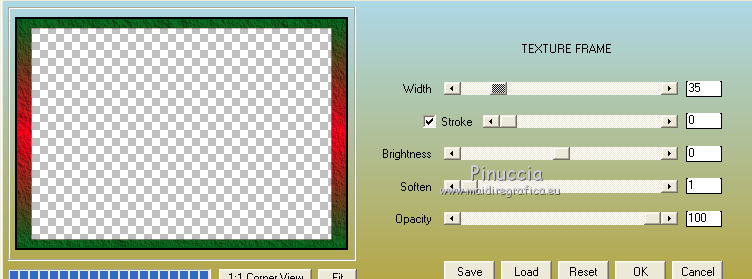
Selections>Select None.
21. Activate the Selection Tool  , rectangle, , rectangle,
and select the little border created by the plugin.
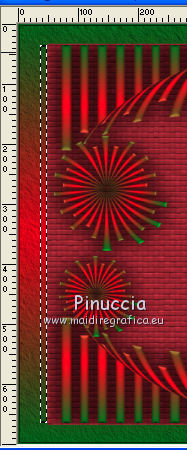
22. Layers>New Raster Layer.
Flood Fill  the layer with your Gradient. the layer with your Gradient.
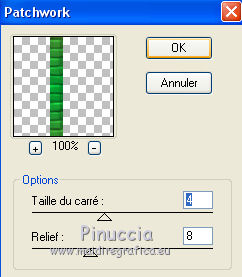
Effects>Plugins>Textures - Patchwork, same settings.
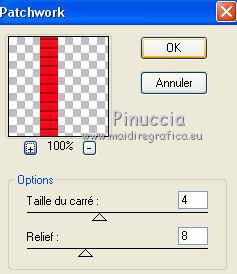
Effects>Edge Effects>Enhance More.
23. Effects>3D Effects>Drop Shadow.
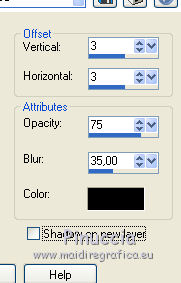
Selections>Select None.
24. Layers>Duplicate.
Image>Mirror.
25. Close the layers Raster 1 and Raster 2.
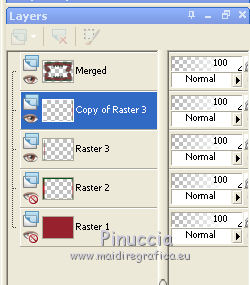
Layers>Merge>Merge visible.
Image>Resize, to 90%, resize all layers not checked.
Re-open the closed layers.
26. Activate again the Selection Tool  , rectangle, , rectangle,
and select the little border.
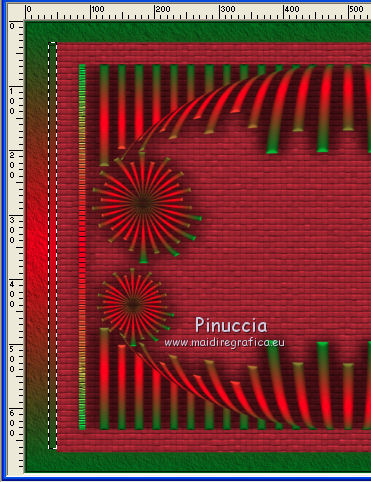
27. Layers>New Raster Layer.
Change the settings of the Gradient, and take off the selection to Invert.
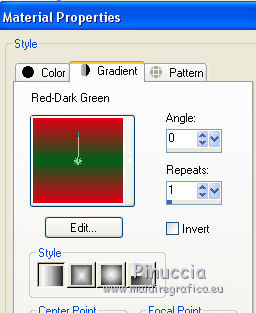
Flood Fill  the selection with your Gradient. the selection with your Gradient.
Effects>Pllugins>Textures - Pachtwork, same settings.
Effects>3D Effects>Drop Shadow, same settings.

Selections>Select None.
28. Layers>Duplicate.
Image>Mirror.
Layers>Merge>Merge Down.
29. Close the layers Raster 1 and Merged and activate the layer Raster 3.
Layers>Merge>Merge visible.
Re-open the closed layers and activate the top layer.
30. Open the landscape tube - Edit>Copy.
Go back to your work and go to Edit>Paste as new layer.
Image>Resize, to 38%, resize all layers not checked.
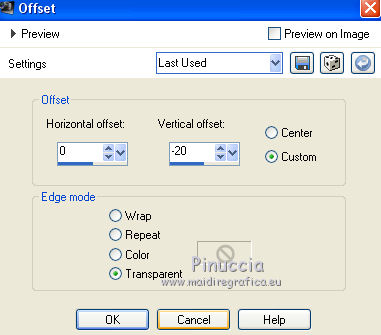
Effects>Image Effects>Offset.
Adjust>Sharpness>Sharpen - 2 times.
Effects>Plugins>FM Tile Tools - Saturation Emboss, default settings.

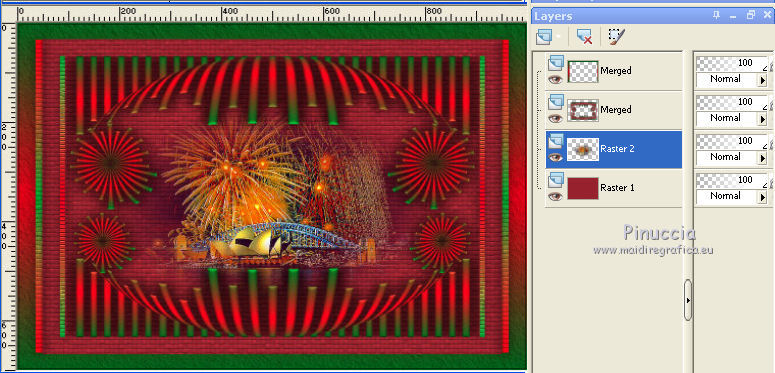
Layers>Arrange>Move down - 2 times.
31. Activate the top layer.
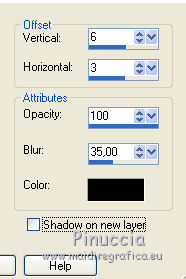
Effects>3D Effects>Drop Shadow.
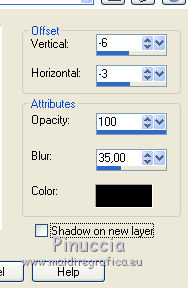
Repeat Drop Shadow, but vertical and horizontal -6/-3.
32. Open the woman tube - Edit>Copy.
Go back to your work and go to Edit>Paste as new layer.
Image>Resize, to 80%, resize all layers not checked.
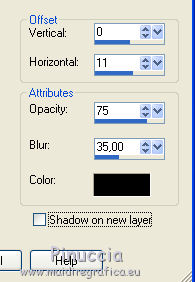
Effects>3D Effects>Drop Shadow.
33. Layers>Merge>Merge visible.
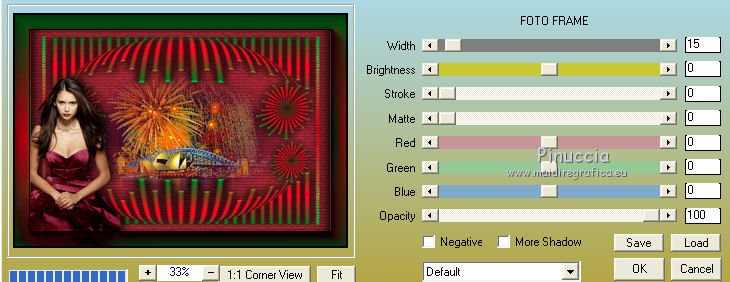
34. Effects>Plugins>AAA Frames - Foto Frame.
35. Sign your work on a new layer.
Layers>Merge>Merge All and save as jpg.
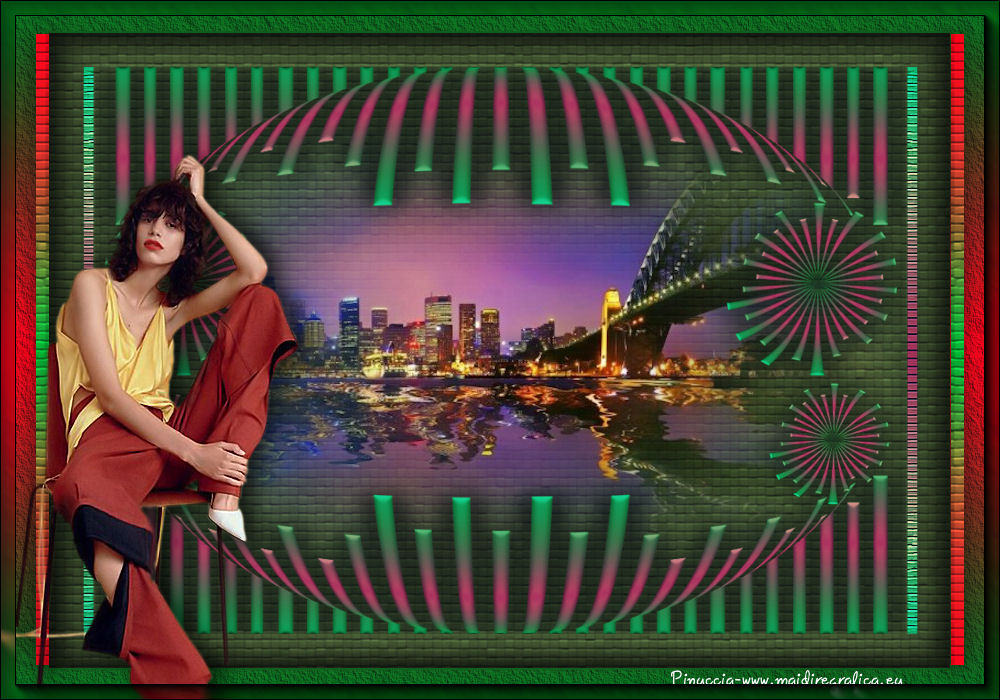
The tube of this version is by Beatriz

If you have problems or doubts, or you find a not worked link, or only for tell me that you enjoyed this tutorial, write to me.
22 January 2018
|

