|
AUSENCIA


Thanks Emilieta for your invite to translate your tutorials into english.
Here you can find the original tutorial.

This tutorial has been translated with PSPX2, but it can also be made using other versions of PSP.
Since version PSP X4, Image>Mirror was replaced with Image>Flip Horizontal,
and Image>Flip with Image>Flip Vertical, there are some variables.
In versions X5 and X6, the functions have been improved by making available the Objects menu.
In the latest version X7 command Image>Mirror and Image>Flip returned, but with new differences.
See my schedule here
french translation here
your versions here
Material here
The tube of the woman is by Animabelle.
The rest of the material is by Emilieta
(The links of the tubemakers here).
Plugins
consult, if necessary, my filter section here
Filters Unlimited 2.0 here
FM Tile Tools - Blend Emboss here
Andrew's Filter 4 - Weaves here
AAA Frames - Foto Frame here
Filters Simple can be used alone or imported into Filters Unlimited.
(How do, you see here)
If a plugin supplied appears with this icon  it must necessarily be imported into Unlimited it must necessarily be imported into Unlimited

You can change Blend Modes according to your colors.
Copy the Gradients in the Gradients Folder.
Open the mask in PSP and minimize it with the rest of the material.
1. Open a new transparent image 1000 x 700 pixels.
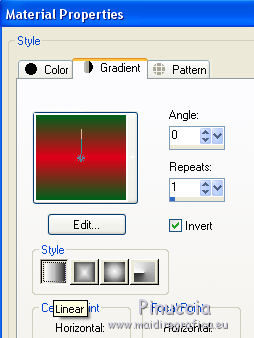
Set your foreground color to Gradient and select the gradient Red_Dark-green, style Linear.
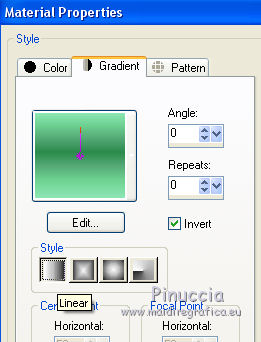
Set your background color to Gradient and select the gradient SN-FANTASYMIN, style Linear.

Flood Fill  the transparent impage with the foreground gradient Red-Dark-green. the transparent impage with the foreground gradient Red-Dark-green.
Effects>Edge Effects>Enhance More - 2 times.
Effects>Plugins>FM Tile Tools - Blend Emboss, default settings.

2. Layers>New Raster Layer.
Flood Fill  the layer with your background gradient SN-FANTASYMIN. the layer with your background gradient SN-FANTASYMIN.
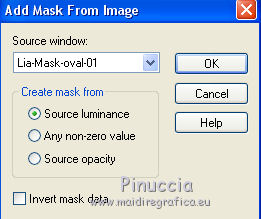
Layers>New Mask layer>From image
Open the menu under the source window and you'll see all the files open.
Select the mask Lia-Mask-Oval-01.

Layers>Merge>Merge Group.
Effects>Edge Effects>Enhance More.
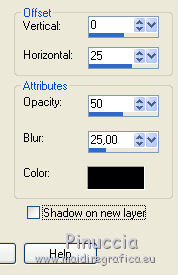
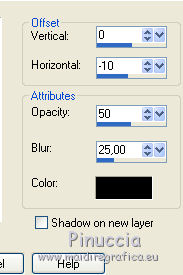
Effects>3D Effects>Drop Shadow.

Repeat Drop Shadow, vertical and horizontal -1.
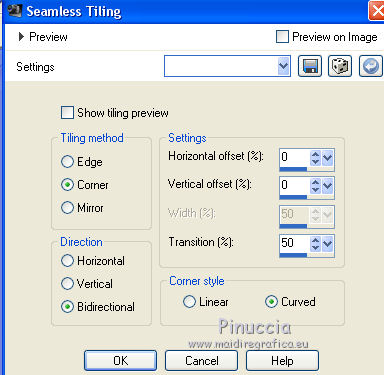
Effects>Image Effects>Seamless Tiling.

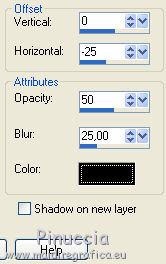
Effects>3D Effects>Drop Shadow.

Repeat Drop Shadow, horizontal -25.

3. Open the landscape tube - Edit>Copy.
Go back to your work and go to Edit>Paste as new layer.
Layers>Arrange>Move Down.
4. Open the man tube - Edit>Copy.
Go back to your work and go to Edit>Paste as new layer.
Image>Resize, to 40%, resize all layers not checked.
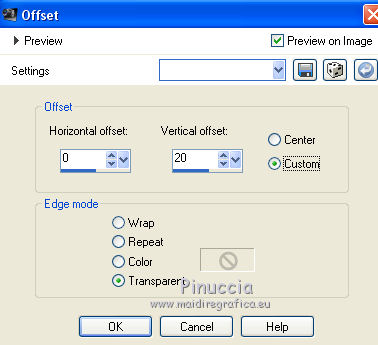
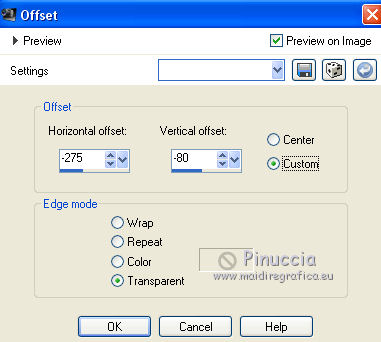
Effects>Image Effects>Offset.

5. Activate the layer of the landscape.
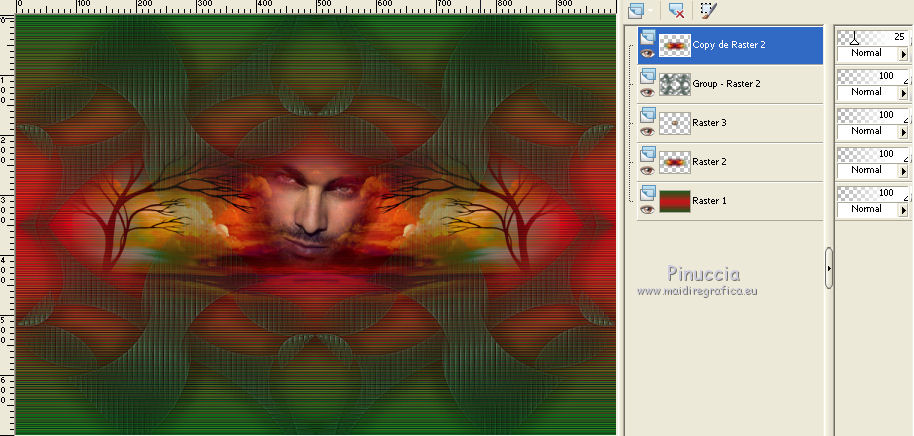
Layers>Duplicate.
Layers>Arrange>Bring to Top.
Reduce the opacity of this layer to 25%.

6. Layers>Merge>Merge visible.
7. Image>Resize, to 90%, resize all layers checked.
8. Selection Tool 
(no matter the type of selection, because with the custom selection your always get a rectangle)
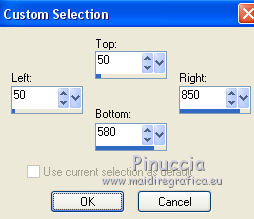
clic on the Custom Selection 
and set the following settings.

Selections>Invert.
Press CANC on the keyboard 
Layers>New Raster Layer.
Flood Fill  the layer with your foreground gradient Red-Dark. the layer with your foreground gradient Red-Dark.
Effects>Plugins>Filters Unlimited 2.0 - Andrew's Filter - Weaved, default settings.

Effects>Plugins>FM Tile Tools - Blend Emboss, default settings.

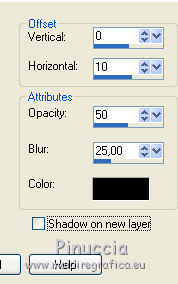
Effects>3D Effects>Drop Shadow.

Repeat Drop Shadow, horizontal -10.

Selections>select None.
9. Open the femme tube - Edit>Copy.
Go back to your work and go to Edit>Paste as new layer.
Image>Resize, to 70%, resize all layers not checked.
Effects>Image Effects>Offset.

10. Activate the Erase Tool 
Erase the piece of the skirt over the edge down...
(reduce the opacity of the layer, if you want, to see better)

... and to the left

Effects>3D Effects>Drop Shadow.

11. Sign your work on a new layer.
Layers>Merge>Merge visible.
Adjust>Sharpness>Sharpen.
Effects>Plugins>AAA Frame - Foto Frame.

Save as jpg.

If you have problems or doubts, or you find a not worked link, or only for tell me that you enjoyed this tutorial, write to me.
28 July 2018
|


 the transparent impage with the foreground gradient Red-Dark-green.
