ICE DAYS

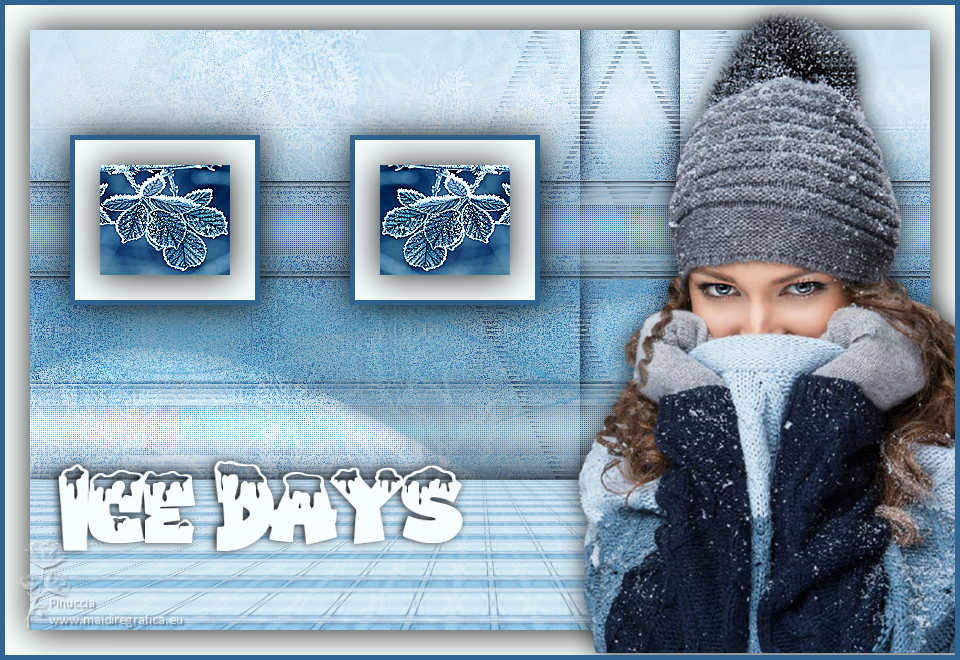
Thanks Annie for your invitation to translate

Clic and move the brush to follow the tutorial.

To print


|
This tutorial was created with PSP2020 and translated with PSPX9 and PSP2020, but it can also be made using other versions of PSP.
Since version PSP X4, Image>Mirror was replaced with Image>Flip Horizontal,
and Image>Flip with Image>Flip Vertical, there are some variables.
In versions X5 and X6, the functions have been improved by making available the Objects menu.
In the latest version X7 command Image>Mirror and Image>Flip returned, but with new differences.
See my schedule here
 italian translation here italian translation here
 french translation here french translation here
 your versions here your versions here
Necessary

Thanks for the tube and the mask Gabry and Narah.
(The links of the tubemakers here).

consult, if necessary, my filter section here
Filters Unlimited 2.0 here
Alien Skin Eye Candy 5 Impact - Perspective Shadow here
Simple - Half Wrap here
Mura's Meister - Perspective Tiling here
Filters Simple can be used alone or imported into Filters Unlimited.
(How do, you see here)
If a plugin supplied appears with this icon  it must necessarily be imported into Unlimited it must necessarily be imported into Unlimited

You can change Blend Modes according to your colors.
Copy the preset  in the folder of the plugin Alien Skin Eye Candy 5 Impact>Settings>Shadow. in the folder of the plugin Alien Skin Eye Candy 5 Impact>Settings>Shadow.
One or two clic on the file (it depends by your settings), automatically the preset will be copied in the right folder.
why one or two clic see here

Copy the selection in the Selection Folder.
Open the mask in PSP and minimize it with the rest of the material
(one of the background images will serve as a mask
1. Open a new transparent image 650 x 500 pixels.
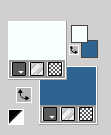
2. Set your foreground color with the light color #f7feff
and your background color with the dark color #316490.
3. Selections>Select All.
Open your background image B 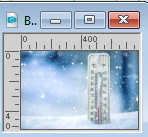
Edit>Copy.
Go back to your work and go to Edit>Paste into Selection.
Selections>Select None.
4. Effects>Image Effects>Seamless Tiling, default settings

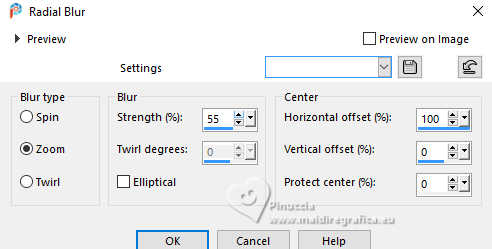
5. Adjust>Blur>Radial Blur.
6. Effects>Image Effects>Seamless Tiling, horizontal checked.

7. Layers>Duplicate.
Image>Mirror>Mirror horizontal (Image>Mirror).
Change the Blend Mode of this layer to Dissolve and reduce the opacity to 50%.
Effects>Edge Effects>Enhance More.
8. Selections>Select All.
Image>Add borders, symmetric not checked, background color.
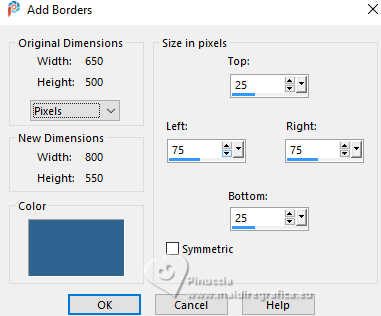
9. Effects>Image Effects>Seamless Tiling, again Bidirectional checked.

10. Effects>3D Effects>Drop Shadow, color black.
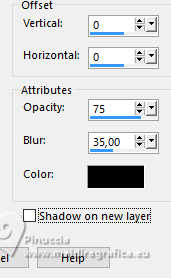
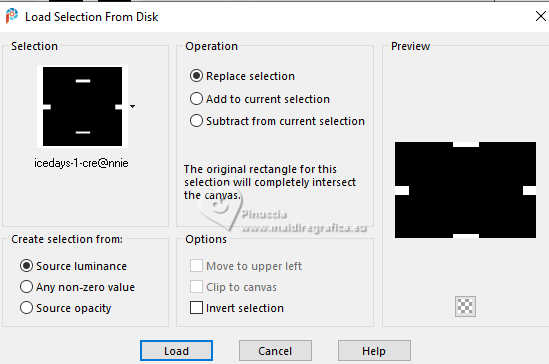
11. Selections>Load/Save Selection>Load Selection from Disk.
Look for and load the selection icedays-1-cre@nnie
 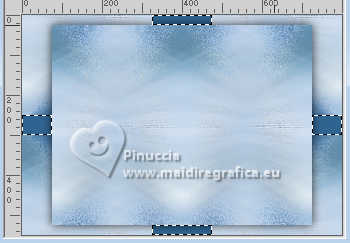
12. Effects>Texture Effects>Weave
weave color: foreground color
gap color - background color.
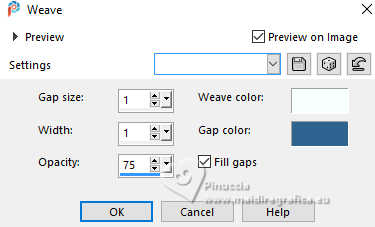
13. Effects>3D Effects>Drop Shadow, same settings.
Selections>Select None.
14. Effects>Image Effects>Seamless Tiling.

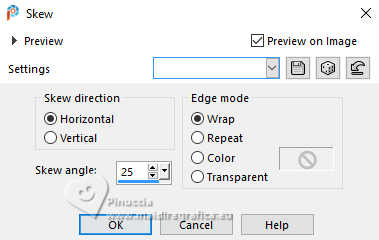
15. Effects>Geometric Effects>Skew.
16. Layers>Duplicate.
Image>Mirror>Mirror horizontal (Image>Mirror).
Change the Blend Mode of this layer to Dissolve and reduce the opacity to 50%.
17. Selections>Select All.
Image>Add borders, symmetric not checked, foreground color.
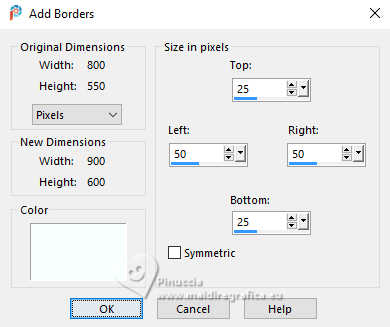
18. Selections>Invert.
Effects>Texture Effects>Weave, same settings.
19. Selections>Invert.
Effects>3D Effects>Drop Shadow, same settings.
Selections>Select None.
20. Effects>Image Effects>Seamless Tiling

21. Layers>New Raster Layer.
Selections>Select All.
Selections>Modify>Contract - 50 pixels.
Effects>3D Effects>Drop Shadow, same settings.
Selections>Select None.
22. Layers>Duplicate.
Effetti>Effetti geometrici>Inclina, same settings.
23. Layers>Duplicate.
Image>Mirror>Mirror horizontal (Image>Mirror)
Layers>Merge>Merge Down.
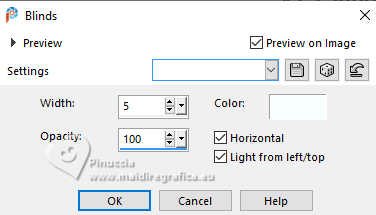
24. Effects>Texture Effects>Blinds - foreground color.
25. Layers>Merge>Merge visible.
26. Layers>Duplicate.
Layers>New Mask layer>From image
Open the menu under the source window and you'll see all the files open.
Select the mask E.
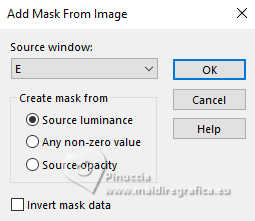
Layers>Merge>Merge Group.
27. Effects>3D Effects>Drop Shadow, same settings.
Change the Blend Mode of this layer to Soft Light.
Effects>Edge Effects>Enhance More.
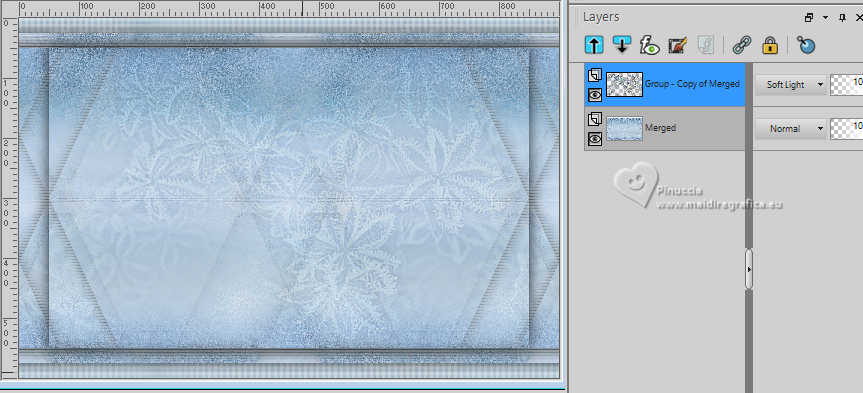
28. Layers>Merge>Merge Down.
29. Effetti>Plugins>Simple - Half Wrap.
This effect works without window; result
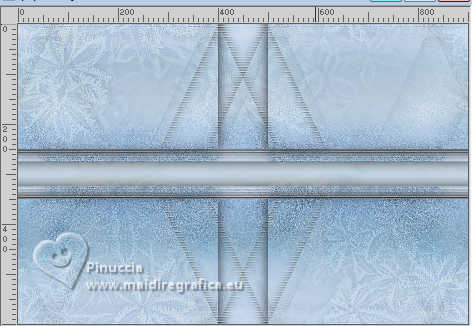
30. Effects>Image Effects>Offset.
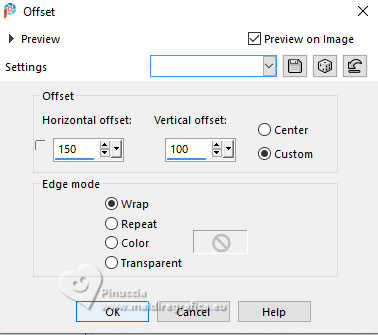
31. Layers>Duplicate.
Image>Mirror>Mirror Vertical (Image>Flip)
Change the Blend Mode of this layer to Overlay.
32. Layers>Merge>Merge Down.
33. Layers>New Raster Layer.
Flood Fill  the layer with your background color. the layer with your background color.
34. Layers>New Mask layer>From image
Open the menu under the source window
and select the mask Narah_Masks_0511.
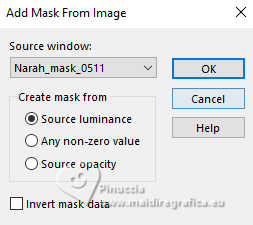
Layers>Merge>Merge Group.
35. Image>Mirror>Mirror Horizontal (Image>Mirror).
Change the Blend Mode of this layer to Luminance, and reduce the opacity to 50%.
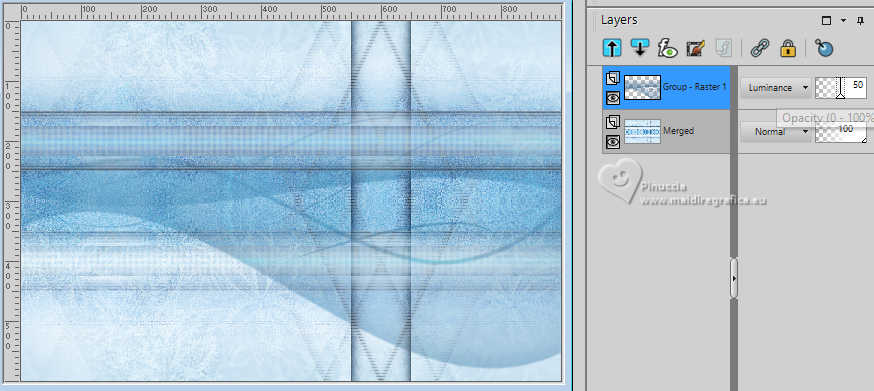
36. Effects>3D Effects>Drop Shadow, same settings.

37. Selection Tool 
(no matter the type of selection, because with the custom selection your always get a rectangle)
clic on the Custom Selection 
and set the following settings.
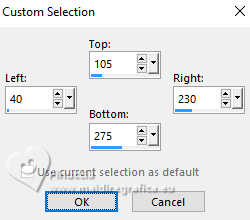
Layers>New Raster Layer.
Flood Fill  the selection with your background color. the selection with your background color.
38. Selections>Modify>Contract - 5 pixels.
Flood Fill  the selection with your foreground color. the selection with your foreground color.
Selections>Modify>Contract - 25 pixels.
39. Open your background image A 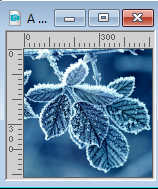
Edit>Copy.
Go back to your work and go to Edit>Paste into Selection.
Effects>Edge Effects>Enhance.
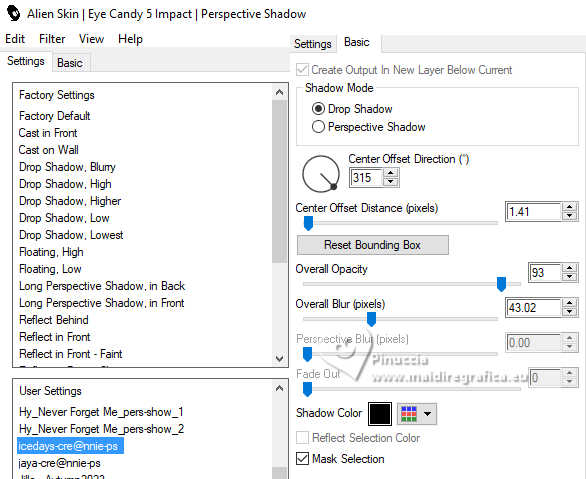
40. Effetti>Plugins>Alien Skin Eye Candy 5 Impact- Perspective Shadow.
Select the preset iceday-cre@nnie-ps and ok.
Selections>Select None.
41. Layers>Duplicate.
Image>Mirror>Mirror Horizontal (Image>Mirror).
42. Effects>Image Effects>Offset.
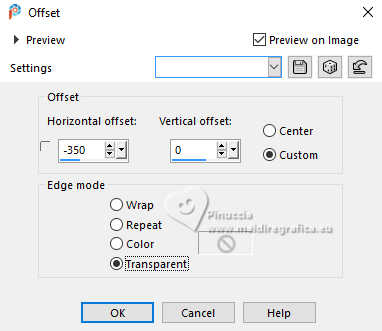
Layers>Merge>Merge Down.
43. Effetti>Plugins>Alien Skin Eye Candy 5 Impact- Perspective Shadow, same settings.
44. Activate your bottom layer.
Layers>Duplicate.
Effects>Plugins>Mura's Meister - Perspective Tiling.
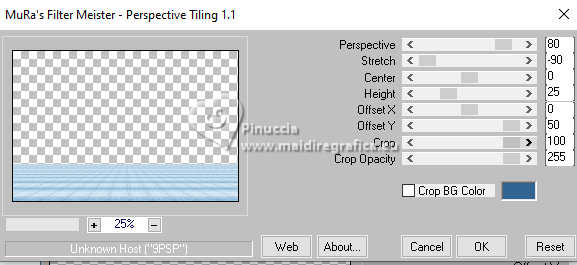
if you have problems with the preset,
copy/paste as new layer punt 87 
Objects>Align>Bottom
45. Effects>Plugins>Alien Skin Eye Candy 5 Impact- Perspective Shadow, same settings.
Layers>Arrange>Move Up.
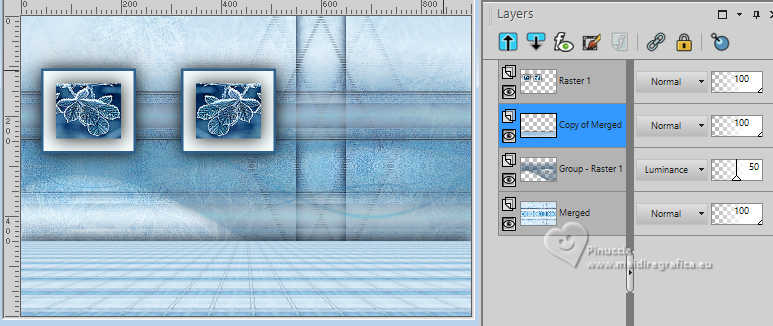
46. Open tekst-icedays 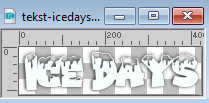
Edit>Copy.
Go back to your work and go to Edit>Paste as new layer.
K key on the keyboard to activate your Pick Tool 
and set Position X: 16,00 and Position Y: 420,00.

47. Selections>Select All.
Image>Add borders, 25 pixels, symmetric, foreground color.
48. Effects>Plugins>Alien Skin Eye Candy 5 Impact- Perspective Shadow, same settings.
Selections>Select None.
49. Open the tube Gabry-woman 26-2022 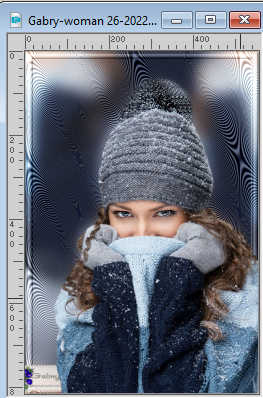
Edit>Copy.
Go back to your work and go to Edit>Paste as new layer.
Image>Resize, to 85%, resize all layers not checked.
50. Set Position X: 573,00 and Position Y: 5,00.

M key to deselect the Tool.
51. Effects>3D Effects>Drop Shadow, same settings.

52. Sign your work on a new layer.
53. Image>Add borders, 5 pixels, symmetric, background color.
54. Image>Resize, 800 pixels width, resize all layers checked.
Save as jpg.
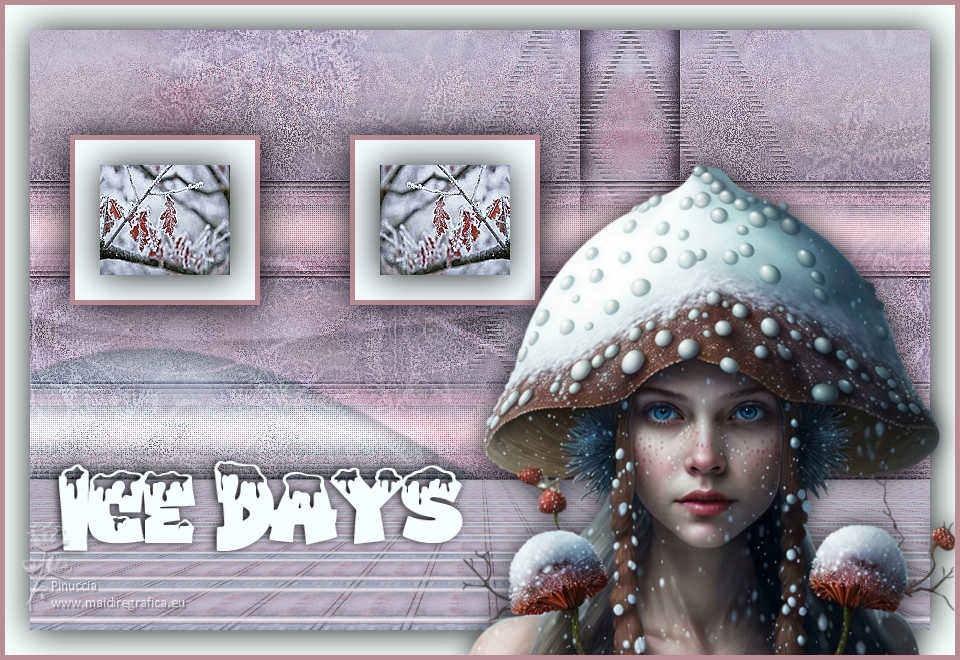
For the tube of this version thanks Riet

If you have problems or doubts, or you find a not worked link, or only for tell me that you enjoyed this tutorial, write to me.
13 January 2024

|
