FIN DE L'ÉTÉ
 END OF SUMMER END OF SUMMER
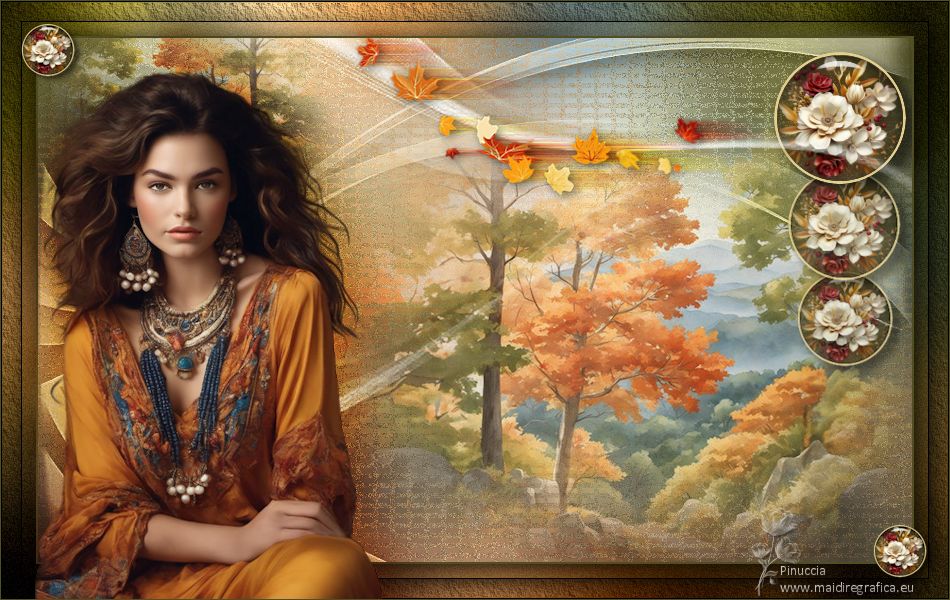
Thanks Colybrix for your invitation to translate

Clic and move the brush to follow the tutorial.

To print


|
This tutorial was translated with PSPX and PSPX3, but it can also be made using other versions of PSP.
Since version PSP X4, Image>Mirror was replaced with Image>Flip Horizontal,
and Image>Flip with Image>Flip Vertical, there are some variables.
In versions X5 and X6, the functions have been improved by making available the Objects menu.
In the latest version X7 command Image>Mirror and Image>Flip returned, but with new differences.
See my schedule here
 italian translation here italian translation here
 your versions here your versions here
Necessary

For the masks thanks Narah.
The rest of the material is by Colybrix.
(The links of the tubemakers here).
consult, if necessary, my filter section here
Filters Unlimited 2.0 here
Alien Skin Eye Candy 5 Impact - Glass here
Graphics Plus - Cross shadow here
AAA Frames - Texture Frame here
Filters Graphics Plus can be used alone or imported into Filters Unlimited.
(How do, you see here)
If a plugin supplied appears with this icon  it must necessarily be imported into Unlimited it must necessarily be imported into Unlimited

You can change Blend Modes according to your colors.

Open the masks in PSP and minimize them with the rest of the material.
Colors

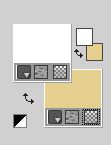
Set your foreground color to white #ffffff,
and your background color to the light color #e4cf8e
1. Open Alpha Fin été
Window>Duplicate or, on the keyboard, shift+D to make a copy.

Close the original.
The copy, that will be the basis of your work, is not empty,
but contains one selection saved to alpha channel.
Selections>Select All.
Open the jpg image image automne 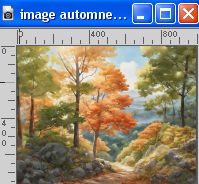
Edit>Copy.
Go back to your work and go to Edit>Paste into selection.
Selections>Select None.
Adjust>Blur>Gaussian Blur - radius 30.

2. Effects>Texture Effects>Mosaic Antique.
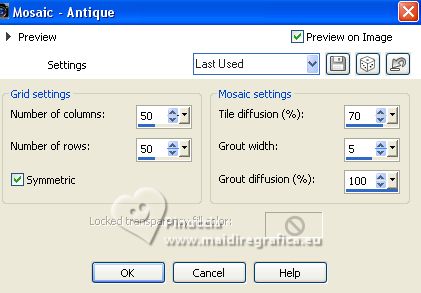
Effects>Plugins>Graphics Plus - Cross Shadow.
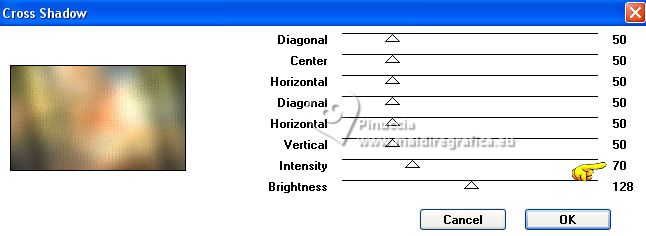
3. Layers>New Raster Layer.
Flood Fill  the layer with your white foreground color #ffffff. the layer with your white foreground color #ffffff.
Layers>New Mask layer>From image
Open the menu under the source window and you'll see all the files open.
Select the mask NarahsMasks_1773
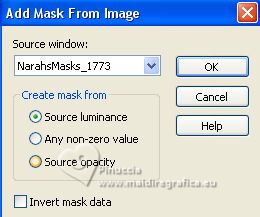
Effects>Edge Effects>Enhance.
Layers>Merge>Merge group.
Change the Blend Mode of this layer to Luminance (legacy) and reduce the opacity to 80%.
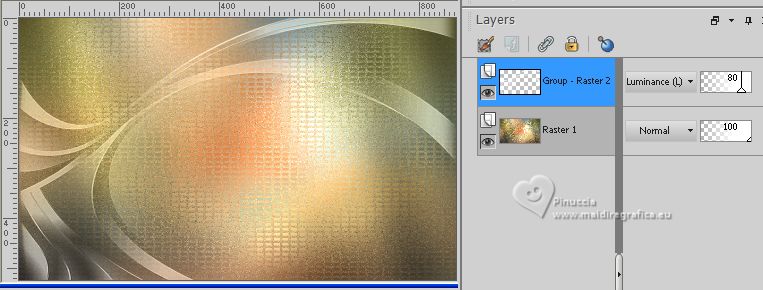
4. Open the landscape misted automn29-coly 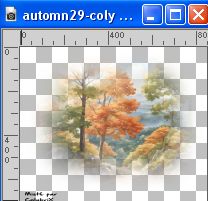
Erase the watermark and go to Edit>Copy.
Go back to your work and go to Edit>Paste as new layer.
Image>Resize, to 85%, resize all layers not checked.
Move  the tube at the bottom right. the tube at the bottom right.
*Optional, according to your tube: Layers>Duplicate and Layers>Merge>Merge Down
The position of my tube:
K key to activate your Pick Tool 
and set Position X: 220,00 and Position Y: 30,00.

5. Layers>Duplicate.
Image>Mirror.
Image>Resize, to 50%, resize all layers not checked.
Move  this tube at the upper left, this tube at the upper left,
for my tube: Pick Tool (K) 
Position X: -15,00 and Position Y: -60,00.

Reduce the opacity of this layer to 72%.
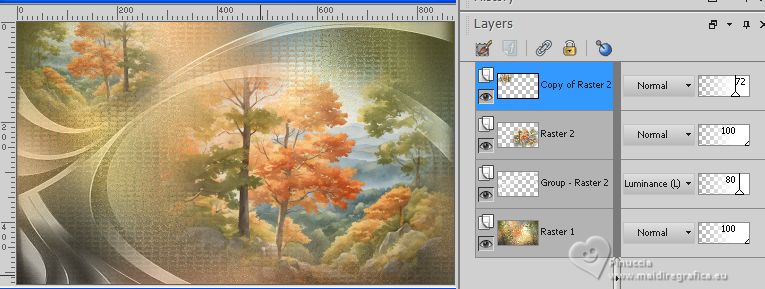
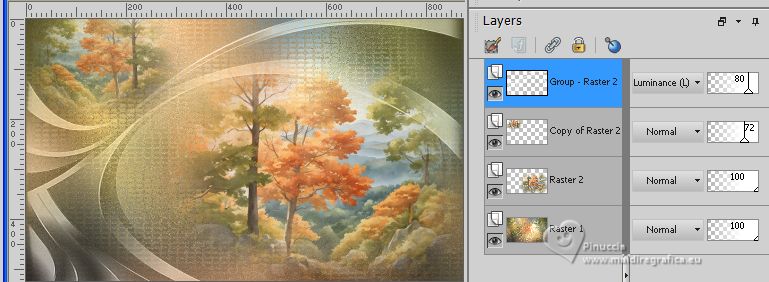
6. Activate the mask's layer, Group-Raster 2.
Layers>Arrange>Bring to top.
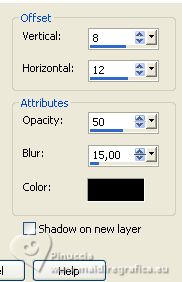
Effects>3D Effects>Drop Shadow, color black.
7. Activate the layer Raster 1.
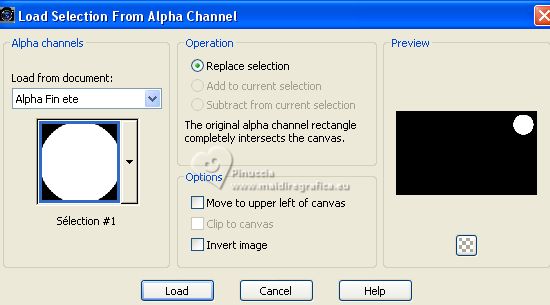
Selections>Load/Save Selection>Load Selection from Alpha Channel.
The selection sélection 1 is immediately available. You just have to click Load.
Selections>Promote Selection to layer.
Layers>Arrange>Bring to Top.
8. Layers>New Raster Layer.
Open Elegant Autumn Element (13) 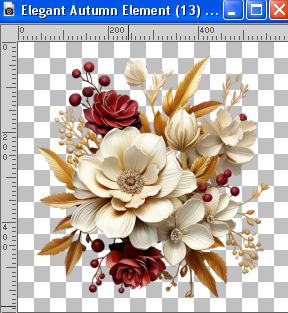
Edit>Copy.
Go back to your work and go to Edit>Paste into selection.
Keep selected.
Layers>Duplicate.
9. Activate the layer below of the original.
Adjust>Blur>Gaussian Blur - radius 10.

Change the Blend Mode of this layer to Multiply.
Layers>Merge>Merge Down.
Activate again the layer above of the copy.
Layers>Merge>Merge Down.
10. Effects>Plugins>Alien Skin Eye Candy 5 Impact - Glass.
Select the preset Clear and ok.

Selections>Modify>Select Selection Borders.
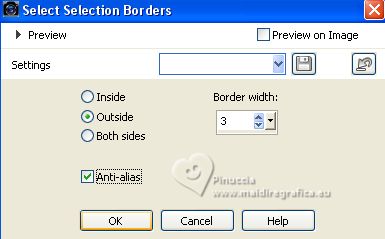
Flood Fill  the selection with your light background color (color 3). the selection with your light background color (color 3).
Selections>Select None.
11. Effects>3D Effects>Drop Shadow, same settings.

Edit>Copy
Edit>Paste as new image.
Minimize this image that you'll use later.
12. Go back to your work at the top layer.
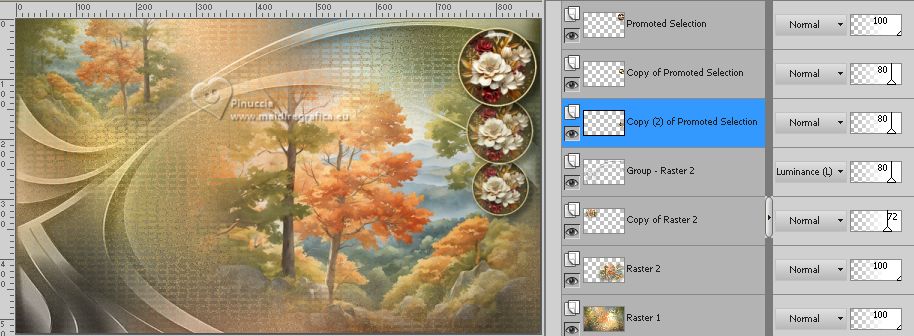
Move  the image slightly to the right. the image slightly to the right.
Pick Tool (K) 
Position X: 730,00 e Posizion Y: 10,00.

13. Layers>Duplicate.
Image>Resize, tol'85%, resize all layers not checked.
Pick Tool (K) 
Position X: 745,00 e Posizion Y: 127,00.

Reduce the opacity of this layer to 80%.
Layers>Arrange>Move Down.
14. Layers>Duplicate.
Image>Resize, to 85%, resize all layers not checked.
Pick Tool (K) 
Position X: 755,00 and Posizion Y: 230,00.

Layers>Arrange>Move Down.
15. Activate again your top layer.
Layers>New Raster Layer.
Flood Fill  the layer with your white foreground color. the layer with your white foreground color.
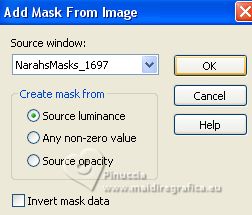
Layers>New Mask layer>From image
Open the menu under the source window
and select the mask NarahsMasks_1697
Effects>Edge Effects>Enhance.
Layers>Merge>Merge group.
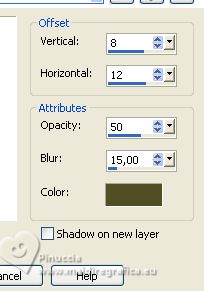
Effects>3D Effects>Drop Shadow, same settings, but dark color #504e25.
17. Open the tube feuilles deco 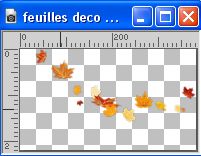
Edit>Copy.
Go back to your work and go to Edit>Paste as new layer.
Pick Tool (K) 
Position X: 284,00 e Posizion Y: -2,00.

Layers>Duplicate,
Activate the layer below of the original.
Effects>Distortion Effects>Wind - from left, strength 100.

Change the Blend Mode of this layer to Multiply.
Effects>Edge Effects>Enhance.
17. Activate again your top layer.
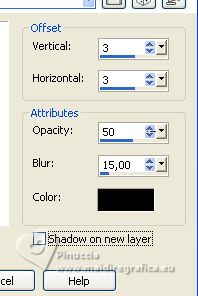
Effects>3D Effects>Drop Shadow, color black.
18. Activate your bottom layer, Raster 1.
Edit>Copy
19. Image>Add borders, 2 pixels, symmetric, dark color #504e25.
Selections>Select All.
Image>Add borders, 35 pixels, symmetric, whatever color.
Selections>Invert.
Edit>Paste into Selection.
20. Adjust>Blur>Gaussian Blur - radius 10.

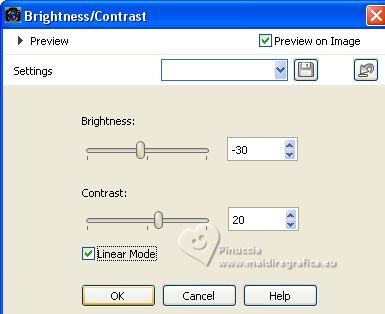
Adjust>Brightness and Contrast>Brightness and Contrast.
Adjust>Add/Remove Noise>Add Noise.
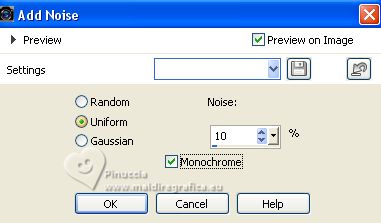
21. Effetti>Plugins>AAA Frames - Texture Frame.
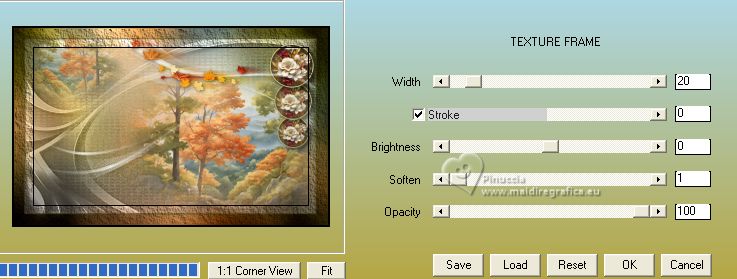
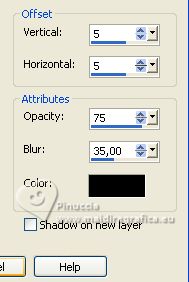
Selections>Invert.
Effects>3D Effects>Drop Shadow, color black.
22. Selections>Select All.
Selections>Modify>Contract - 20 pixels.
Effects>3D Effects>Drop Shadow, same settings.
Selections>Select None.
23. Activate the image minimized at step 11 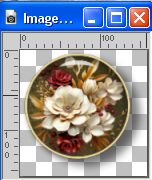
Edit>Copy.
Go back to your work and go to Edit>Paste as new layer.
Image>Resize, to 40%, resize all layers not checked.
Move  the image to the upper left corner. the image to the upper left corner.
Layers>Duplicate.
Move  this image to the lower right corner. this image to the lower right corner.
24. Open the woman's tube 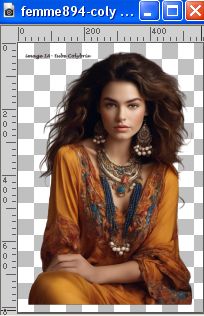
Erase the watermark and go to Edit>Copy.
Go back to your work and go to Edit>Paste as new layer.
Image>Resize, to 70%, resize all layers not checked.
Image>Mirror.
Move  the tube to the left side. the tube to the left side.
25. Layers>Duplicate.
Activate the layer below of the original.
Adjust>Blur>Gaussian Blur - radius 30.

Change the Blend Mode of this layer to Overlay.
26. Sign your work.
Image>Add borders, 1 pixel, symmetric, dark color #504e25.
Save as jpg.
For the tubes of this version thanks Elaine and Anna.br; the misted is mine, from an image by Giovanna Maffioli
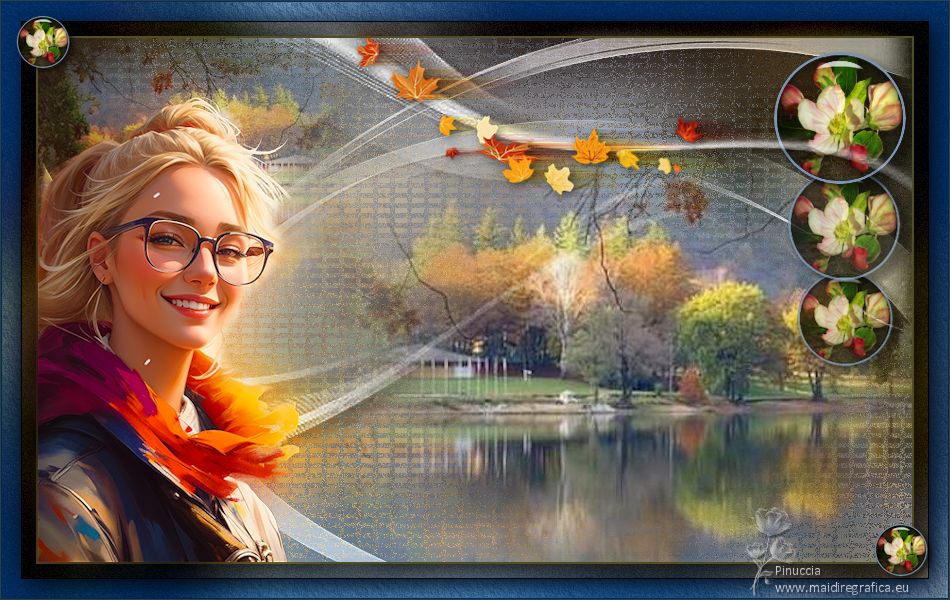

If you have problems or doubts, or you find a not worked link, or only for tell me that you enjoyed this tutorial, write to me.
4 September 2023

|

