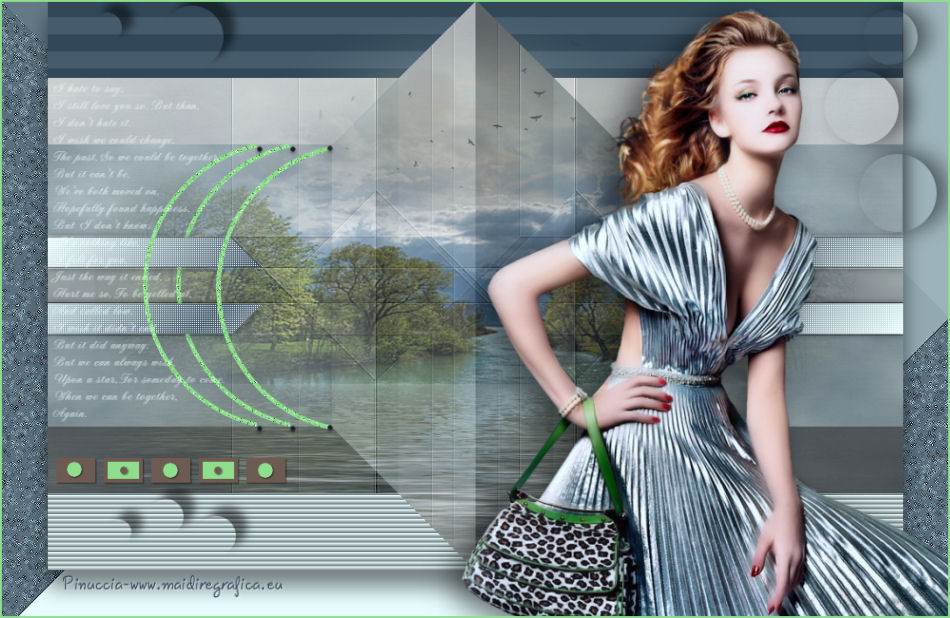

This tutorial was created with CorelX6.
It's a personal creation of Azalée and it is prohibited to copy or distribute it on the net (forums, groupes.. etc),
or to use it on commercials sites.
Masks and tubes should not be used in other tutorials without her permission.
For my translation, I used CorelX2, but the tutorial can also be made using other versions of PSP.
Since version PSP X4, Image>Mirror was replaced with Image>Flip Horizontal,
and Image>Flip with Image>Flip Vertical, there are some variables.
In versions X5 and X6, the functions have been improved by making available the Objects menu.
In the latest version X7 command Image>Mirror and Image>Flip returned, but with new differences.
See my schedule here
Italian translation here
For this tutorial, you will need:
Material here
All the material is by Azalée.
Plugins
consult, if necessary, my filter section here
Filters Unlimited 2.0 here
Simple - Left Right Wrap here
VM Toolbox - Trimosaic here
Toadies - What are you here
Carolaine and Sensibility - CS-HLines, CS-LDots here
It@lian Editors Effect - Bordo con luci here
Mura's Meister - Cloud here
Flaming Pear - Flood here
Filters Simple, VM Toolbox, Toadies and It@lian editors can be used alone or imported into Filters Unlimited.
(How do, you see here)
If a plugin supplied appears with this icon  it must necessarily be imported into Unlimited

You can change Blend Modes according your colors.
Copy the preset for Flood in a Folder of your choice.
Copy the selections in the Selections Folder.
1. Open a new image transparente 900 x 600 pixels.
Set the Foreground color to #e7fdff,
and the Background color to #3c5263.

2. Effects>Plugins>Mura's Meister - Cloud, default settings.

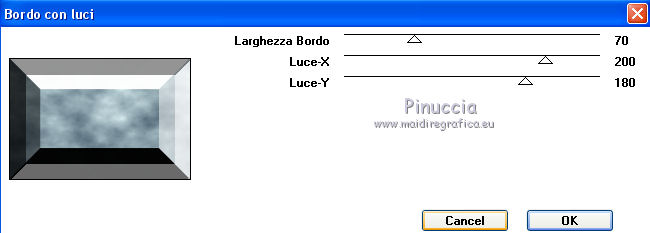
3. Effects>Plugins>It@lian Editors Effect - Bordo con luci.

4. Again Effects>Plugins>It@lian Editors Effect - Bordo con luci:
5. Effects>Plugins>Simple - Left Right Wrap
Used alone, this plugin works without window,
imported in Unlimited, you can see the result in the preview window

6. Activate the Magic Wand Tool 
tolerance 20, feather 0, and select the two the two top spaces, as below.

7. Layers>New raster layer (Raster2).
Flood Fill  with background color #3c5263 (right clic).
8. Effects>Plugins>Carolaine and Sensibility - CS-HLines.

Selections>Select None.
9. Activate the bottom layer - Raster 1.
Activate the Magic Wand tool 
tolerance 10, feather 0, and select the two bottom spaces, as below.

10. Layers>New raster layer (Raster3).
Flood Fill  with foreground color #e7fdff.
Effects>Texture Effects>Blinds - color black #000000.

Selections>Select None.
Activate the top layer (Raster2).
Layers>Merge>Merge down.
11. Activate the bottom layer, raster 1.
Layers>Duplicate.
Effects>Plugins>Filters Unlimited 2.0 - Toadies - What are you.

Effects>Edge Effects>Enhance more.
Change opacity of this layer to 60%.

12. On the same layer:
Selections>Load/Save Selection>Load Selection from disk.
Look for and load the selection Someday-Sel1.

Layers>New raster layer (Raster2).
With the first colors: foreground color #e7fdff, background color #3c5263:

set the foreground color to foreground/background gradient, style Linear.

Flood fill  the selection with the gradient.
13. Effects>Plugins>Carolaine and Sensibility - CS-LDots.

Selections>Select None.
Effects>3D Effects>Drop Shadow, color black.

14. Activate the top layer (Raster3)
Selections>Load/Save Selection>Load Selection from disk.
Look for and load the selection Someday-Sel2.

Selections>Promote selection to layer.
Effects>3D Effects>Drop shadow, color black #000000.

Selections>Select None.
15. Selections>Load/Save Selection>Load Selection from disk.
Look for and load the selection Someday-Sel3.

Layers>New raster layer (Raster4).
Set the foreground color to #8ede8e.
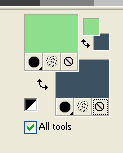
Flood Fill  the selection with the new foreground color #8ede8e.
16. Adjust>Add/Remove Noise/Add Noise.

Selections>Select None.
17. Layers>Duplicate.
To move the element, clic key K to activate Pick Tool 
with PSP 9 clic key D to activate Deformation Tool 
mode Scale 
set the layer to positions x: 135 - y: 150.

Clic on Pan tool  or clic M or A or S
(why these keys see here)
to deselect the tool.
Layers>Arrange>Move down - 4 times.

18. Layers>Duplicate.
Key K/D to activate Pick Tool /Deformation
set the layer to positions x: 100 - y: 150.

Deselect the tool.
Layers>Arrange>Move down.

19. Activate the tube Elément1-Someday, Edit>Copy.
Go back to your work and Edit>Paste as new layer.
Layers>Move>Bring to top.
To move it, Key K/D to activate Pick Tool /Deformation
set the layer to positions x: 215 - y: 150.

Deselect the tool.
20. Activate the layer Copy of Raster 1 (the second layer).
Selection Tool 
(no matter the type of selection, because with the custom selection your always get a rectangle)
clic on the Custom Selection 
and set the following settings.

Layers>New raster layer (Raster 6).
Open the tube Pays-127-azalee, Edit-Copy.
Go back to your workd and Edit>Paste into Selection.
Selections>Select None.
Change the opacity of this layer to 65%.
Adjust>Sharpness>Sharpen more.
21. Effects>Plugins>Flaming Pear - Flood.
Clic on the red arrow, and look for the preset Flood-Someday,
clic on Open or Enter on the keyboard to apply it.

Again ok to close (if you are problems with the preset, you can copy these settings).

22. Activate the top layer (Raster 5).
Open the tube Someday-Poem, Edit-Copy.
Go back to your work and Edit>Paste as New Layer.
To move it in the upper left:
Key K/D to activate Pick Tool /Deformation
set the layer to positions x: 3 - y: 87.

Deselect the tool.
If you want, you can colorize or change the blend mode to Luminance (legacy).
23. Open the tube Elément2-Someday, Edit-Copy.
Go back to your work and Edit>Paste as New Layer.
To move it in the lower left:
Key K/D to activate Pick Tool /Deformation
set the layer to positions x: 8 - y: 481.

Deselect the tool.
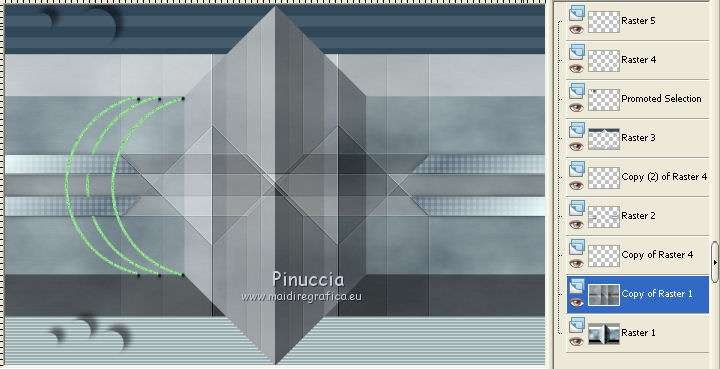
24. You should have this.

25. Layers>Merge>Merge visible.
26. Image>Canvas Size - 1000 x 650 pixels.

Effects>3D Effects>Drop shadow, color black #000000.

27. Layers>New raster layer.
Again set the foreground color to #e7fdff,
and to foreground/color Gradient.


Flood Fill  the layer with the gradient.
28. Effects>Plugins>Filters Unlimited 2.0 - VM Toolbox - Trimosaic.

29. Selections>Load/Save Selection>Load Selection from disk.
Look for and load the selection Someday-Sel4.

30. Adjust>Add/Remove Noise>Add Noise.

Effects>Edge Effects>Enhance.
Selections>Select None.
Layers>Arrange>Send to bottom.
31. Activate the top layer - Merged.
Selections>Load/Save Selection>Load Selection from disk.
Look for and load the selection Someday-Sel5.

Selections>Promote selection to layer.
Effects>3D Effects>Drop shadow, color black #000000.

Selections>Select None.
32. Open the tube oiseaux-misted-15-Azalee, Edit>Copy.
Go back to your work and Edit>Paste as new layer.
Key K/D to activate Pick Tool /Deformation
set the layer to positions x: 274 - y: 8.

Deselect the tool.
Change the opacity of this layer to 36%.
33. Open the tube Femme-1189-azalee, Edit>Copy.
Go back to your work and Edit>Paste as new layer.
Image>Resize, 88%, resize all layers not checked.
Move  the tube to the right side - see my final tag.
Effects>3D Effects>Drop shadow, color black #000000.

34. Layers>New raster layer.
Selection>Select All.
Set the foreground color to the green color #8ede8e,
Flood Fill  the layer with this color.
Selections>Modify>Contract - 2 pixels.
Press CANC on the keyboard 
Selections>Select None.
35. Sign your work on a new layer.
36. Layers>Merge>Merge All.
Image>Resize, as you want, resize all layers checked.
Save as jpg.
Tubes of this version are by Beatriz and Mentali.


Your versions. Thanks

Rossella

Marie

Seval

Dilek

Myra

Olimpia

Terry

Mony

If you have problems or doubt, or you find a not worked link, or only for tell me that you enjoyed this tutorial, write to me.
22 April 2014
