|
SOPHIE


Thanks SIM PSP Group for your invitation to translate your tutorials into english

This tutorial was written with PSP2020 and translated with Psp19, but it can also be made using other versions of PSP.
Since version PSP X4, Image>Mirror was replaced with Image>Flip Horizontal,
and Image>Flip with Image>Flip Vertical, there are some variables.
In versions X5 and X6, the functions have been improved by making available the Objects menu.
In the latest version X7 command Image>Mirror and Image>Flip returned, but with new differences.
See my schedule here
For this tutorial, you will need:

Thanks for the tube Pqna Alice.
The rest of the material is by AnaMariaC
(The links of the tubemakers here).

consult, if necessary, my filter section here
Filters Unlimited 2.0 here
Graphics Plus - Cross Shadow here
Cybia Screenworks here
Plugins AB4 - Colour Sweeping (to import in Unlimited) here
Flaming Pear - Flexify here
Flaming Pear - Flexify 2 here
Filters Graphics Plus can be used alone or imported into Filters Unlimited.
(How do, you see here)
If a plugin supplied appears with this icon  it must necessarily be imported into Unlimited it must necessarily be imported into Unlimited

You can change Blend Modes according to your colors.

Copy the Selection in the Selections Folder.
Copy the Texture in the Textures Folder.
1. Choose 2 colors from your material
Set your foreground color to #ffce65,
and your background color to #d25400.

2. Set your foreground color to a Foreground/Background Gradient, style Linear.

3. Open a new transparent image 900 x 550 pixels.
Flood Fill  the transparent image with your Gradient. the transparent image with your Gradient.
4. Effects>Plugins>Filters Unlimited 2.0 - Plugins AB 04 - Colour Sweeping.

5. Layers>Duplicate.
6. Effects>Plugins>Flaming Pear - Flexify 2.

7. Open the misted 1049byPqnaAlice 
Erase the watermark and go to Edit>Copy.
Go back to your work and go to Edit>Paste as new layer.
Image>Resize, to 80%, resize all layers not checked.
Adjust>Sharpness>Sharpen.
8. Layers>Merge>Merge All.
9. Selections>Select All.
Edit>Copy
Image>Add borders, 20 pixels, symmetric, whatever color.
10. Selections>Invert.
Edit>Paste into Selection
Adjust>Blur>Gaussian Blur - radius 20.

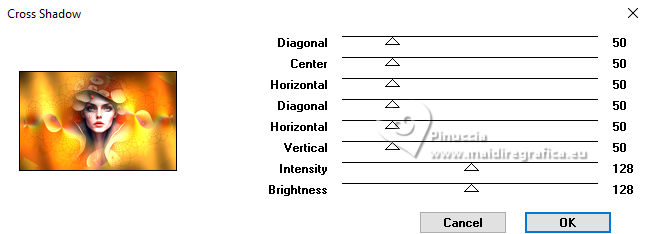
11. Effects>Plugins>Graphics Plus - Cross Shadow, default settings.

12. Selections>Invert.
13. Selections>Modify>Select Selection Borders.

Set your foreground color to Color.
Flood Fill  the selection with your foreground color #ffce65. the selection with your foreground color #ffce65.
14. Effects>3D Effects>Inner Bevel.

15. Selections>Invert.
Effects>3D Effects>Drop Shadow, color #000000.

16. Selections>Select All.
Image>Add borders, 40 pixels, symmetric, whatever color.
Selections>Invert.
Selections>Promote Selection to layer.
17. Set again your foreground color to the Gradient Linear.

Flood Fill  the selection with your Gradient. the selection with your Gradient.
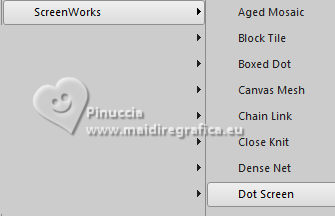
18. Effects>Plugins>Cybia - Screenworks - Dot Screen.

if you use the old version (the effect works without window):
Effects>Plugins>Screenworks - Dot Screen

19. Selections>Invert.
Effects>3D Effects>Drop Shadow, color #000000.

Selections>Select None.
Layers>Duplicate.
20. Effects>Plugins>Flaming Pear - Flexify

21. Open WordArt_Titulo 
Edit>Copy.
Go back to your work and go to Edit>Paste as new layer.
Colorize to your liking.
22. Effects>3D Effects>Drop shadow, background color #d25400, or to your liking.

23. K key to activate your Pick Tool 
and set Position X: 78,00 and Position Y: 83,00.

24. Layers>Duplicate.
Set Position X: 657,00 and Position Y: 484,00.

M key to deselect the Tool.
25. Reduce the opacity of this layer to 50.
Layers>Merge>Merge Down.
26. Image>Add borders, 1 pixel, symmetric, background color #d25400.
27. If you want, resize your layer.
Sign your work and save as jpg.
For the tube of this version thanks PqnaAlice.


Your versions. Thanks

Tosca dei gatti

Denise

Lynnette


If you have problems or doubts, or you find a not worked link, or only for tell me that you enjoyed this tutorial, write to me.
13 October 2023

|


