Thanks Talanat

This tutorial was created using PSP X5 but it may be esecuted using other versions of PSP.
In PSP X4 and X5, there are some variables.
An important difference concerne the options Image>Miroir and Image>Flip.
See my schedule here
I translated this tutorial using PSP X and PSP X2.
I created also a french version here
The original italian here
Your versions here
For this tutorial, you will need:
Material here
All the material is by TalaNat.
Filtres:
if you have a doubt about plugins, see my section plugins here
Alien Skin Eye Candy 5 Impact qui
Alien Skin Eye Candy 5 Textures qui
Alien Skin Eye Candy 5 Nature - Icicles qui
Flaming Pear - Flood qui
Filters Unlimited 2.0 qui
Sybia - Streaker qui
AAA Frames - Foto Frame qui
Mura's Meister - Copies qui
Your versions here
Thank you very much to all.

Copy the preset  in the folder of the plugins Alien Skin Eye Candy 5.
One or two clic on the file (it depends by your settings), automatically the preset will be copied in the right folder.
why one or two clic see here
Copy the preset TN_ice_and_fire.q8r in the folder of Flood.
If you prefer, you can import it from the folder of the material, when you'll need it.
Copy the selection in the folder Selections.
Copy the masks in the folder Mask.
1. Open a new transparent image 900 x 500 pixels.
Selections>Select All.
Open the image Fon_0_ec86A_FC1512FF_XXXL.jpg and go to Edit>Copy.
Back to your tag and go to Edit>Paste into Selection.
Selections>Select None.
2. Effects>Image Effects>Seamless Tiling, default.

3. Effects>Distortion Effects>Wind - from right, wind strength 100.

Edit>Repeat Wind.
4. Effects>Edge Effects>Enhance more.
5. Layers>Duplicate.
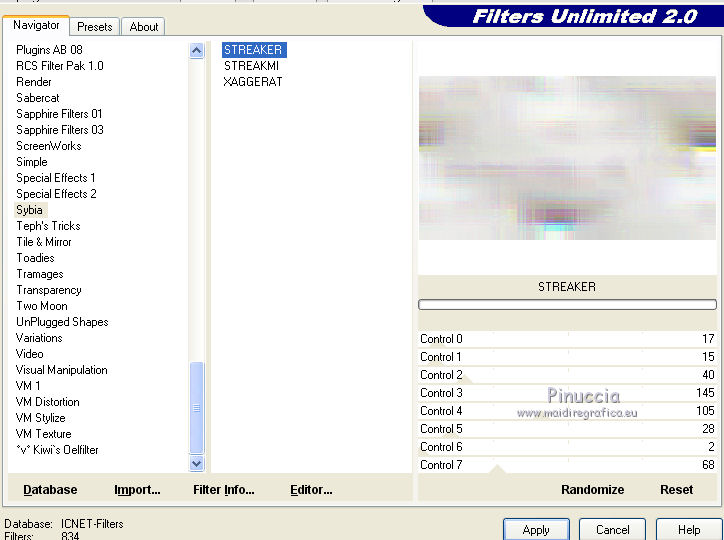
Effects>Plugins>Filters Unlimited 2.0 - Sybia - Streaker.
Set the blend mode to Multiply.
Layers>Merge>Merge visible.
6. Set the Foreground Color on #e9eeef,
and the Background Color on #820305.
Set you Foreground color to Gradient, Radial.
(in the newest version of PSP, it is Corel_06_029)

7. Layers>New Raster Layer - Raster 1.
Flood Fill  with the gradient.
Adjust>Blur>Gaussian blur - radius 50.

Set the blend mode on Hard Light, opacity 80%.
Layers>Merge/Merge visible.
8. Window>Duplicate (or, on the keybord, shift+D) to make a copy.
Minimize the copy and go back to your original work.
9. Selections>Select All.
Layers>New Raster Layer - Raster 1.
Activate the tube TalaNat_Man_26112013 and go to Edit>Copy.
Go back to your work and go to Edit>Past into Selection.
Selections>Select None.
Adjust>Sharpness>Sharpen.
10. Layers>Duplicate.
Close this layer and activate che under original layer.
Adjust>Hue and Saturation>Hue Map
Select the preset Greyscale and ok.

11. Open again and activate the upper layer of the copy.
Selections>Load/Save Selection>Load Selection from Disk.
Look for and load the selection TN_Ice and Fire

Clic two-three times on the keyboard CANC 
Selections>Select None.
12. Layers>Duplicate.
Set the blend mode of this layer on Multiply, and opacity à 50%.
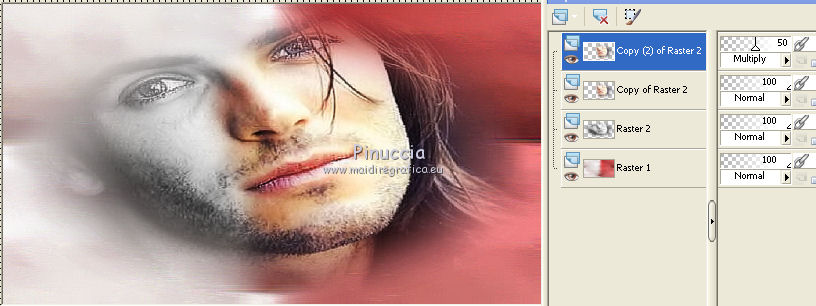
Close you background layer, and remain on the top layer.
Layers>Merge>Merge visible.
13. Again set the Foreground color on #e9eeef.
Layers>New Raster layer - Raster 1.
Selections>Load/Save Selection>Load Selection from Disk.
Again load the selection TN_Ice and Fire
Flood Fill the selection with your Foreground color.
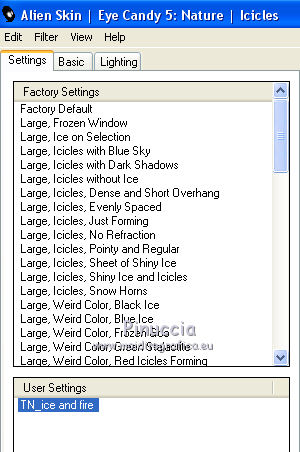
14. Effects>Plugins>Alien Skin Eye Candy 5 Nature - Icicles.
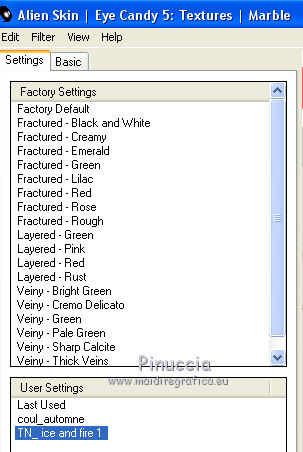
Select the preset TN_ice and fire and ok.
If you have problems with the preset, these are the settages

Selections>Select None.
Set the blend mode of this layer on Multiply, and opacity à 50%.
15. Layers>New Raster Layer - Raster 2.
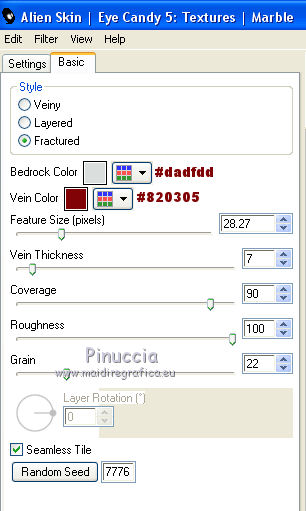
Effects>Plugins>Alien Skin Eye Candy 5 Textures - Marble.
Select the preset TN_ice and fire and ok.
If you have problems with the preset, these are the settages.
Effects>Edge Effects>Enhance.
Set the blend mode of this layer on Multiply, and opacity à 45%.
Open again the background layer and you should have this.

16. Layers>Merge>Merge all.
Image>Add borders - 1 pixel, symmetric, color white #ffffff.
Image>Add borders - 1 pixel, symmetric, background color #820305.
Image>Add borders - 2 pixels, symmetric, color white #ffffff.
Image>Add borders - 1 pixel, symmetric, background color #820305.
Image>Add borders - 15 pixels, symmetric, color white #ffffff.
Active the Magic Wand tool 
clic on the 15 pixels border to select it.
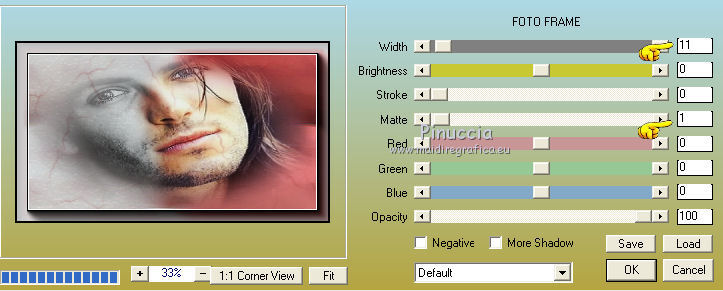
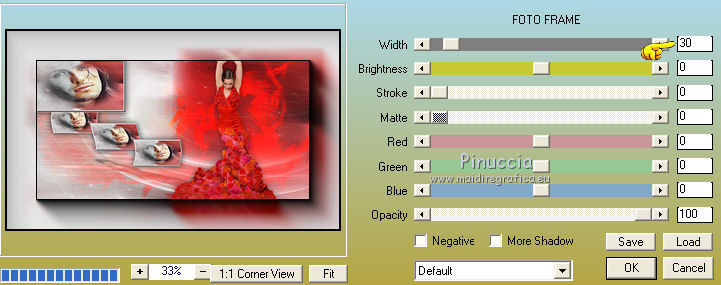
17. Effects>Plugins>AAA Frames - Foto Frame.
Selections>Select None.
Image>Add borders - 1 pixel, symmetric, background color white #ffffff.
18. Layers>Promote Background Layer.
Image>Resize>30%, resize all layers not checked.
Effects>Image Effects>Offset.

Adjust>Sharpness>Sharpen.
19. Layers>Duplicate.
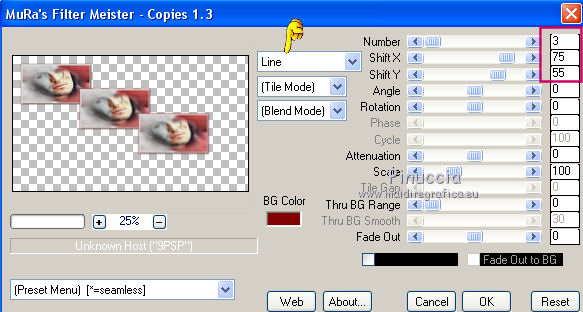
Effects>Plugins>Mura's Meister - Copies.
20. Effects>Distortion Effects>Wave.

Layers>Arrange>Move down.
21. Edit>Copy, and minimize it.
Activate the work you minimized on step 8
(this will be your new work)
Edit>Paste as New Layer.

Image>Resize>50%, resize all layers not checked.
Effects>Image Effects>Offset.

22. Activate the first work with the man images.
Activate the top layer and go to Edit>Copy.
Go back to your new work and go to Edit>Paste as new layer.

Effects>Image Effects>Offset.

23. Layers>Duplicate.
Effects>Plugins>Flaming Pear - Flood.
Clic on the red arrow, and look for the preset TN_ice and fire.q8r
Clic on Open to apply it.

Again ok to close.
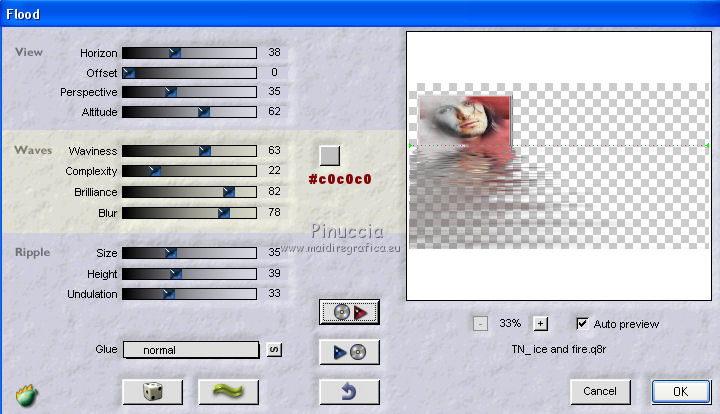
Set the opacity of this layer à 40%.
Layers>Arrange>Move down, under the images layers.
You should have this.

24. Activate the top layer - Raster 2.
Layers>Merge>Merge Down.
Effects>3D Effects>Drop Shadow, background color #820305.

25. Layers>Merge>Merge down.
Close this layer and activate the under layer.
Layers>Duplicate.
Set the blend mode to Multiply.
26. Layers>New Raster Layer - Raster 1.
Flood Fill the layer with your foreground color.
Layers>Load/Save mask>Load Mask from Disk.
Look for and load the mask 1217491254

Layers>Merge>Merge Group.
Adjust>Sharpness>Sharpen.
Set the blend mode to Screen.
27. Layers>New Raster Layer - Raster 1.
Set your Foreground color with #fc521a.

Set your Foreground color to Gradient, Linear.

Flood Fill the layer with your gradient.
28. Layers>Load/Save mask>Load Mask from Disk.
Look for and load the mask TN_mask

Layers>Merge>Merge Group.
Set the blend mode to Overlay.
29. Layers>Arrange>Move down.
Layers>Duplicate.
Set the blend mode to Dodge, opacity 75%.
Open again the top layer.
You should have this.

30. Layers>Merge>Merge visible.
Adjust>Sharpness>Sharpen More.
31. Activate the tube TalaNat_Woman_26112013 and go to Edit>Copy.
Back to your tag and go to Edit>Paste as new layer.
Image>Resize>60%, resize all layers not checked.
32. Effects>Image Effects>Offset.

Adjust>Sharpness>Sharpen.
33. Effects>3D Effects>Drop Shadow.

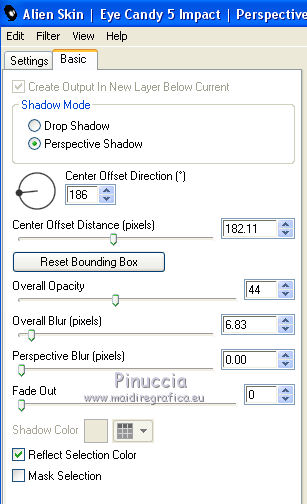
34. Effects>Plugins>Alien Skin Eye Candy 5 Impact - Perspective Shadow.
Select the preset TN_ice and fire_shadow and ok.
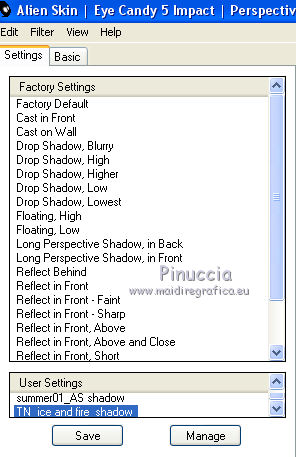
If you have problems with the preset, these are the settages.
35. Layers>Merge>Merge All.
Image>Add borders - 1 pixel, symmetric, color white #ffffff.
Image>Add borders - 1 pixel, symmetric, background color #820305.
Image>Add borders - 2 pixels, symmetric, color white #ffffff.
Image>Add borders - 1 pixel, symmetric, background color #820305.
Image>Add borders - 15 pixels, symmetric, color white #ffffff.
Image>Add borders - 1 pixel, symmetric, background color #820305.
36. Selections>Select All.
Image>Add borders - 30 pixels, symmetric, color white #ffffff.
Selections>Invert.
Effects>Plugins>AAA Frames - Foto Frame.
37. Selections>Invert.
Effects>3D Effects>Drop Shadow.
Selections>Select None.
Image>Add borders - 1 pixel, symmetric, background color #820305.
38. Activate the text TN_Ice and Fire_Text and go to Edit>Copy.
Back to your tag and go to Edit>Paste as new layer.
Effects>Image Effects>Offset.

39. Effects>3D Effects>Drop Shadow, background color #820305.

40. Sign your tag on a new layer.
Layers>Merge>Merge All.
Layers>Duplicate.
Set the blend mode to Multiply, and the opacity 70%.
Layers>Merge>Merge All.
41. Image>Resize> 900 pixels width, resize all layers checked.
Adjust>Sharpness>Sharpen.
Save as jpg.

If you have problems or doubt, or you find a not worked link, or only for tell me that you enjoyed this tutorial, write to me.
6 December 2013


