|
TAG THEREZA CHRIST
 ENGLISH VERSION ENGLISH VERSION

Here you find the original of this tutorial:

This tutorial was translated with PSPX7 but it can also be made using other versions of PSP.
Since version PSP X4, Image>Mirror was replaced with Image>Flip Horizontal,
and Image>Flip with Image>Flip Vertical, there are some variables.
In versions X5 and X6, the functions have been improved by making available the Objects menu.
In the latest version X7 command Image>Mirror and Image>Flip returned, but with new differences.
See my schedule here
French translation here
your versions ici
For this tutorial, you will need:
Material here
Tube 2830-woman-LB TUBES
Mist CAL-2958-081318
Mask_ d79054242fe
Mask_ cid_inlinelmage0
Adorno.294.nines
Adorno rallitas.294.nines
(you find here the links to the material authors' sites)
Plugins
consult, if necessary, my filter section here
Filters Unlimited 2.0 here
Tramages - Pool Shadow, Tow the lines here
Filters Tramages can be used alone or imported into Filters Unlimited.
(How do, you see here)
If a plugin supplied appears with this icon  it must necessarily be imported into Unlimited it must necessarily be imported into Unlimited

You can change Blend Modes according to your colors.
In the newest versions of PSP, you don't find the foreground/background gradient (Corel_06_029).
You can use the gradients of the older versions.
The Gradient of CorelX here
Copy the Selection in the Selections Folder.
Open the masks in PSP and minimize them with the rest of the material.
1. Open a new transparent image 900 x 600 pixels.
2. Set your foreground color to #5c0f1f,
and your background color to #ddbfb9.

Flood Fill  the transparent image with your foreground color #5c0f1f. the transparent image with your foreground color #5c0f1f.
3. Layers>New Raster Layer.
Flood Fill  with your background color #ddbfb9. with your background color #ddbfb9.
4. Layers>New Mask layer>From image
Open the menu under the source window and you'll see all the files open.
Select the mask d79054242fe.
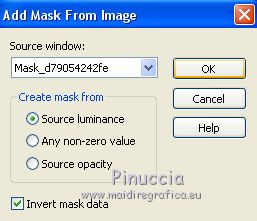
Layers>Merge>Merge Group.
Erase the watermark.
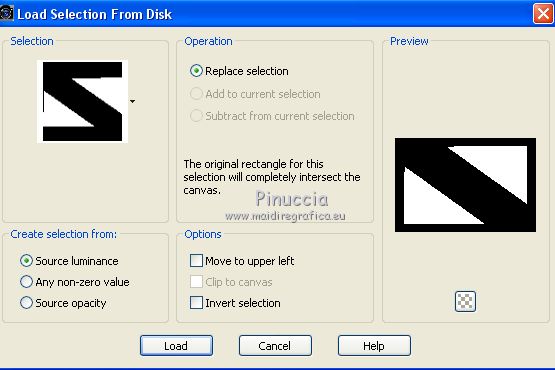
5. Selections>Load/Save Selection>Load Selection from disk.
Look for and load the selection sel.294.nines
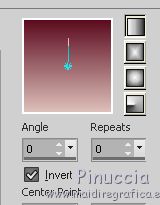
6. Set your foreground color to a Foreground/Background Gradient, style Linear.
7. Layers>New Raster Layer.
Flood Fill  the layer with your Gradient. the layer with your Gradient.
8. Effects>Plugins>Tramages - Tow the line.
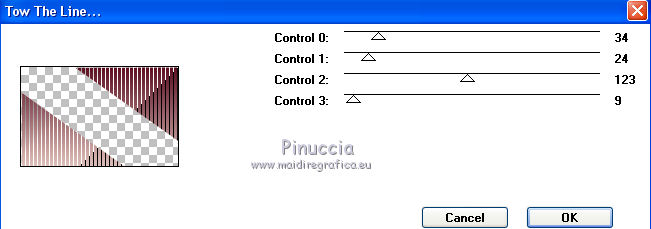
Selections>Select None.
9. Layers>Duplicate.
10. Effects>Image Effects>Seamless Tiling, default settings.

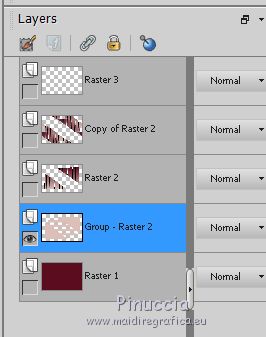
11. Open the tube Adorno.294.nines, erase the watermark - Edit>Copy.
Go back to your work and go to Edit>Paste as new layer.
12. Close all the layer except the mask layer
13. Open the tube CAL-2958-081318, erase the watermark - Edit>Copy.
Go back to your work and go to Edit>Paste as new layer.
Reduce the opacity of this layer to 80%.
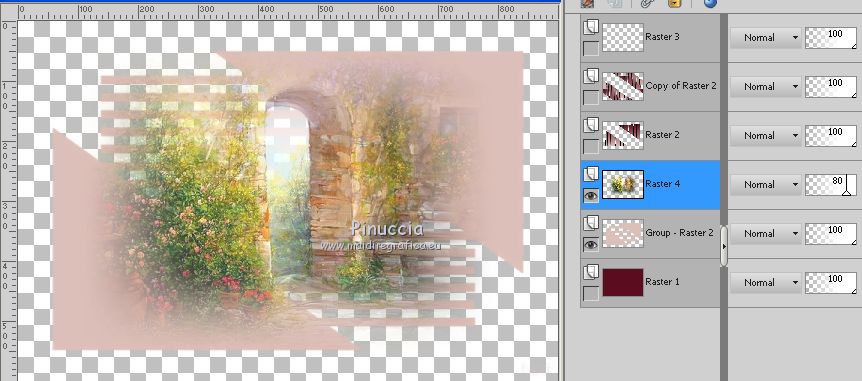
14. Open again the closed layers: Layers>View>All.
15. Layers>New Raster Layer.
Layers>Arrange>Bring to Top.
Flood Fill  with your background color #ddbfb9 with your background color #ddbfb9
16. Layers>New Mask layer>From image
Open the menu under the source window
and select the mask cid_inlinelmage0.
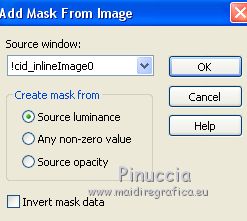
Layers>Merge>Merge Group.
17. Layers>Merge>Merge All.
18. Image>Add borders, 2 pixels, symmetric, foreground color #5c0f1f.
Image>Add borders, 40 pixels, symmetric, background color #ddbfb9.
Activate the Magic Wand Tool 
and click on the last border to select it.
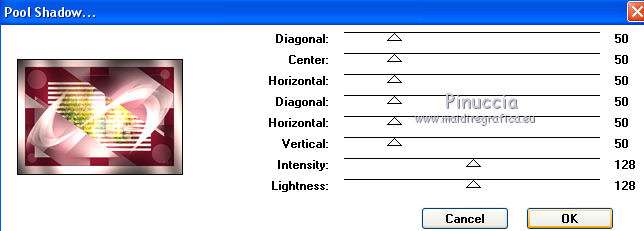
19. Effects>Plugins>Tramages - Pool Shadow, par défaut.
20. Selections>Invert.
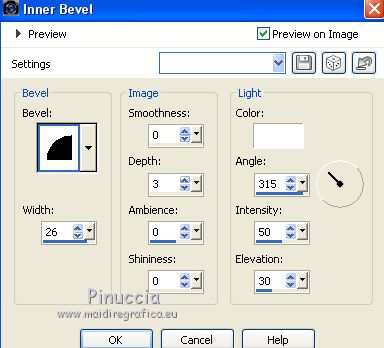
21. Effects>3D Effects>Inner Bevel.
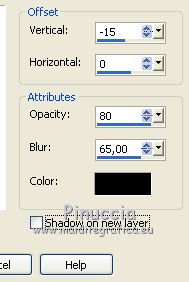
22. Effects>3D Effects>Drop Shadow, color black.
Selections>Select None.
23. Open the tube 2830-woman-LB TUBES, erase the watermark - Edit>Copy.
Go back to your work and go to Edit>Paste as new layer.
Place  rightly the tube. rightly the tube.
24. Effects>3D Effects>Drop Shadow, same settings.

25. Layers>Merge>Merge All.
26. Image>Add borders, 2 pixels, symmetric, foreground color #5c0f1f.
27. Open the tube Adorno rallitas.294.nines, erase the watermark - Edit>Copy.
Go back to your work and go to Edit>Paste as new layer.
28. Sign your work on a new layer.
Layers>Merge>Merge All and save as jpg.
Your versions here

If you have problems or doubts, or you find a not worked link, or only for tell me that you enjoyed this tutorial, write to me.
29 September 2018
|
 ENGLISH VERSION

 ENGLISH VERSION
