|
FEERIE AUTOMNALE  ENGLISH VERSION ENGLISH VERSION

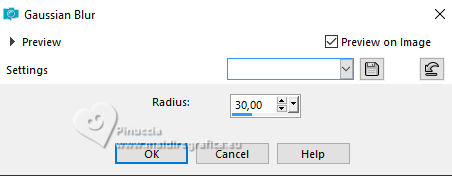
This tutorial was translated with PSPX7 but it can also be made using other versions of PSP. attention please, before applying the next effect, save your work, because the plugins could block your PSP. The main reason is the memory that may be insufficient for its application. As for me, after the program has been blocked and restarted, I removed the most filters from the list (that for the moment I didn't need), and so the filter worked. If this doesn't help you (in any case, it will always useful), you can import the effect in Unlimited. Almost at the end, however this solution will no longer be sufficient, because the filter will still hang. So from Selection 9, I imported the effects in Unlimited Effects>Plugins>Kang 4 - Emboss 1 grave  Effects>Plugins>Alien Skin Eye Candy 5 Impact - Glass, same settings. 13. Selections>Load/Save Selection >Load Selection from Alpha Channel. Open the selections menu and load sélection#3.  Selections>Modify>Expand - 2 pixels. Edit>Paste into Selection. Effects>Plugins>Kang 4 - az-Gen1-dolphin  Effects>Plugins>Alien Skin Eye Candy 5 Impact - Glass, same settings. 14. Selections>Load/Save Selection >Load Selection from Alpha Channel. Open the selections menu and load sélection#4.  Selections>Modify>Expand - 2 pixels. Edit>Paste into Selection. Effects>Plugins>Kang 4 - Spectra-flare.  Effects>Plugins>Alien Skin Eye Candy 5 Impact - Glass, same settings. 15. Selections>Load/Save Selection >Load Selection from Alpha Channel. Open the selections menu and load sélection#5.  Selections>Modify>Expand - 2 pixels. Edit>Paste into Selection. Effects>Plugins>Kang 4 - Gembars 2.  Effects>Plugins>Alien Skin Eye Candy 5 Impact - Glass, same settings. 16. Selections>Load/Save Selection >Load Selection from Alpha Channel. Open the selections menu and load sélection#6.  Selections>Modify>Expand - 2 pixels. Edit>Paste into Selection. Effects>Plugins>Kang 4 - Batwave.  Effects>Plugins>Alien Skin Eye Candy 5 Impact - Glass, same settings. 17. Selections>Load/Save Selection >Load Selection from Alpha Channel. Open the selections menu and load sélection#7.  Selections>Modify>Expand - 2 pixels. Edit>Paste into Selection. Effects>Plugins>Kang 4 - az-Gen2-periwrinkle  Effects>Plugins>Alien Skin Eye Candy 5 Impact - Glass, same settings. 18. Selections>Load/Save Selection >Load Selection from Alpha Channel. Open the selections menu and load sélection#8.  Selections>Modify>Expand - 2 pixels. Edit>Paste into Selection. Effects>Plugins>Kang 4 - Dayglo Lavalamp  Effects>Plugins>Alien Skin Eye Candy 5 Impact - Glass, same settings. 19. Selections>Load/Save Selection >Load Selection from Alpha Channel. Open the selections menu and load sélection#9.  Selections>Modify>Expand - 2 pixels. Edit>Paste into Selection. Effects>Plugins>Filters Unlimited 2.0 - Kang 4 - Emboss 3 Krikle.  Effects>Plugins>Alien Skin Eye Candy 5 Impact - Glass, same settings. 20. Selections>Load/Save Selection >Load Selection from Alpha Channel. Open the selections menu and load sélection#10.  Selections>Modify>Expand - 2 pixels. Edit>Paste into Selection. Effects>Plugins>Filters Unlimited 2.0 - Kang 4 - Softdot  Effects>Plugins>Alien Skin Eye Candy 5 Impact - Glass, same settings. 21. Selections>Load/Save Selection >Load Selection from Alpha Channel. Open the selections menu and load sélection#11.  Selections>Modify>Expand - 2 pixels. Edit>Paste into Selection. Effects>Plugins>Filters Unlimited 2.0 - Kang 4 - Emboss 2 inbo  Effects>Plugins>Alien Skin Eye Candy 5 Impact - Glass, same settings. 22. Selections>Load/Save Selection >Load Selection from Alpha Channel. Open the selections menu and load sélection#12.  Selections>Modify>Expand - 2 pixels. Edit>Paste into Selection. Effects>Plugins>Filters Unlimited 2.0 - Kang 4 - The June Taylor microbes  Effects>Plugins>Alien Skin Eye Candy 5 Impact - Glass, same settings. 23. Selections>Load/Save Selection >Load Selection from Alpha Channel. Open the selections menu and load sélection#13.  Selections>Modify>Expand - 2 pixels. Edit>Paste into Selection. Effects>Plugins>Filters Unlimited 2.0 - Kang 4 - SillyString.  Effects>Plugins>Alien Skin Eye Candy 5 Impact - Glass, same settings. 24. Selections>Load/Save Selection >Load Selection from Alpha Channel. Open the selections menu and load sélection#14.  Selections>Modify>Expand - 2 pixels. Edit>Paste into Selection. Effects>Plugins>Filters Unlimited 2.0 - Kang 4 - Lens fun  Effects>Plugins>Alien Skin Eye Candy 5 Impact - Glass, same settings. Selections>Select None. 25. Activate your background image. Layers>Load/Save Mask>Load Mask from Disk. Look for and load the mask 20-20.  Layers>Merge>Merge Group. Edit>Copy. Now your can close the image, without saving the changes. Go back to your work and go to Edit>Paste as new layer. Image>Resize, if necessary and place  as you like. as you like.26. Close the layer Raster 1. Layers>Merge>Merge visible. 27. Re-open and activate the layer Raster 1. Edit>Copy. Layers>New Raster Layer. Layers>Arrange>Send to Bottom. Image>Canvas Size.  Selections>Select All. Edit>Paste into Selection. Selections>Select None. 28. Effects>Plugins>Mura's Meister - Perspective Tiling.  29. Activate the layer above, Raster 1. Layers>Merge>Merge down. To soften the bord between the two layers, activate the Soften Brush  with these settings. with these settings. Move the mouse lightly along the line. 30. Add your tubes and your accessories and apply a Drop Shadow at your choice. 31. Layers>Merge>Merge All. 32. Image>Add borders, 2 pixels, symmetric, dark color. Image>Add borders, 5 pixels, symmetric, light color. Image>Add borders, 2 pixels, symmetric, dark color. Selections>Select All. Image>Add borders, 20 pixels, symmetric, color white. Effects>3D Effects>Drop Shadow.  Selections>Invert. 33. Effects>Plugins>Mehdi - Wavy Lab 1.1  Adjust>Blur>Gaussian Blur - radius 10.  34. Effects>Plugins>Filters Unlimited 2.0 - &<Sandflowers Special °v°> - Pool Shadow, default settings.  Selections>Select None. 34. Image>Add borders, 2 pixels, symmetric, dark color. Image>Add borders, 5 pixels, symmetric, light color. Image>Add borders, 2 pixels, symmetric, dark color. Selections>Select All. Image>Add borders, 50 pixels, symmetric, light color. Selections>Invert. Effects>Plugins>AAA Frames - Texture Frame.  Effects>Plugins>AAA Frames - Foto Frame.  Selections>Invert. Effects>3D Effects>Drop Shadow, same settings. Selections>Select None. Image>Add borders, 1 pixel, symmetric, dark color. Image>Resize, 1000 pixels width, resize all layers checked. Adjust>Sharpness>Sharpen. Sign your work and save as jpg.  If you have problems or doubts, or you find a not worked link, or only for tell me that you enjoyed this tutorial, write to me. 27 September 2018 |


 the transparent image with your Gradient.


