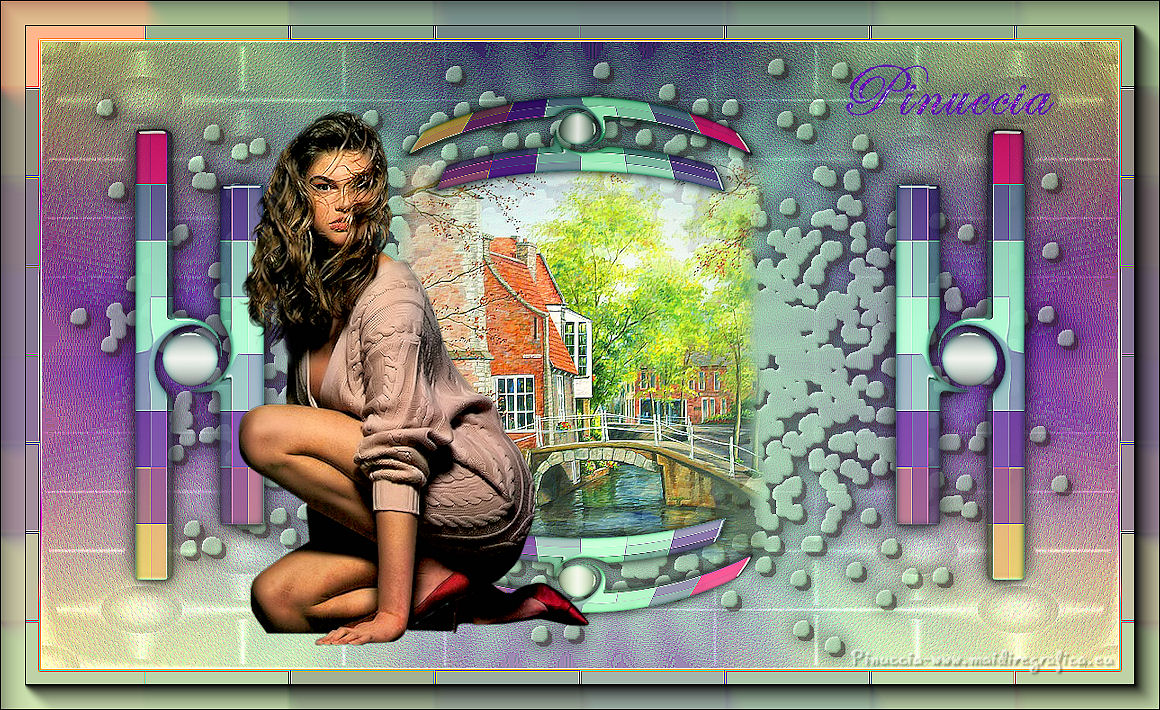
|
PINUCCIA

Thanks Emilieta for your invite to translate your tutorials into english.
Here you can find the original tutorial.
 Gracias Emilieta por dedicarme este maravilloso tutorial
This tutorial has been translated with PSPX3, but it can also be made using other versions of PSP.
Since version PSP X4, Image>Mirror was replaced with Image>Flip Horizontal,
and Image>Flip with Image>Flip Vertical, there are some variables.
In versions X5 and X6, the functions have been improved by making available the Objects menu.
In the latest version X7 command Image>Mirror and Image>Flip returned, but with new differences.
See my schedule here
french translation here
your versions here
Material here
Thanks: for the woman tube Tocha and for the mask Narah
The rest of the material is by Emilieta
(The links of the tubemakers here).
Plugins
consult, if necessary, my filter section here
Attacks - Random Poligone 1 ici
Attacks for Windows 10 ici
see my notes ici
AAA Frames - Foto Frame here
Alien Skin Eye Candy 5 Impact - Glass here
VM Distortion - Gear here
FM Tile Tools - Saturation Emboss here
L&K's - L&K's Jeffrey here
Attacks - Random Poligone 1 here
Filters Unlimited 2.0 here
Filters VM Distortion can be used alone or imported into Filters Unlimited.
(How do, you see here)
If a plugin supplied appears with this icon  it must necessarily be imported into Unlimited it must necessarily be imported into Unlimited

You can change Blend Modes according to your colors.
Copy the gradient gmbgrd4 in the Gradients Folder.
Copy the selection duo in the Selections Folder.
Copy the mask 20-20 in the Masks Folder.
Open the mask by Narah in PSP and minimize it with the reste of the material.
1. Open a new transparente image 1200 x 700 pixels.
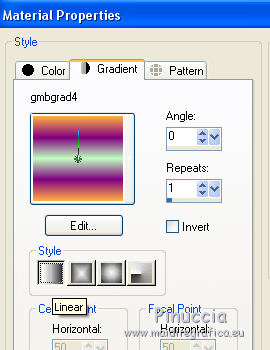
2. Set your foreground color to Gradient, and select the Gradient gmbgrd4, style Linear.
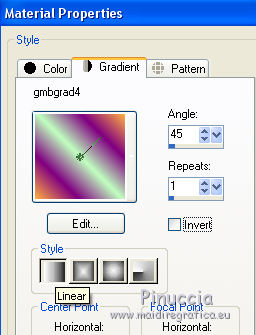
Flood Fill  the transparent image with the Gradient the transparent image with the Gradient
3. Layers>Duplicate.
Image>Mirror.
Reduce the opacity of this layer to 50%.
Layers>Merge>Merge visible.
4. Effects>Edge Effects>Enhance More.
5. Effects>Plugins>Filters Unlimited 2.0 - VM Distortion - Gear, default settings.
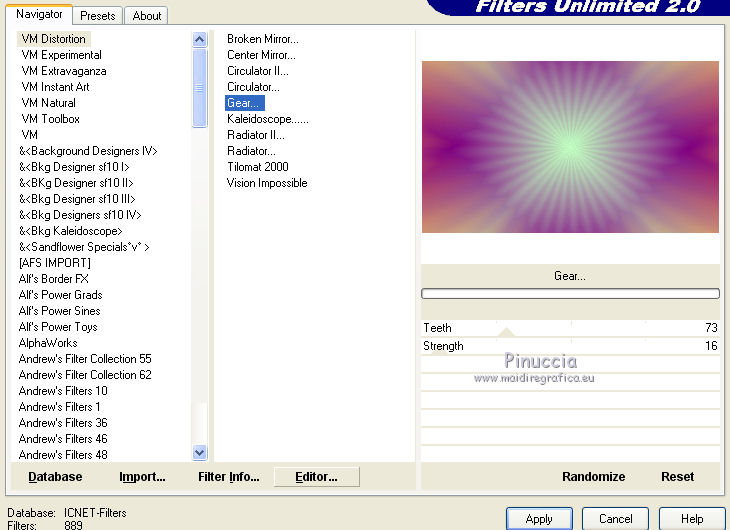
Effects>Edge Effects>Enhance More.
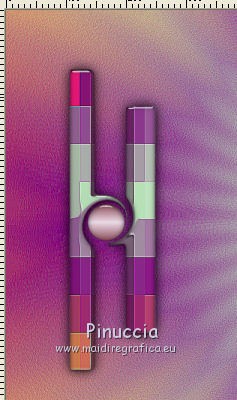
6. Layers>New Raster Layer.
Selections>Load/Save Selection>Load Selection from Disk.
Look for and load the selection duo.
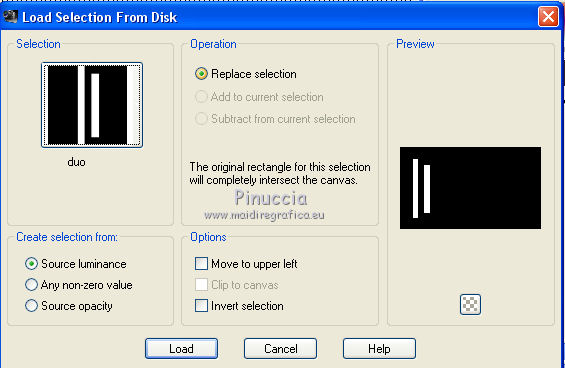
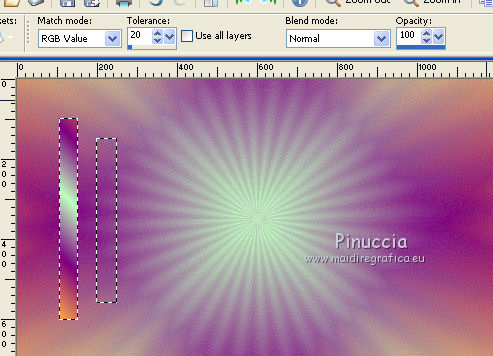
Set Match mode of the Flood Fill Tool to RGB Value
Flood Fill  the left selection with your Gradient. the left selection with your Gradient.
Change the settings of your Gradient
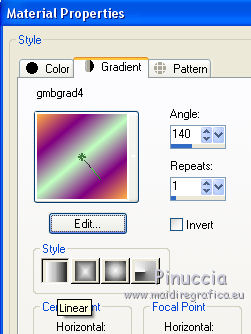
Flood Fill  the right selection with the Gradient. the right selection with the Gradient.
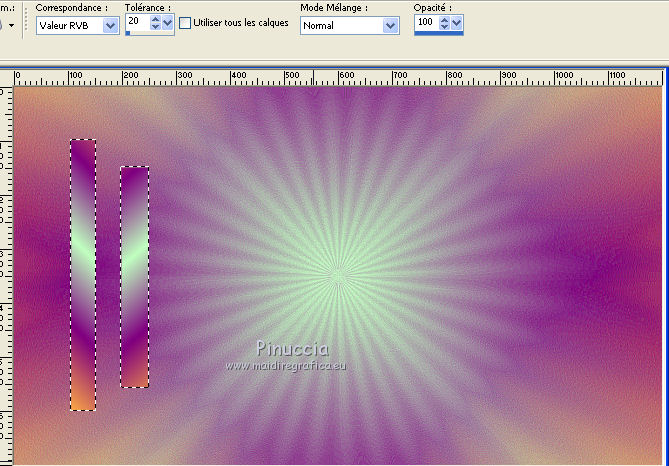
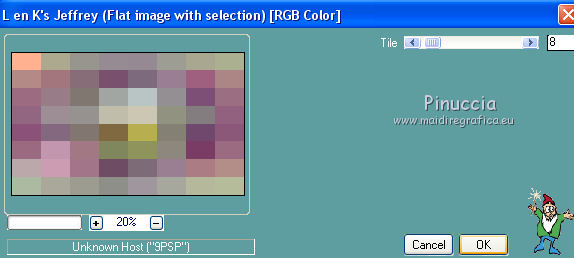
7. Effects>Plugins>L&K's - L&K's Jeffrey.
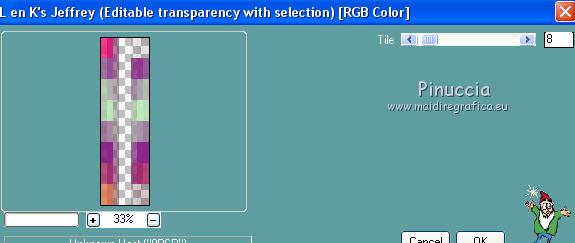
Effects>Edge Effects>Enhance More.
8. Effects>3D Effects>Inner Bevel.
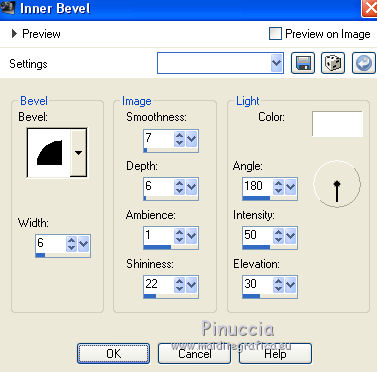
Selections>Select None.
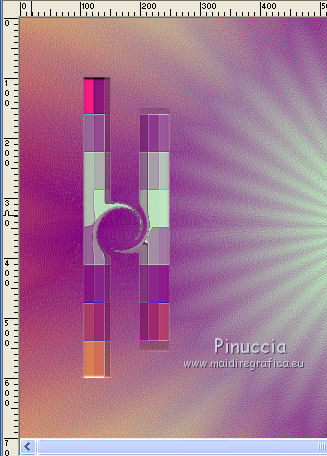
9. Activate the Warp Brush Tool 
avec these settings

Place your mouse to 170 pixels width and 350 pixels height
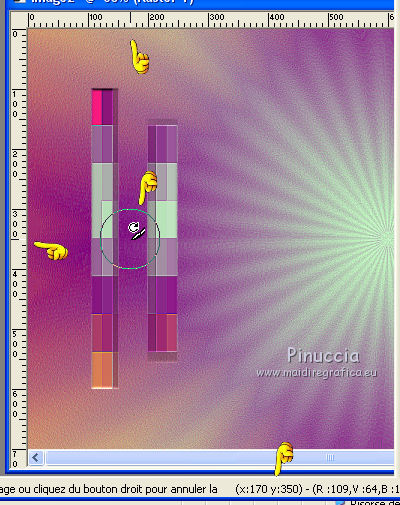
Hold down the left mouse button without moving it, until you get about this
(I counted up to 6)
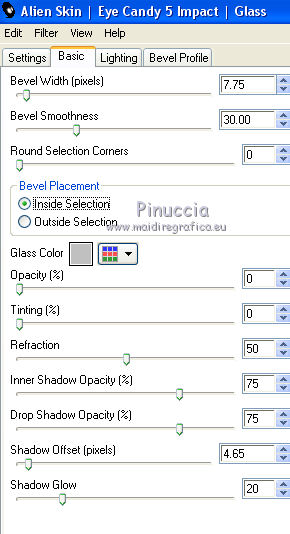
10. Effects>Plugins>Alien Skin Eye Candy 5 Impact - Glass.
Glass color: #c0c0c0.
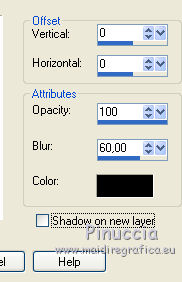
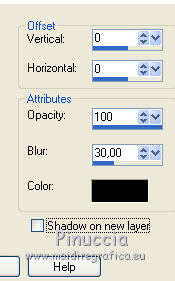
11. Effects>3D Effects>Drop Shadow.
12. Open the tube Botòn - Edit>Copy.
Go back to your work and go to Edit>Paste as new layer.
Place  the tube in the middle of the figure. the tube in the middle of the figure.

Layers>Merge>Merge Down.
Layers>Duplicate.
Image>Mirror.
Layers>Merge>Merge Down.
13. Layers>Duplicate.
Effects>Geometric Effects>Circle.

14. Image>Free Rotate - 90 degrees to right.

Layers>Merge>Merge Down.
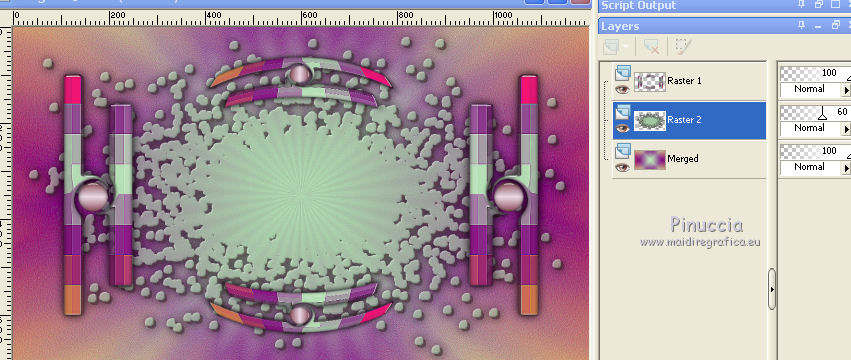
15. Layers>New Raster Layer.
Set your background color to green color #a2c8a2, (or another color of your gradient).
Flood Fill  the layer with your background color. the layer with your background color.
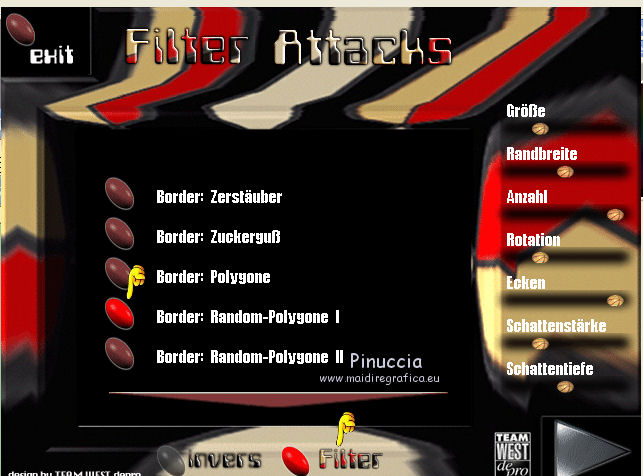
16. Effects>Plugins>Attacks:
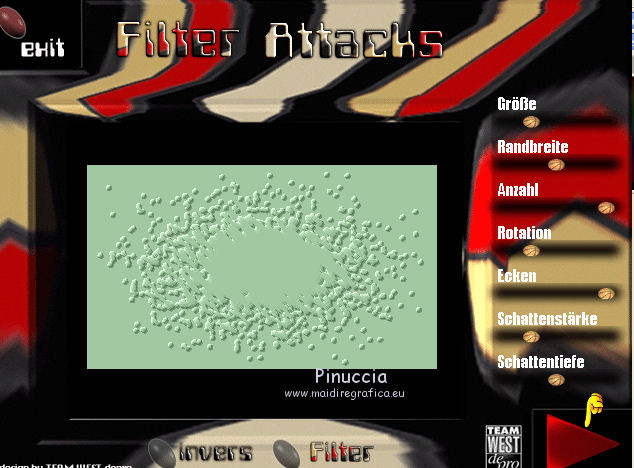
click on Filter and select Border Random, Poligone I, default settings.

click on the red arrow to apply.

The result is random. So don't worry if your result will not be the same as mine.
17. Effects>3D Effects>Drop Shadow, same settings.
Layers>Arrange>Move Down.
Reduce the opacity of this layer to 60%.

18. Open the landscape and go to Edit>Copy.
Go back to your work and go to Edit>Paste as new layer.
Image>Resize, to 85%, resize all layers not checked.
Adjust>Sharpness>Sharpen.
19. Effets>Modules Externes>FM Tile Tools - Saturation Emboss, default settings.

20. Layers>New Raster Layer.
Flood Fill  the layer with your background green color. the layer with your background green color.
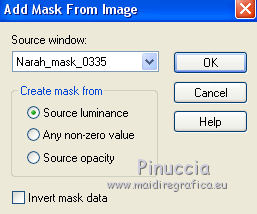
Layers>New Mask layer>From image
Open the menu under the source window and you'll see all the files open.
Select the mask Narah mask-0335.

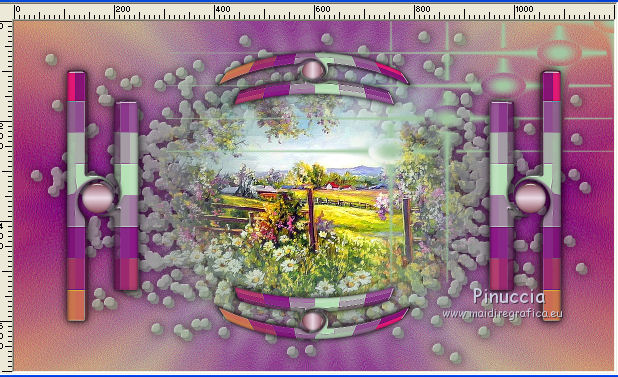
Layers>Merge>Merge Group.
Image>Resize, to 75%, resize all layers not checked.
Move  the mask up to the right against the borders. the mask up to the right against the borders.

Layers>Duplicate.
Image>Mirror.
Layers>Merge>Merge Down.
Layers>Duplicate.
Image>Flip.
Layers>Merge>Merge Down.
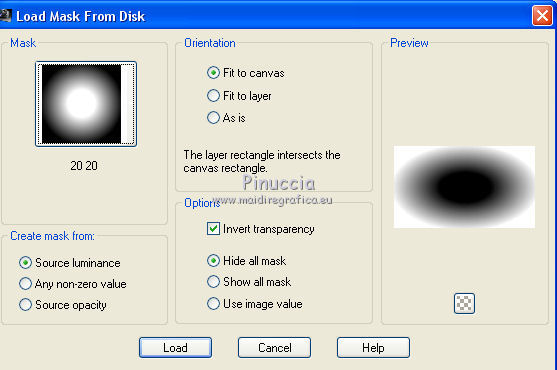
21. Layers>Load/Save Mask>Load Mask from Disk
Look for and load the mask 2020

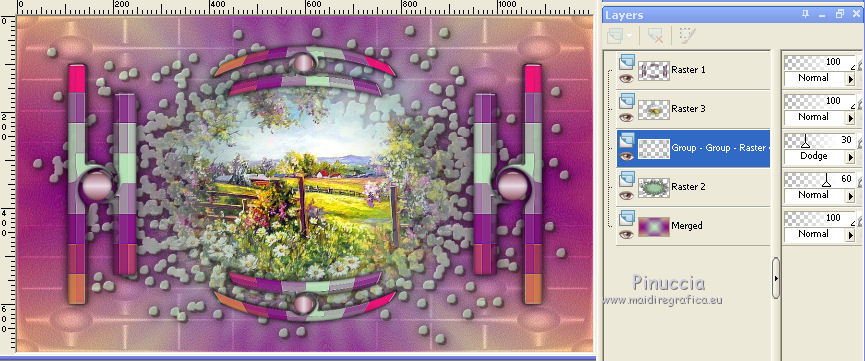
Layers>Merge>Merge Group.
Effects>Edge Effects>Enhance More.
Layers>Arrange>Move Down.
Change the Blend Mode of this layer to Dodge and reduce the opacity to 30%.

22. Activate the top layer, Raster 1 (the figures)
Effects>3D Effects>Drop Shadow.

23. Open the tube of the woman and go to Edit>Copy.
Go back to your work and go to Edit>Paste as new layer.
Image>Resize, to 60%, resize all layers not checked.
Adjust>Sharpness>Sharpen.
Move  the tube to the left side. the tube to the left side.
Effects>3D Effects>Drop Shadow.

24. Open the texte - Edit>Copy.
Go back to your work and go to Edit>Paste as new layer.
Move  the text at the upper right. the text at the upper right.
25. Sign your work on a new layer.
Layers>Merge>Merge visible.
26. Image>Resize, to 90%, resize all layers checked.
27. Change the settings of your Gradient.

Layers>New Raster Layer.
Flood Fill  the layer with your Gradient. the layer with your Gradient.
Selections>Select All.
Selections>Modify>Contract - 2 pixels.
Press CANC on the keyboard 
Selections>Select None.
Effects>Edge Effects>Enhance More.
28. Image>Add borders, 40 pixels, symmetric, background green color.
Activate the Magic Wand Tool 
and click on the bord to select it.
Effects>Plugins>L&K's - L&K's Jeffrey, same settings.

Effects>Edge Effects>Enhance More - 2 times.
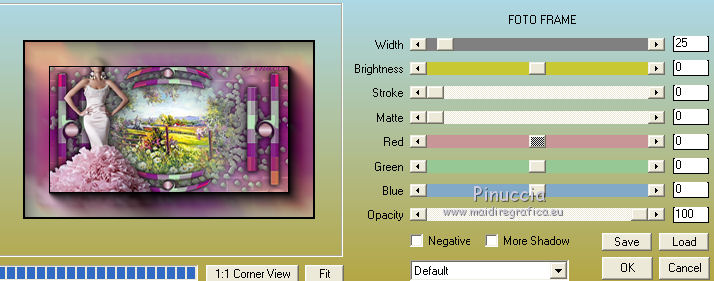
29. Effects>Plugins>AAA Frames - Foto Frame.

Selections>Select None.
Adjust>Sharpness>Sharpen.
30. Save as jpg.
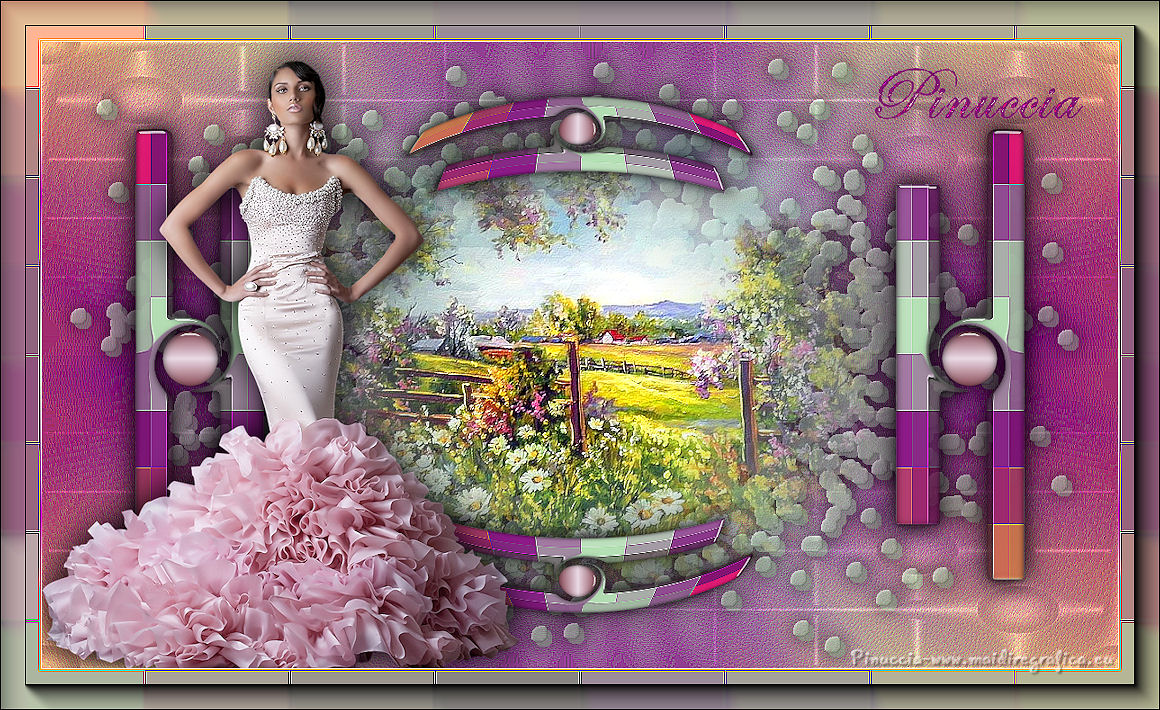
The tubes of this version are by Gabry and Daisy


If you have problems or doubts, or you find a not worked link, or only for tell me that you enjoyed this tutorial, write to me.
30 May 2018
|


 Gracias Emilieta por dedicarme este maravilloso tutorial


 the transparent image with the Gradient


 the tube in the middle of the figure.