|
EUGENIA CLO


Thanks Emilieta for your invite to translate your tutorials into english.
Here you can find the original tutorial.

This tutorial has been translated with PSPX2, but it can also be made using other versions of PSP.
Since version PSP X4, Image>Mirror was replaced with Image>Flip Horizontal,
and Image>Flip with Image>Flip Vertical, there are some variables.
In versions X5 and X6, the functions have been improved by making available the Objects menu.
In the latest version X7 command Image>Mirror and Image>Flip returned, but with new differences.
See my schedule here
french translation here
your versions here
Material here
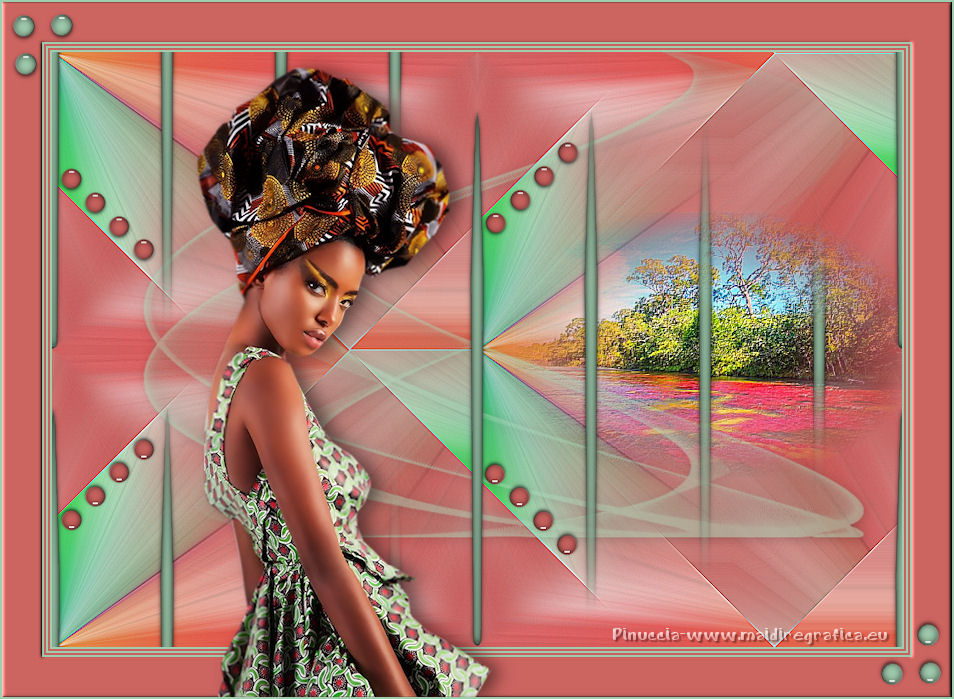
The tube of the woman is by Clo.
The rest of the material is by Emilieta
(The links of the tubemakers here).
Plugins
consult, if necessary, my filter section here
Alien Skin Eye Candy 5 Impact - Glass here
FM Tile Tools - Saturation Emboss here
Simple - Pizza Slice Mirror here
Filters Simple can be used alone or imported into Filters Unlimited.
(How do, you see here)
If a plugin supplied appears with this icon  it must necessarily be imported into Unlimited it must necessarily be imported into Unlimited

You can change Blend Modes according to your colors.
Open the mask in PSP and minimize it with the rest of the material.
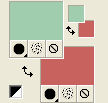
1. Set your foreground color to green color #a1cdaf
and your background color to red color #c7625e
Open a new transparent image 1000 x 700 pixels.
Selections>Select All.
Open the image "parchis" and go to Edit>Copy.
Go back to your work and go to Edit>Paste into Selection.
Selections>Select None.
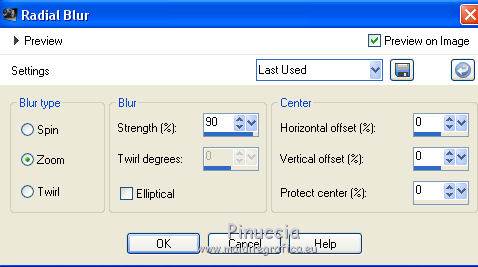
2. Adjust>Blur>Radial Blur.
3. Effects>Plugins>Simple - Pizza slice mirror
4. Effects>Image Effects>Seamless Tiling, default settings.

Effects>Edge Effects>Enhance More.
5. Open the landscape tube, erase the watermark, and go to Edit>Copy.
Go back to your work and go to Edit>Paste as new layer.
Move  the tube to the right side. the tube to the right side.
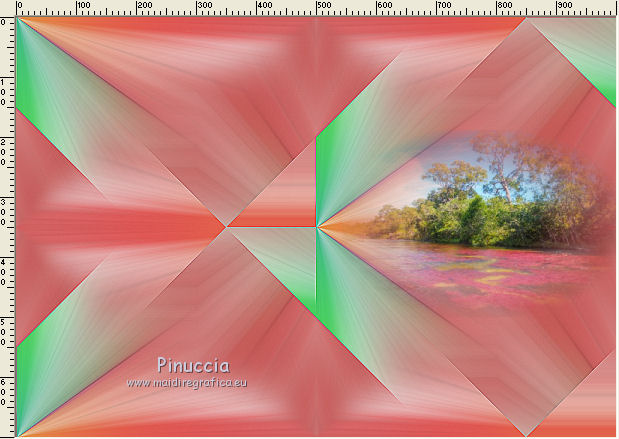
Adjust>Sharpness>Sharpen more.
6. Effects>Plugins>FM Tile Tools - Saturation Emboss.

7. Layers>New Raster Layer.
Flood Fill  with your foreground color #a1cdaf. with your foreground color #a1cdaf.
8. Layers>New Mask layer>From image
Open the menu under the source window and you'll see all the files open.
Select the mask Lia-bumerang.
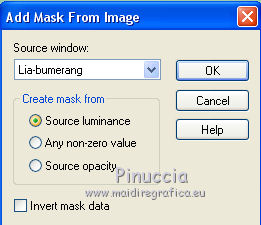
Layers>Merge>Merge Group.
Image>Resize, to 85%, resize all layers not checked.
Image>Mirror.
Place  the middle of the mask in the middle of the canvas. the middle of the mask in the middle of the canvas.
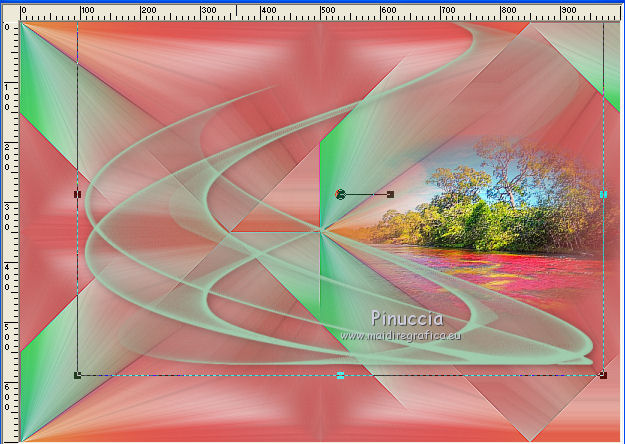
Reduce the opacity of this layer to 55%.
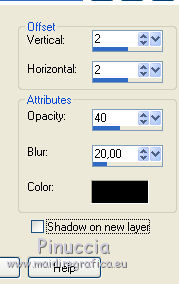
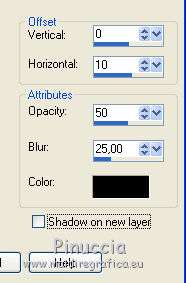
9. Effects>3D Effects>Drop Shadow.
10. Open tube-fichas and go to Edit>Copy.
Go back to your work and go to Edit>Paste as new layer.
Place  rightly the tube as below. rightly the tube as below.
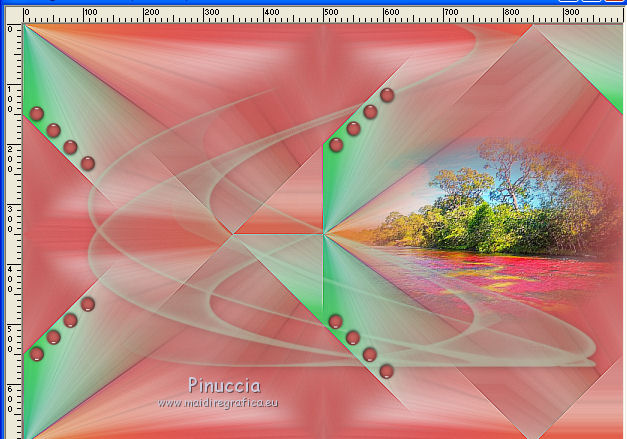
11. Layers>Merge>Merge visible.
12. Image>Resize, to 85%, resize all layers checked.
13. Selection Tool 
(no matter the type of selection, because with the custom selection your always get a rectangle)
clic on the Custom Selection 
and set the following settings.
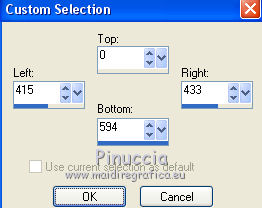
Layers>New Raster Layer.
Flood Fill  with your foreground green color #a1cdaf. with your foreground green color #a1cdaf.
Selections>Select None.
14. Effects>Plugins>Alien Skin Eye Candy 5 Impact - Glass.
glass color: #ffffff
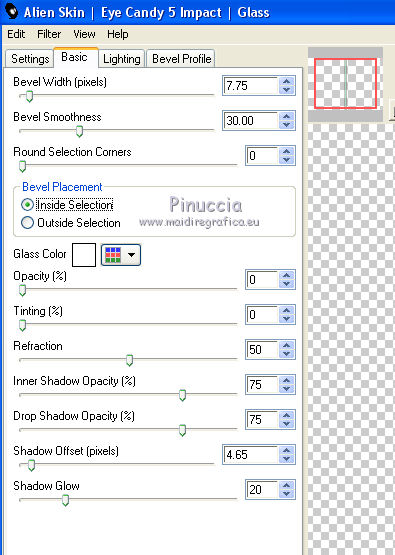
15. Effects>Geometric Effects>Pentagon.
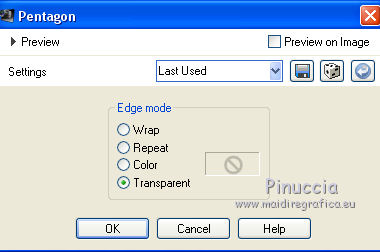
Image>Flip.
Again Effects>Plugins>Alien Skin Eye Candy 5 Impact - Glass, same settings.
Again Image>Flip.
16. Layers>Duplicate.
Effects>Image Effects>Offset.
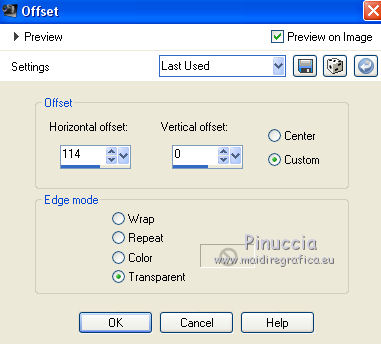
17. Layers>Duplicate.
Effects>Image Effects>Offset, same settings.
18. Again Layers>Duplicate.
Effects>Image Effects>Offset, same settings.
19. Close the bottom layer, Merged.
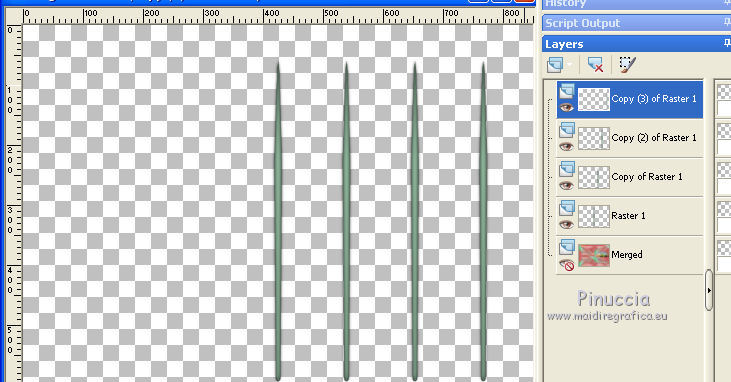
Layers>Merge>Merge visible.
Effects>Image Effects>Seamless Tiling, default settings.

20. Open again the layer Merged.
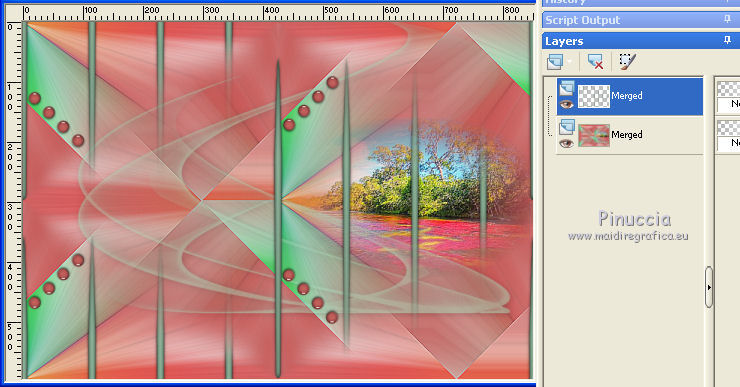
Image>Add borders, 2 pixels, symmetric, foreground green color #a1cdaf.
Image>Add borders, 2 pixels, background red color #c7625e.
Image>Add borders, 2 pixels, symmetric, foreground green color #a1cdaf.
Image>Add borders, 2 pixels, background red color #c7625e.
Image>Add borders, 2 pixels, symmetric, foreground green color #a1cdaf.
Image>Add borders, 40 pixels, background red color #c7625e.
21. Activate the Magic Wand Tool 
and click on the 40 pixels border to select it.
Effects>3D Effects>Inner Bevel.
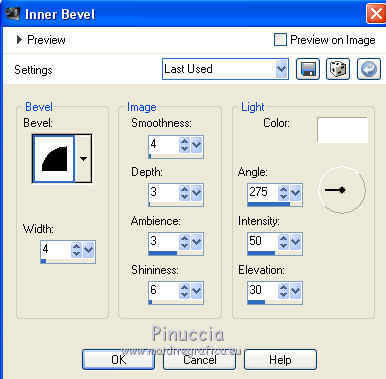
Selections>Select None.
22. Open the tube fichas verdes, erase the watermark and go to Edit>Copy.
Go back to your work and go to Edit>Paste as new layer.
23. Open the woman tube and go to Edit>Copy.
Go back to your work and go to Edit>Paste as new layer.
Image>Resize, to 80%, resize all layers not checked.
Effects>Image Effects>Offset.
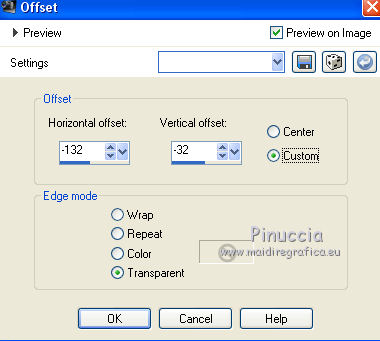
24. Effects>3D Effects>Drop Shadow.
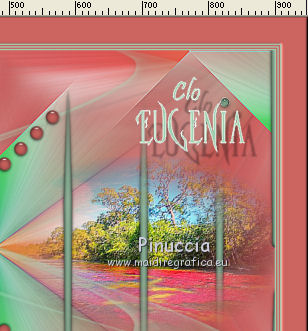
25. Open the text "pincel" and go to Edit>Copy.
Go back to your work and go to Edit>Paste as new layer.
Move  the text at the upper right. the text at the upper right.
26. Image>Add borders, 2 pixels, symmetric,foreground green color #a1cdaf.
Sign your work on a new layer.
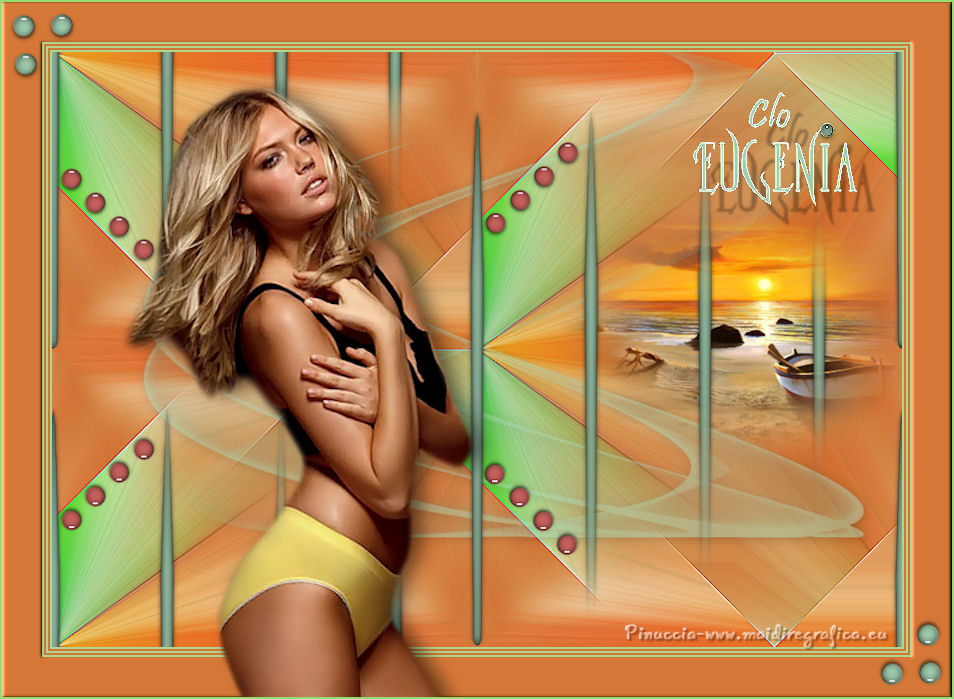
Layers>Merge>Merge All and save as jpg.
The tubes of this version are by Clo

If you have problems or doubts, or you find a not worked link, or only for tell me that you enjoyed this tutorial, write to me.
15 June 2018
|

